We’ve all experienced the overwhelming feeling of being swamped with email. So it’s useful to know how to delete all your emails at once on your iPhone to save time and effort.
In this article, I’ll show you can quickly get rid of emails in Gmail, Outlook, Yahoo, or any other accounts you’ve added to your iPhone or iPad. This can help free up space and keep you organized. Here’s how to take control of your inbox.
How to delete all emails at once on iPhone and iPad
- Launch the Mail app on your iPhone.
- Enter your Inbox → tap Edit.
- Tap Select All if you wish to delete all your emails.
Alternatively, you may just select the emails you wish to delete.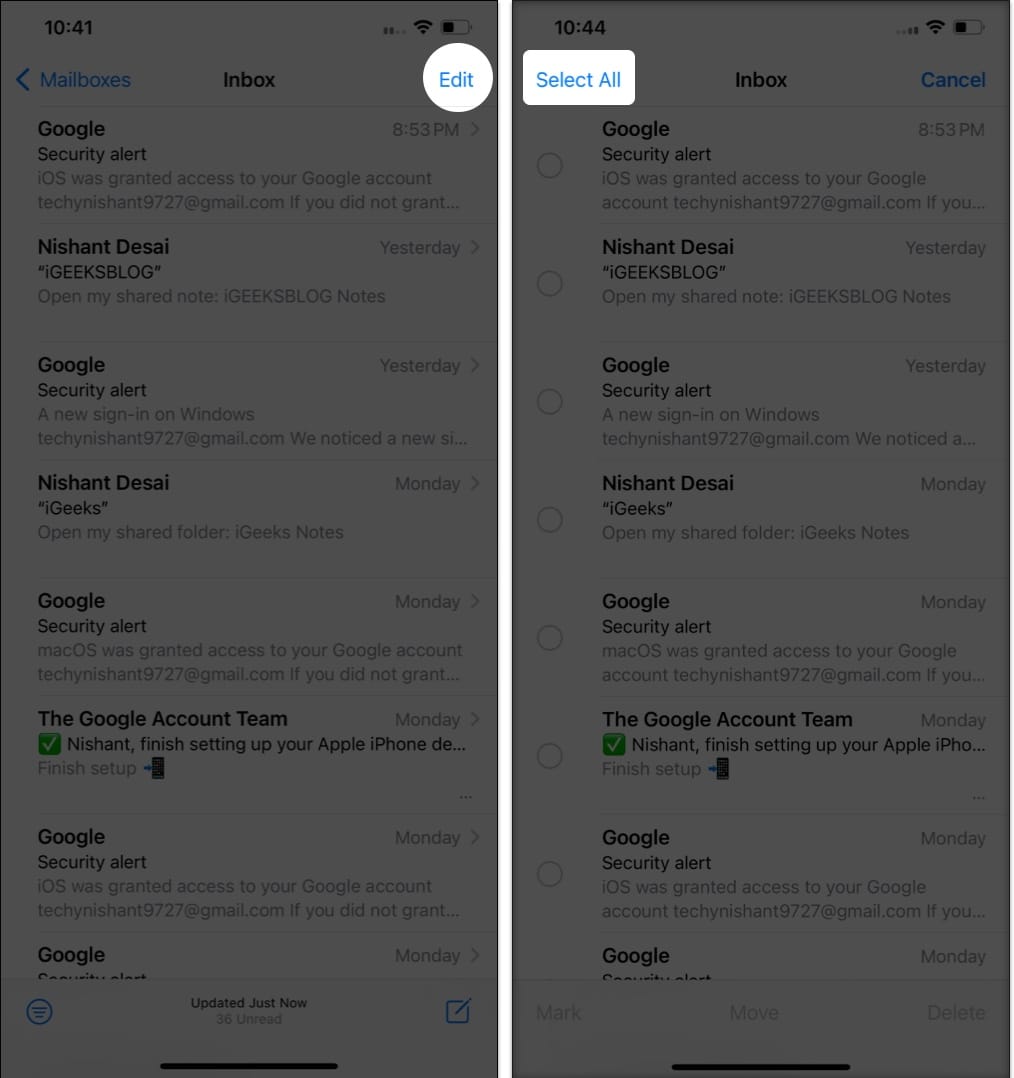
- Tap Delete at the bottom-right → select Delete All to confirm your choice.
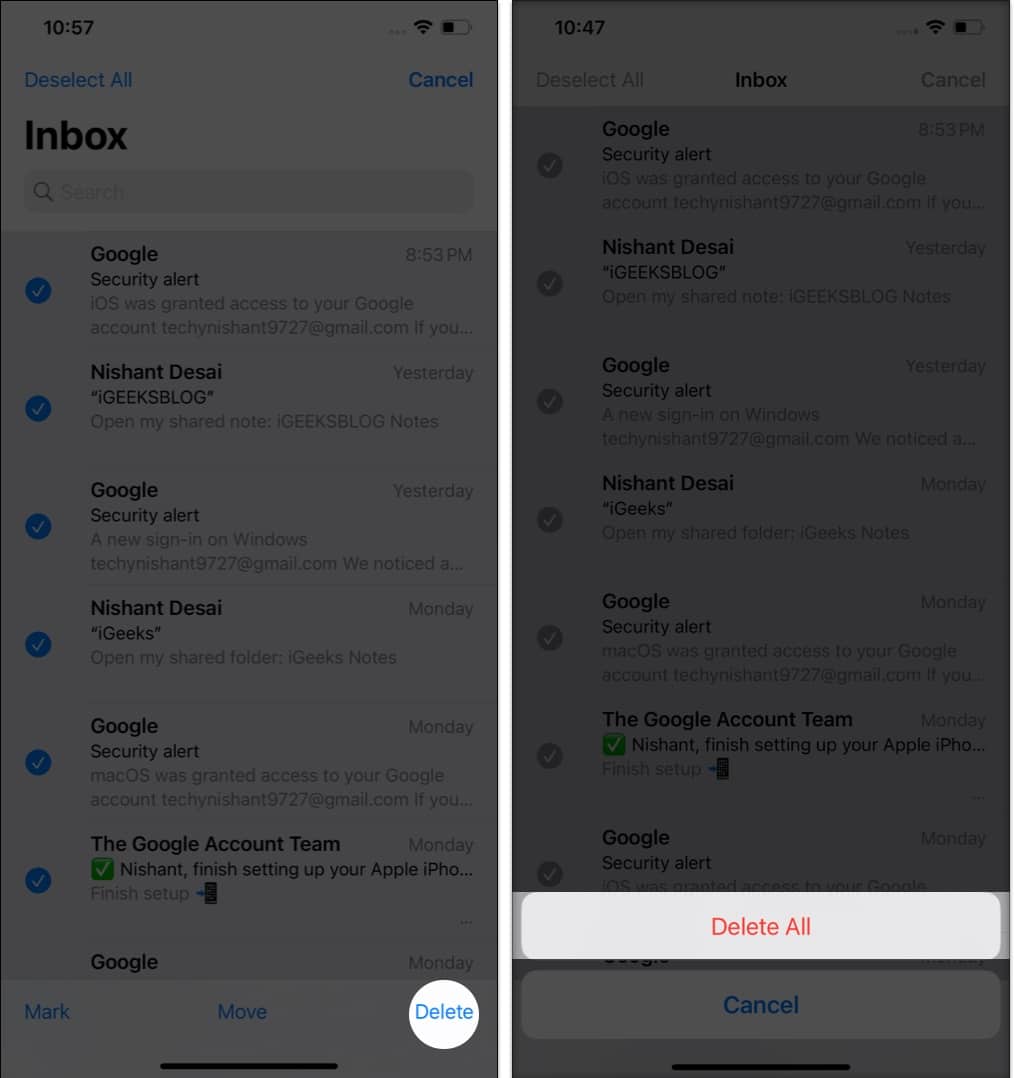
If you see Archive instead of Delete at the bottom right, then follow the steps mentioned below to change your default option in the inbox.
Set Delete as your default option in Inbox
- Launch the Settings app on your iPhone.
- Scroll down and tap Mail → select Accounts.
- Now, select your mail service provider.
Here, I am going with Gmail.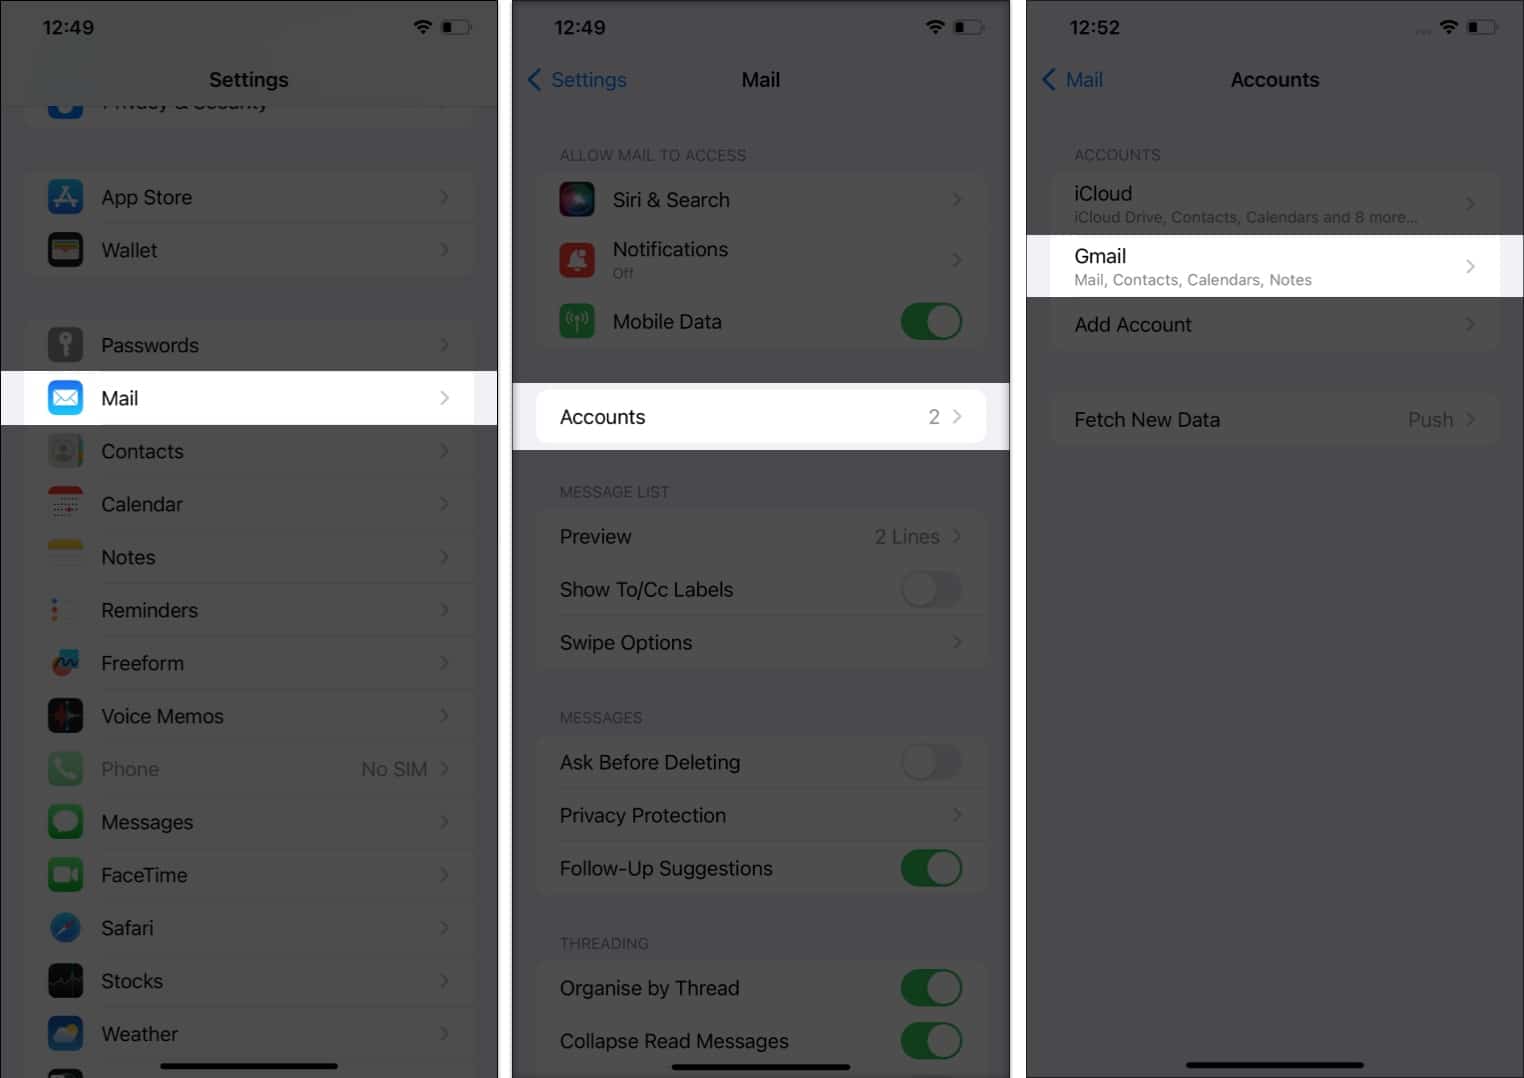
- Tap Account → select Advanced.
- Select Deleted Mailbox under Move Discarded Messages Into.
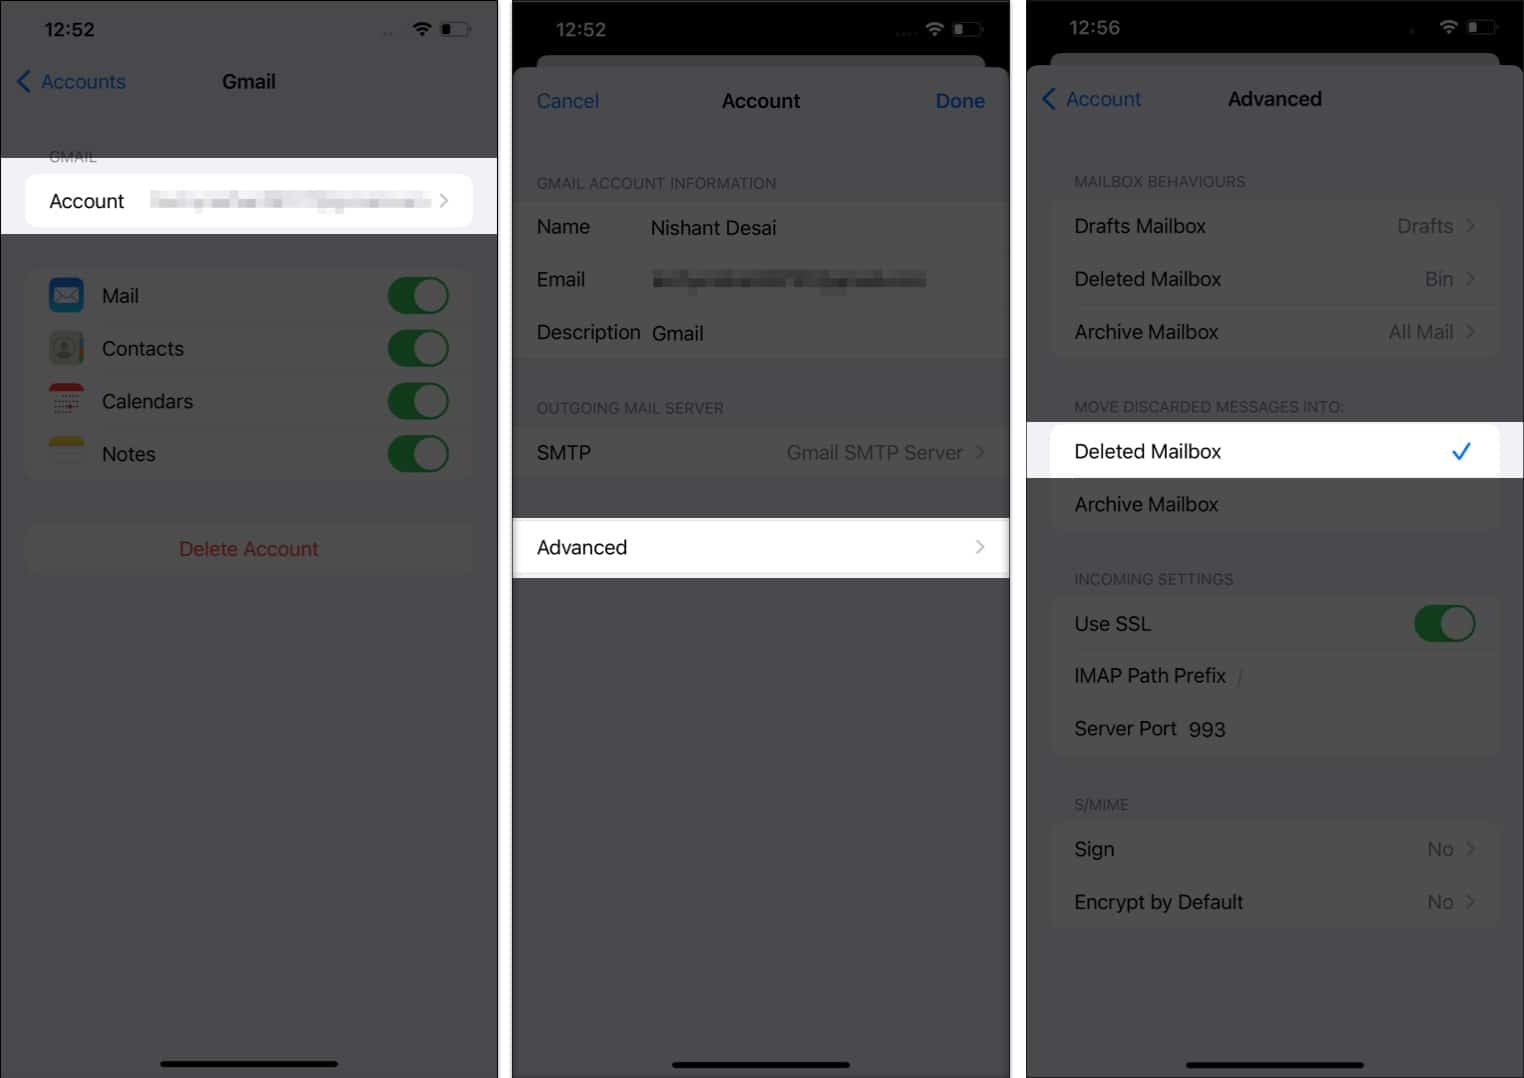
That’s it! Now, you’ll see Delete instead of Archive in your Inbox, and you can trash messages conveniently.
Note: Remember to select the specific email ID from which you wish to remove emails if you have multiple Gmail accounts.
3 Alternate ways to delete email from Mail app on iPhone or iPad
There are a few other ways to delete emails in the Mail app on your iPhone or iPad. Here’s a list.
Move to delete
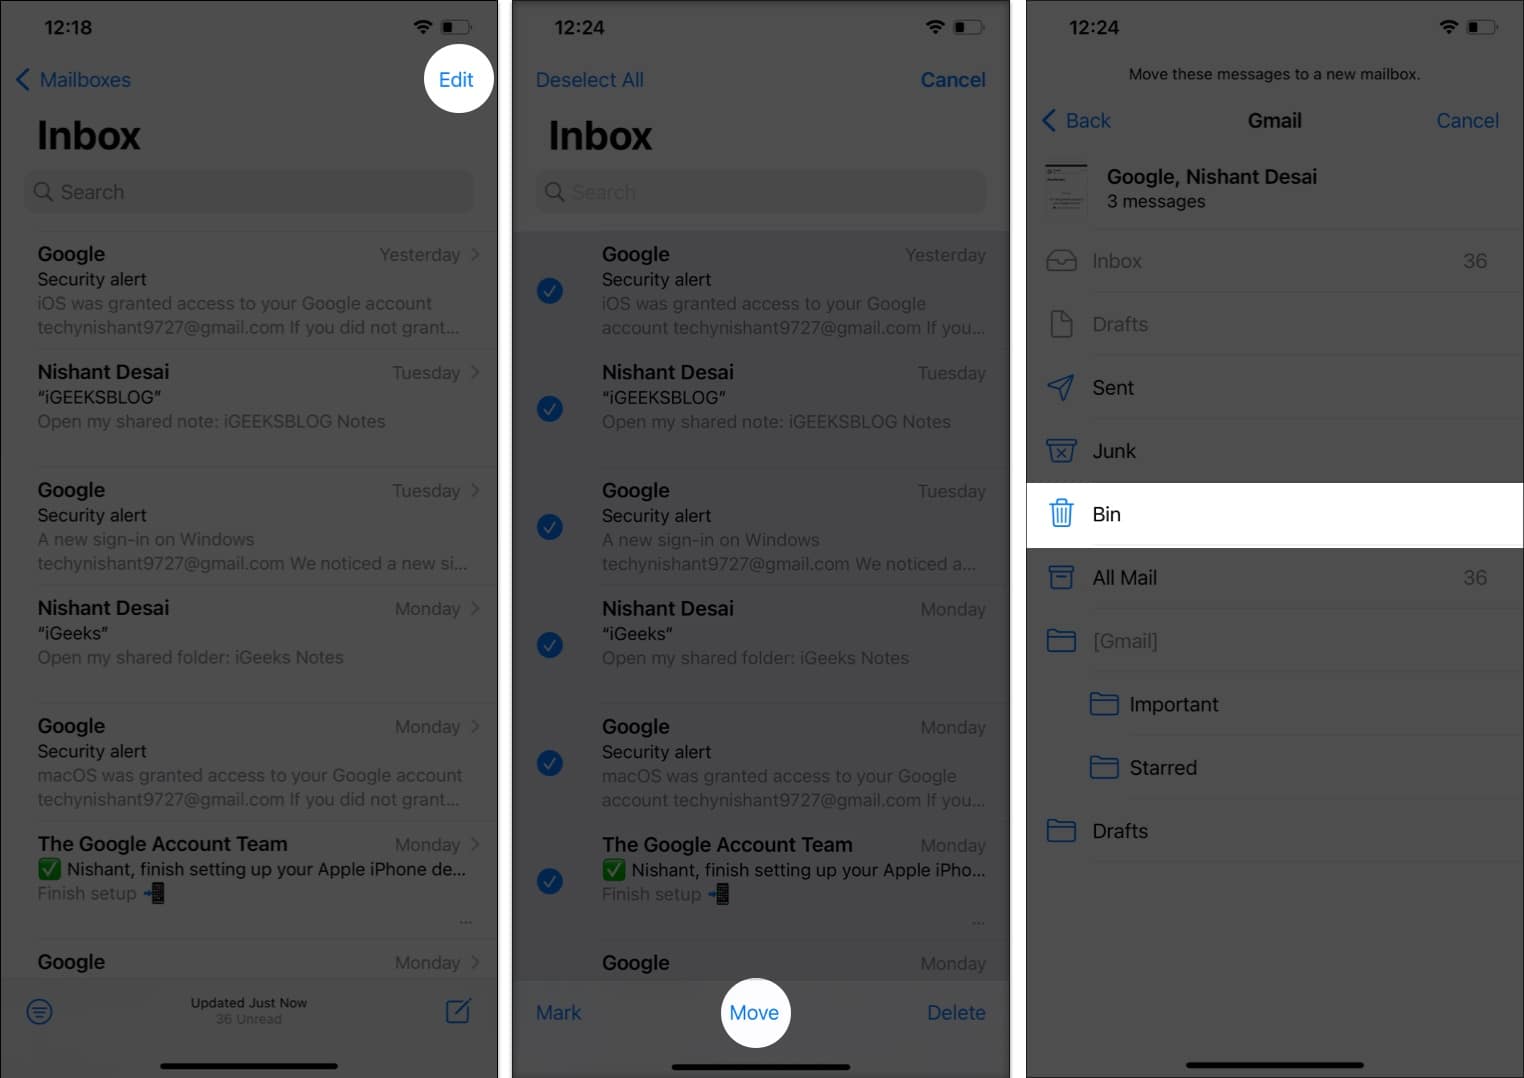
- Open Mail app → tap Edit.
- Select the emails you wish to delete.
You may also tap Select All if you wish to delete all your emails. - Tap Move located at the bottom.
- Tap Bin to transfer all selected emails to the trash at once.
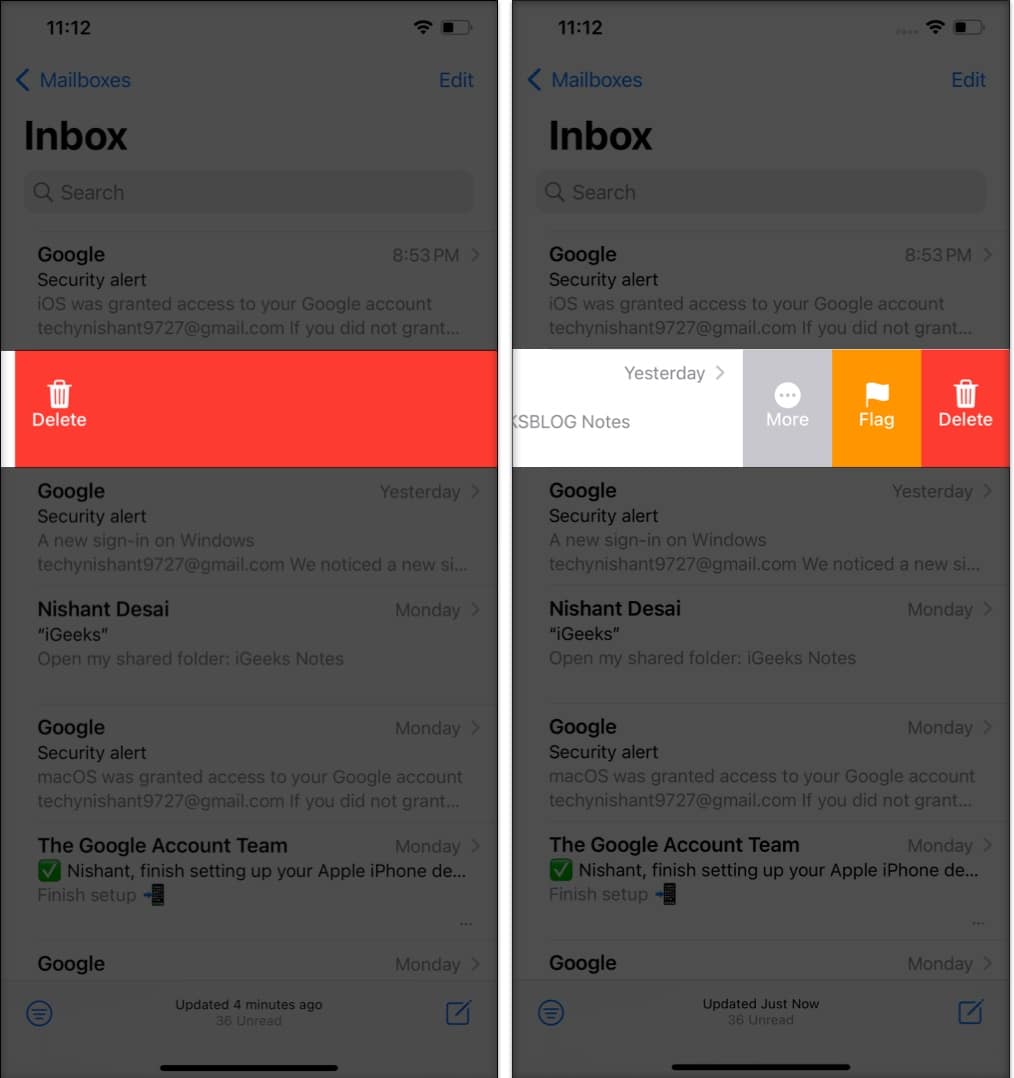
Swipe to delete emails on iPhone and iPad
This method is only viable if you seek to delete one particular email at a time.
Become an iGeeksBlog Premium member and access our content ad-free with additional perks.
- Swipe all the way to the left on a particular email to delete the entry.
- However, if you want more control over that mail, swipe halfway to the left and select from options such as More, Flag, or Delete.
Press and hold to delete mails in Mail app
If you’re old school, you can simply long-press the email and select Delete Message from the context menu.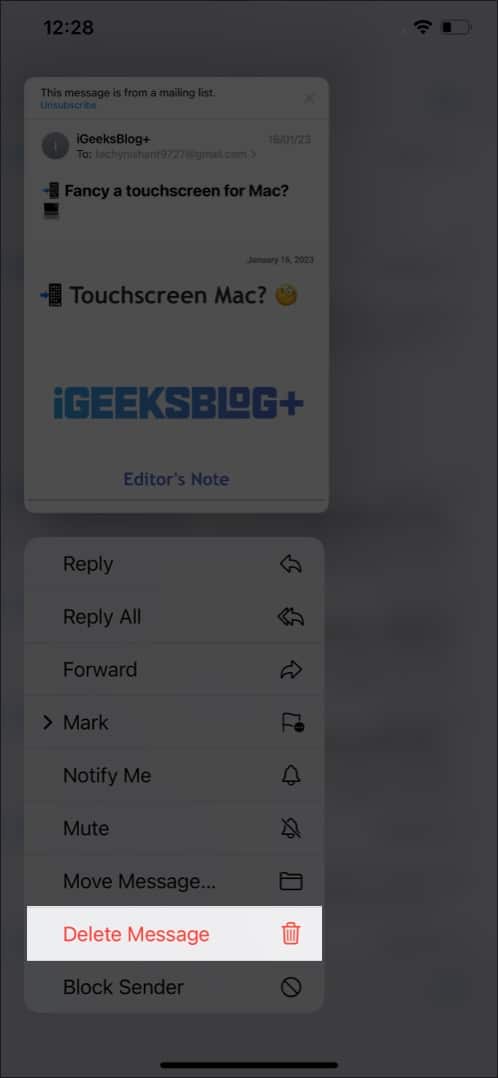
This method can get very annoying if you seek to delete multiple emails. So, I’d suggested going with the other methods mentioned above.
Wrapping up…
This is how you can delete all emails at once on your iOS device.
So now you can quickly trash all emails on your iPhone whenever you need to start with a blank slate. If you’re not a fan of the default Mail app on your iOS device then you might also want to check out our selection of the best email apps for iPhone and iPad. And if you’re looking for any other email tips, let us know in the comments below.
FAQs
All deleted emails are transferred to the Bin folder. Meanwhile, an archived email is forwarded to the Archive folder, which can be accessed anytime in the future.
Navigate to the Bin folder and select the emails you wish to delete permanently. Next, tap Edit→ Select All→ Delete. These steps will permanently delete all emails on your iPhone.
Deleted emails will be in the Bin for 30 days. If the emails are deleted from the bin or have crossed their due time, they cannot be recovered.
Read more:
