Ah, that dreadful sight of apps opening the moment you boot up your Mac! It used to be excruciatingly painful for me, too.
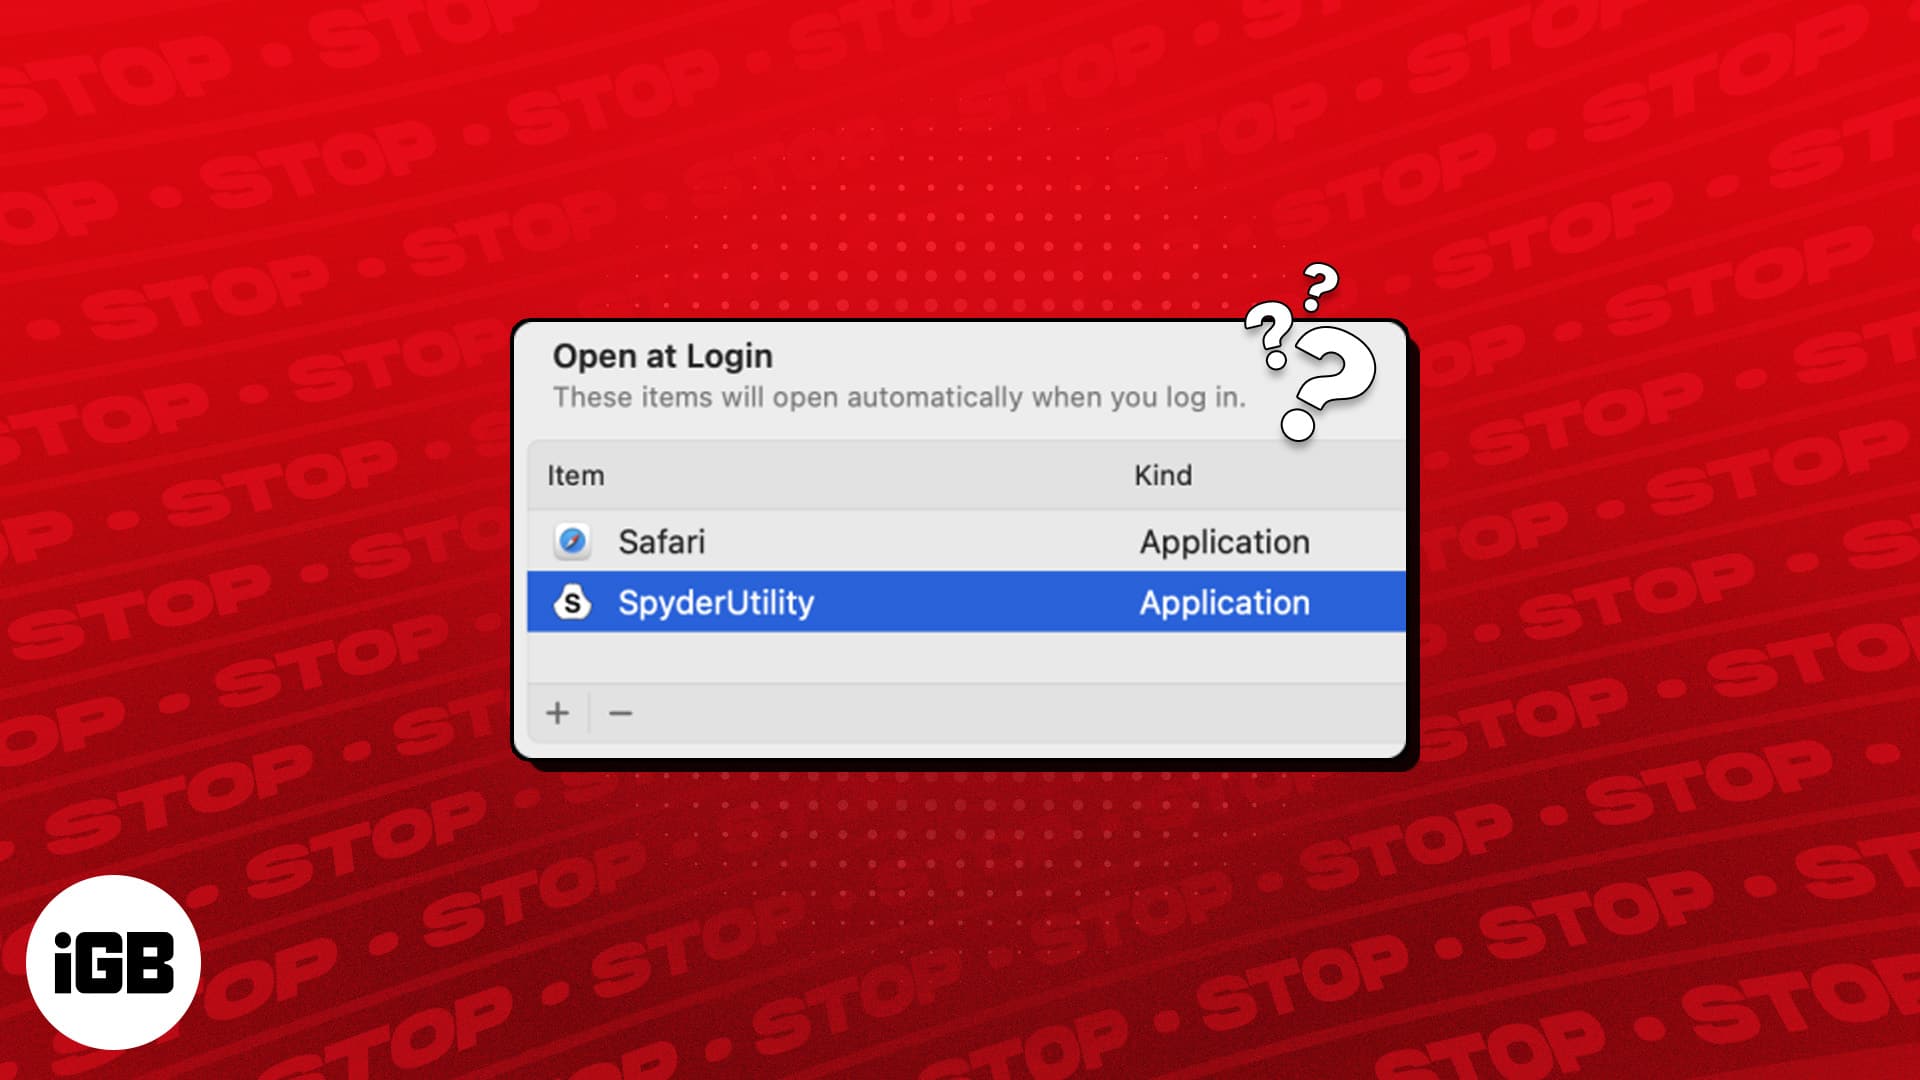
First, it slowed down my Mac. Second, since these apps kept running in the background and eating up memory, it took my Mac forever to go full throttle.
Finally, after trying and testing a few built-in options and a third-party app, I managed to completely stop Mac apps from opening at startup. Below, I have shared all my findings and solutions to help you avoid the issue or put an end to it. Take a look.
Table of Contents
- Why do certain Mac apps open at startup?
- How to stop Mac apps from opening at startup in macOS Sonoma
- 1. Use a startup utility app like CleanMyMac X
- 2. Temporarily disable apps opening at startup on Mac
- 3. How to stop Mac apps from launching on startup from Dock
- 4. How to remove startup apps in System Settings
- 5. Remove Launch Daemons and Launch Agents
- 6. Disable apps from opening at startup from app settings
Why do certain Mac apps open at startup?
Negligence. When installing apps, we tend to be in a hurry and hit continue/skip without reading what the dialog box says. App developers smartly place the “Start at login/launch” option above Install Now, which results in many Mac apps starting automatically after logging in.
Another reason apps open at launch is if you have added apps to your Login Items. While chances are you did this by choice, you should remove startup items you no longer need or recognize.
How to stop Mac apps from opening at startup in macOS Sonoma
In this article, I have outlined all the possible ways to stop apps from opening when you start up your Mac.
Although the most convenient way to do it is from System Settings, you must take a few more precautionary steps to prevent the problem from recurring. These include manually finding and removing Launch Agents.
If you find the latter time-consuming, you should consider using a Mac cleaner app that can effortlessly remove login items, Launch Agents files, and other unwanted stuff to speed up your Mac.
1. Use a startup utility app like CleanMyMac X
The best way to manage your login apps and programs is to use a startup manager utility app like CleanMyMac X.
To get started, you need to download CleanMyMac X and install the app on your Mac. I recommend using the 7-day free trial to familiarize yourself with the app.
After launching the app, you must add login credentials, enter payment details, and provide the app with the necessary permissions.
Once you finish the formalities, CleanMyMac’s intuitive UI will make removing login items a breeze. Here’s how:
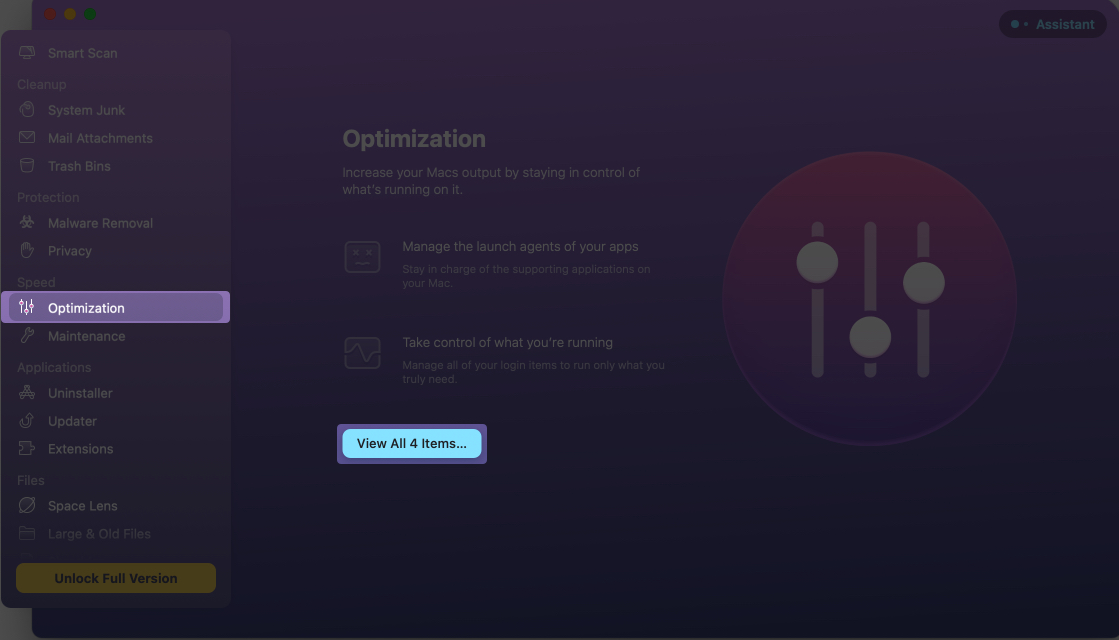
- Launch CleanMyMac → Select Optimization from the home page.
- Select View All (number) Items to see login items.
- Now, select Login Items → Click Remove.
If you don’t want to remove all items, you can select particular login items in the right pane and hit Remove.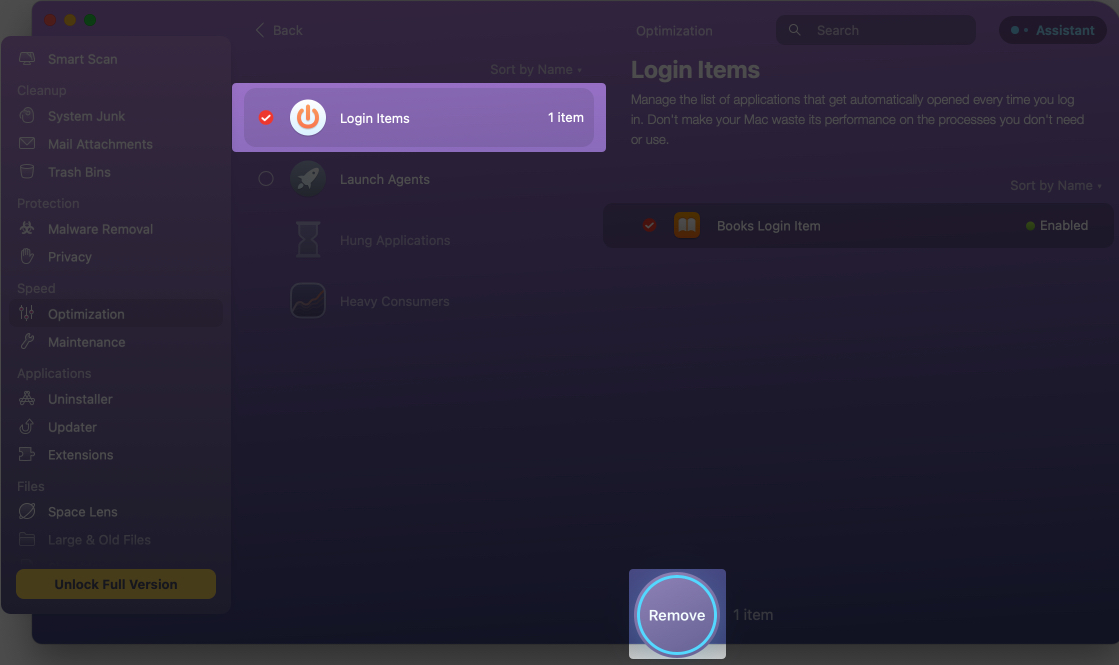
- Further, you can go to Launch Agents and remove unnecessary app files that are eating up your space and starting apps independently.
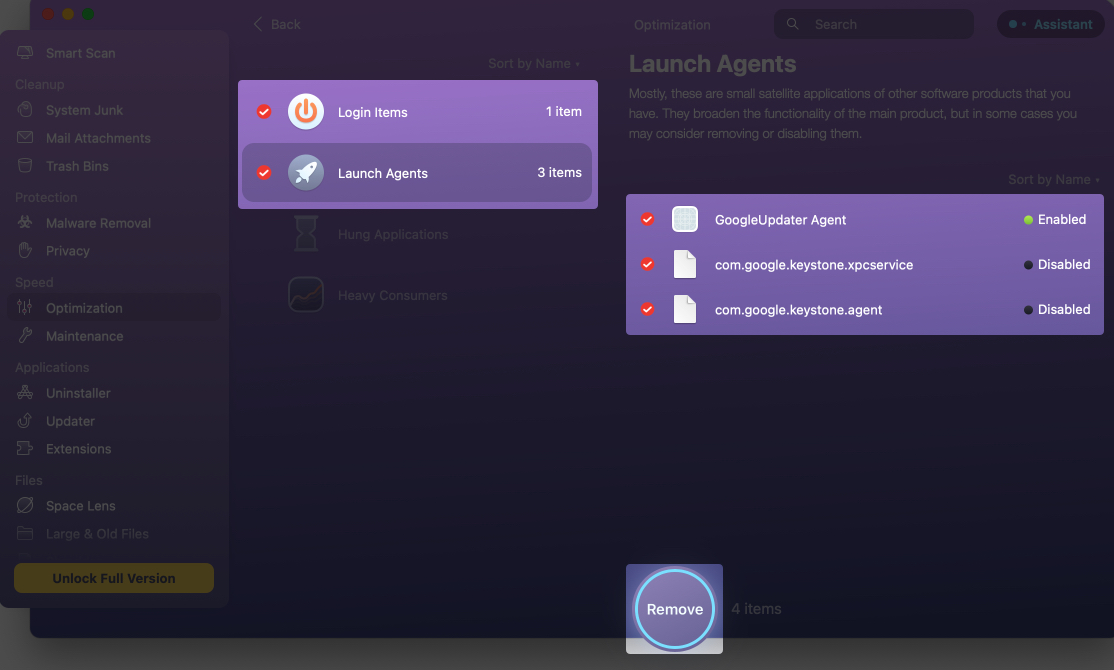
The good thing about CleanMyMac is that if you installed a new app and are unaware that it has been added to your login items, the app will detect it. Regularly checking this part of the CleanMyMac app will help you mitigate the issue at the source.
Now, if you don’t wish to download another app to manage login items, you can make use of the built-in options provided by macOS.
2. Temporarily disable apps opening at startup on Mac
Suppose you don’t want to permanently disable apps; you just don’t want it to appear the next time you log in. In that case, there’s a cheeky macOS trick you can try.
Become an iGeeksBlog Premium member and access our content ad-free with additional perks.
After typing your login password, hold down the shift key and then hit return. Keep holding the shift key until the Dock appears. This will temporarily stop the login items from appearing.
To permanently stop apps from appearing, you can disable the function from your Dock or System Settings, as shown below.
3. How to stop Mac apps from launching on startup from Dock
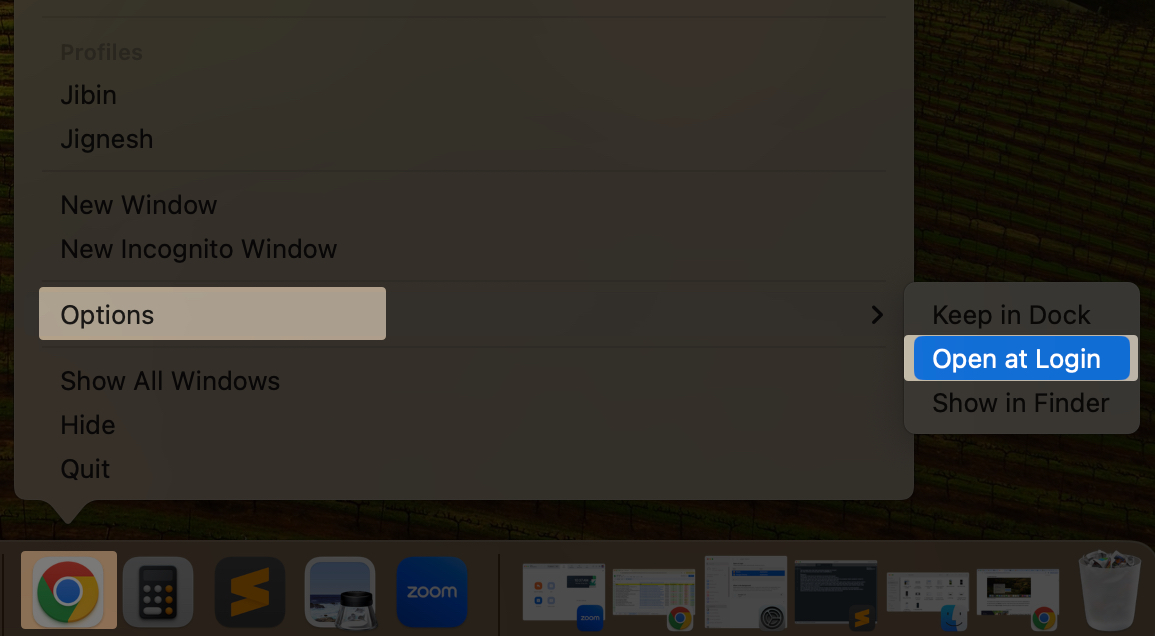
Need a two-click solution to stop apps from launching? Disable it from your Dock.
- Right-click on the app in the Dock.
- Go to Options.
- De-select Open at Login to remove the tick mark next to it.
4. How to remove startup apps in System Settings
If too many apps open at launch, you need to fix the issue from System Settings.
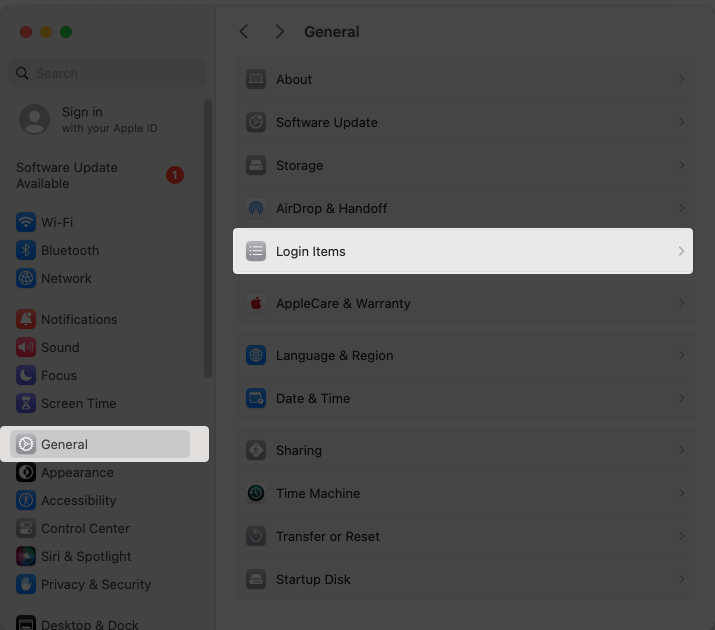
- Go to Apple menu → System Settings.
- Click General in the sidebar → Pick Login Items from the right.
- Now, hold down the shift key and click on apps to select them.
- Click minus (-) to remove them.
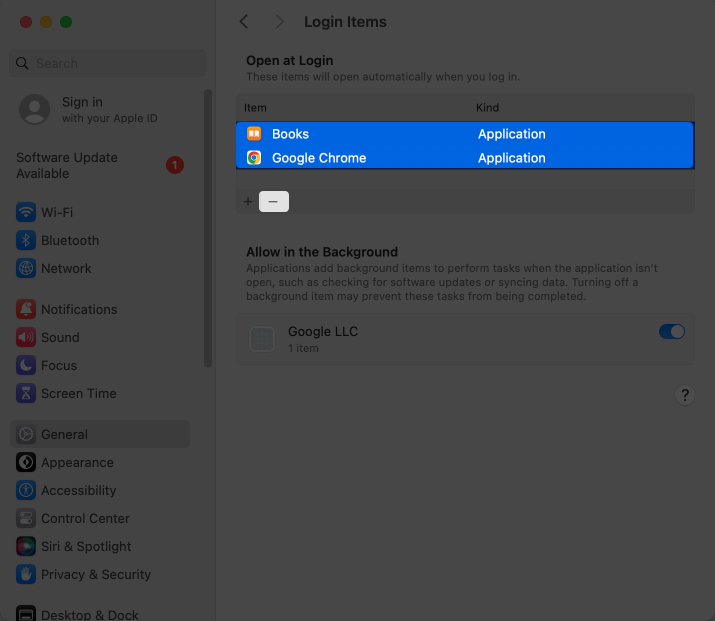
Additionally, look for apps in the Allow in the Background box. Toggle off any app that could make your Mac sluggish.
If you wish to complete this process on older macOS versions, you need to go to System Preferences → Users & Groups → Login Items.
5. Remove Launch Daemons and Launch Agents
After trying the above, if apps are still opening at launch, you must remove Launch Daemons and Launch Agents. Both these run in the background at the system level to independently enable the automatic opening of apps.
The catch here is you won’t find them in your usual folders. You’ll have to dig deeper.
- Open Finder → Click Go in the menu bar → Pick Go to Folder.
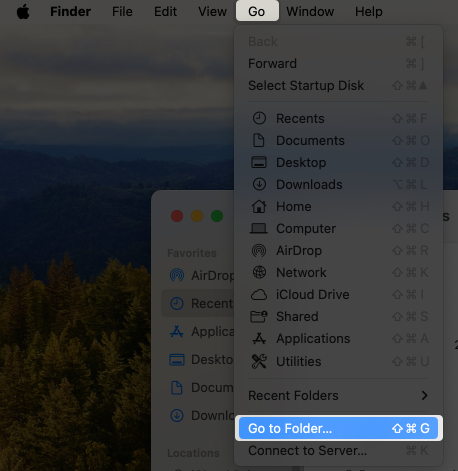
- Search for
/Library/LaunchAgents/and/Library/LaunchDaemons/one after the other.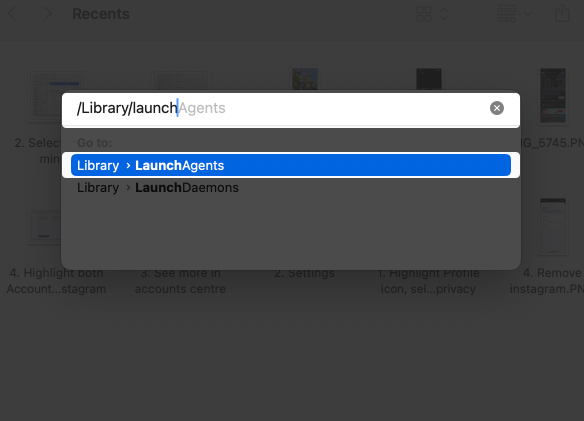
- Open each folder one after the other and trash the files you don’t recognize.
Repeat this process once in a while to ensure no Launch Agent is able to automatically run apps on your Mac.
6. Disable apps from opening at startup from app settings
Apart from using System Preferences in macOS to manage startup items, you can also prevent specific apps from launching at startup by adjusting their in-app settings. Many apps, particularly cloud storage services, and music streaming apps have built-in options to disable automatic startup.
While the exact steps to access and modify these settings can vary between apps, it generally involves navigating to the app’s preferences or settings menu and locating an option related to startup behavior or background processes.
For instance, here’s how you can access these settings in the Dropbox app for Mac:
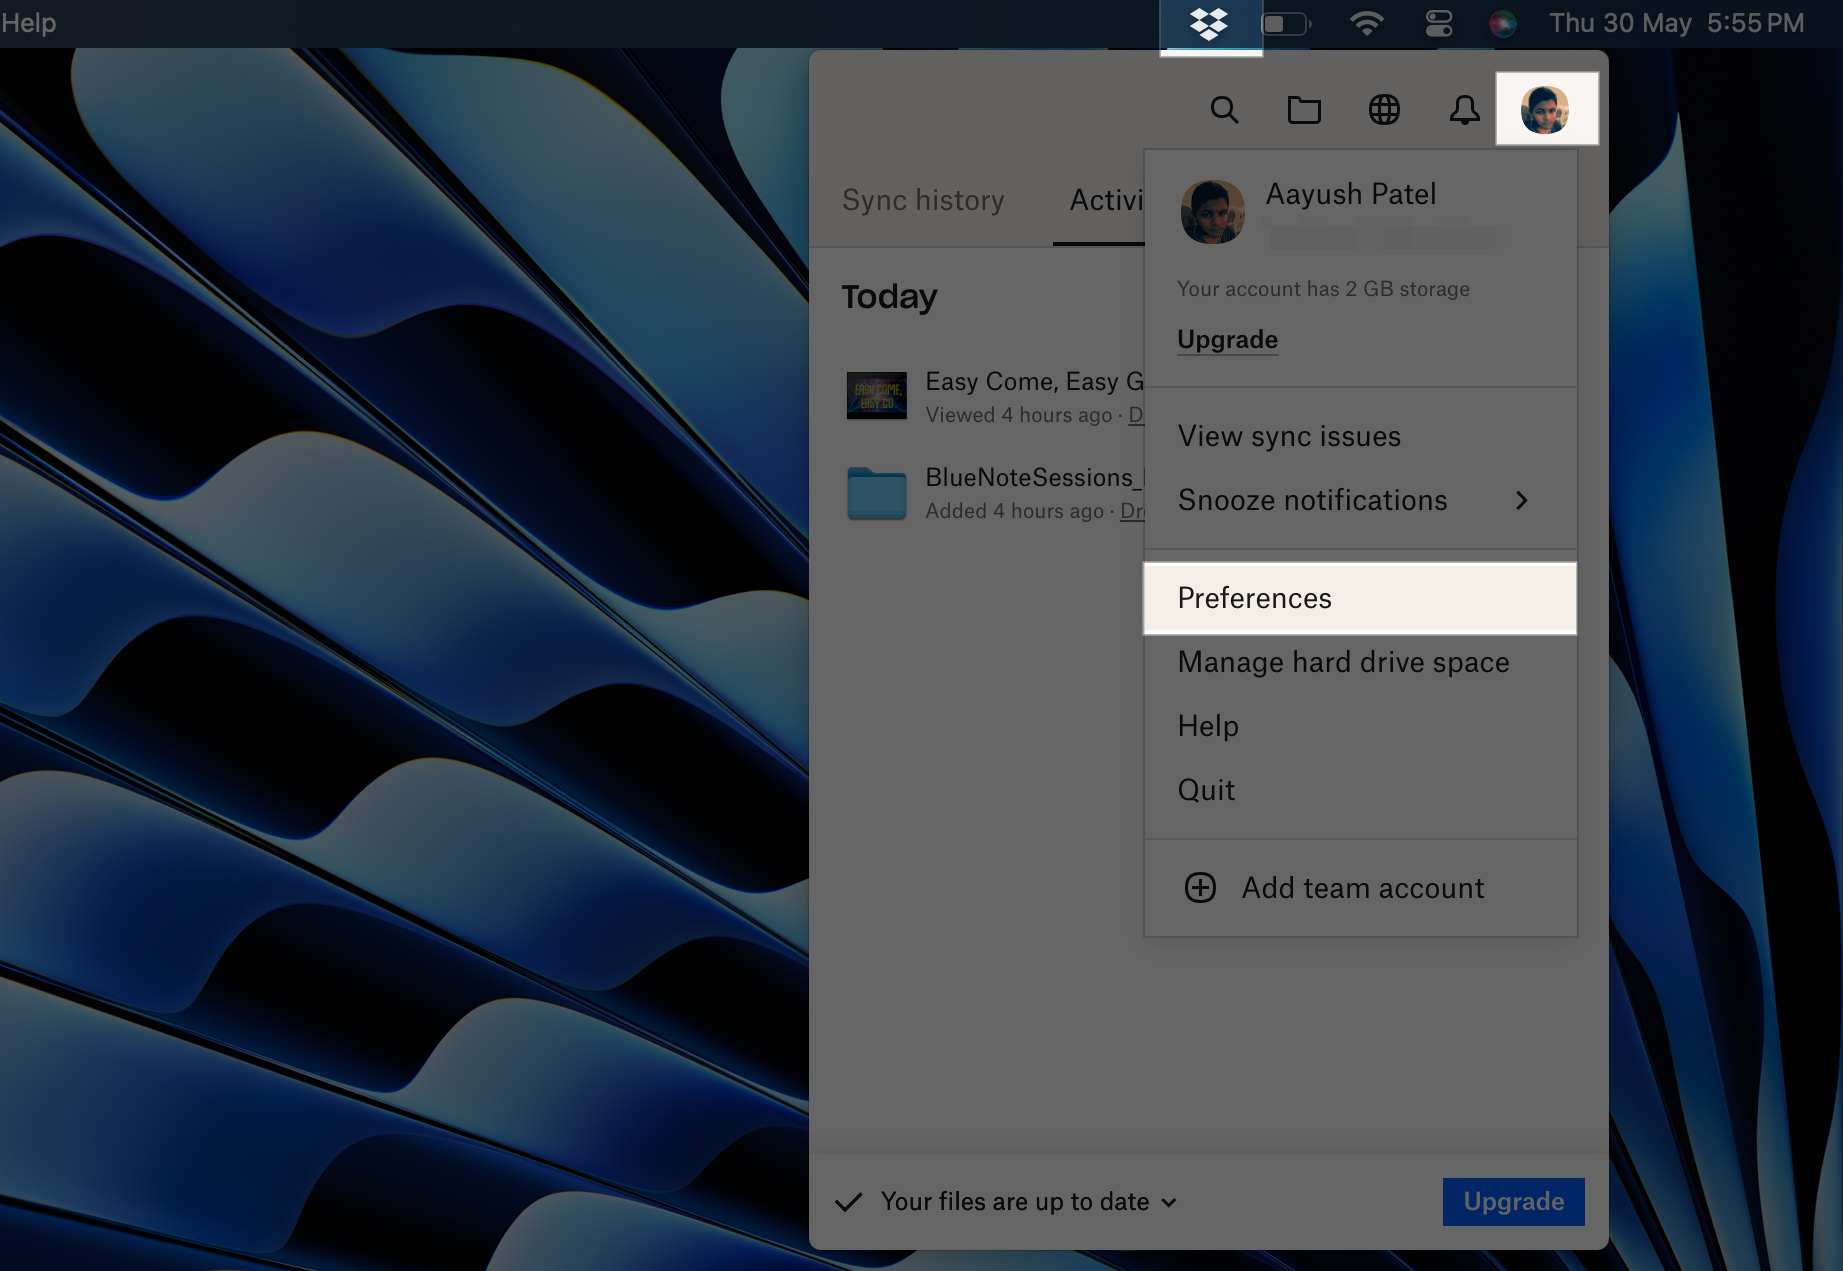
- Click the Dropbox app icon located on the Menu Bar at the top.
- Click your profile picture on the top-right and go to Preferences.
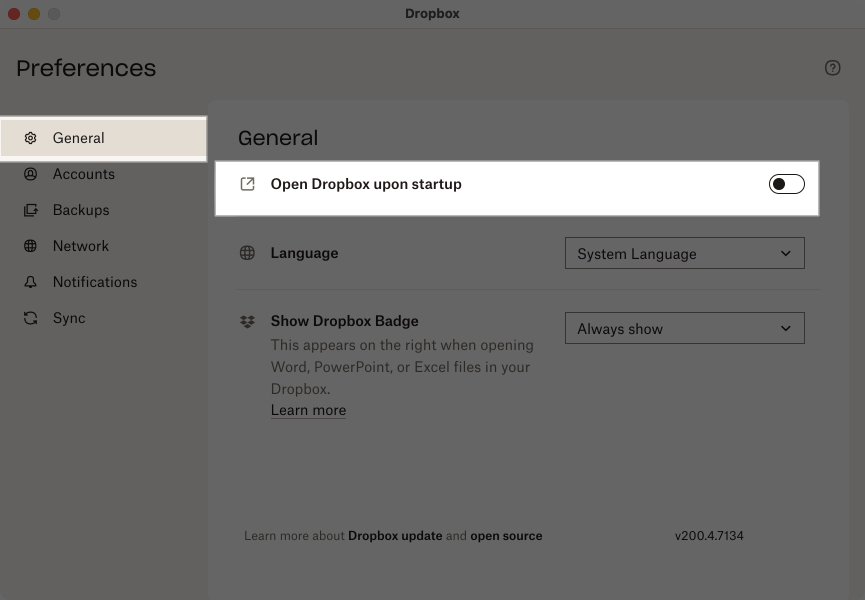
- Then, In the General tab, toggle off Open Dropbox upon startup.
Conclusion
After implementing the above solutions, apps will no longer bother you or your Mac at startup. In fact, you’ll notice a considerable change in speed when you restart your Mac.
Did you find this guide helpful? I’d like to hear your thoughts in the comments below.
Learn more about Mac:
