Video editing has fascinated me for ages. I mostly craft videos to share on social networking sites for fun. For serious editing, Final Cut Pro has long been my top bet. But for light-hearted videos, my loyalty continues to switch.
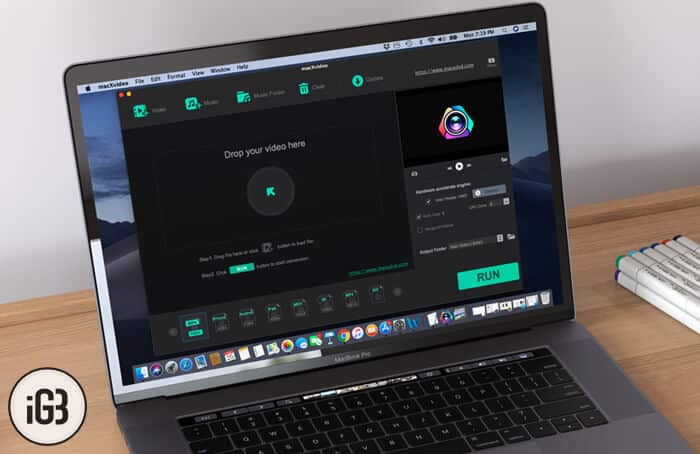
The one department where I’m always a bit extra cautious is processing. Though I want my videos to be lightweight, I don’t want it at the cost of quality.
Recently, I got a chance to try out “macXvideo”—a free video-editing app for Mac. At first instance, I thought it’s not developed for my taste. However, once I gave it a spin, it kind of proved me wrong. Jump right in to know more…
macXvideo Free Video Editor for Mac
Compress 4K/5K/8K Videos Without Any Loss of Quality
Aside from being a super handy tool for editing videos, the app works as exceptionally well in letting you process your videos.
The feature that has stood out for “macXvideo” can compress 4K/5K/8K videos without any loss of quality. You can also resize HD/SD videos with optimum ease.
Believe me, there are very few apps that can process videos so efficiently. But those apps are quite expensive. The app offers you the needed control over what sort of quality you want. And, based on your specific requirements, you can lower or increase the video quality.
You can use this app to shrink videos by up to whopping 90%. That means you will be able to prevent large files from cluttering your storage without having to compromise with the quality of the videos. Another advantage of the small file is that it’s shared easily and a lot faster than the larger files.
How to Reduce Videos Size Using macXvideo on Mac
Step #1. To cut down the video size, all you need to do is just import it in the app and click on the codec icon.
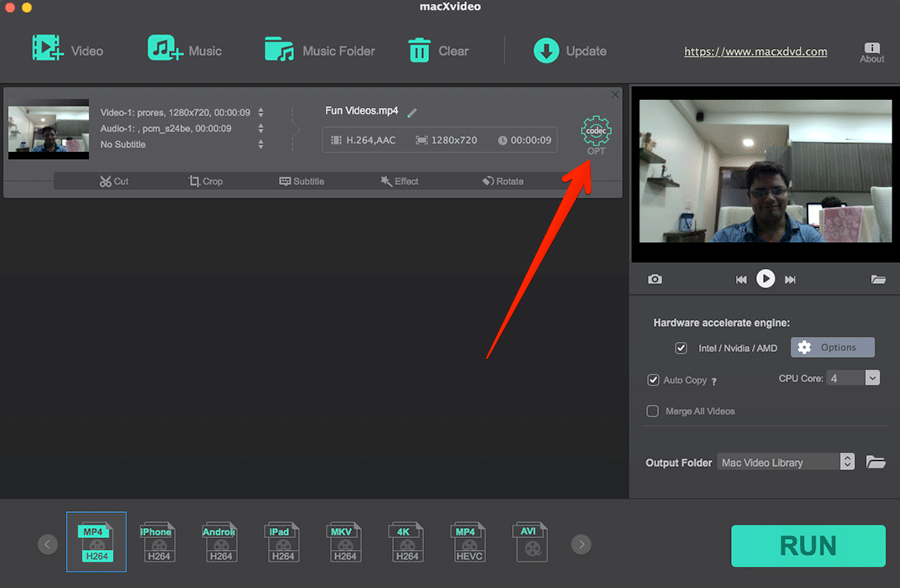
Step #2. To decrease the video quality, drag the slider to the left side. To increase the video quality, drag the slider to the right side.
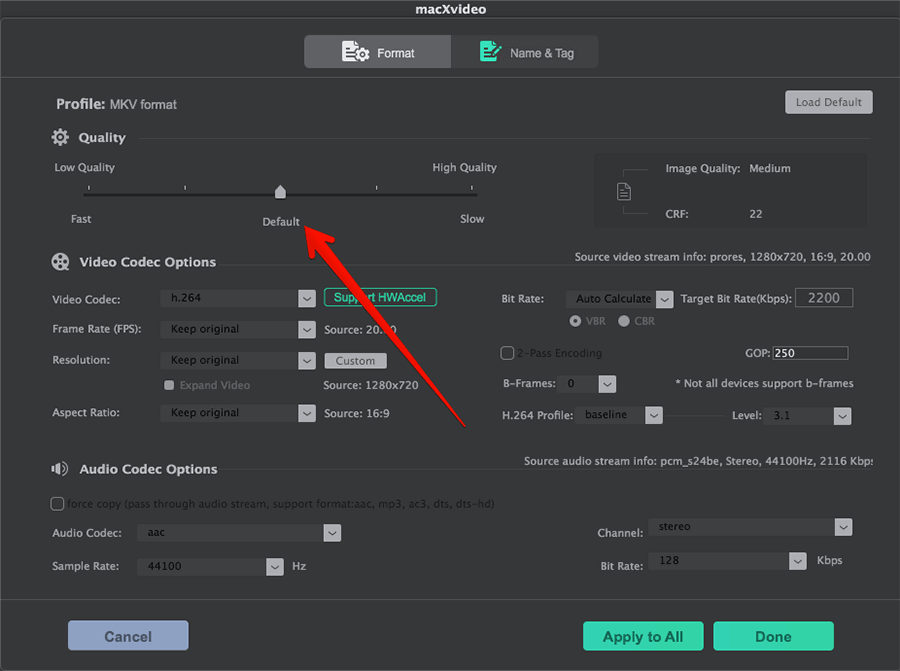
Tip: Under video Codec Options, select Bit Rate drop-down icon and click Manual. Then, enter the desired bit rate.
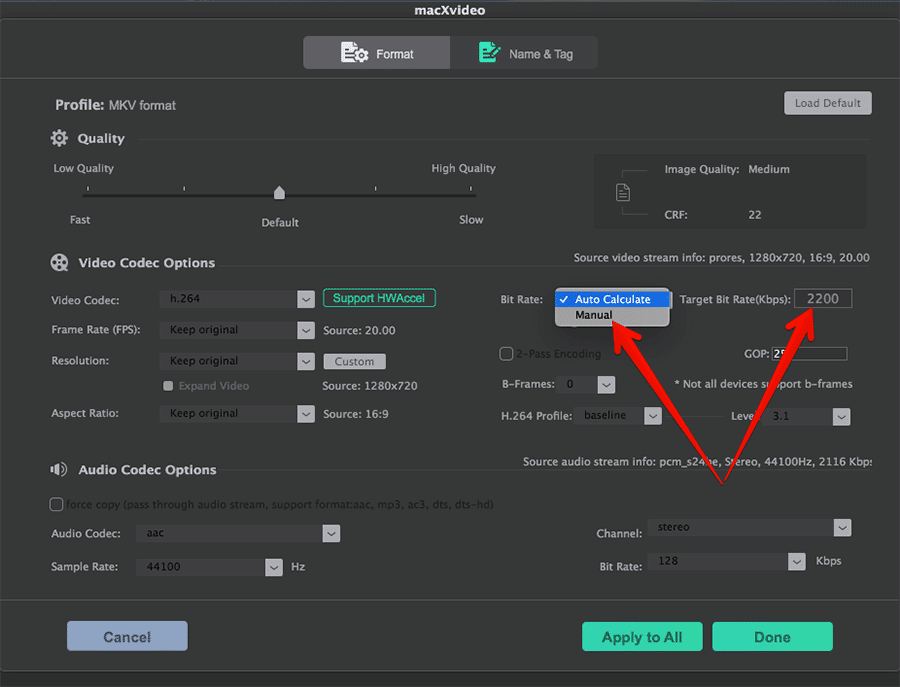
You have the option to lower the video bitrate by 20%-30%.
Step #3. Once you are happy with the result, click on Done button to confirm the changes.
Intuitive User-Interface with Pretty Neat Editing Tools
One very important aspect that I can make sure to check out in my favorite video-editing app is the intuitive user-interface. And, to be honest, it hasn’t disappointed me. I like its clean and straightforward interface.
Due mainly to the lightweight interface, it runs smoothly. Therefore, your computer doesn’t get exposed to heavy workloads.
With multiple easy-to-use editing tools, you can adorn your videos effortlessly. Whether you want to remove the unwanted parts, add cool music, rotate the clip, add some attractive effects, you have got all the options at your disposal.
Become an iGeeksBlog Premium member and access our content ad-free with additional perks.
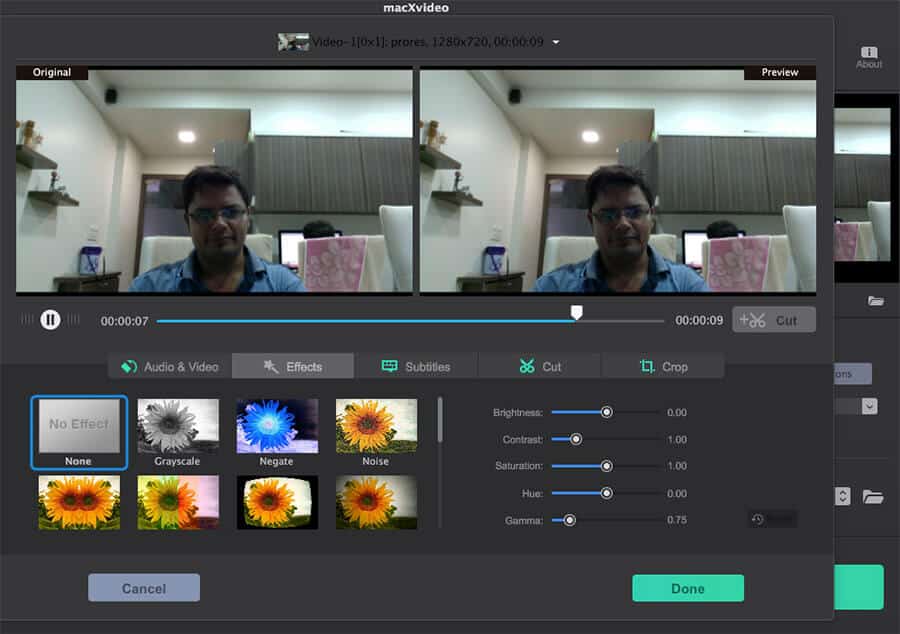
You can also split your videos into smaller pieces and merge them into one. There is also an option to add the suitable subtitles to make your video impactful.
Tip: Simply choose the clips you want to merge → select “Merge All Video” at the lower-right corner. And then, click RUN.
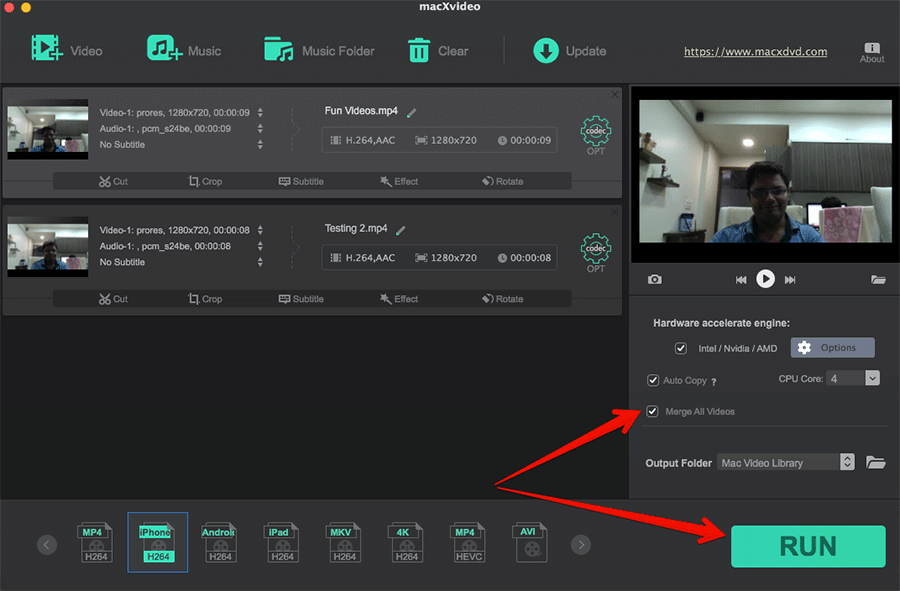
Even if you aren’t good at video editing, you will find this app pretty familiar right from the word go. Within just a few minutes, you can adorn your video to look eye-catching.
Transcode Almost Any Video/Audio Format with Rapid Speed
I always want my video editor to be versatile so that I can transcode any format without any roadblock. In this regard, the macXvideo video editor is up to the task. With the support for several file formats including MP4, H.264, AVI, MKV, MOV, MP3 and more, it has you fully covered.
Regardless of whether the footage is from your iPhone, Android device, DSLR or action cam like GoPro, it’s designed to read them fast. Boasting a massive audio/video codec library (370), it never lets you run out of the option. This is what makes it such an ideal tool for video editing!
Aside from supporting a number of formats, the app excels in letting you transcode them with the top speed. Thus, you will be able to create your favorite video for social media like Facebook, Twitter, and Instagram quickly.
How to Transcode Videos Using macXvideo
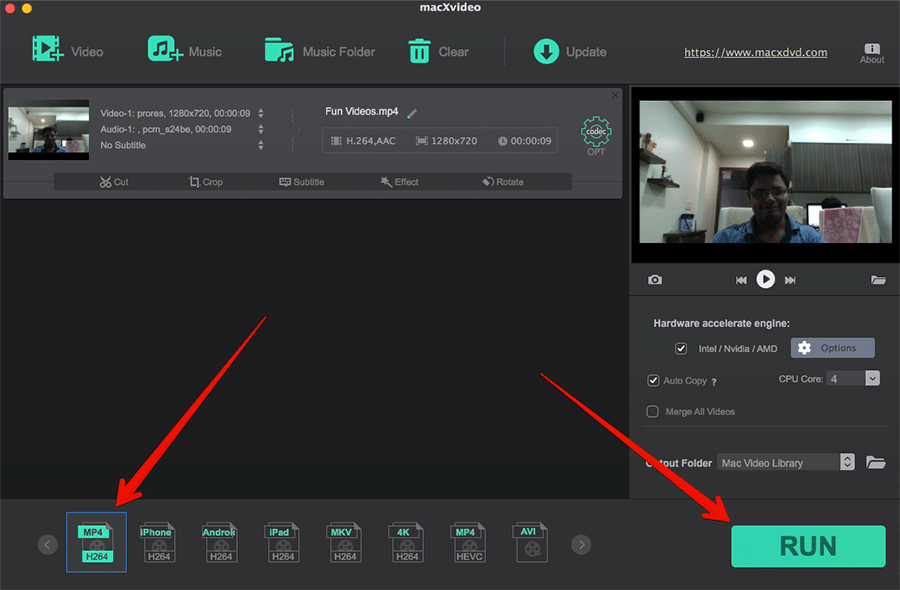
Step #1. Once you have imported the video into the app, you should see the available output video formats at the bottom.
Tip: You can click on the codec icon to perfectly adjust video bit rate, bit rate, frame rate and other important things.
Step #2. Now, choose the output format for your video and then click on RUN button to process video decoding and encoding.
Price and Availability
“macXvideo” is available for free. When I first had an interface with this video app, I thought it’d be really pricey. But I was a bit surprised when I came to know that it can be had free of cost.
The Verdict
From what I have experienced, I can say that macXvideo is an excellent option for video processing. Three features set it apart:
- High Efficiency
- The Intuitive User-Interface
- Lightning Fast Speed
What adds the cherry on the cake is the no price tag. That means you can get started with this top-notch video-processing app for Mac right now without breaking any bank.
If you have to often deal with videos and want to process them seamlessly to share them on social media more conveniently, you shouldn’t miss out on this one.
Of course, it can also come very handy for the folks who are running YouTube channels and wish to make video processing a tad less painful.
