The menu bar is a vital component of a MacBook’s interface, and it appears as a slender strip at the top of the screen. It offers access to various system and application functions, so improving your mastery of using this tab can boost productivity and streamline your workflow. To discover how you can pin items to the menu bar on your Mac, follow along with this article.
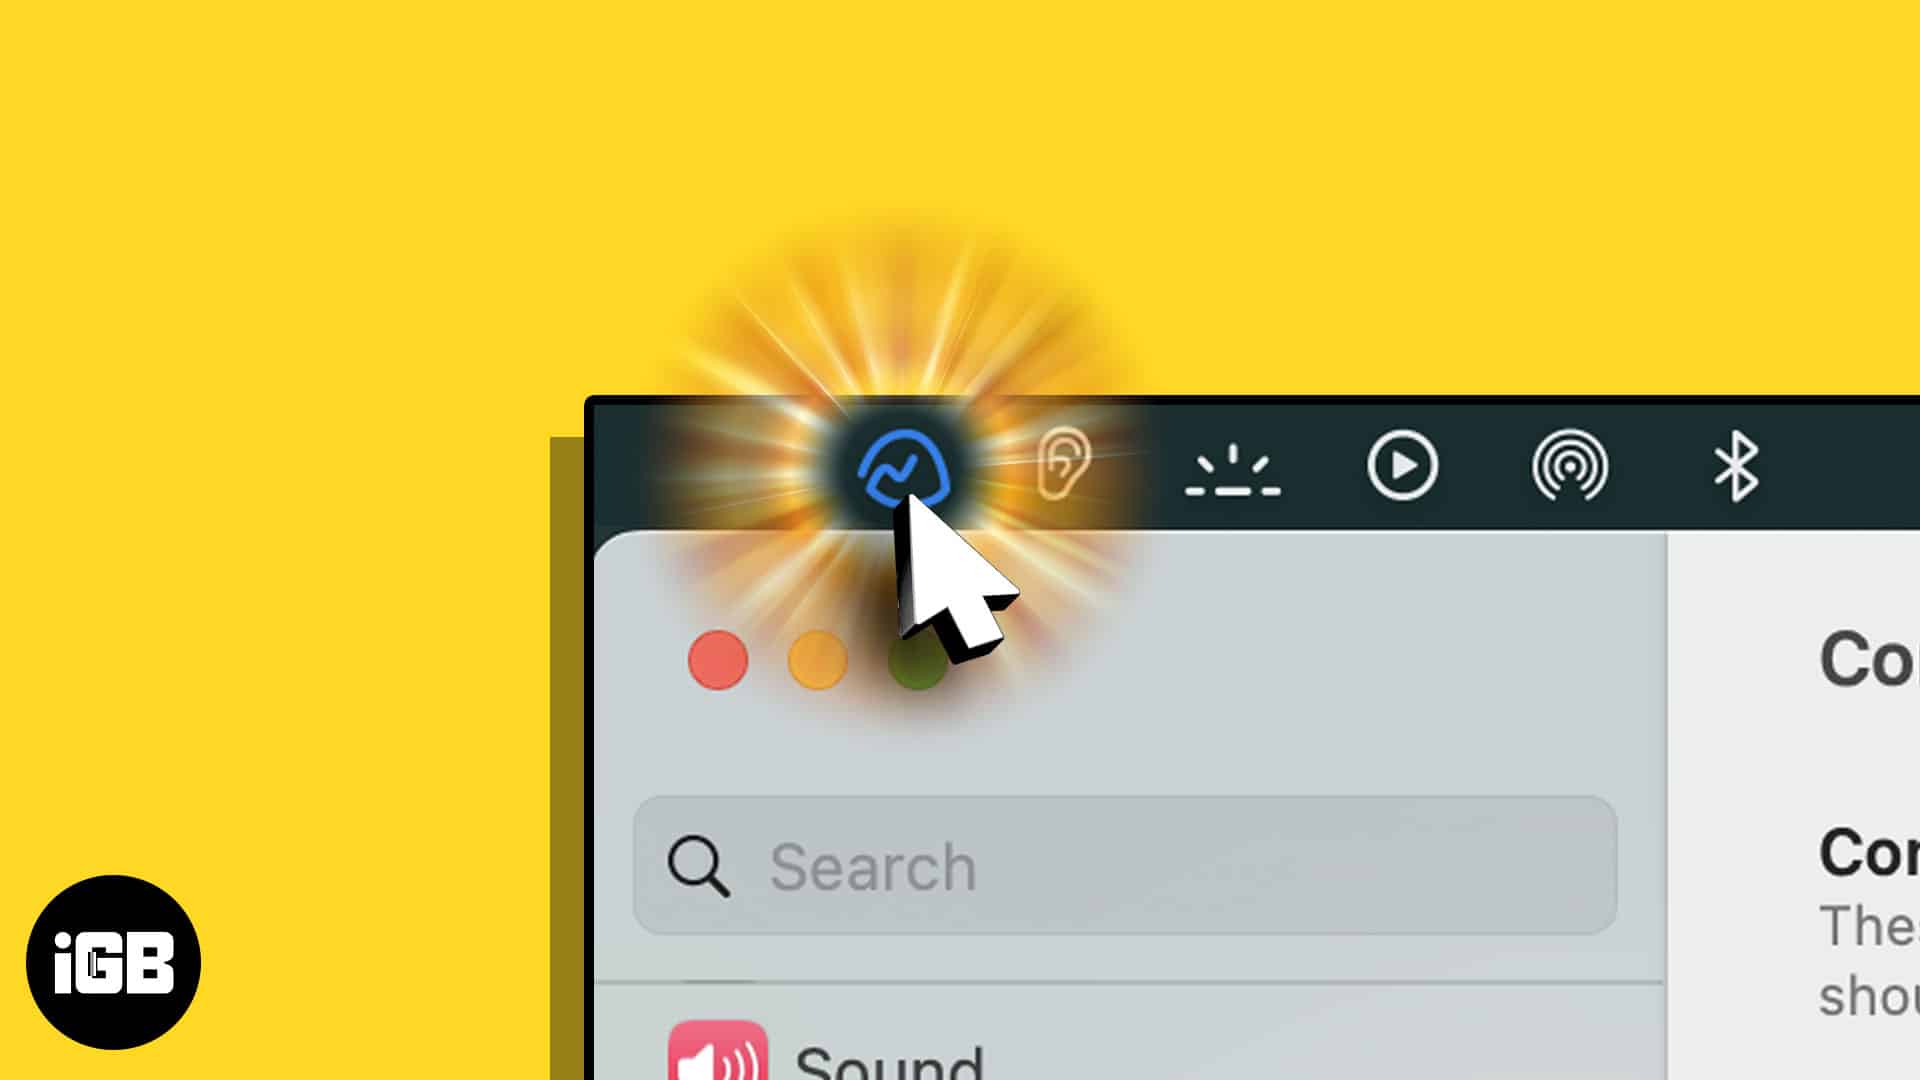
- Quick access: It provides quick access to the items you need. It eliminates the need to navigate through the file system or search for them in the start menu or launchpad.
- Customization: Once you pin your desired apps on the menu bar, you can rearrange items by simply pressing the Cmd key (⌘) and ordering the pins using the trackpad or external mouse.
- Multitasking: By pinning frequently used applications, users can quickly switch between them without the need to minimize or close other windows.
What types of items can you pin to the Menu bar?
- System control items: These include system controls such as Bluetooth, AirDrop, Screen Mirroring, etc.
- Control Center Modules: You can choose when to make them visible (intervals) on the menu bar.
- Other modules: These are items that can be made visible both on the menu bar and Control Center.
- Third-party apps: Many apps come with the support of menu bar icons. Read our article to find out the best free menu bar apps for Mac.
How to pin control center items to Mac menu bar
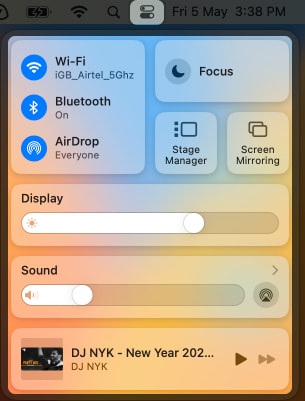
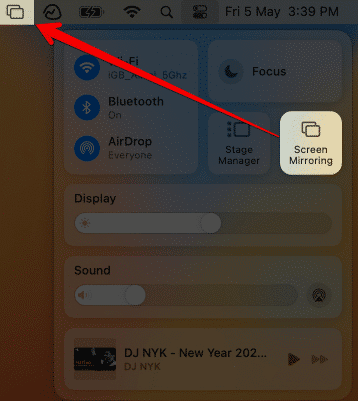
- Click on Control Center → Select an item from the pane.
- Drag and drop the selected item in the menu bar.
You can also switch the positions of the added icons according to your convenience by pressing the Command key (⌘) on your keyboard and dragging them.
How to add items to menu bar in macOS Ventura or later
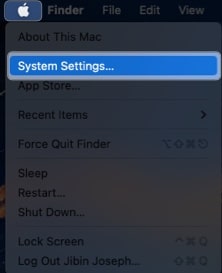
- Click on the Apple logo () in the menu bar → Select System Settings.
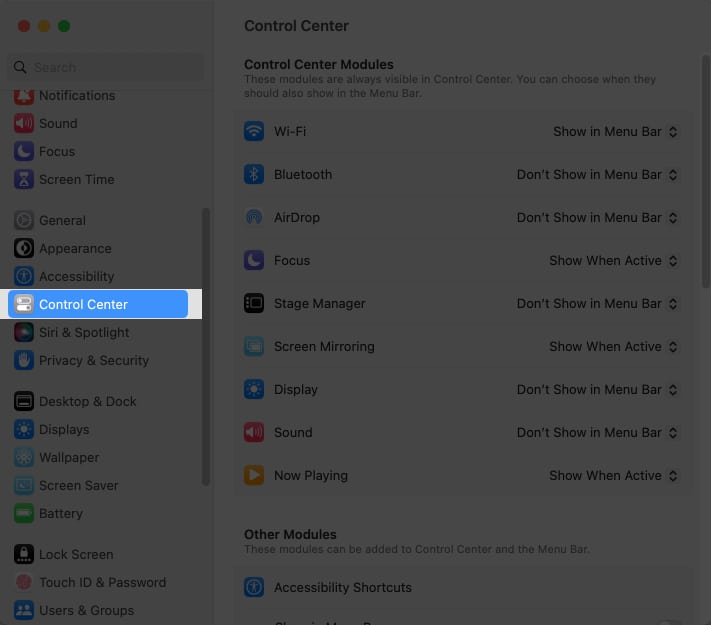
- Go to the Control Center.
Follow below mentioned steps based on the module and features you want to display.
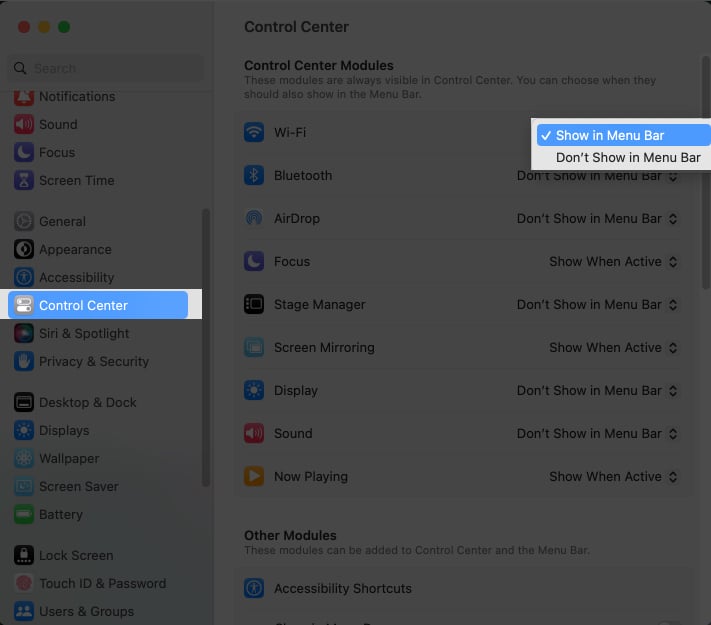
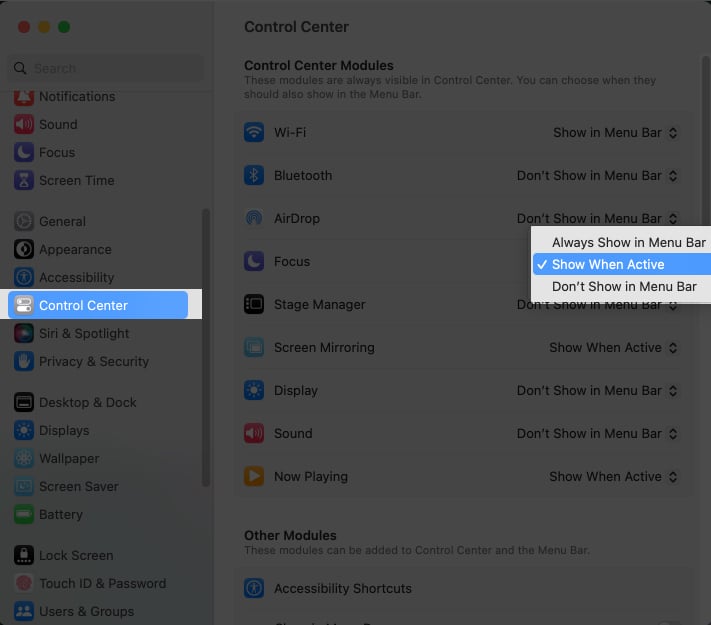
Add Control Center Modules to the menu bar
You can click on the drop-down menu next to the tab and choose your desired option. The available options are:
- For AirDrop, Wi-Fi, Bluetooth, & Stage Manager: Show in Menu Bar, Don’t Show in Menu Bar.
- For other modules: Always Show in Menu Bar, Show When Active, Don’t Show in Menu Bar.
In case you change your mind and remove items from the menu bar, you can just select Don’t Show in Menu Bar from the drop-down menu.
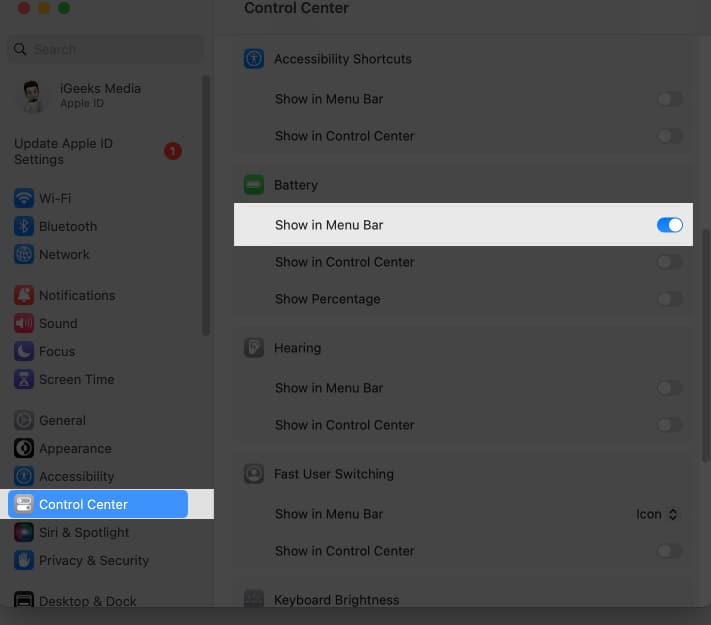
Other modules
To display modules like Accessibility Shortcut, Battery, and more in the menu bar, you can toggle on the button adjacent to Show in Menu Bar.
To remove these options from the menu bar, you can just toggle off the button next to each function.
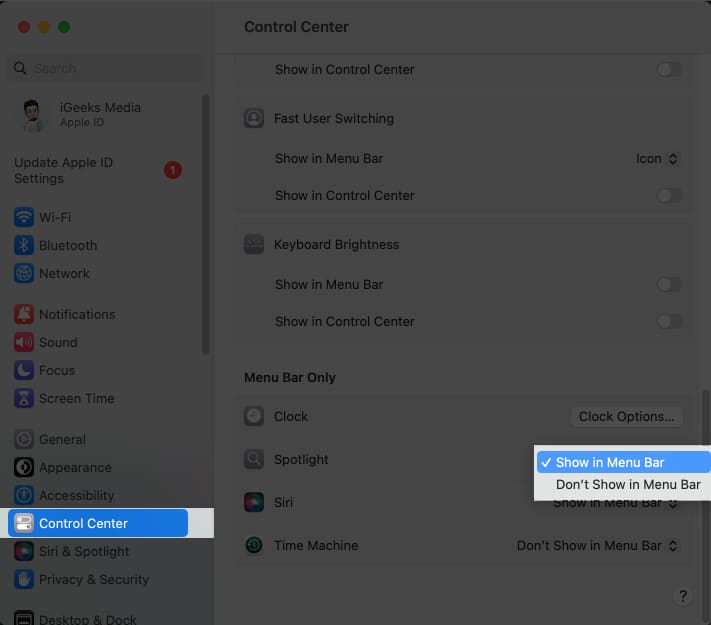
Menu Bar Only
To display Spotlight, Siri, or Time Machine in the menu bar, you can select the Show in Menu Bar option from the drop-down menu next to these items.
The number of items you can pin to the menu bar on a Mac isn’t fixed. However, keep in mind that adding too many items will make the menu bar cluttered and more difficult to use.
Not every item on a Mac can be pinned to the menu bar. The menu bar can only be pinned with apps, folders, and specific system options.
No, the appearance of the items in the menu bar cannot be changed on a Mac. The application or the Mac settings determine how an item will look.
Wrapping up…
I hope the above article helped you add items to your Mac menu bar and use frequently used items without difficulty. Also, don’t forget to share your Mac menu bar experiences in the comments below.
Read more:
