If you created a Facebook account in your younger years, there’s a high chance that you used an alias instead of your real name. While changing your name on Facebook was straightforward back then, the same isn’t true today, as a lot’s changed in Facebook’s naming policy over the years.
So, whether you want to change your Facebook account name due to real-life changes like marriage or divorce or wish to adopt a more professional name, it’s important to know what’s allowed in Facebook’s naming policy and the correct steps to do so.
This guide explains everything you need to know about changing your name on Facebook.
- What is Facebook’s naming policy?
- How do you change your name on Facebook (iPhone and desktop browser)
What is Facebook’s naming policy?
Before we discuss how to change your name on Facebook, it’s important to understand Facebook’s name policy so that you don’t encounter any issues.
- Facebook doesn’t allow you to add titles, words, or phrases or include characters from multiple languages, numbers, or unusual capitalization in your name.
- The name of your profile must be what you’re known as in real life and should match the name on your official government ID. You can use a nickname as the first or middle name if it’s a variation of your original name, and listing another name, such as a professional name, is also possible.
- Faking your identity or pretending to be someone else is strictly prohibited.
Also, Facebook keeps updating its naming policy and adding features like the ability to lock your Facebook profile to improve your account’s privacy and security. Be sure to check the latest naming rules before changing your name.
How do you change your name on Facebook (iPhone and desktop browser)
You can change your name on Facebook via the iOS app or the Facebook website. However, you can only do so once in 60 days. Simply put, if you change your name today, you won’t be able to rectify it until the next 60 days if you make a mistake, such as wrong spelling.
How to change your name on Facebook on iPhone
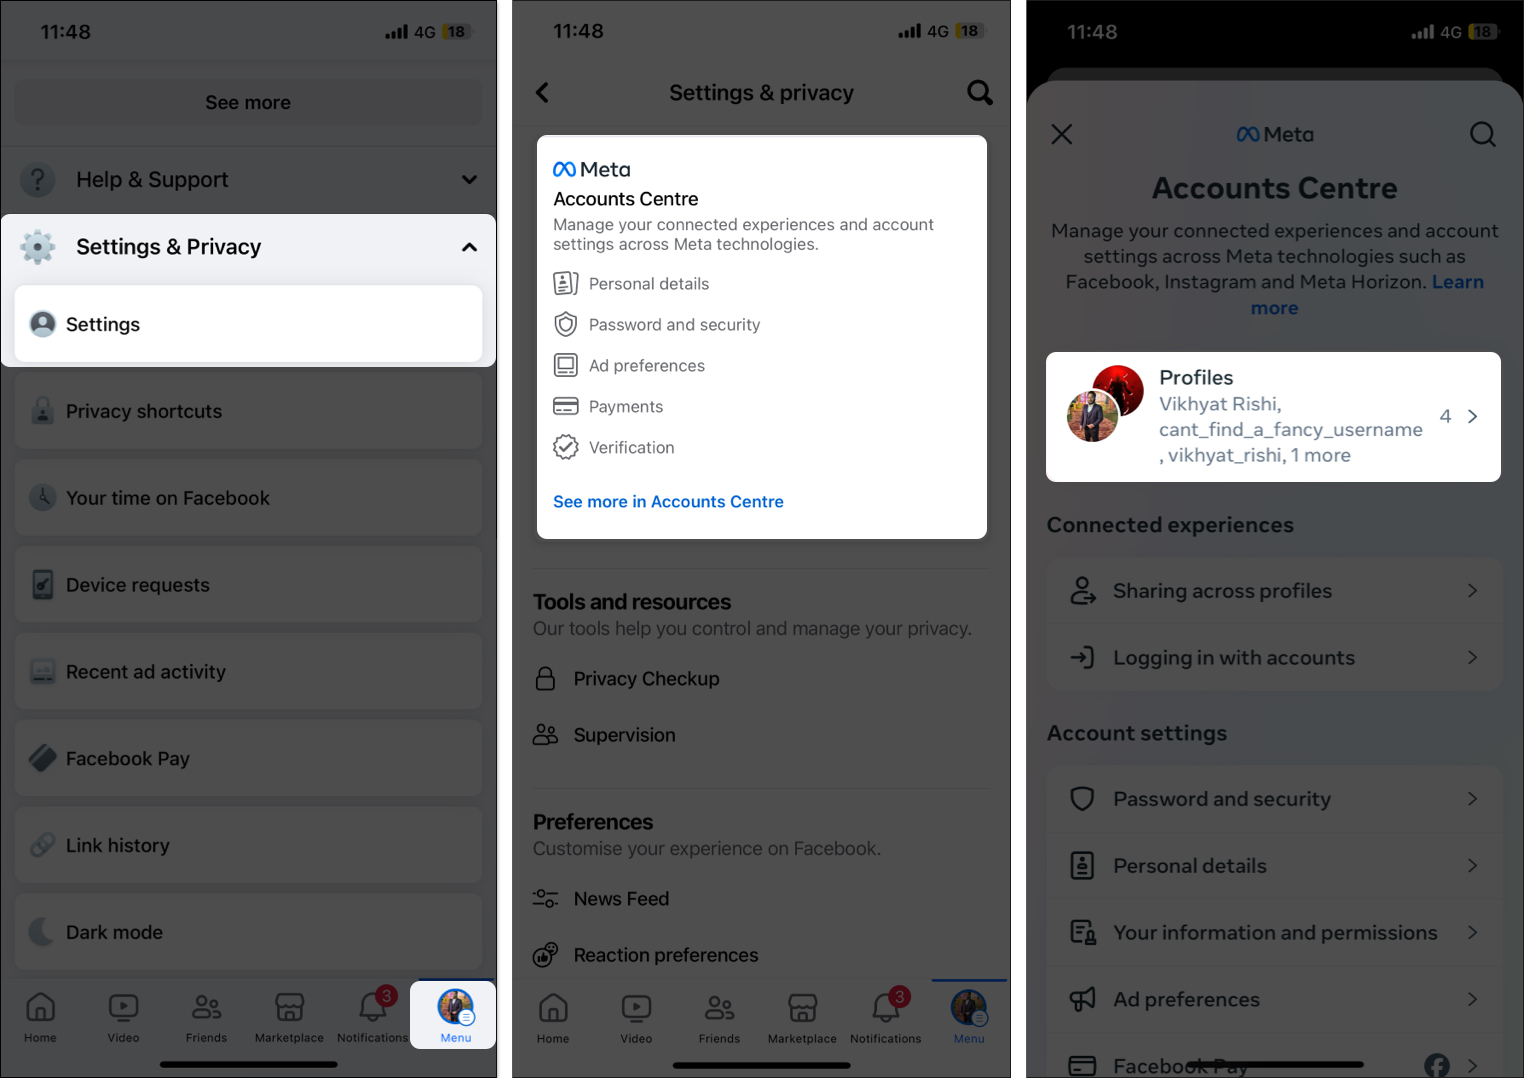
- Open the Facebook app and tap the Menu button at the bottom-right corner of the screen.
- Tap Settings & Privacy, then select Settings in the menu.
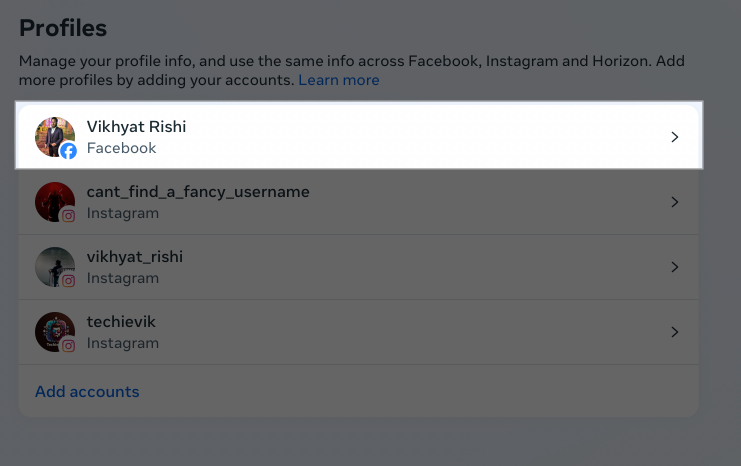
- Now, tap on Account Center and choose Profiles on the next screen.
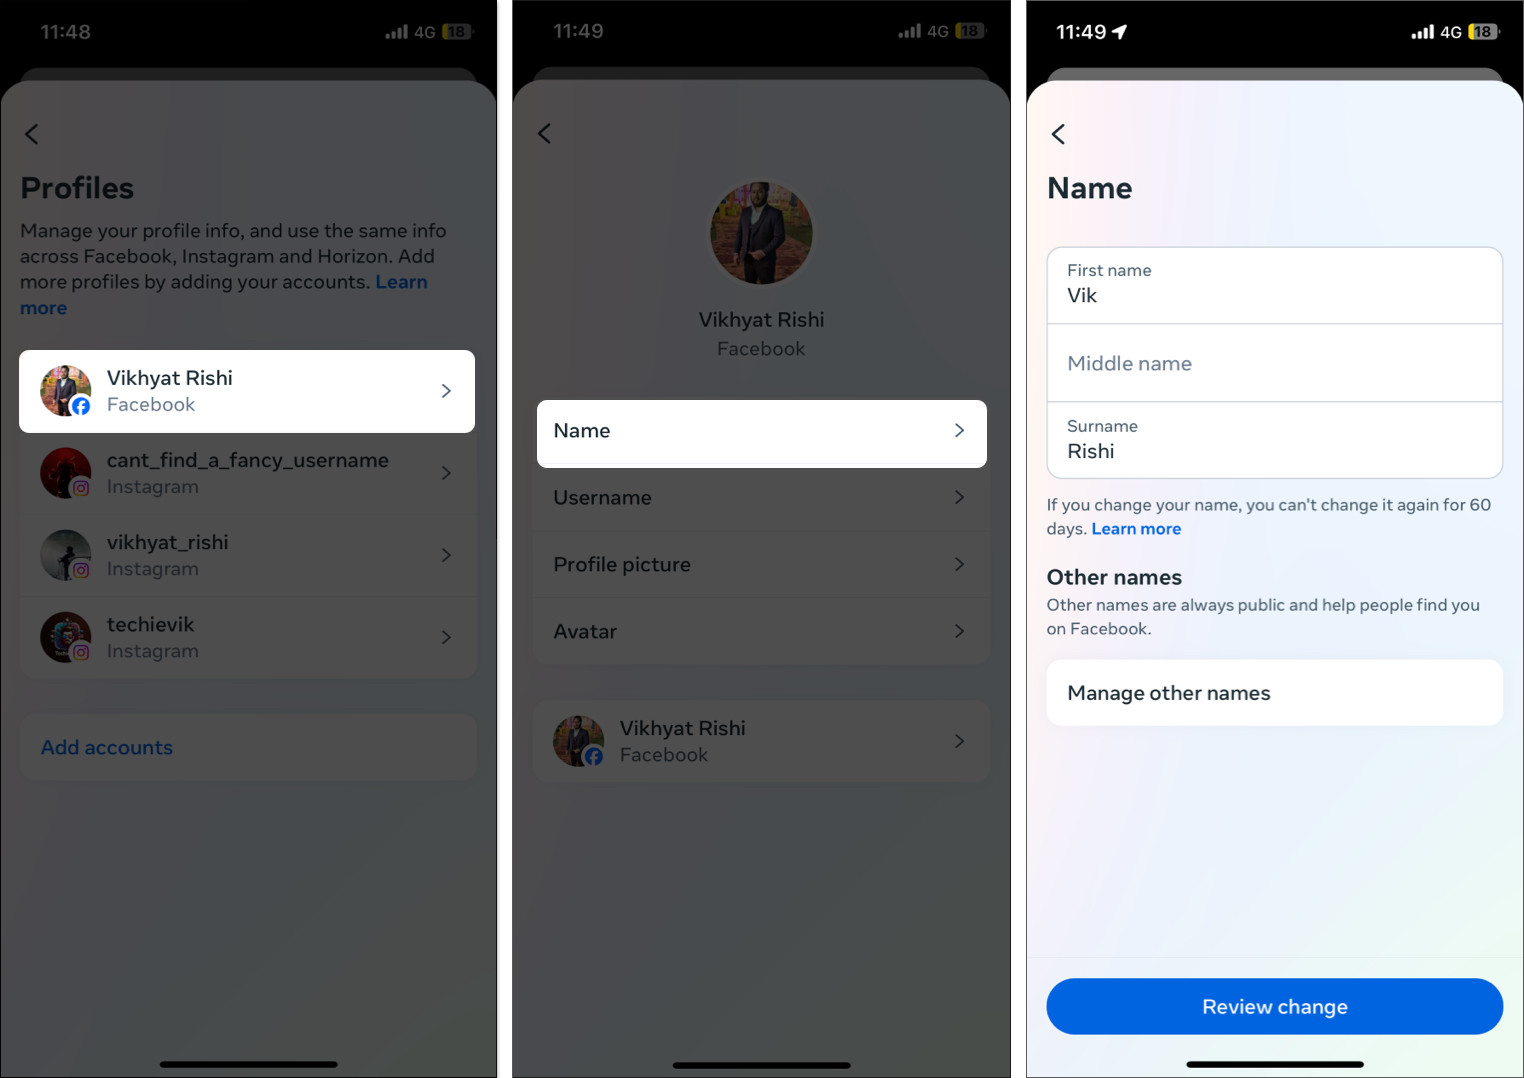
- Select the Facebook account whose name you want to change.
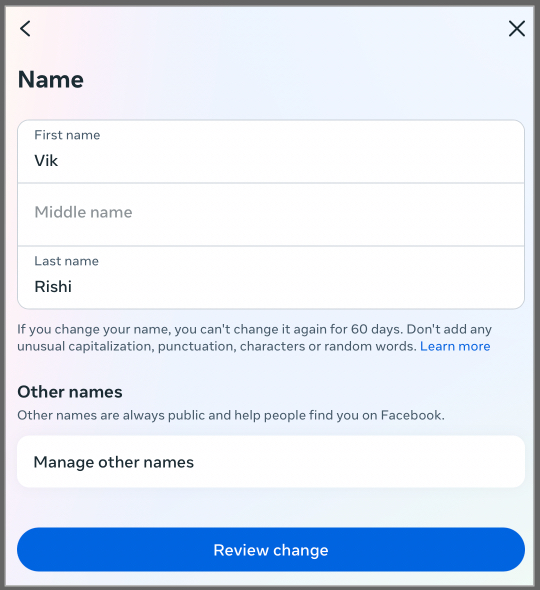
- Tap on the Name tab and type in your new name.
- Tap the Review Change button at the bottom to preview the change.
- Enter your account password when prompted, and hit Save Changes to save your new name.
While Facebook’s iOS makes it easy to change your Facebook account’s name on your iPhone, there are times when it may not work. In that case, refer to our guide on how to fix Facebook not working on iPhone to restore the app’s functionality, and then try changing your name.
How to change your name on Facebook on desktop browser
- Open Facebook in your preferred browser and sign in using your Facebook ID.
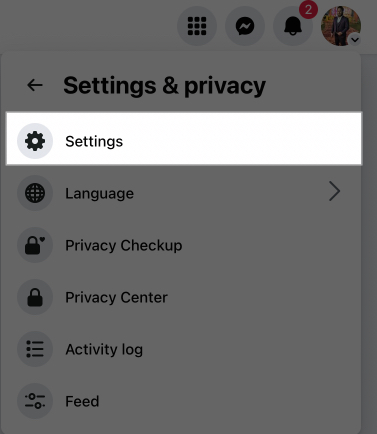
- Click on the profile icon in the top-right corner.
- Now, click on Settings & Privacy in the drop-down menu.
- Click on the Settings option in the subsequent menu.
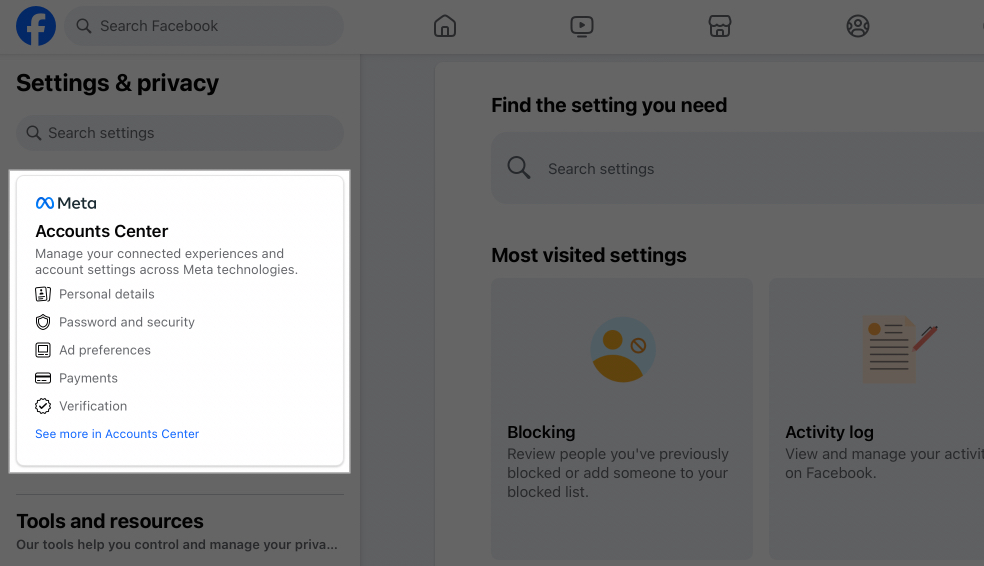
- Here, click on Account Center.
- Select the Facebook profile for which you want to change the name.
- Click on Name.
- Enter the new name and click the Review Change button at the bottom.
- When prompted for a password, type it in and hit the Save Changes button to save the new name.
No. Your friends won’t be notified when you change your name on Facebook. However, they’ll be able to view your new name.
Yes. You can change your name on Facebook to a nickname or alias if they are a variation of your authentic name.
Signing off…
That’s pretty much all you need to know about changing the name of your Facebook account. If you face any difficulty with either method, you can comment below, and we’ll happily respond, or you can also head to Facebook’s help center for assistance. Till then, you can go through these other Facebook related articles:
