Key Takeaways
- Besides Apple Magic Mouse, you can use any third-party mouse with your Mac.
- To setup your wireless mouse, enable Bluetooth on your mouse. Then go to System Settings > Toggle on Bluetooth > Click Connect beside the mouse on Mac.
- You may get Mac trackpad gestures on your regular mouse using xGestures tool.
Apple’s Magic Mouse is an excellent peripheral for Mac. But it has its fair share of flaws that deter users from buying it. Hence, many tend to use a third-party mouse on Mac. This leads to missing out on some amazing trackpad gestures available on the Magic Mouse.
But there’s a way out! I recently found a workaround while setting up my Dell mouse. Now, it seamlessly runs all the macOS gestures. Let me show you how to properly set up a third-party mouse (like Dell, HP, or Lenovo) and get those smart gestures on it.
How to connect a wireless mouse to Mac
First things first, you’ll need to connect your mouse to your Mac. But you need not worry, even if the wireless mouse doesn’t mention that it’s compatible with macOS or Windows. It’ll likely connect with your Mac without any issues.
There are two kinds of wireless mouse available in the market: one with Bluetooth and the other with a 2.4GHz USB connector for establishing a wireless connection. Let’s learn how to connect them properly:
Connecting a wireless mouse with Bluetooth to your Mac
- Turn on the wireless mouse and enable Bluetooth on it.
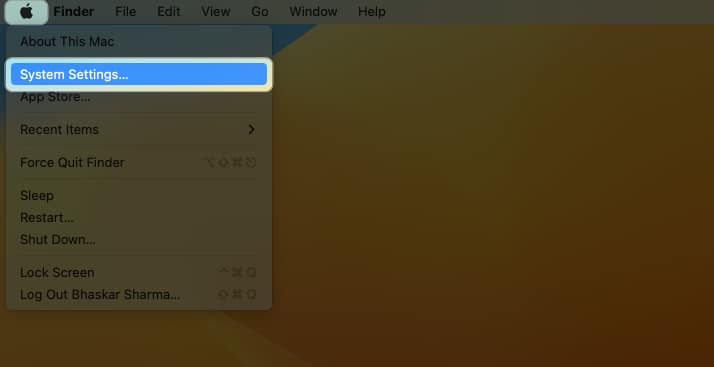
Check the mouse’s manual to turn on Bluetooth. - Open System Settings from the Apple menu ().
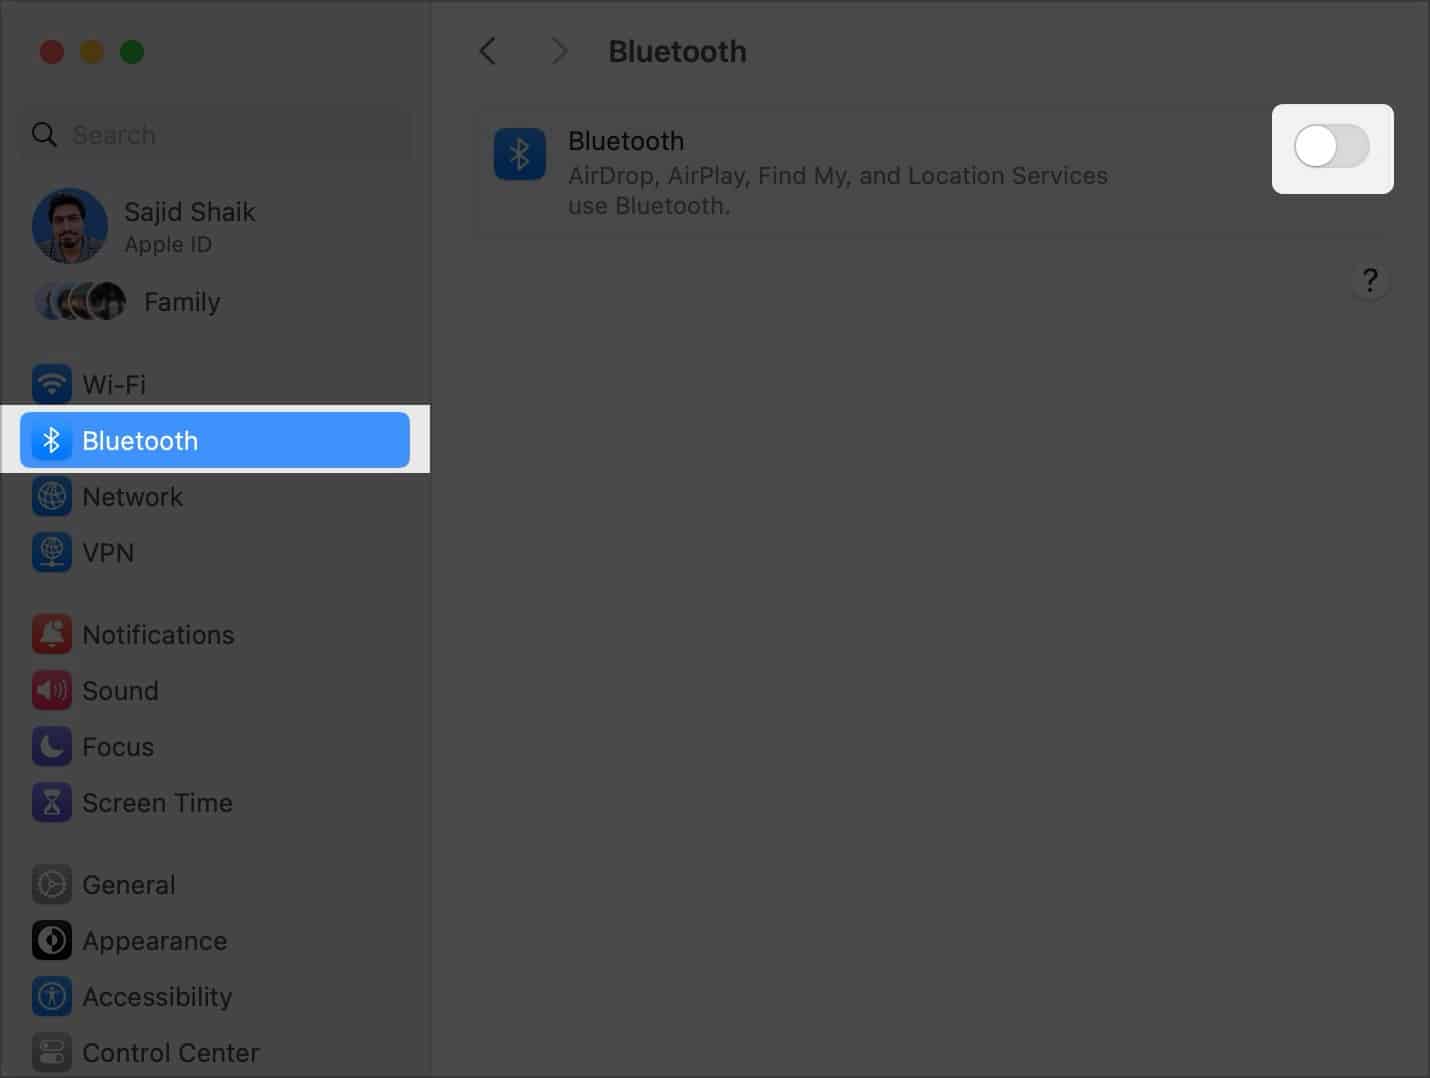
- Select Bluetooth from the left pane and toggle on Bluetooth if disabled.
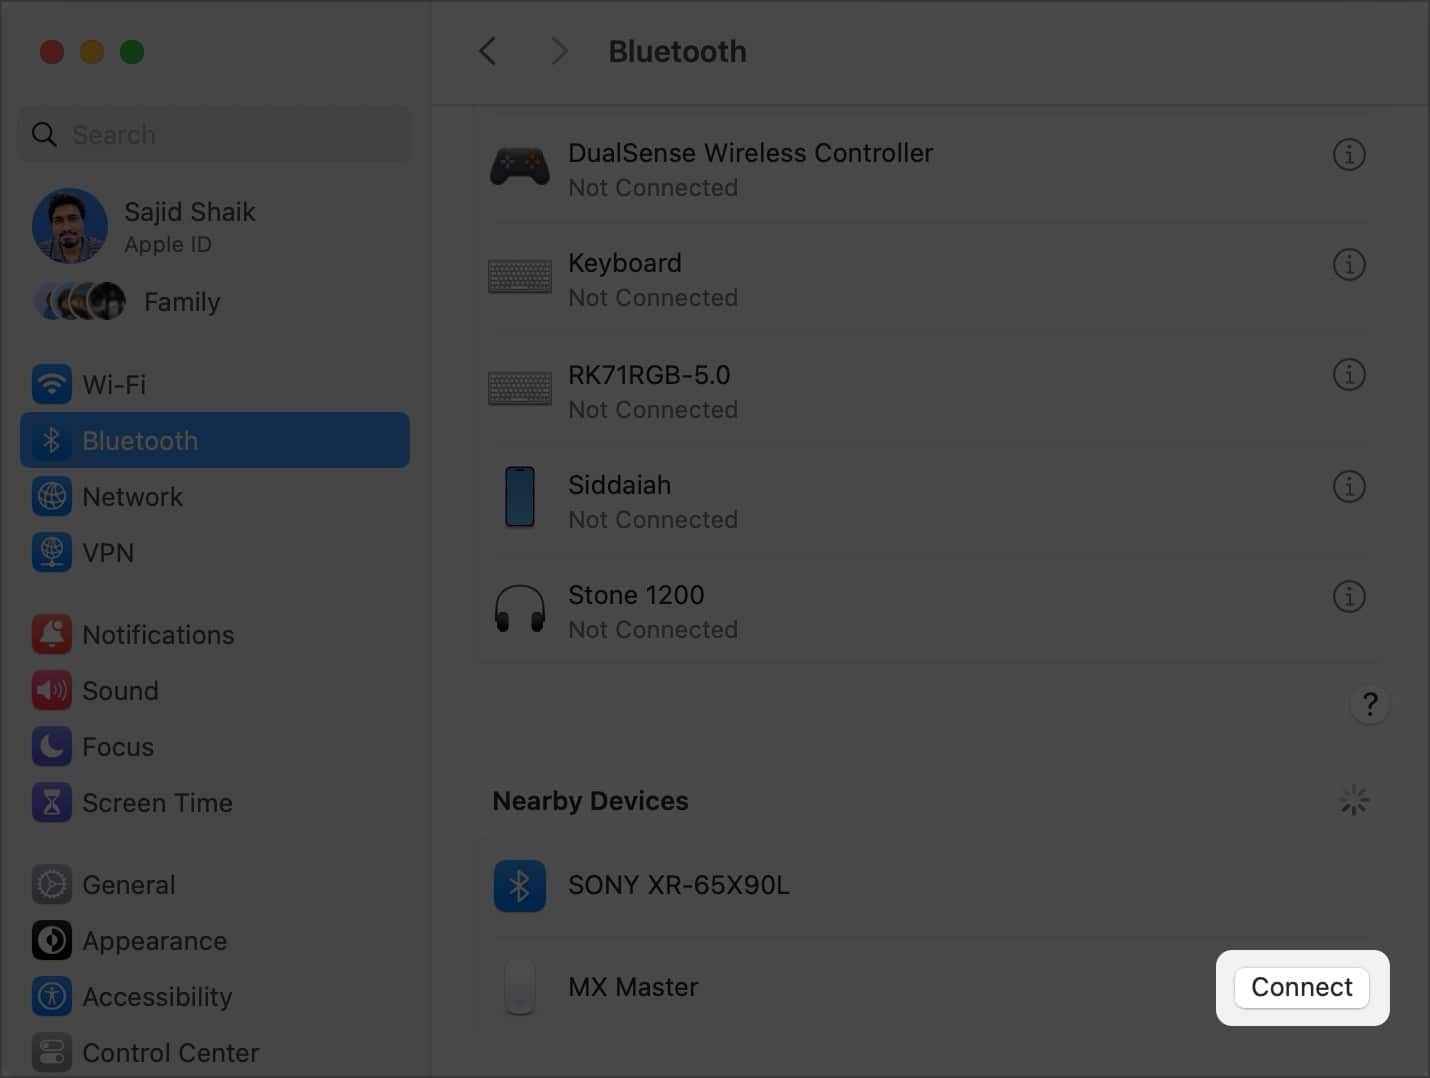
- Scroll to the bottom and tap Connect next to the wireless mouse’s name.
Connecting a wireless mouse with a USB connector to your Mac
If your wireless mouse has included a USB connector in the package, connect the provided USB connector to your Mac. Next, turn on the wireless mouse, and it should connect to your Mac automatically.
If your Mac or MacBook doesn’t have a USB-A port, you might have to get USB-C hub for your Mac.
Tweak the basic mouse settings on Mac
Once you’ve connected your mouse to your Mac, you’ll need to customize a few settings on your Mac. Here’s what you need to change before you start using your wireless mouse.
Before proceeding further, here’s how you can access mouse settings in macOS:
- Connect wireless mouse to your Mac. If not connected, you won’t be able to access mouse settings on the MacBook.
- Open Apple menu () → Select System Settings.
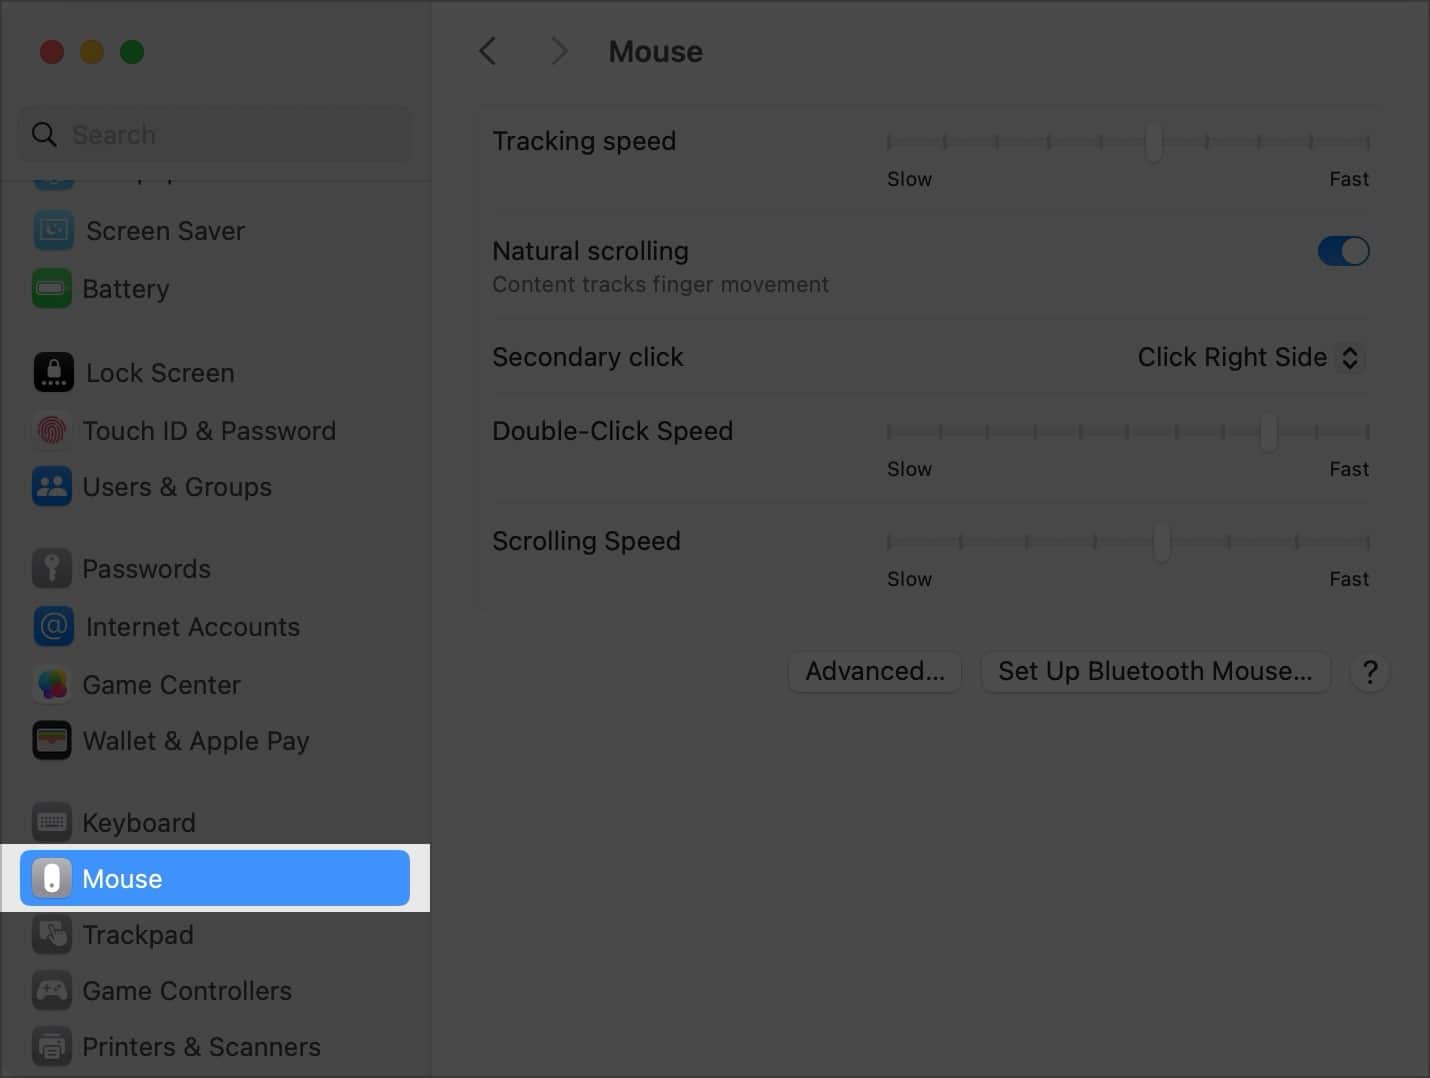
- Select Mouse on the left pane.
Here, you will find all the mouse settings. Let’s explore what measures you need to take:
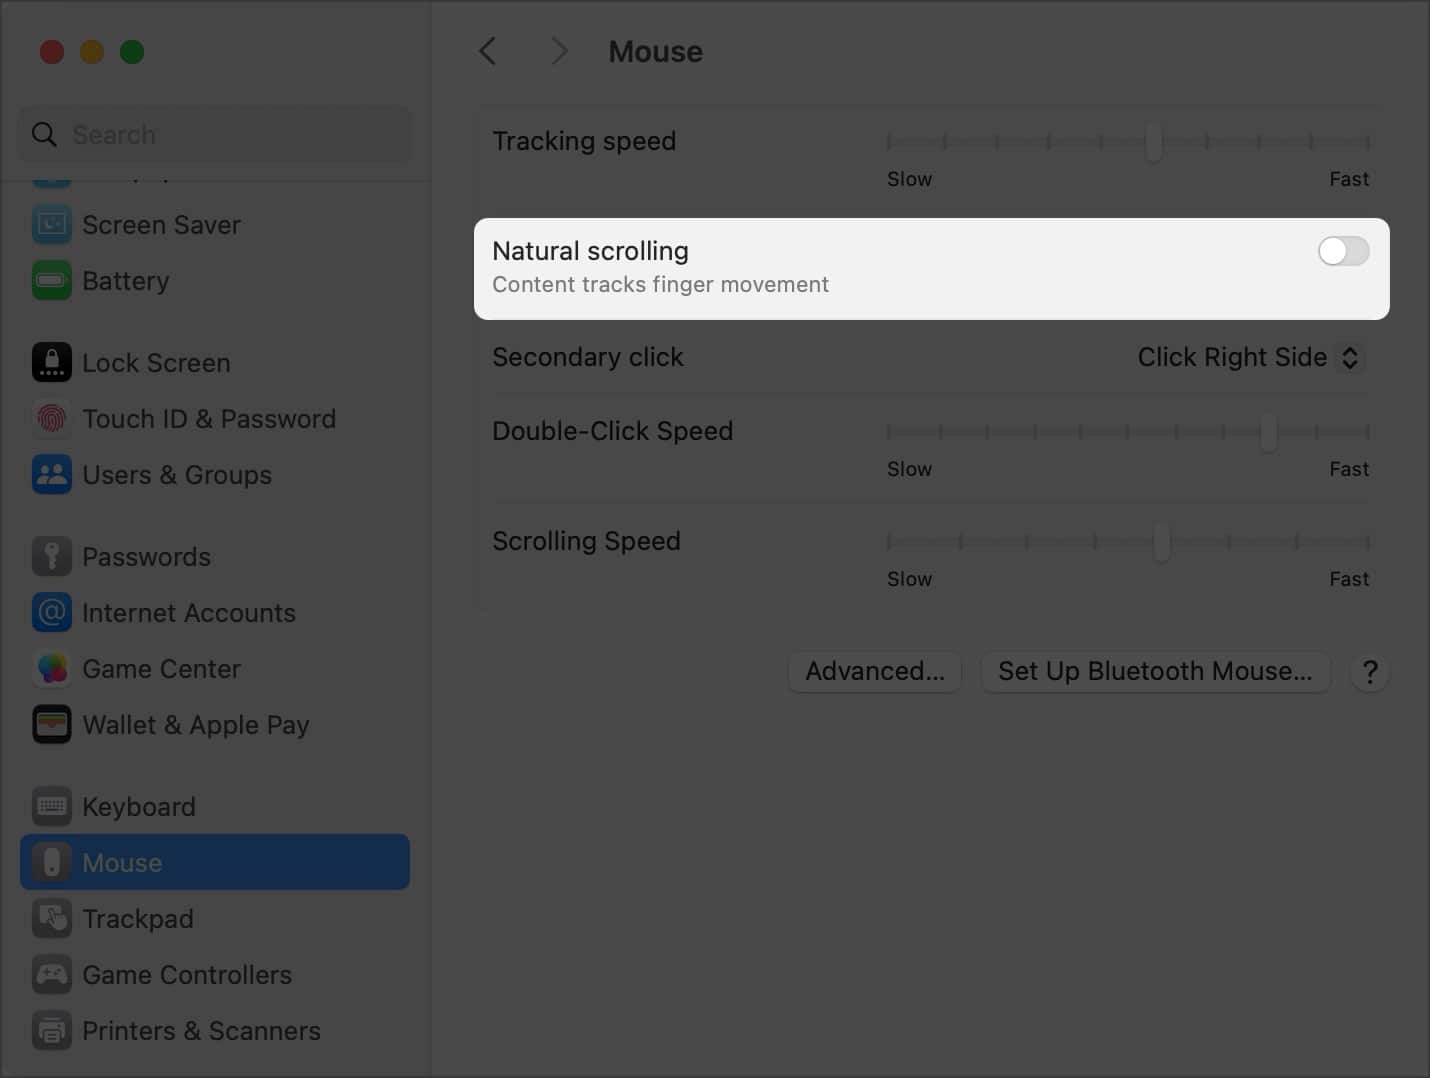
1. Turn off Natural Scrolling
First of all, you’ll need to change the ‘Scrolling’ settings. You must have noticed that once you connect a mouse to a Mac, moving the wheel up and down does the opposite of what you want it to do.
This is because you’re used to using the two-fingers swipe-up gesture to move a website or a page in a downward direction on your Mac trackpad.
However, when using a mouse, moving the wheel in the backward direction feels natural. You need to toggle off Natural Scrolling to stop this from happening.
2. Set Tracking, Scrolling, and Double-Click Speeds
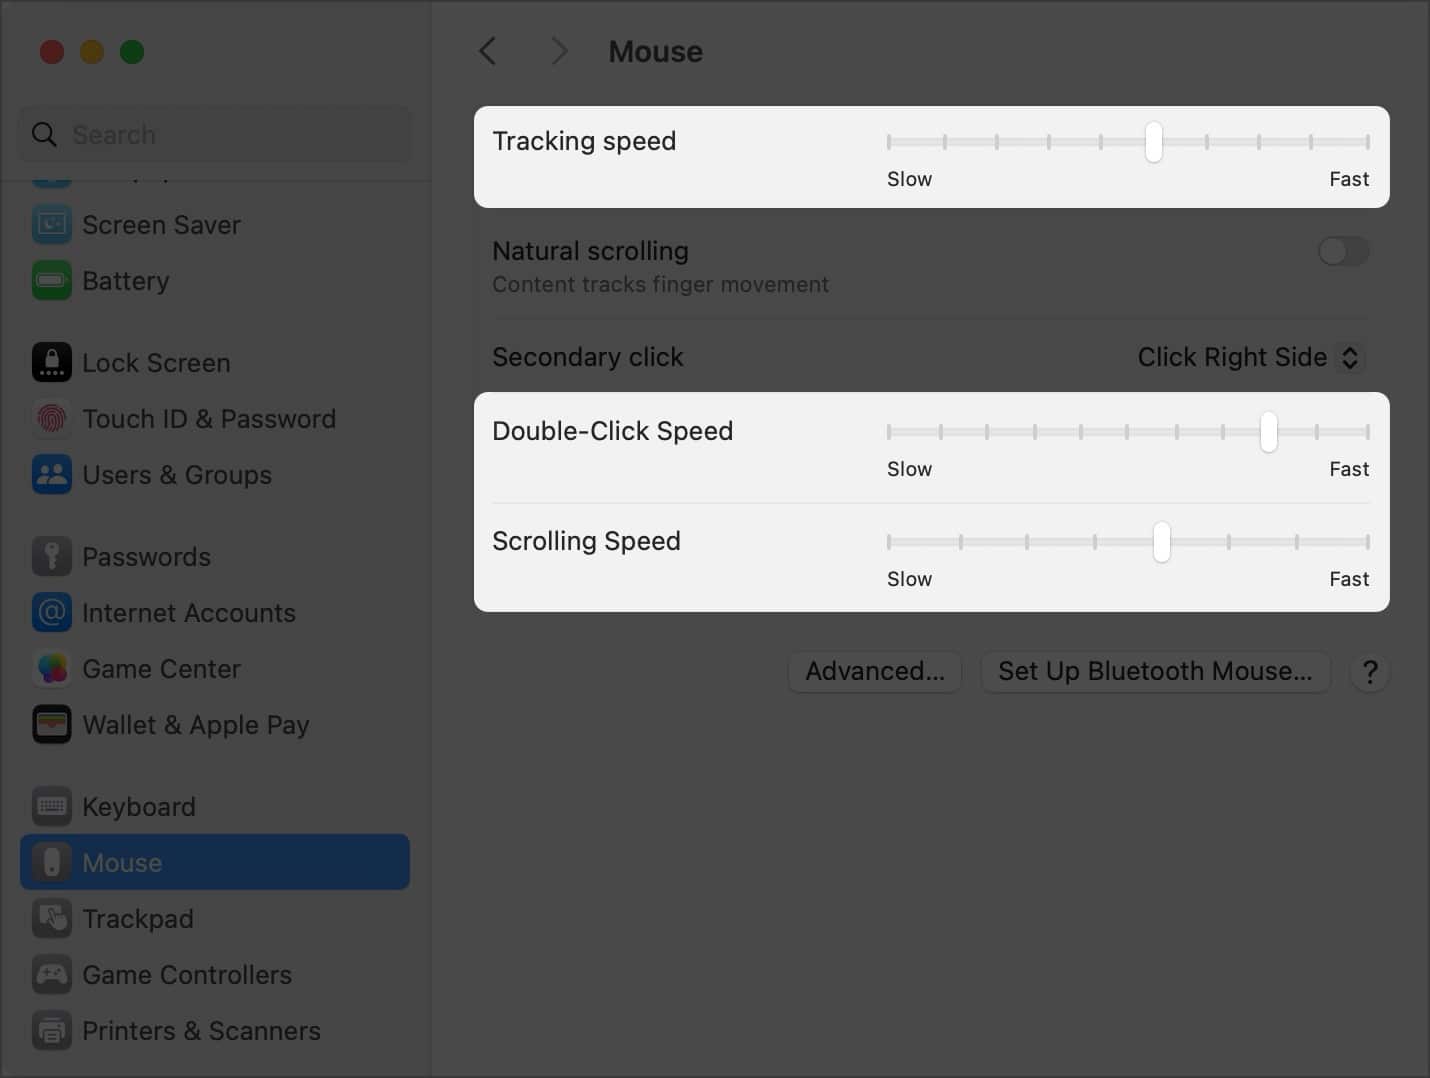
If you’re moving from a different OS, the tracking, scrolling, and double-click settings might be different on Mac. Here’s what these settings mean:
- Tracking Speed: This speed means how fast your Mac can recognize a mouse movement. The faster the tracking speed, the faster the gestures.
- Scrolling Speed: This determines the amount of page scrolled when you spin the wheel button. The faster the scrolling speed, the faster the page will be scrolled. I wouldn’t recommend you to change this speed.
- Double-Click Speed: As the name suggests, it determines how fast the double click can be tracked. The faster the speed, the faster your Mac will determine click gestures. If you increase this speed, your Mac will even recognize the faintest of mouse clicks.
Adjust these mouse settings as per your preferences.
3. Turn on Spring Loading
I’m sure you’re aware of the feature when you hold a file over a folder, and the folder opens. Well, Apple has disabled this gesture with the third-party mouse by default. Here’s how you can enable Spring Loading in macOS:
- Open System Settings on your Mac from the Apple menu ().
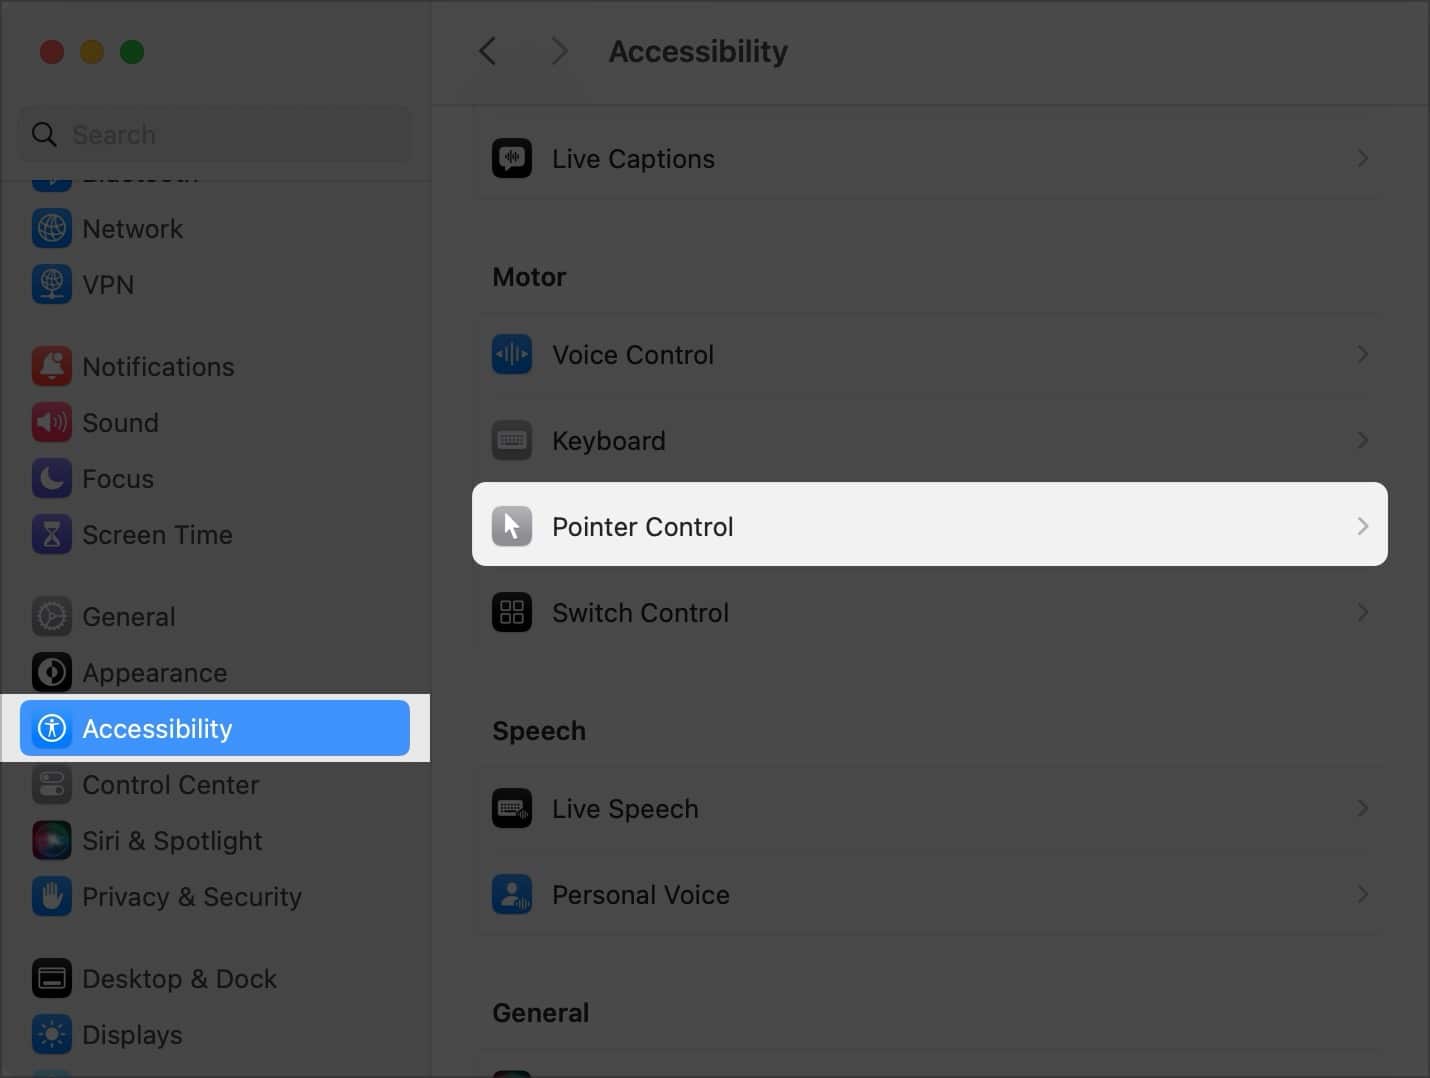
- Click Accessibility from the left pane → Select Pointer Control on the right pane.
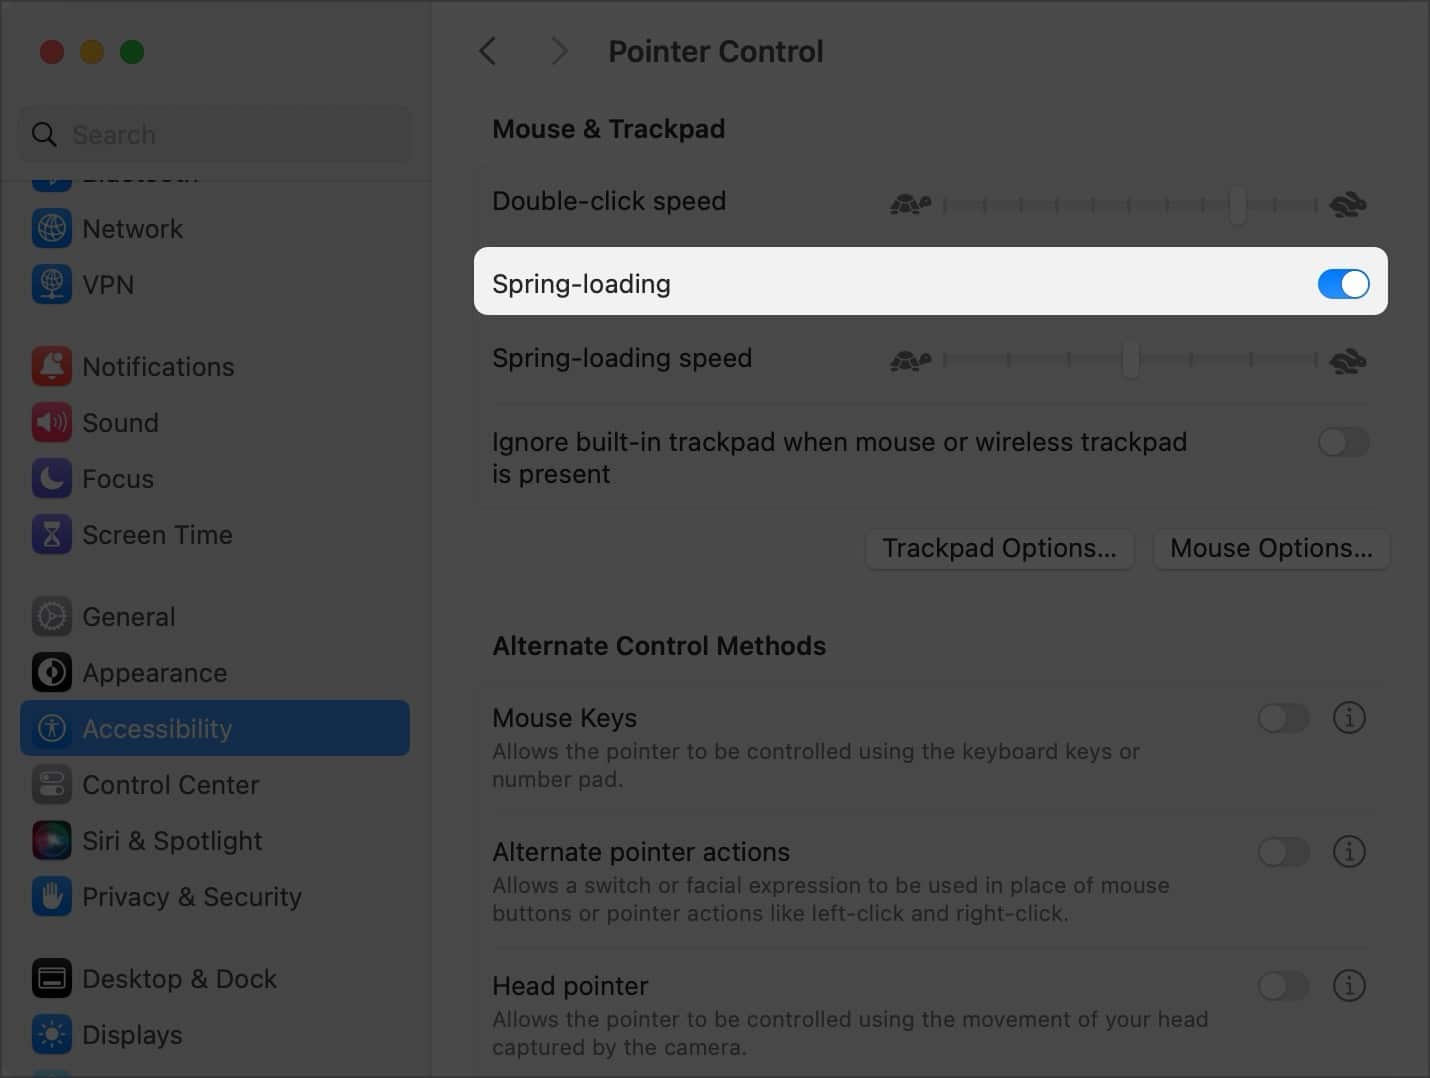
- Toggle on Spring-loading.
Below Spring loading, you can set the spring-loading speed. The shorter the Spring Loading delay, the faster the folder will open when you hover a file over it.
Use Mac Trackpad gestures with a regular mouse
One of the limitations of using a third-party mouse with a Mac is that you don’t get to use the Mac trackpad gestures, such as a three-finger swipe to switch windows or a three-finger swipe up to open Mission Control.
Worry not! Using a third-party tool called xGestures, you can use some of the Mac trackpad gestures with your regular mouse as well. Follow these steps:
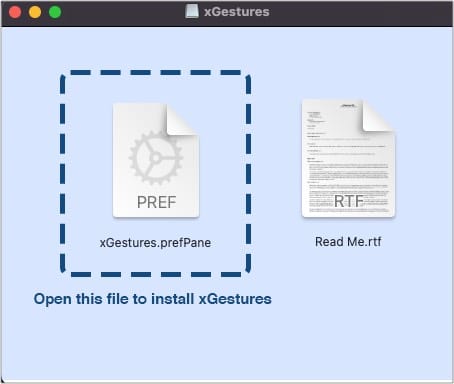
- First, download and install xGestures on your Mac.
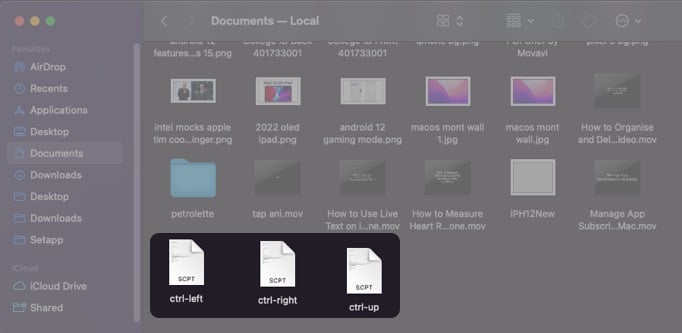
- Now, download three Apple Scripts.
- Save these Apple Scripts in a separate folder, and do not delete these Apple Scripts.
Note: Deleting these Apple Scripts will disable Mac gestures on the mouse. - Now, go to System Settings → open xGestures.
- Select if you want to perform the gesture while holding the middle button (the scrolling wheel) or by using the left or right button.
You can even customize it to perform the gesture when you’re holding the Command button. - Go to the Applications tab.
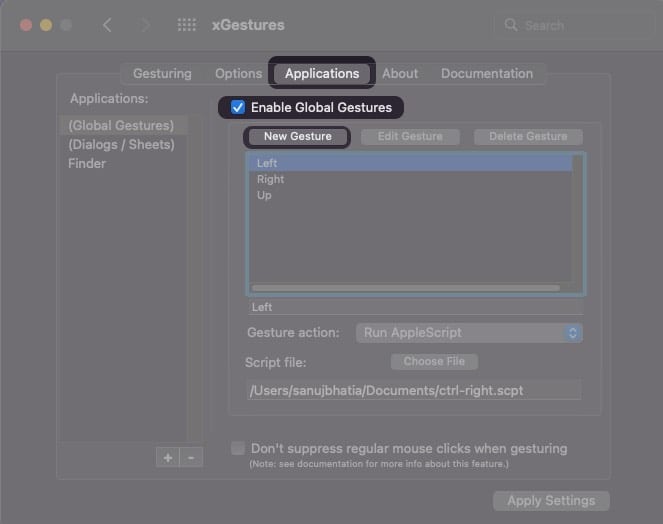
- Checkmark Enable Global Gestures and select New Gesture.
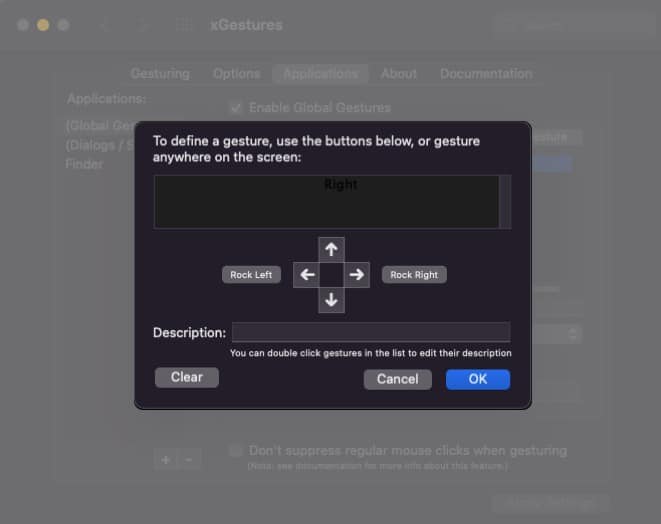
- Swipe right while holding the middle button.
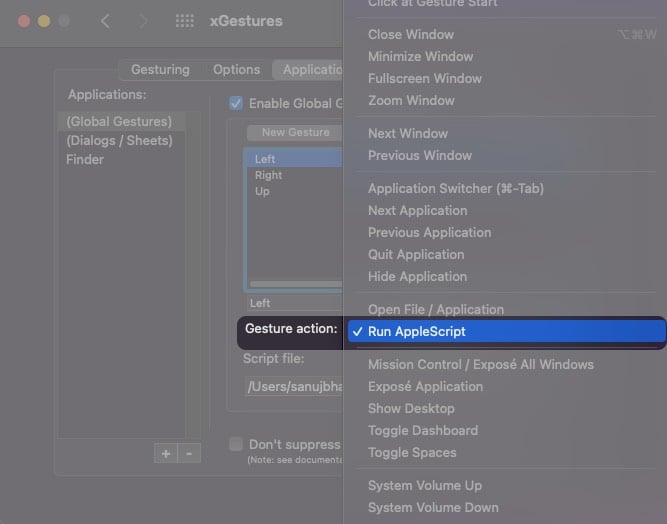
The window screen should say ‘Right.’ - Choose Gesture Action as Run AppleScript.
- Select the ctrl-right file for the Left gesture and ctrl-left for the right gesture.
This is because when you switch a window from left to right, you actually swipe toward the left. - Similarly, add gestures for Swipe Left (Ctrl Right file) and Swipe Up (Ctrl Up file).
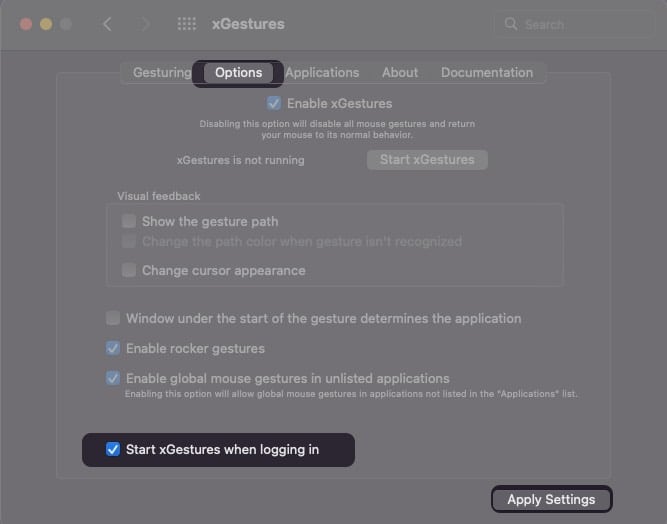
- Click Apply Settings.
- Go to the Options tab and select Start xGestures.
You can now go ahead and use the three-finger gesture on your Mac with the mouse.
Note: The service might get killed abruptly due to macOS background processes. Just go to System Preferences → xGestures → Options → Start xGestures to re-enable it.
Wrapping up…
With this guide, I hope you can use a third-party mouse on Mac and run all the trackpad gestures. If you have any issues mapping gestures to a mouse, let me know in the comments section below. I’ll be more than happy to help!
Read more:
