It can be frustrating when you can’t find important messages or chats on Facebook. You might’ve even concluded that you’ve deleted them already. However, Facebook has a reputation for keeping memories (read data). Hence, there are ways to recover deleted messages on Facebook and Messenger using iPhone and the web.

Read this article to find out those tricks and retrieve your messages!
Check archived messages on Facebook and Messenger
If you can’t find a chat or message, you might’ve archived it instead of deleting the chat permanently. Similar to finding archived posts on Instagram, you can retrieve archived messages on Facebook Messenger. Your lost messages might just be there.
Here’s how to do it:
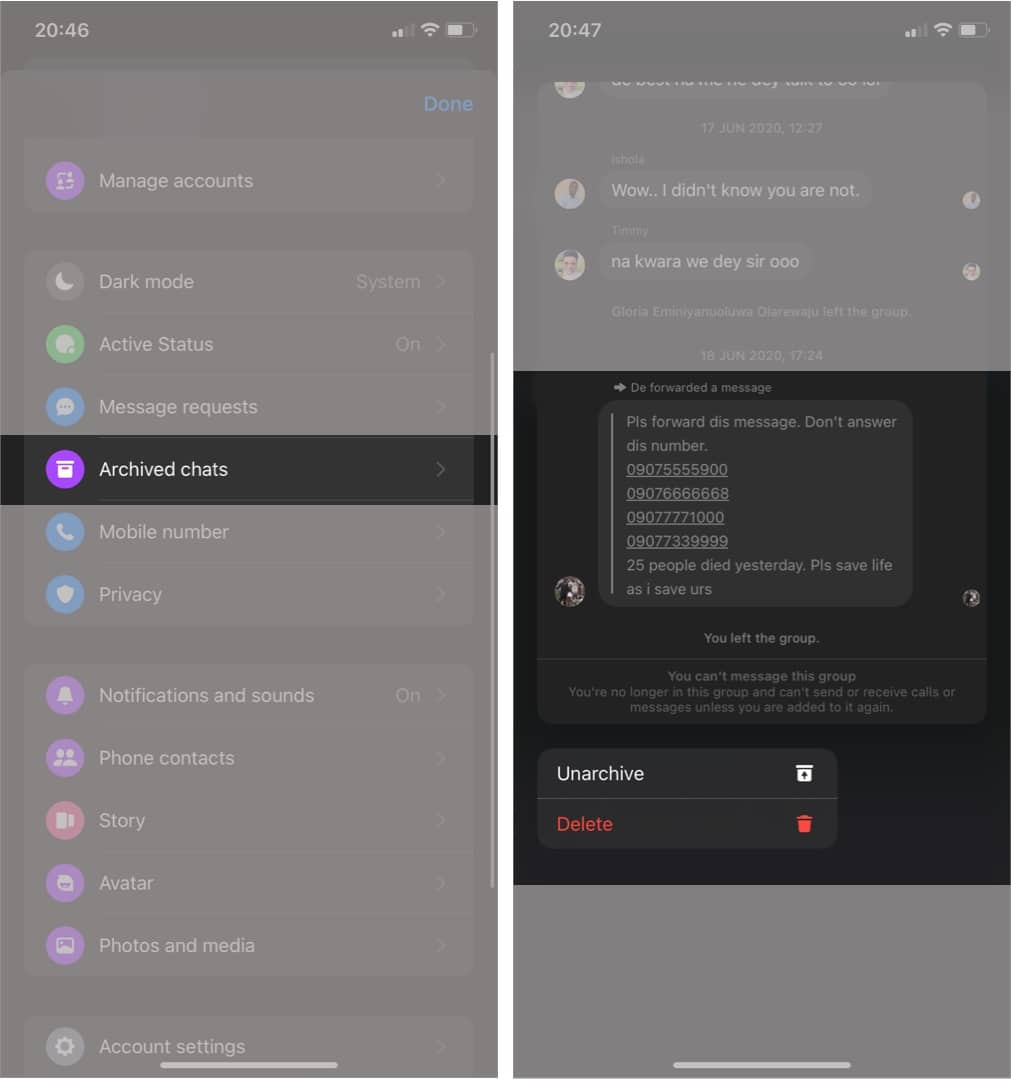
See archived chat on the Messenger app using iPhone
- Open the Facebook Messenger app on your iPhone.
- Tap the three-horizontal line icon at the top right corner.
- Select Archive.
- Long-tap the chat or message you want to retrieve and choose Unarchive.
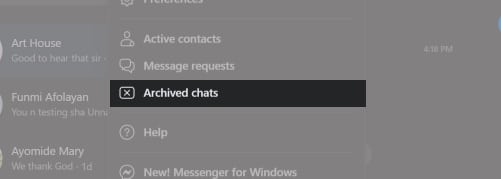
Find archived chat on the Facebook website
On the web, log in to your Facebook account and follow these steps:
- Click the dotted square icon at the top right (next to your name).
- Scroll down and select Messenger in-app.
- Click the three-dotted horizontal icon at the top of the Chats menu.
- Select Archived chats.
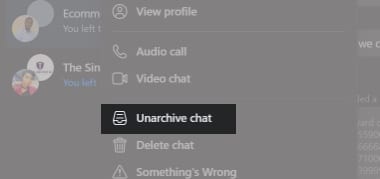
- Click the three-dotted icon to the right of a conversation you want to retrieve and select Unarchive chat.
However, if you can’t find your chats in the archived messages, they may be gone forever. But there’s one more hopw!
Downloading your chat data from Facebook may help you to recover deleted messages. Before deleting your messages from the server, Facebook saves the data for a certain period. Hence, you may find your deleted messages in the Facebook data if you are on time.
How it works? Well, once requested, you’ll get a zipped file containing your chat history with each of your Facebook friends.
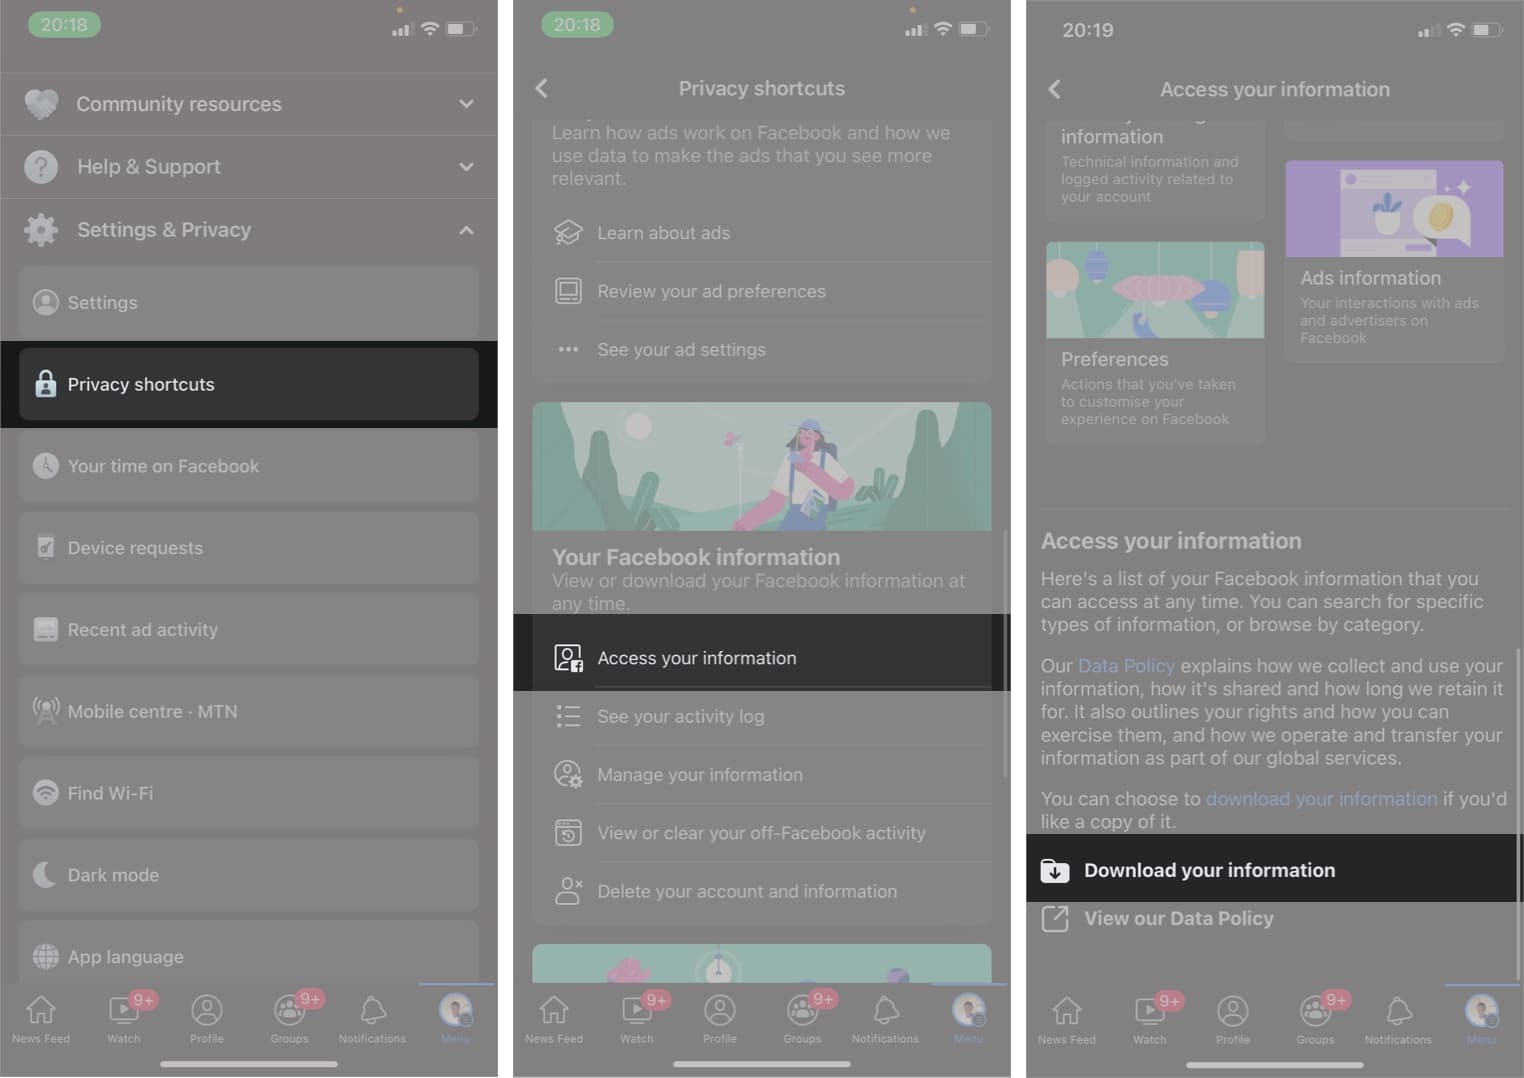
How to download Facebook data on iPhone
- Open the Facebook app.
- Tap the small picture icon at the bottom right.
- Scroll down and tap Settings & Privacy.
- Select Privacy shortcuts.
- Scroll down, and select Access your information under Your Facebook information.
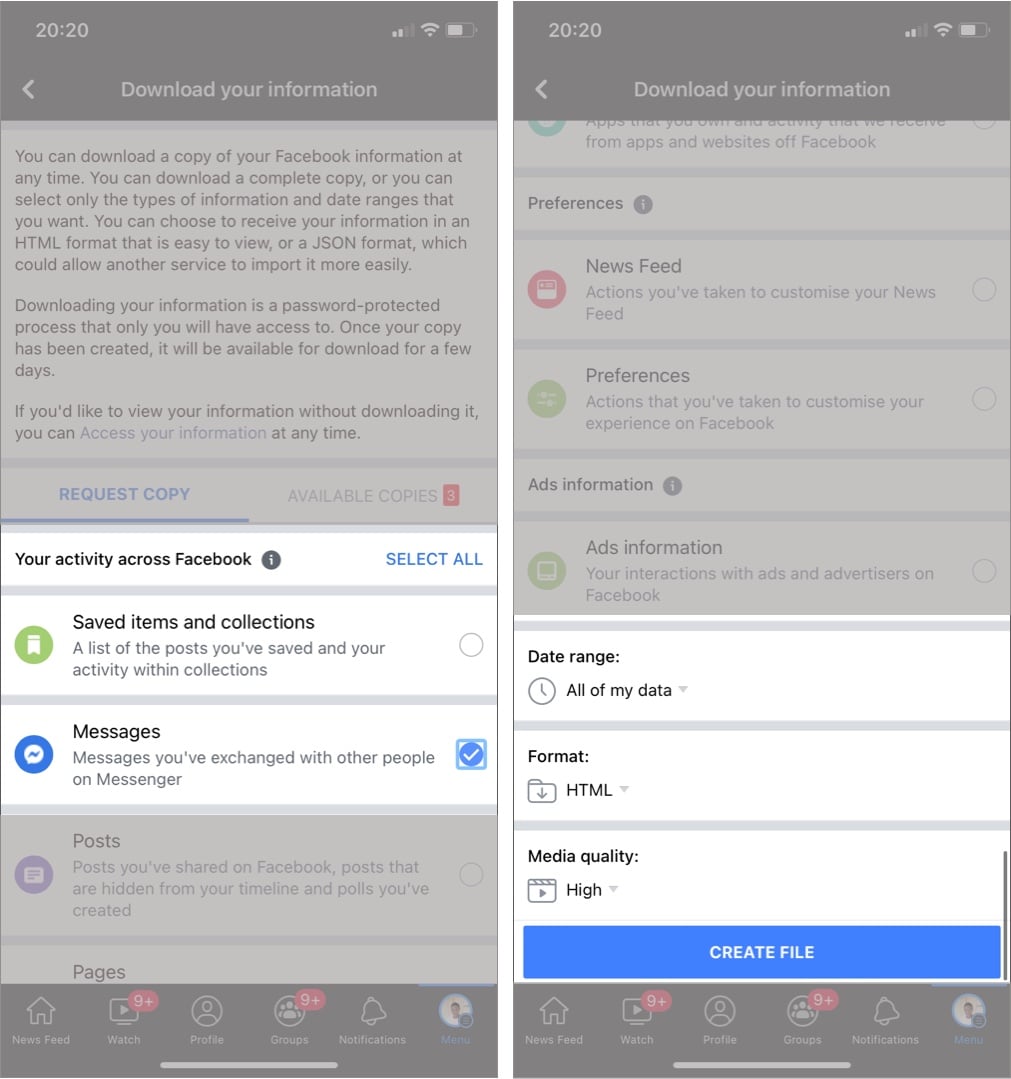
- Swipe to the bottom and tap Download your information.
- Choose Deselect All → select Messages.
- Scroll to the bottom and tap the dropdown under Date range to choose a date range.
- Select CREATE FILE.
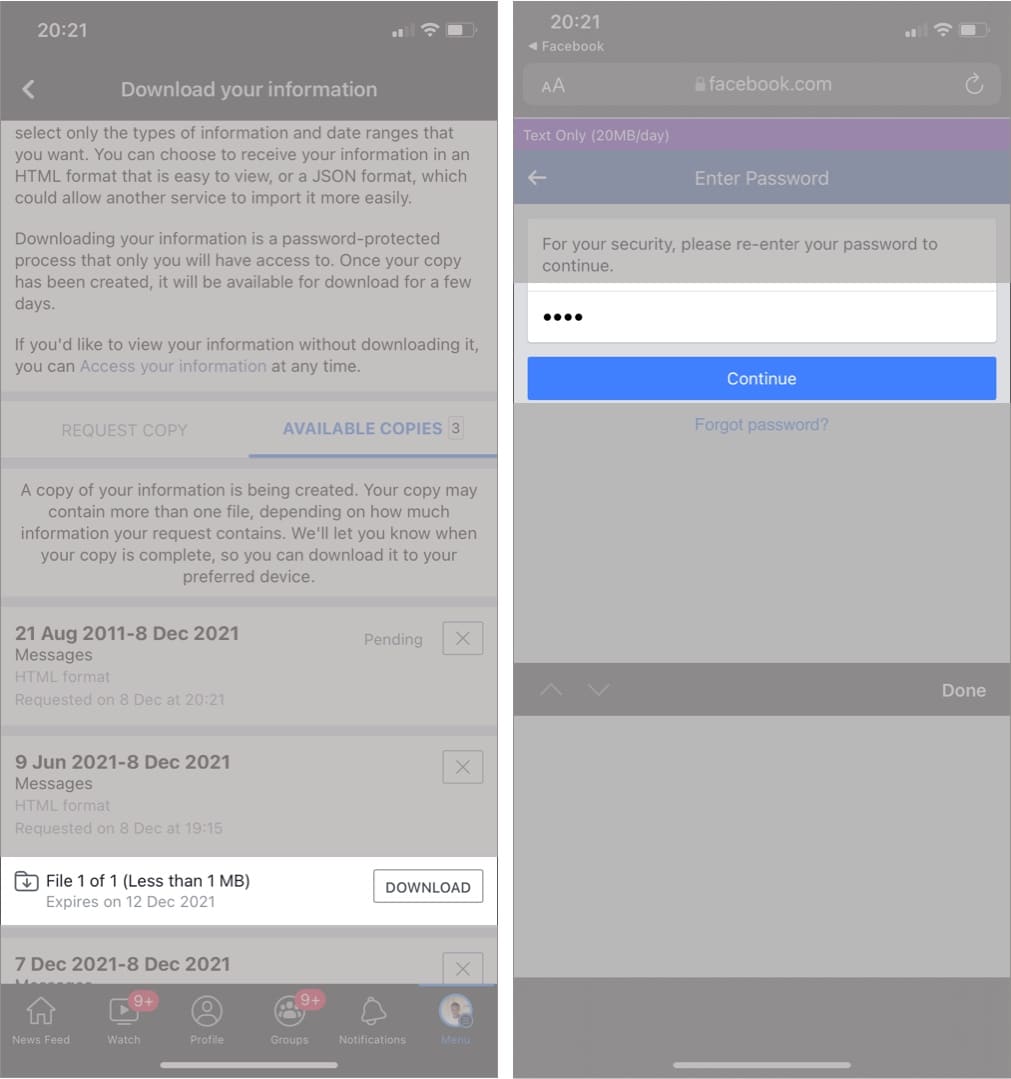
- On the next screen, you’ll see a message for your requested file that says Pending.
Wait for a few minutes, and Facebook will notify you in the notification menu when your data is ready for download. - Once your download is ready, tap Download.
- Enter your Facebook password and select Continue to download.
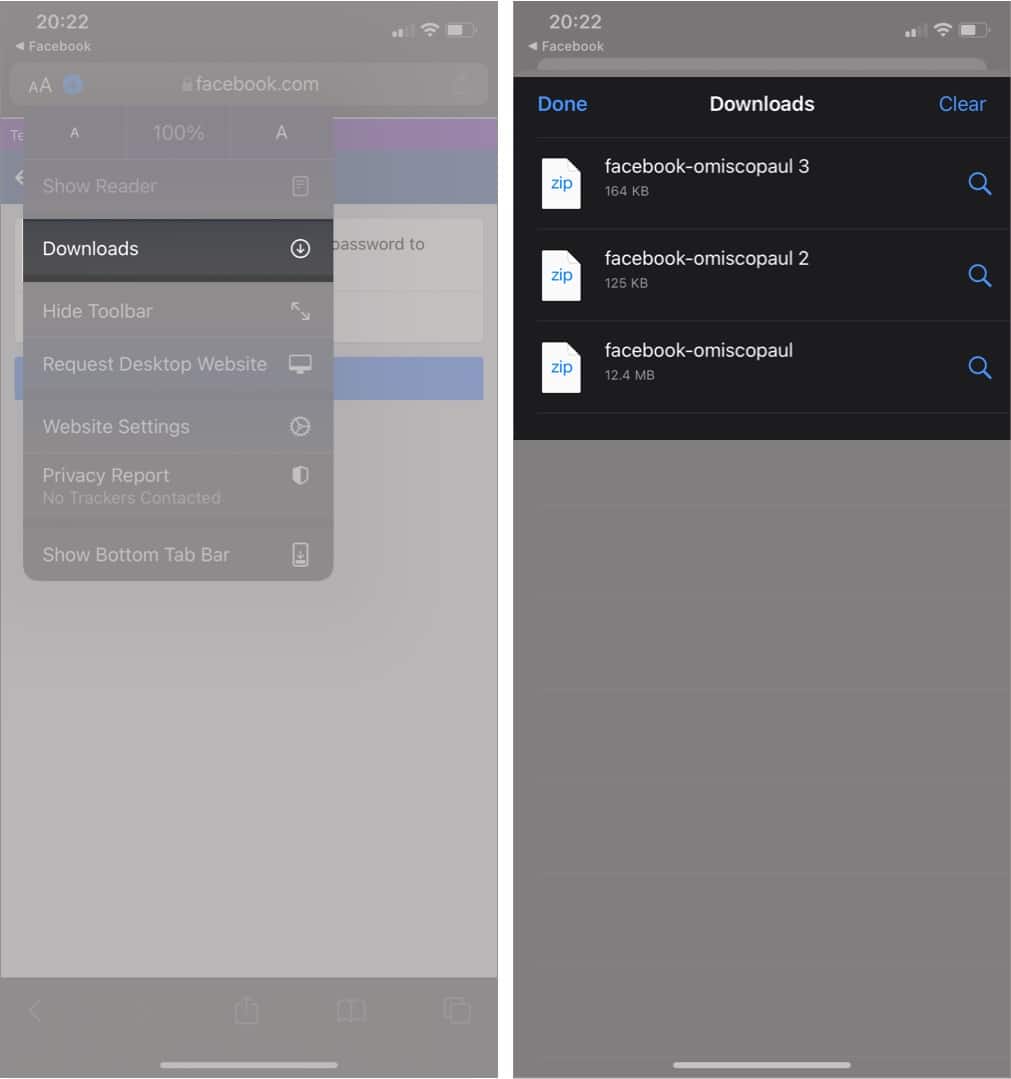
- If Safari is your default browser, tap the AA symbol at the top left.
If you’re using Chrome instead, tap the three horizontal dots at the bottom-right:- Select Downloads.
- Pick the downloaded file from the list.
- Tap it to unzip and view its content.
How to download Facebook data on the Facebook website
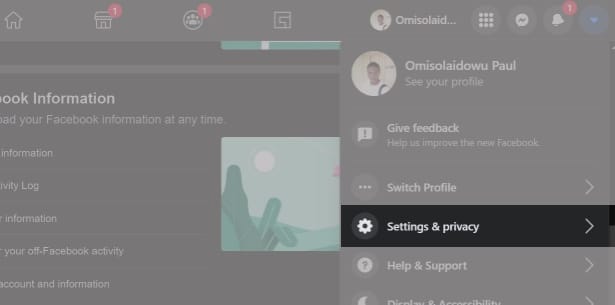
- Click the Account icon at the top right.
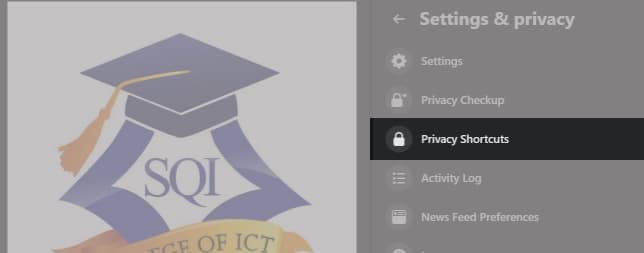
- Select Settings & privacy.
- Click Privacy shortcuts.
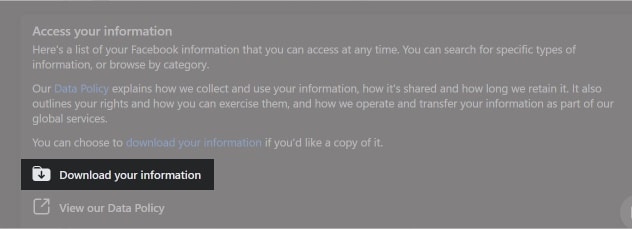
- Under Your Facebook information, select Access your information.
- Scroll to the bottom and click Download your information.
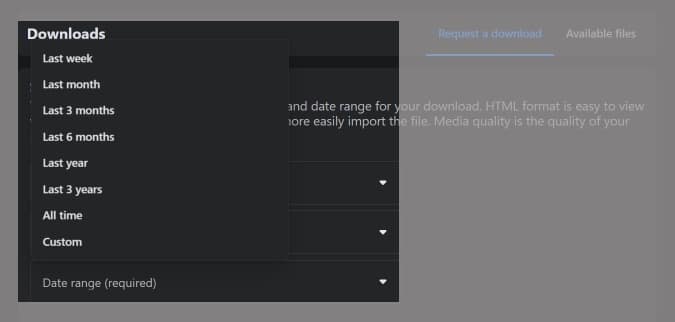
- Select a date range from the Date range field.
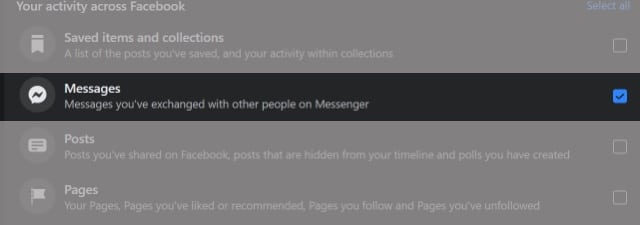
- Click Deselect and choose Messages.
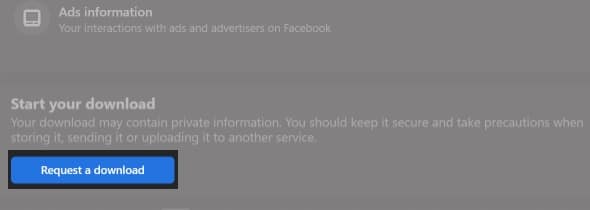
- Scroll to the bottom and click Request a download.
Facebook will notify you as soon as your information is ready. You can also click Available files at the top of that menu. Next, click Download to the right of the requested file to get it on your computer.
Note: If you deleted messages and can’t find them in the downloaded data, you can get a copy of these chats from your friends if they’ve not deleted it from their end. A recommended way is to tell them as soon as possible to follow the steps for downloading their Facebook message data as explained.
So, that’s how you can access removed messages on Messenger or Facebook! However, many people told me that many third-party apps promised to recover permanently deleted Facebook messages on iPhone. But is it really true and safe? Find out!
Can you download Facebook messages via third-party apps?
Well, when you delete a message on Facebook, it is permanently removed. While some third-party apps might claim to help download your Facebook data, this isn’t true and can be a portal to a privacy breach. So be careful what apps you grant access to your Facebook history.
As said earlier, using the Facebook app method itself works better and is secure than any other third-party option.
Besides, deleted or wiped chats might become unretrievable on Facebook as these aren’t on Facebook’s server anymore. So, don’t fall for third-party apps making such commitments!
That’s it!
This is how you can get back a deleted Facebook message on your iPhone and the web. Have more questions? Share them in the comment section below.
Other related posts you might enjoy:
