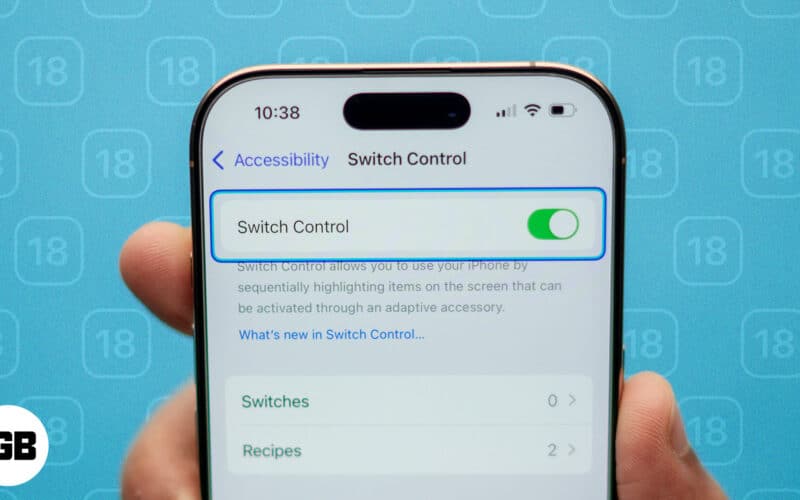
As the name suggests, Switch Control is an accessibility feature that lets you navigate your iPhone with different gestures, such as pressing an external button, making head movements, or making a sound. It was designed to help people with limited mobility interact with their iPhones to their full potential. In this guide, I will explain what ‘Switch Control’ is and how you can use it on your iPhone or iPad.
Table of Contents
- What is the Switch Control on the iPhone used for?
- How to use Switch Control on iPhone and iPad
- How to turn on or off Switch Control on iPhone or iPad
- How to customize Switch Control on iPhone and iPad
- How to use an iPhone to control another Apple device
- How to stop your iPhone from controlling another Apple device
What is the Switch Control on the iPhone used for?
Switch Control is a feature that lets you control your iPhone or iPad in a unique way, helping people who have difficulty using a touchscreen. When you enable the feature, your iPhone sequentially highlights items on the screen. You can set up switches to tap or select these items and perform other actions.
You can also drag items, type and draw on the screen, use gestures like pinch-to-zoom, and even play games using a switch. These switches can be external, like a physical adaptive button that you can connect or pair via Bluetooth. If you don’t have external hardware, you may use the Back Tap, gestures on the screen, or movements in front of the selfie camera as a switch.
Moreover, Apple lets you set up multiple switches for different actions and customize the settings to enjoy a full-fledged interaction with your iPhone. Therefore, Switch Control can make tasks like sending messages, opening apps, gaming, running Shortcuts, or browsing the web possible and straightforward.
Now that you understand the Switch Control feature, let’s learn how to use it on an iPhone.
How to use Switch Control on iPhone and iPad
It’s much easier to set up Switch Control by adding a new switch and assigning some essential functions before enabling accessibility.
Turning on the Switch Control will immediately start the screen scanning features, which you won’t be able to control without any switches set up.
You have the option to use the following as a switch for your iPhone:
- iPhone screen
- Camera
- Back tap
- Sounds
- External adaptive switch
If you’re planning to add an external adaptive switch, the first step is to connect it to your iPhone following the instructions that came with it. If the switch connects using Bluetooth, go to Settings → Bluetooth, then pair your switch.
Add a new switch
- To set up a new switch, go to Settings → Accessibility.
- Then go to Switch Control → Switches.
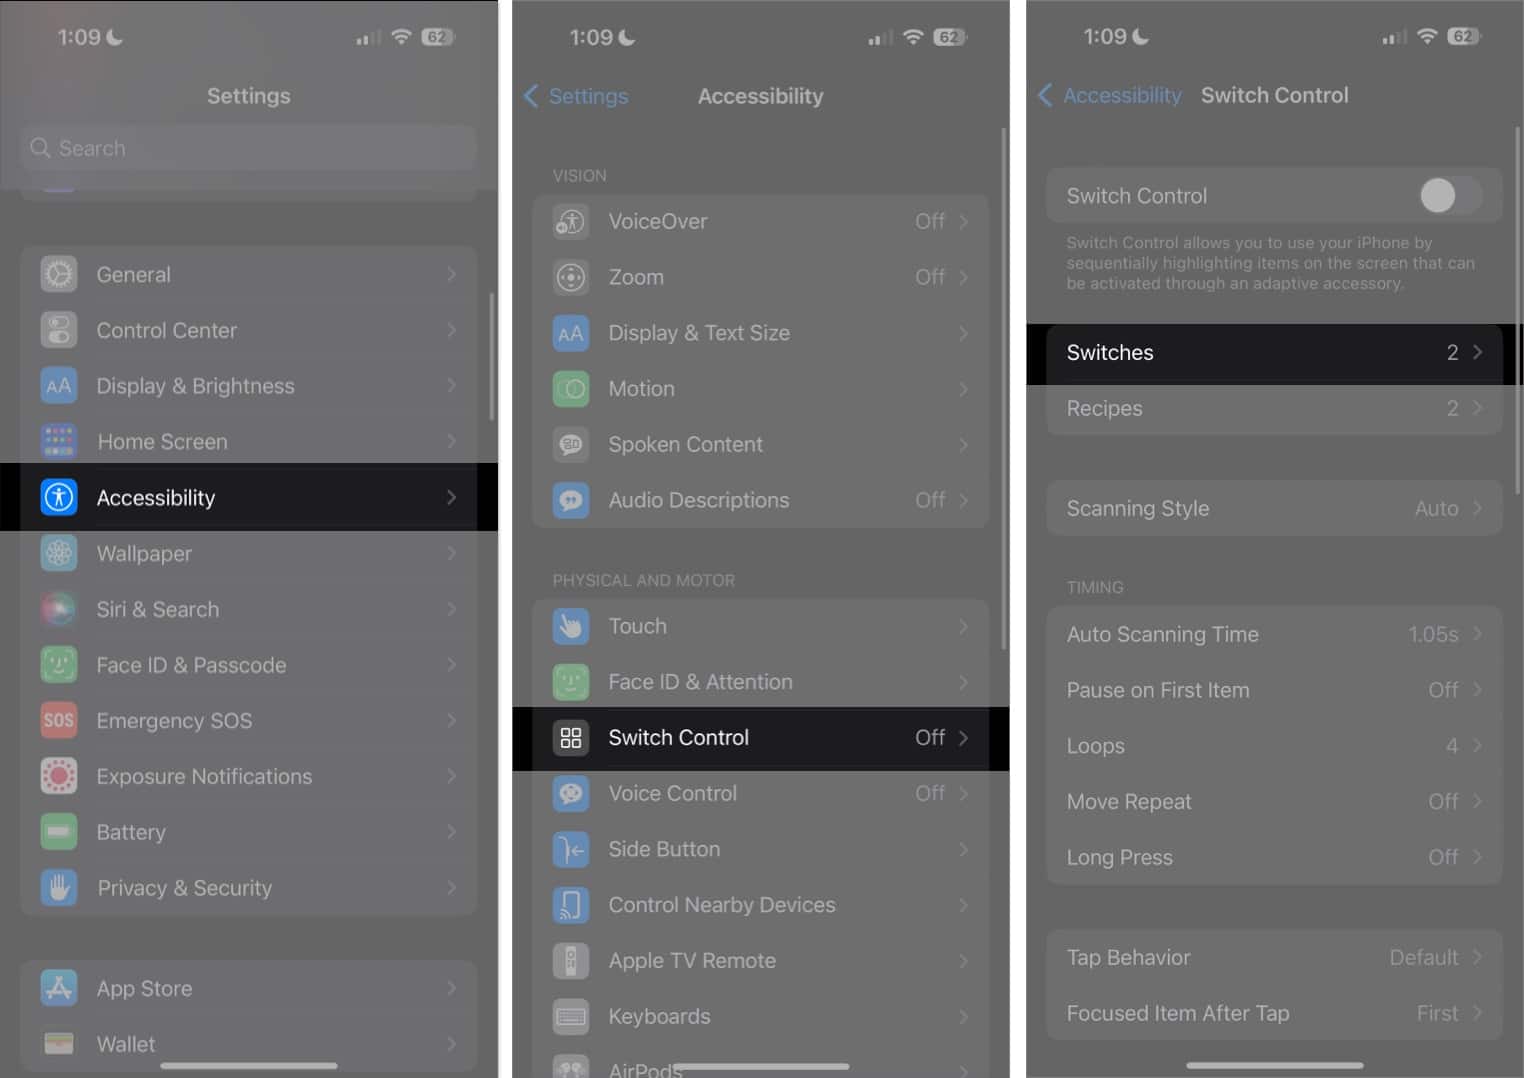
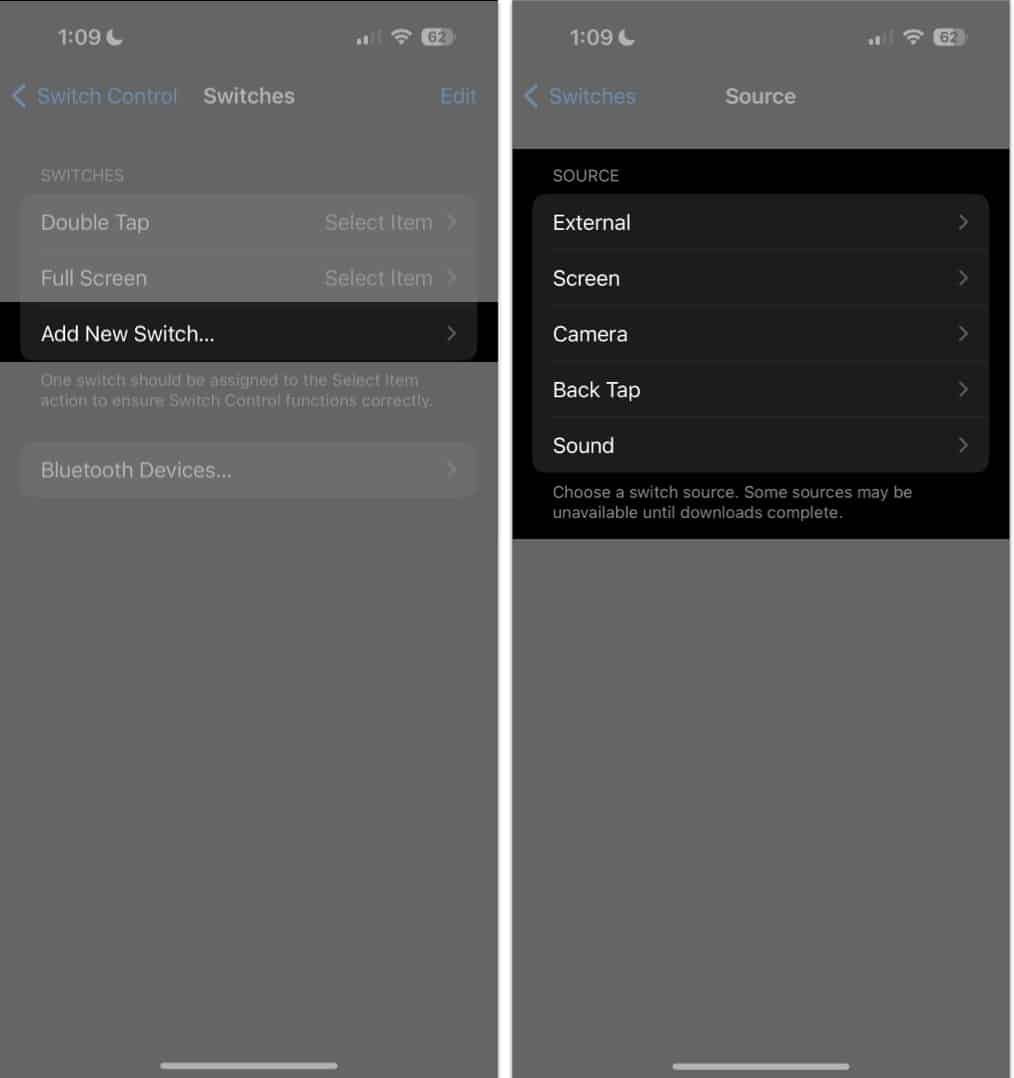
- Tap Add New Switch, then select any of the following:
- External: This lets you use a Made For iPhone (MFi) switch that plugs into the Lightning connector on your iPhone or an already paired Bluetooth switch.
- Screen: You tap or long press anywhere on the iPhone screen to make the gesture a switch.
- Camera: This uses your front camera to detect Left Head Movements and Right Head Movements, which you can assign as a switch.
- Back Tap: You can do a Double Tap or Triple Tap to perform a switch action.
- Sound: To perform an action, choose from various voice and voiceless sounds, such as “La,” “Sh,” or a tongue click.
- AirPods gestures: If you have AirPods, connect them to your iPhone, wear them and nod or shake your head. These nods and shakes can be configured as two distinct switches with independent actions.
- Select an action to assign to the switch. Two of the most basic functions you need to set a switch for are Select Item, which selects a highlighted item, and Move to Next Item, which moves the selection to the next group or item.
Aside from these two, below are other actions you can assign for the scanner:
- Scanner Menu: This reveals the scanner menu.
- Stop Scanning: This stops Auto Scanning, which will continue indefinitely.
- Move To Previous Item: This moves the selection to the previously highlighted group or item.
- Resume Auto Scanning: This enables the iPhone to resume Auto Scanning items on the screen.
You may also assign switches that immediately perform System actions aside from the basic Tap function. This allows a person to perform actions that would typically require certain gestures. Some of these include the App Switcher, Notification Center, and Control Center.
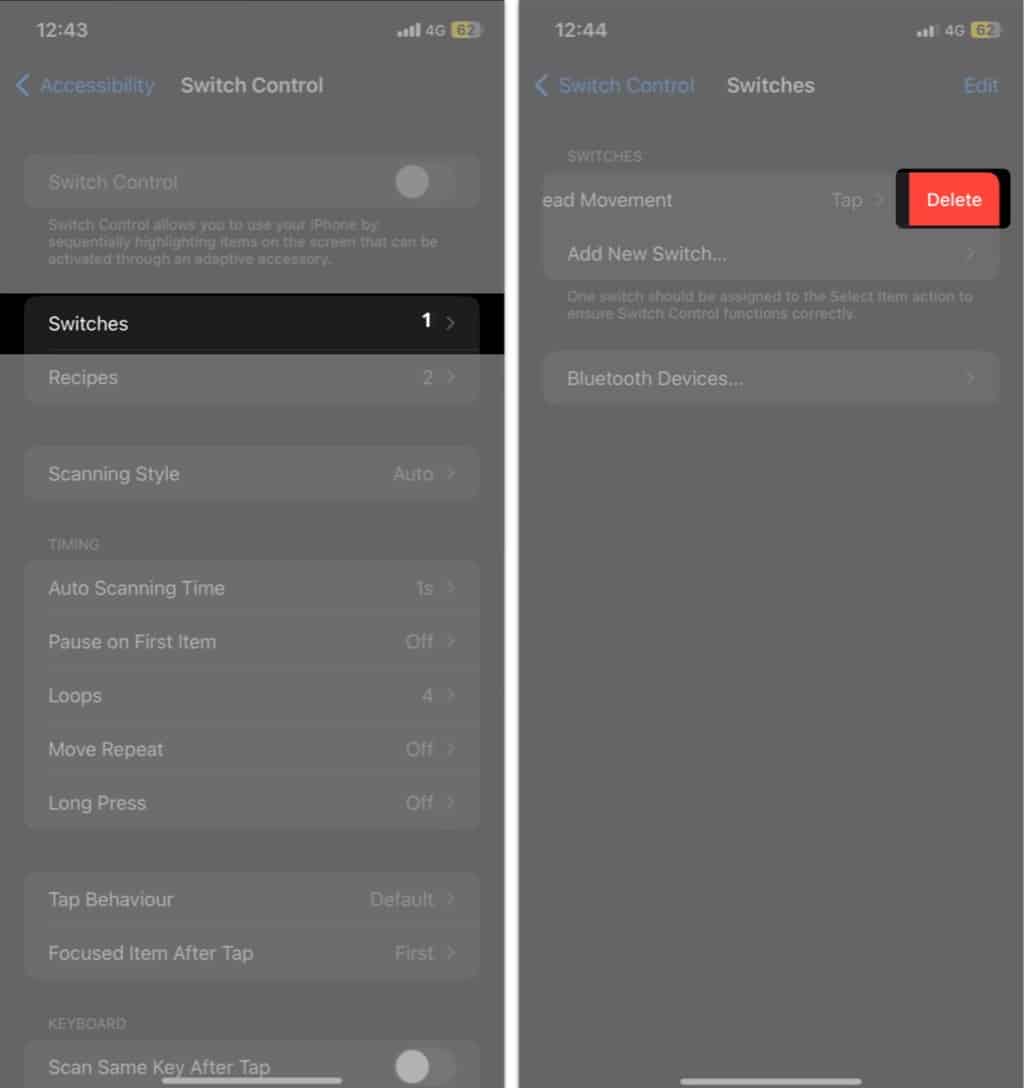
Remove a switch
- To remove a switch from Switch Control, go to Switches.
- Choose the switch you want to delete and swipe left.
- Tap Delete.
How to turn on or off Switch Control on iPhone or iPad
- Go to Settings on your iPhone → Accessibility.
- Tap Switch Control → toggle Switch Control on.
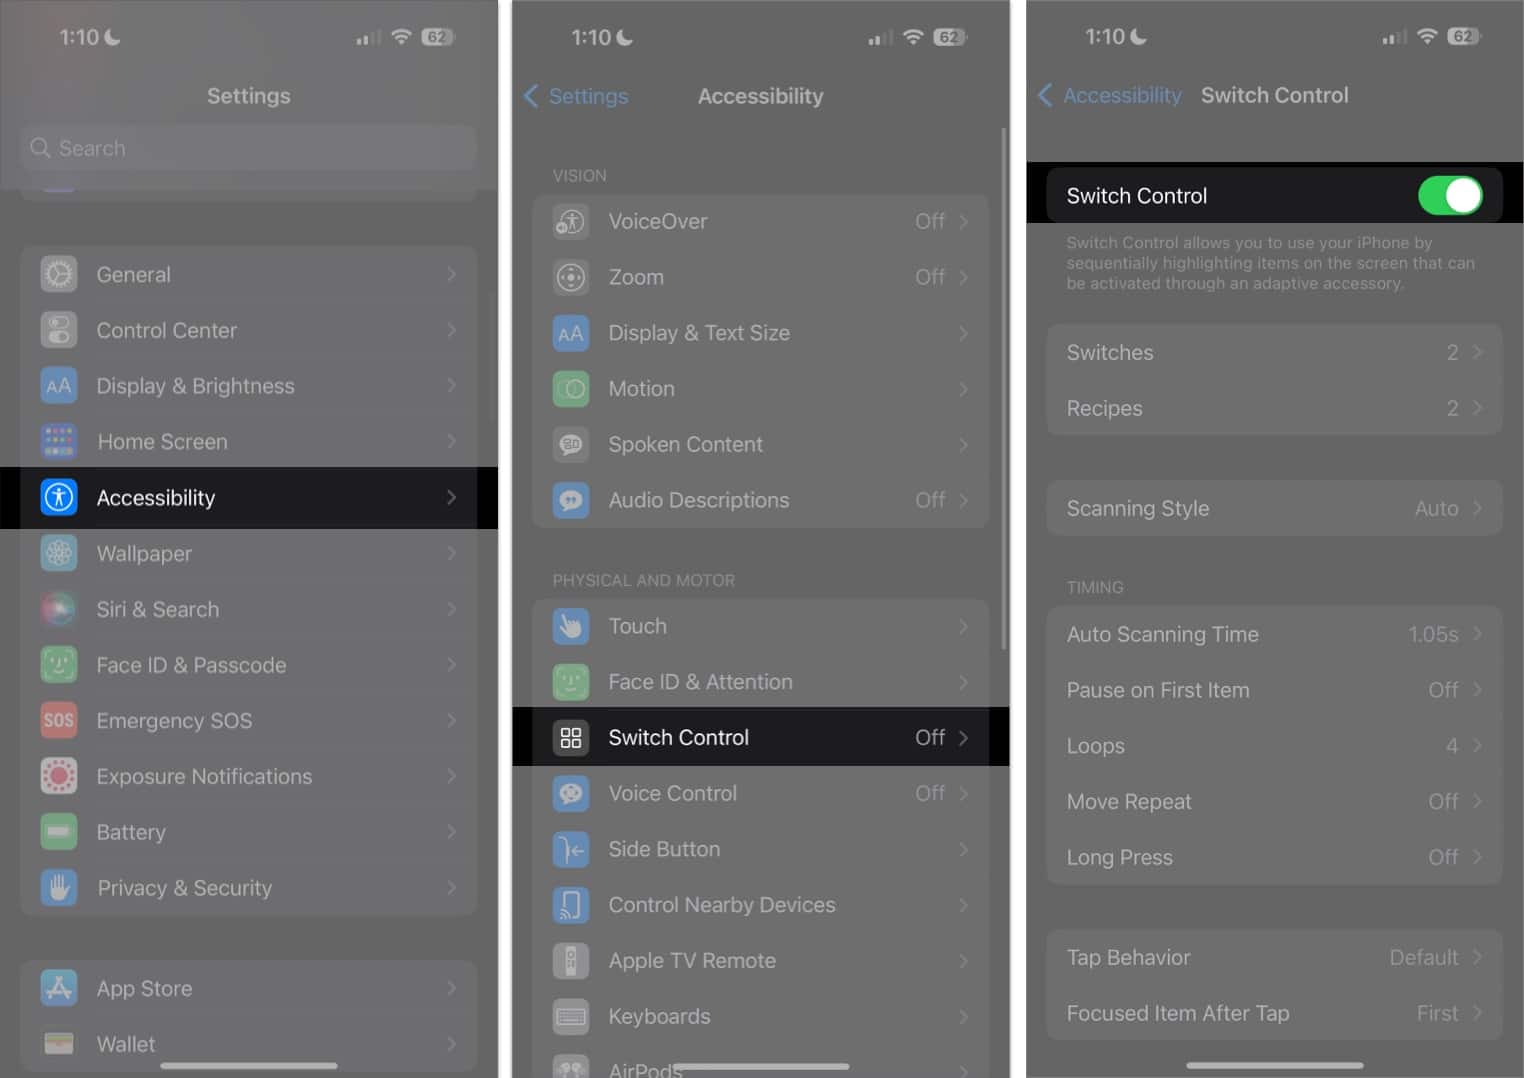
You may also triple-click the Home button or Side button (depending on the iPhone model) at any time to disable Switch Control. You may also manually repeat the process to turn the feature off.
How to customize Switch Control on iPhone and iPad
Now that you’re done, you can now fully customize Switch Control. Here are the following aspects you can customize.
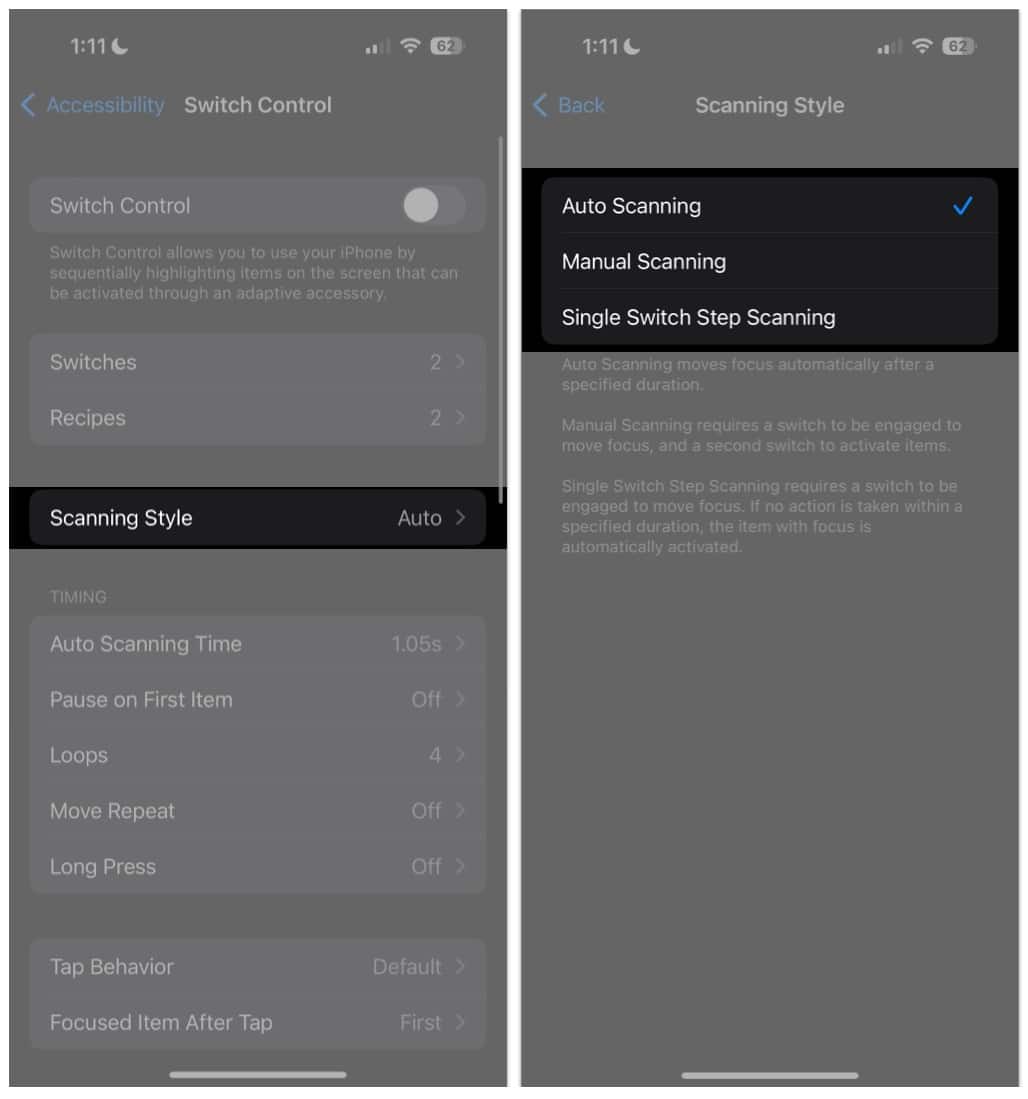
Scanning Style
- Auto Scanning: This moves the focus automatically after a specified duration.
- Manual Scanning: To use this, you must have a switch that you can engage to move the focus and a second switch to activate or select focused/highlighted items.
- Single Switch Step Scanning: This also requires you to have a switch you should engage to move its focus. The focused item will automatically be activated if you don’t do any action within a specified duration.
Switch Control Mode
You can select how you want the Switch Control to function. Whatever mode you choose, Switch Control will start the scanning in that way.
Become an iGeeksBlog Premium member and access our content ad-free with additional perks.
- Item Mode: It will sequentially highlight items or group of items.
- Gliding Cursor: This mode shows a scanning crosshair across your screen so you can select a point.
- Head Tracking: You can control the pointer using your head movements.
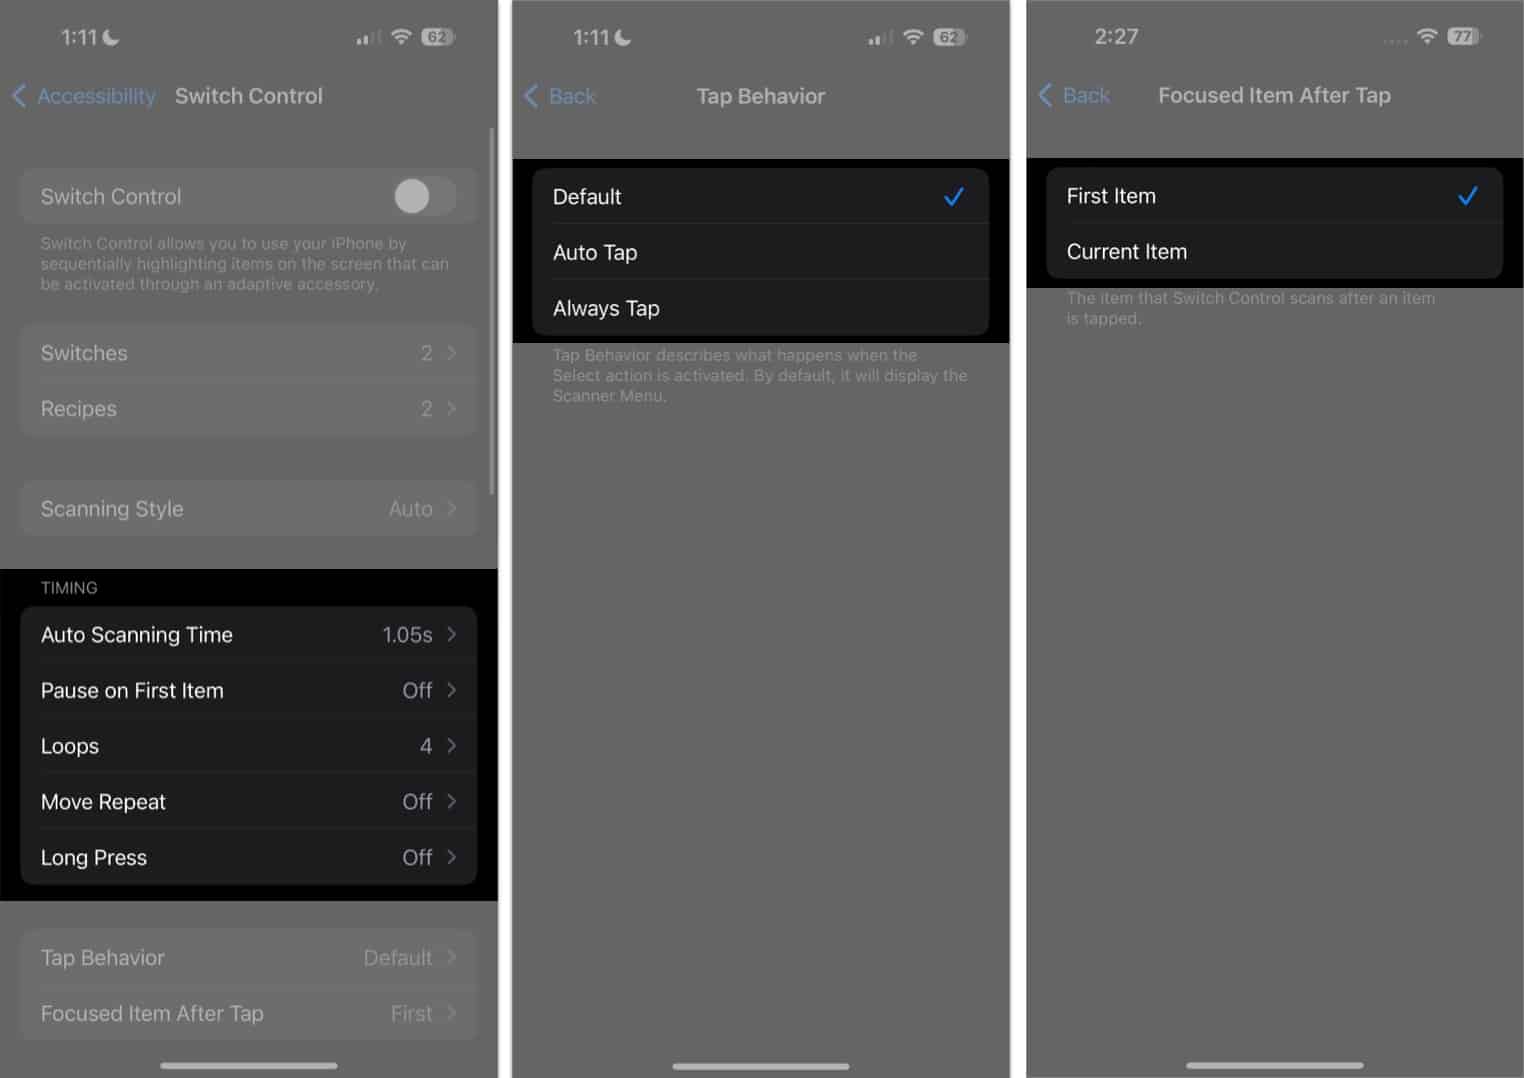
Timing
This section lets you adjust the timing and timing-related scanning behaviors.
- Auto Scanning Time: This lets you adjust the scanning speed.
- Pause on First Item: Selecting the first item in the group can be challenging when the scanning speed is fast. This option makes scanning pause on the first item in the group.
- Loops: Select how many times scanning will cycle through the items on the screen before hiding the cursor. You can choose from 1 to 10.
- Move Repeat: Enable this to delay before moving to the previous or next item while a switch remains pressed.
- Long Press: When enabled, you can enable Pause Scanning, which will pause Switch Control. Select from 1 to 8 seconds.
- Tap Behavior: Define what happens when the Select action is activated. Choose Default to displace the Scanner Menu, Auto Tap to automatically tap the screen after a specified duration, or Always Tap to immediately tap the focused item instead of showing the Scanner Menu.
- Focused Item After Tap: Choose whether Switch Control scans the First Item or resumes scanning the Current Item after you tap an item
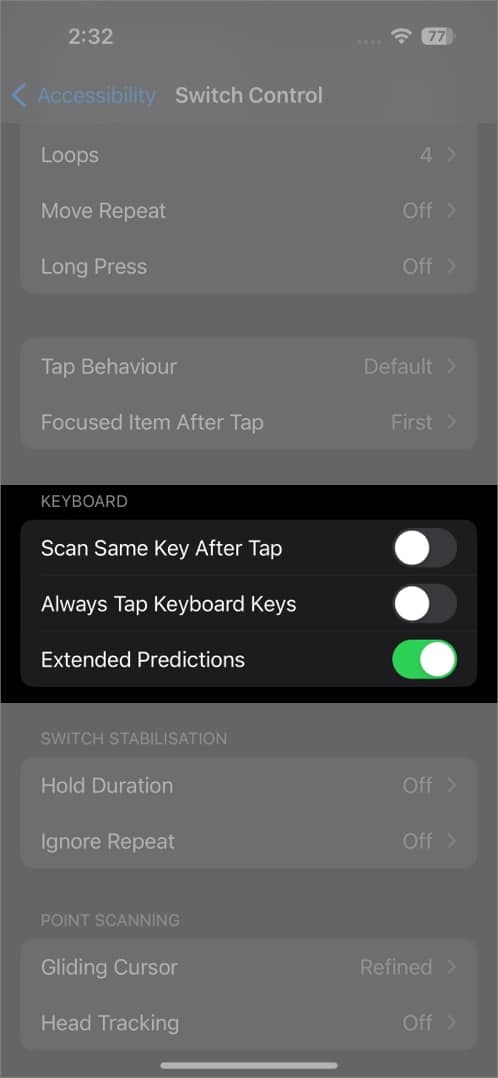
Keyboard
This contains adjustments in the keyboard behavior and includes:
- Scan the Same Key After Tap
- Always Tap the Keyboard Keys
- Extended Predictions
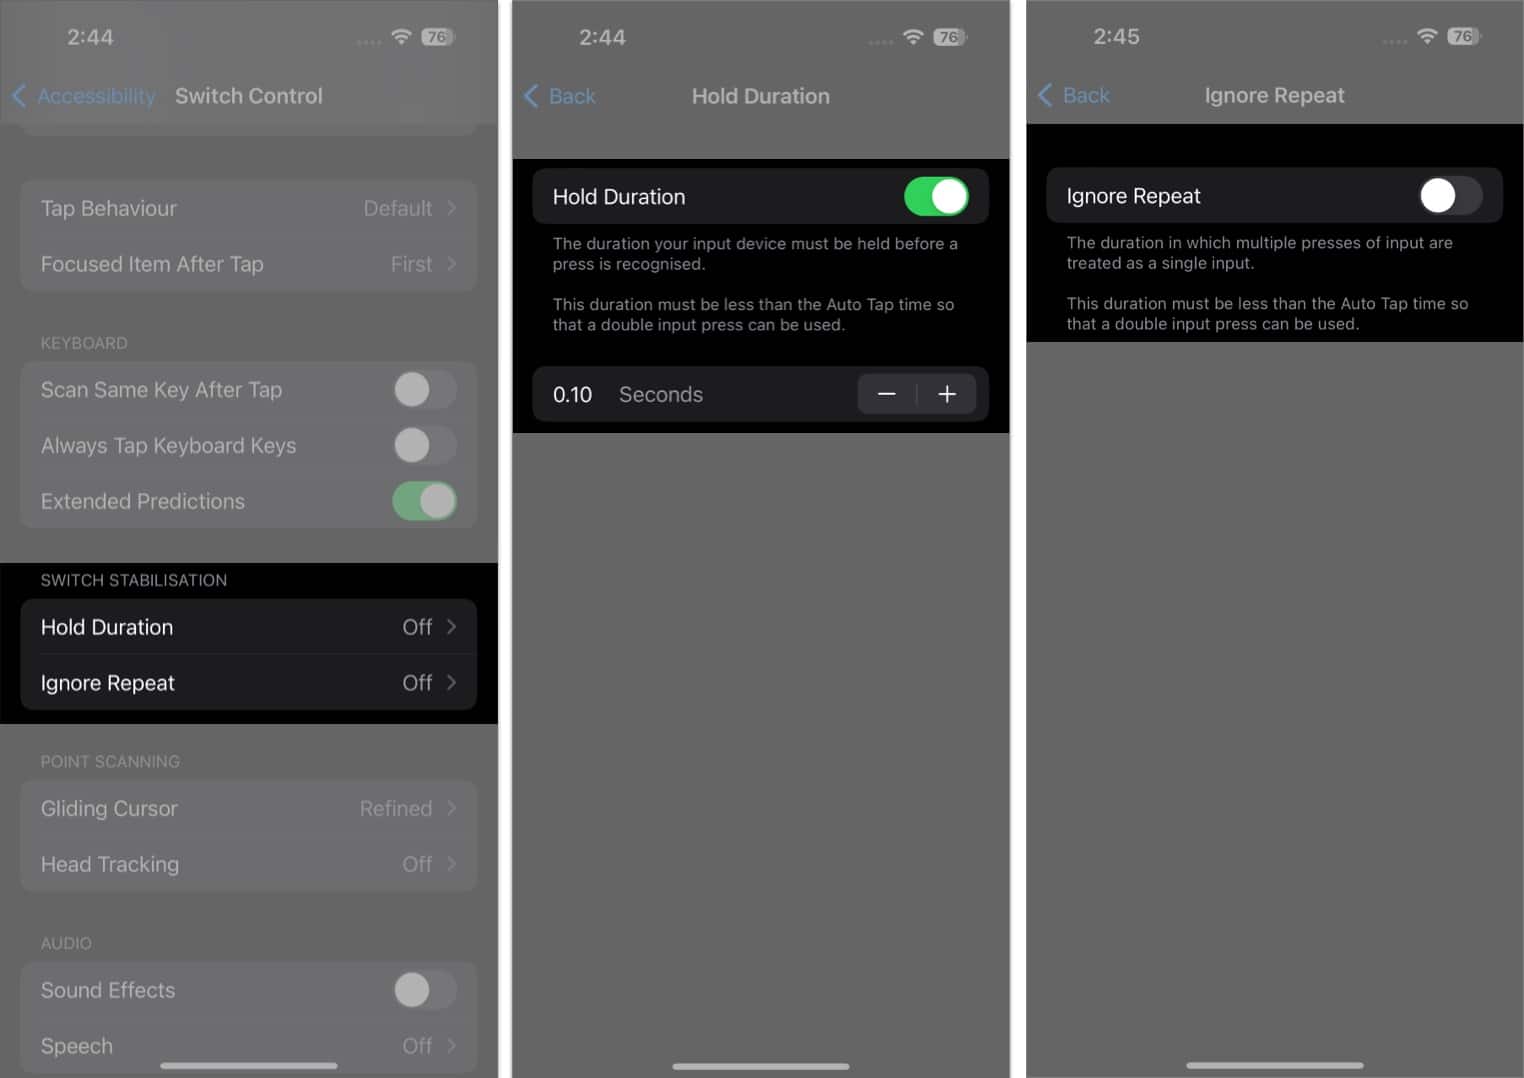
Switch Stabilization
Switch Stabilization helps ensure that switches don’t get triggered accidentally. It considers errors in producing movement to activate the switch, which can occur in people with tremors or other movement disorders. You can set the duration from 1 to 10 seconds.
- Hold Duration: Requires a person to hold the input device for a time before the device recognizes it.
- Ignore Repeat: This treats multiple presses as a single input.
Point Scanning
This lets you choose from Gliding Cursor or Head Tracking as the scanning method you want. If you select Gliding Cursor, you can modify the selection mode: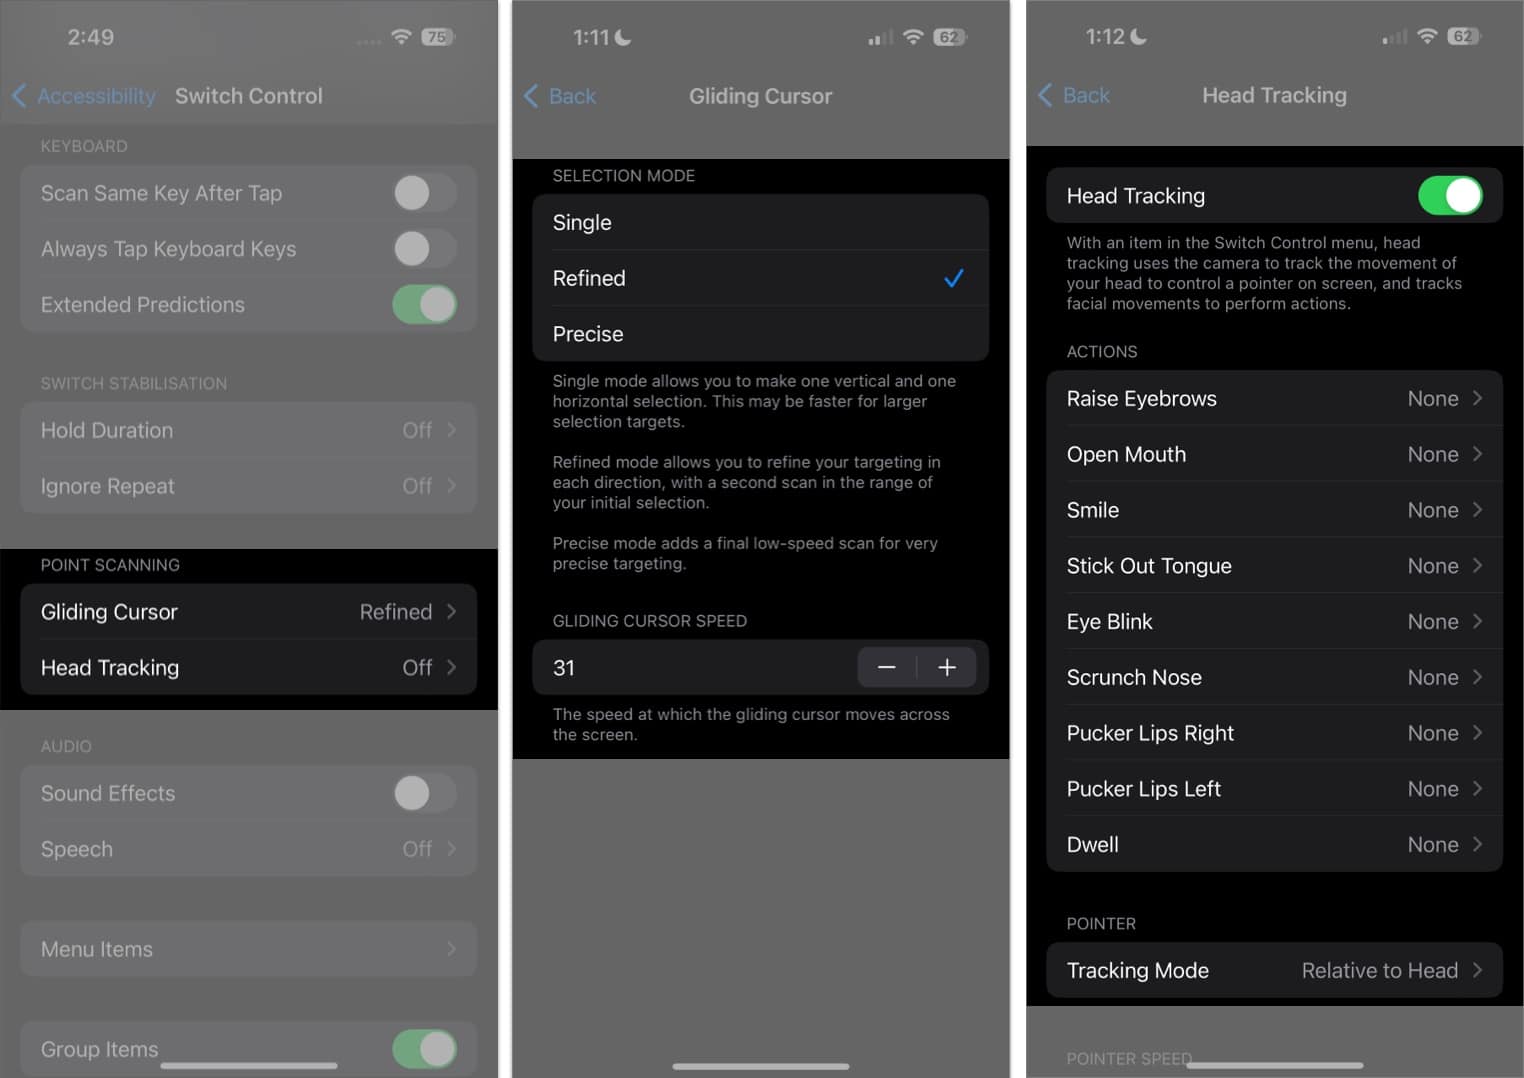
- Single: Uses one vertical and one horizontal selection, which is helpful for larger targets.
- Refined: This adds a second scan in the range of your initial selection.
- Precise: This adds a final low-speed scan for more accurate targeting.
Toggle Head Tracking on if you want to use the iPhone’s camera to track a person’s head movement to control a pointer on the screen and specific facial movements, like raising eyebrows or opening the mouth, to perform additional actions.
Audio
Toggle Sound Effects to enable sound effects, such as when selecting an item.
Tap Speech → toggle on Speech to make the iPhone speak items or item attributes as they’re being scanned. You can also adjust the speaking rate and add pauses while speaking.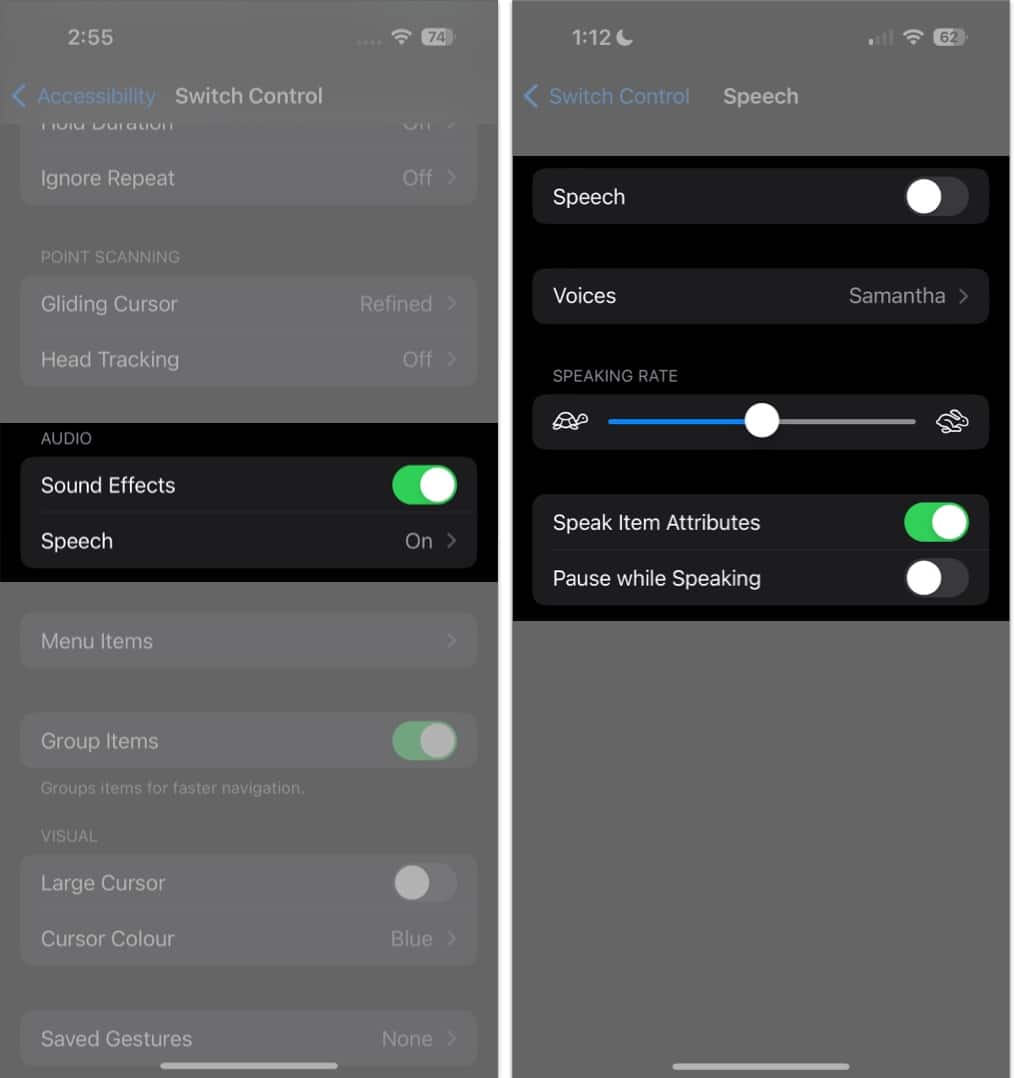
Modify the actions shown in the Scanner Menu and how you would like them arranged.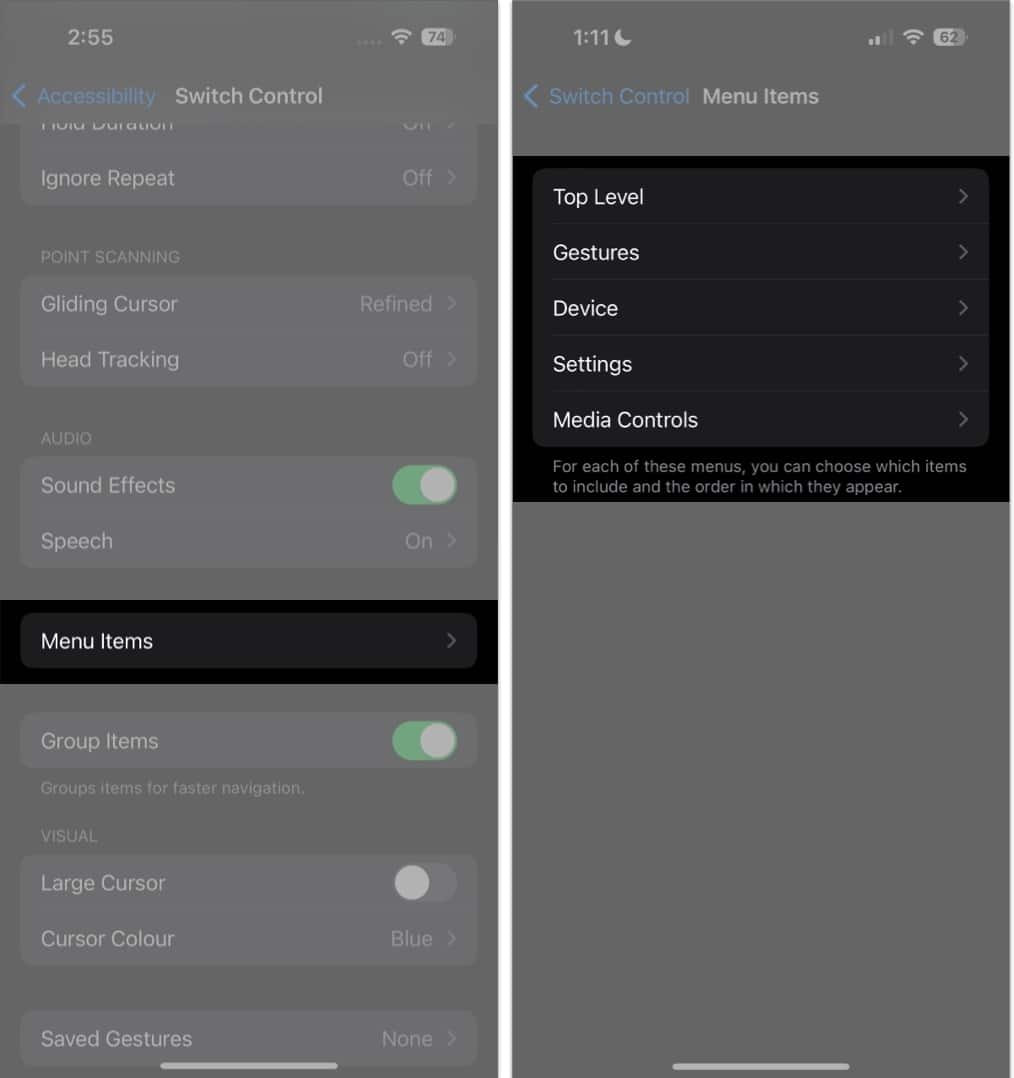
Group items
This is enabled by default, which groups items together for faster navigation. Disabling this makes the scanner focus on one item at a time.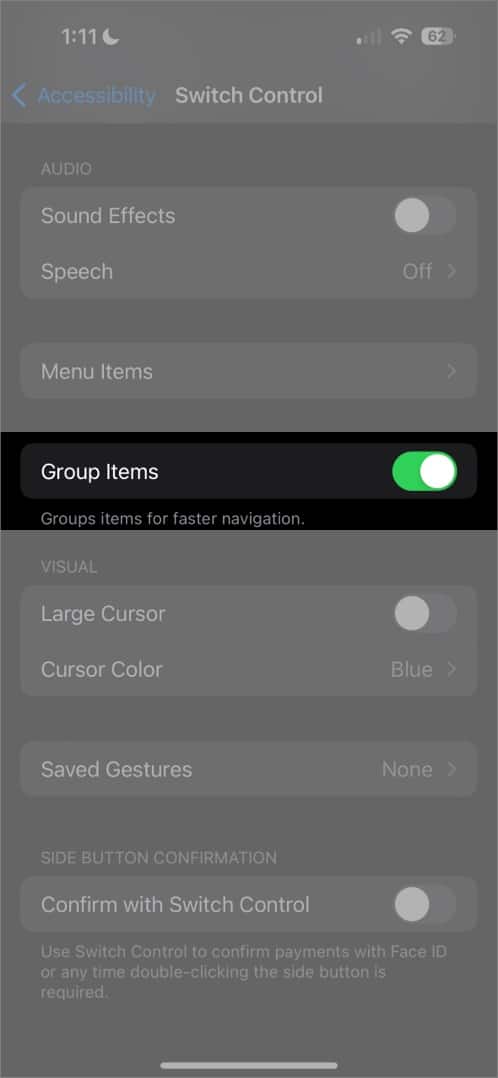
Visual
Visual modifications can help a user see the cursor items better. For example, you can make the cursor larger or change its color to make it easier to spot.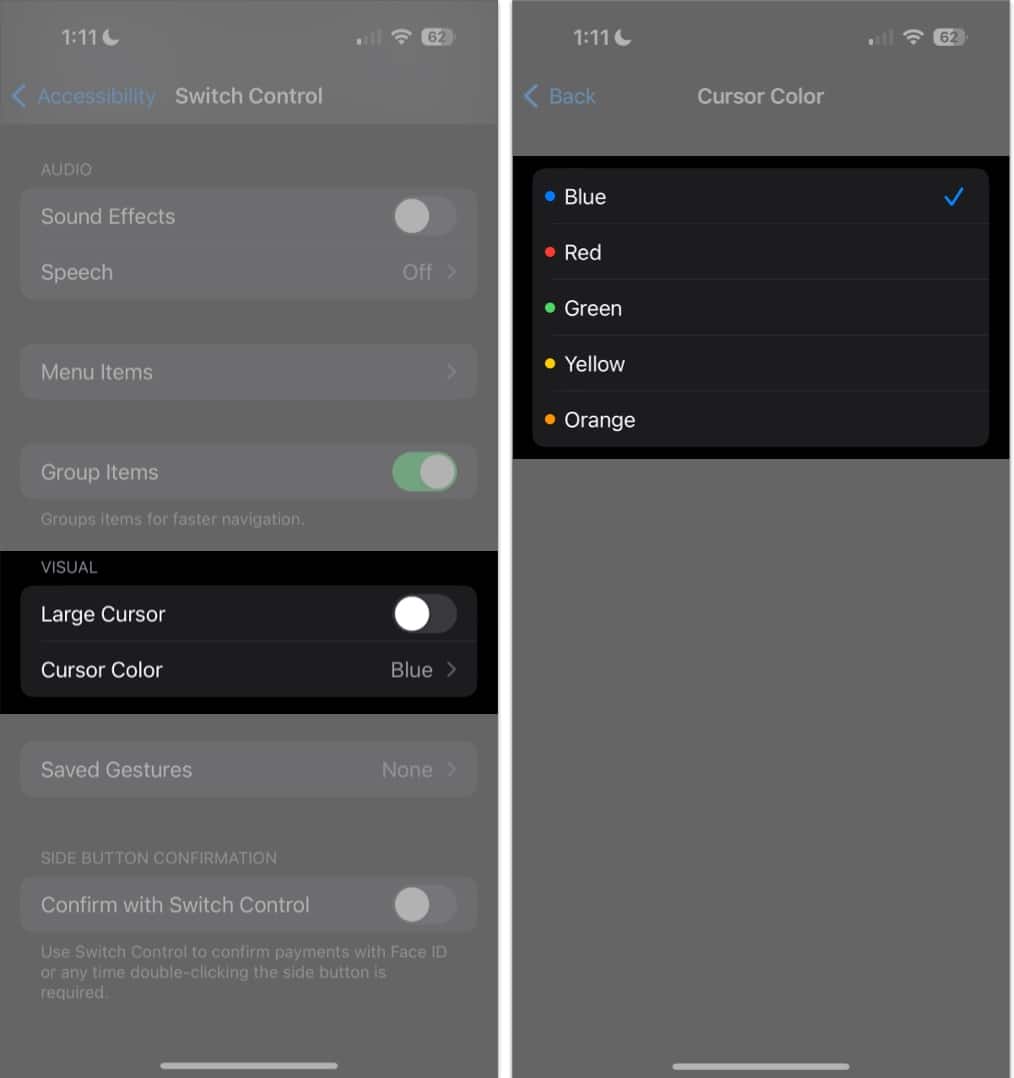
Create new gestures
Tap Saved Gestures → Create a New Gesture to record a gesture the user can activate from the menu by going to Actions → Gestures → Saved.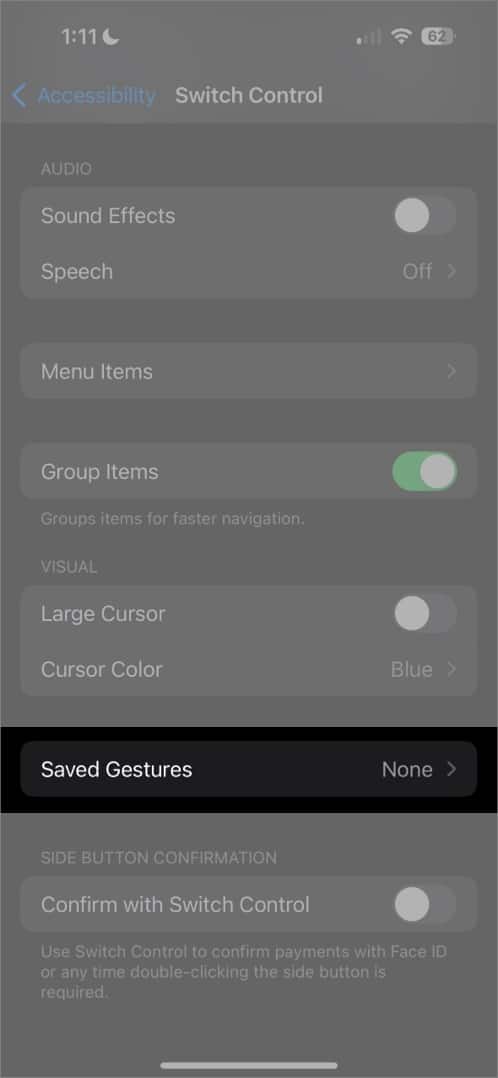
Confirm with Switch Control
Toggle this switch if you want to confirm payments using Face ID (for iPhone models with Face ID) instead of using the side button to confirm.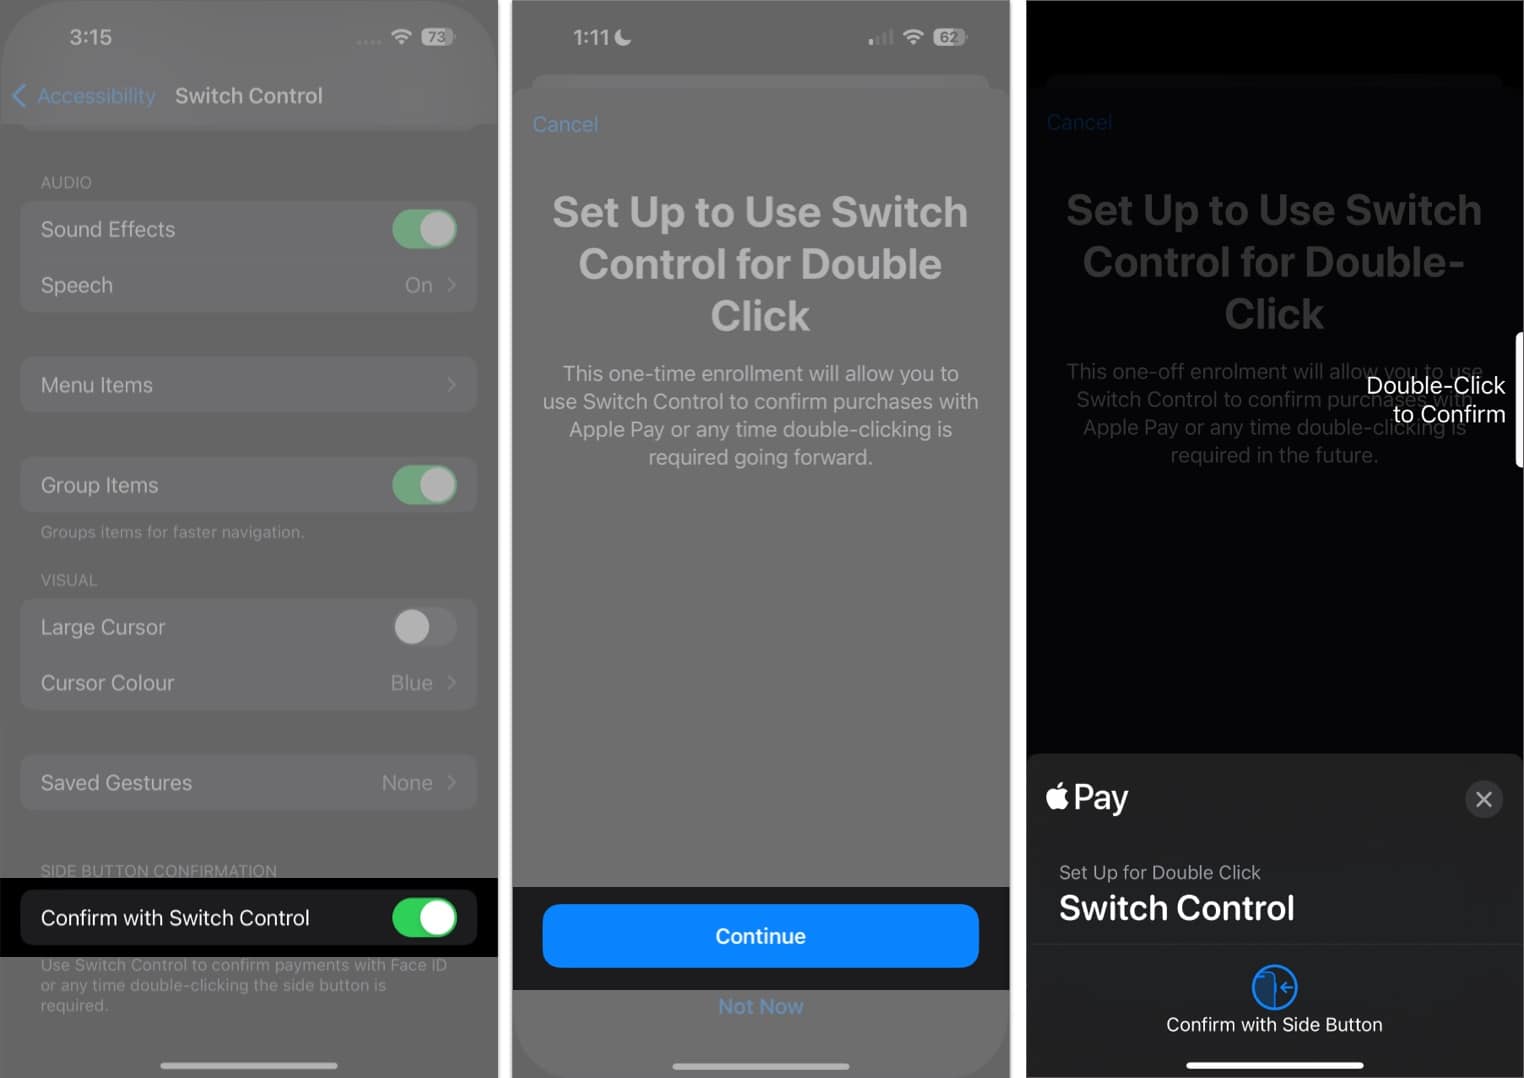
Create new recipes
Recipes are specialized actions you can use to perform frequently repeated or complex actions within apps. You can create recipes to assign special actions to switches temporarily. These may include game controls or turning the pages when reading an eBook.
How to use an iPhone to control another Apple device
You may also use your iPhone to remotely control another Apple device connected to the same Wi-Fi network.
This lets you navigate your Apple TV or Mac using the same switch setup that controls your iPhone.
To begin controlling another device:
- Make sure that both devices are connected to the same Wi-Fi network and iCloud account.
- To control a Mac:
- Go to the Apple menu → System Settings → Accessibility.
- On the right side, select Switch Control.
- Tick the box beside Allow platform switching to control your computer.
- Then, turn on Switch Control on your iPhone or iPad.
- Then go to Devices → Other Devices.
- Select the device you want to control, then choose Connect.
You should now be able to use the switch connected to your iPhone, or your iPhone itself, to control the other device.
How to stop your iPhone from controlling another Apple device
Once you’re done controlling the other device, just press and hold your switch for 10 seconds. This will revert the switch’s control to your iPhone or iPad again.
If you’re controlling a Mac, you can also navigate to the Switch Control menu → select Device → Stop Using Device.
Wrapping up…
With Switch Control, you can make your iPhone or iPad easier to navigate and more accessible for yourself or a loved one with limited mobility or other disability.
While the customization process can be complicated and is more of a trial-and-error process based on what works best for your loved one, seeing them navigate their device with greater ease is worth the effort. So don’t be afraid to experiment and have patience on your journey towards making technology more accessible. Good luck!
Read more:

