When it comes to video conversations, FaceTime has emerged as the go-to option for Apple users. And with the latest updates, you can now plan video or audio calls in advance. If you’re wondering how, then follow this guide to learn how to schedule FaceTime calls on your iPhone, iPad, and Mac.

Table of Contents
How to schedule FaceTime calls on iPhone or iPad
- Launch Calendar on your iPhone or iPad.
- Based on your preference, enter the Title of the Event.
- Tap Location or Video Call → Select FaceTime when prompted.
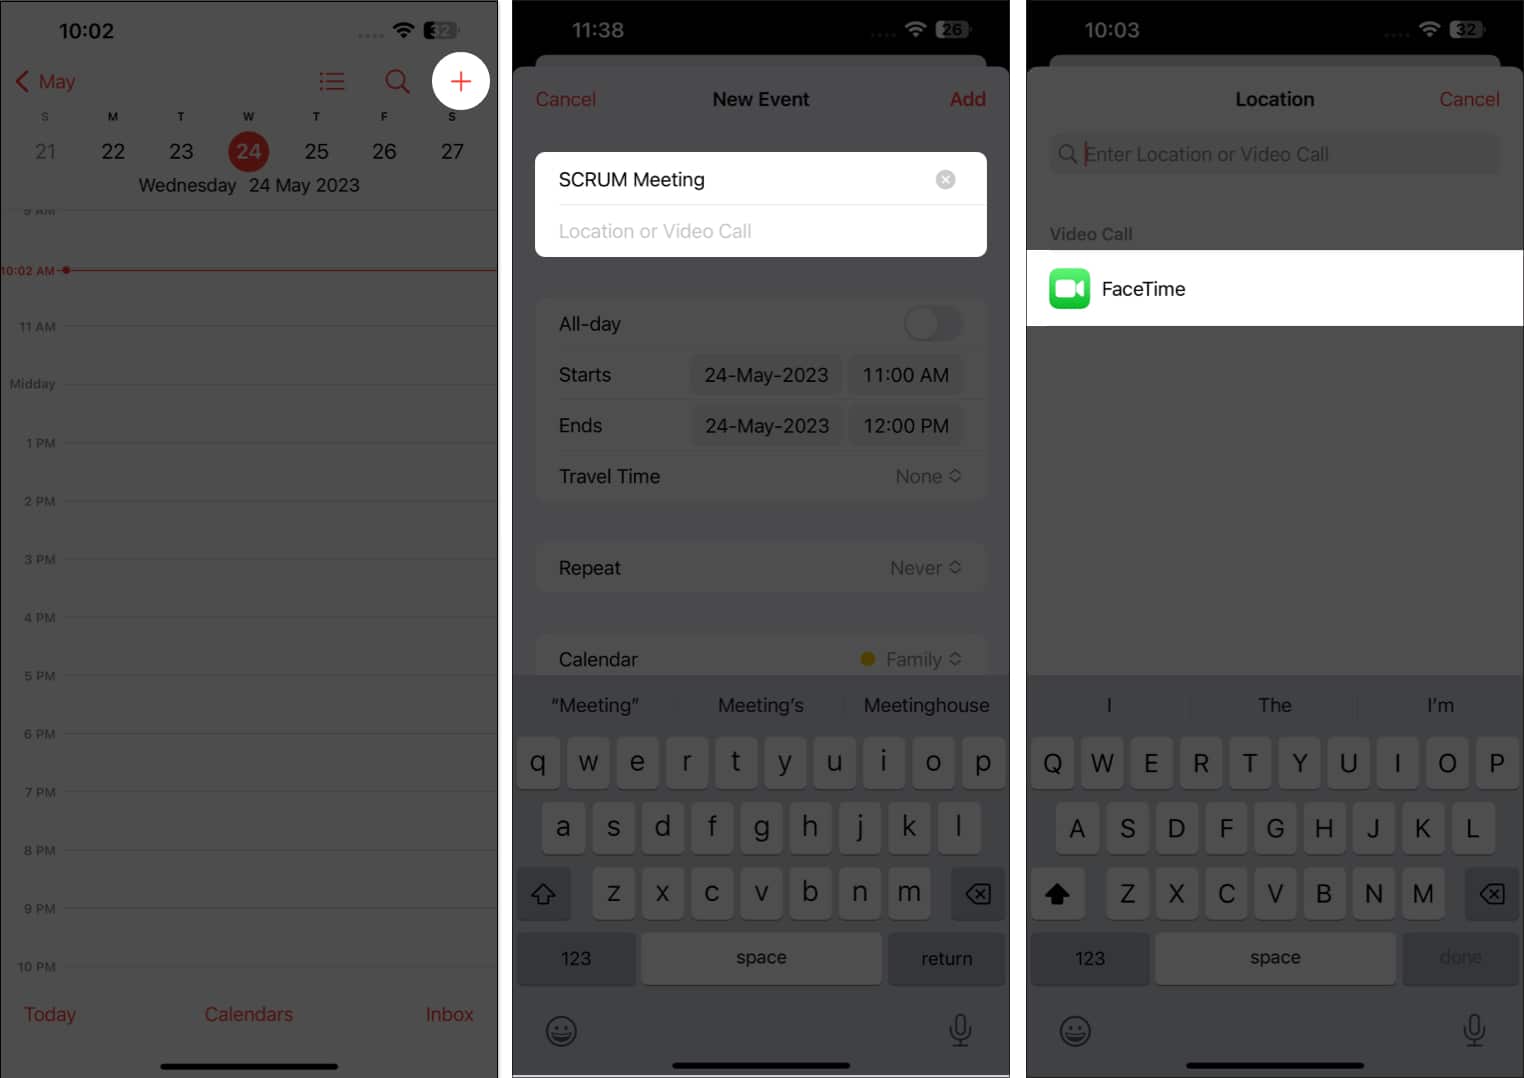
- Specify the Date and Time to initiate the call. Designate a Travel Time if applicable.
- Repeat: If you tend to establish this call on a regular basis, set a Repeat rate.
- Calendar: For those who operate multiple Apple IDs, tap the Calendar option and pick the account that suits your needs.
- Invitees: Enter the Email-ID of the participants to set up an invite list for the event. Alternatively, tap the (+) icon to select the invitees from saved contacts. Tap Done to save your preferences.
- Alert: You can pick a time slot you seek to notify the participants regarding the upcoming scheduled FaceTime event.
- Add attachment: You can even share important information with the participants via attaching files or documents beforehand.
- URL/Notes: Finally, based on the situation, you can add a URL or tag a Note along the invite to every invite.
- Once your event is all set up, hit Add to conclude the process.
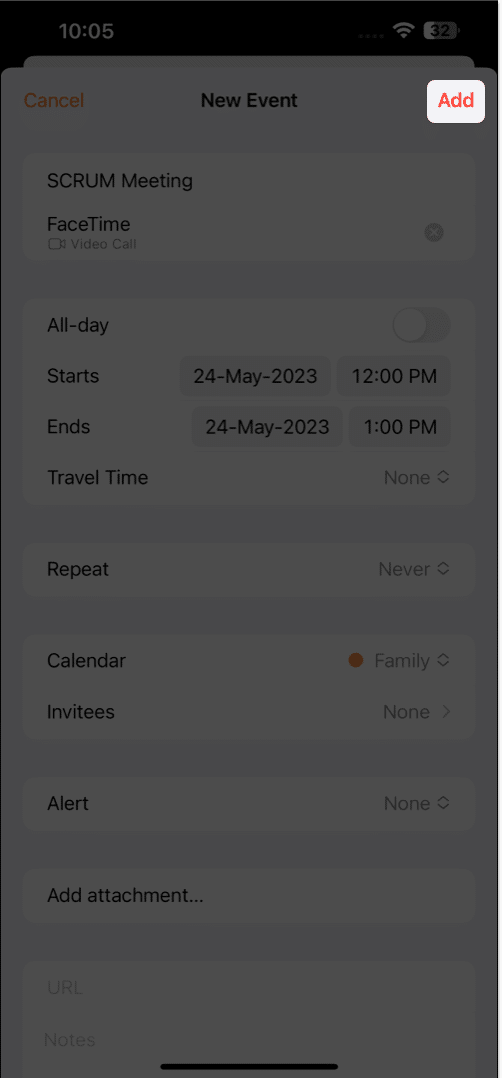
Simple, isn’t it?
How to edit or delete scheduled FaceTime calls on iPhone or iPad
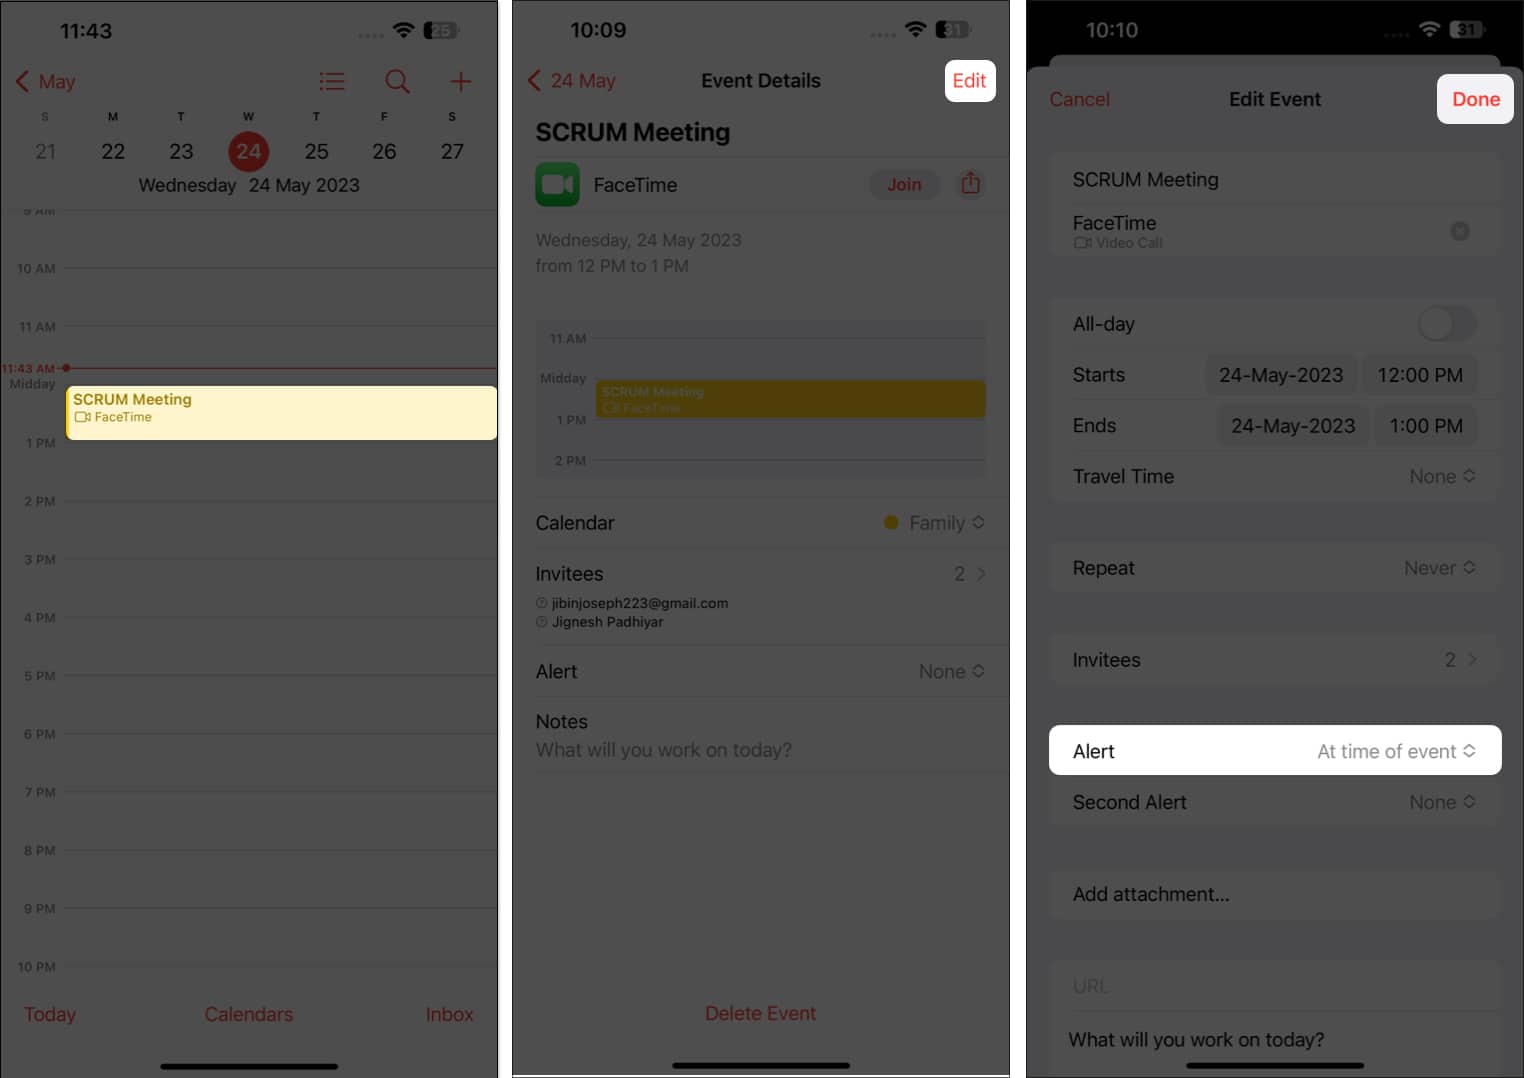
- Launch Calendar and locate the scheduled FaceTime event.
- Tap the event → Hit Edit to modify the event.
I have set an Alert to demonstrate the process. - Upon confirmation, tap Done to save the changes.
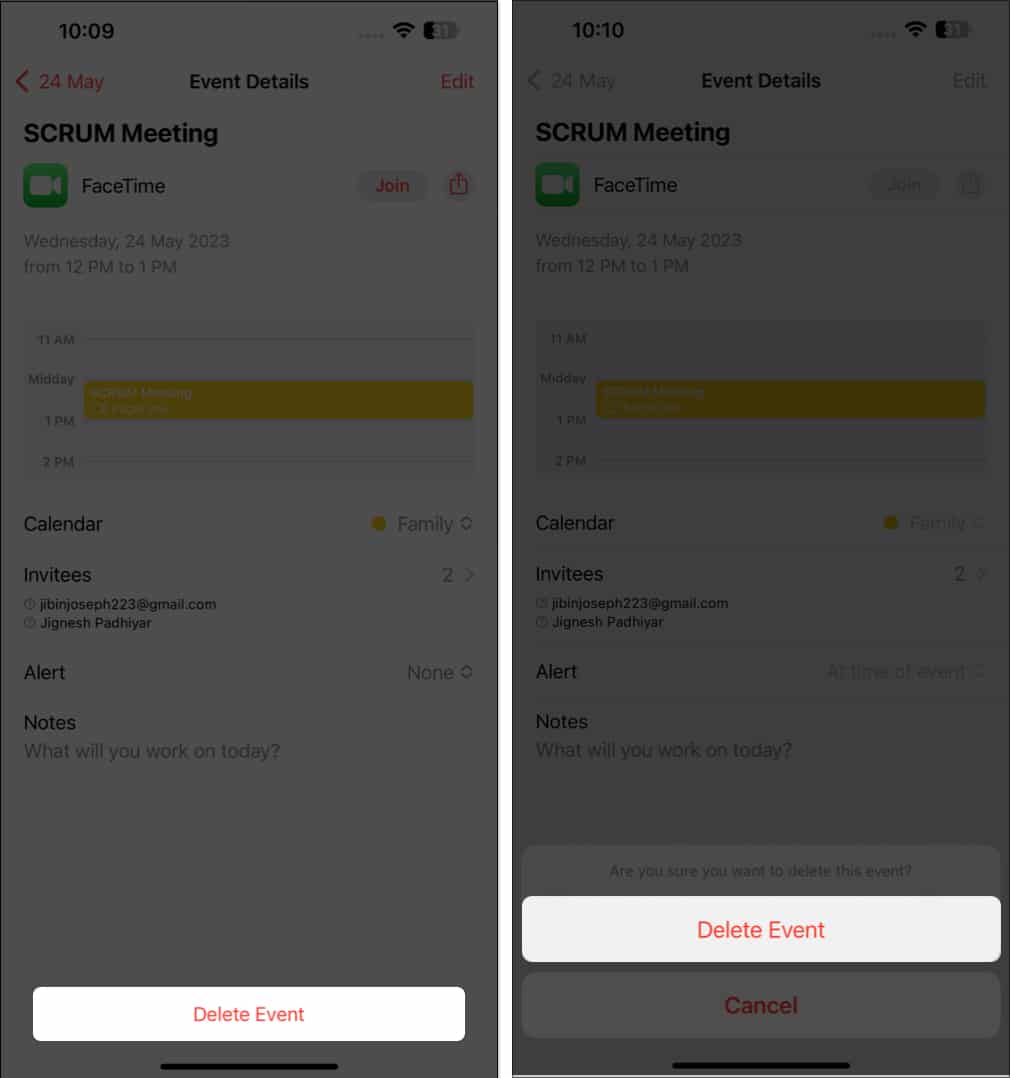
- However, if you seek to delete the session.
- Open the event in Calendar → Tap Delete Event → Delete Event when prompted.
How to schedule FaceTime calls on Mac
- Access Calendar on your Mac.
- Click on the (+) icon → Name the Event.
- Press Return or select the same to tweak your preferences.
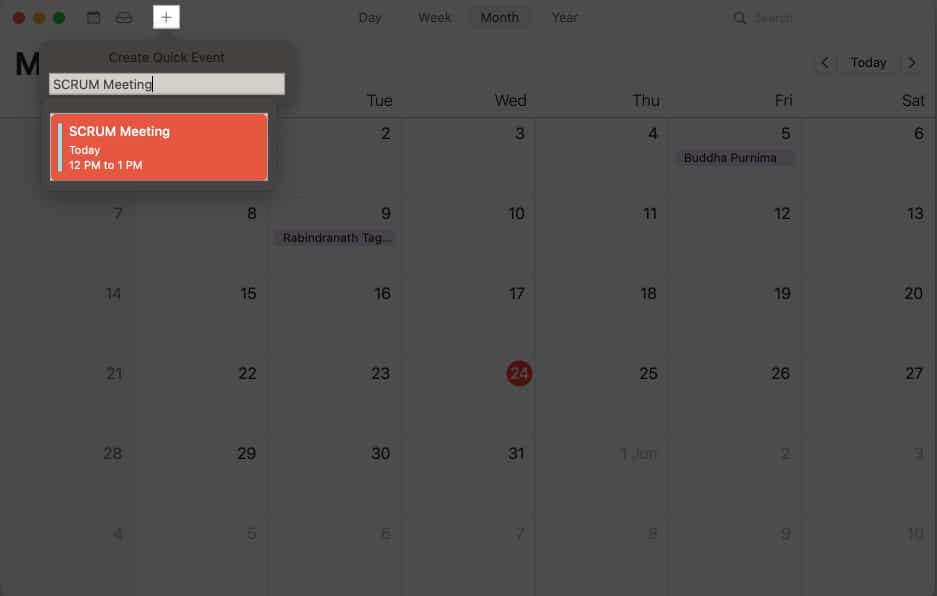
- When prompted, click Add Location or Video Call.
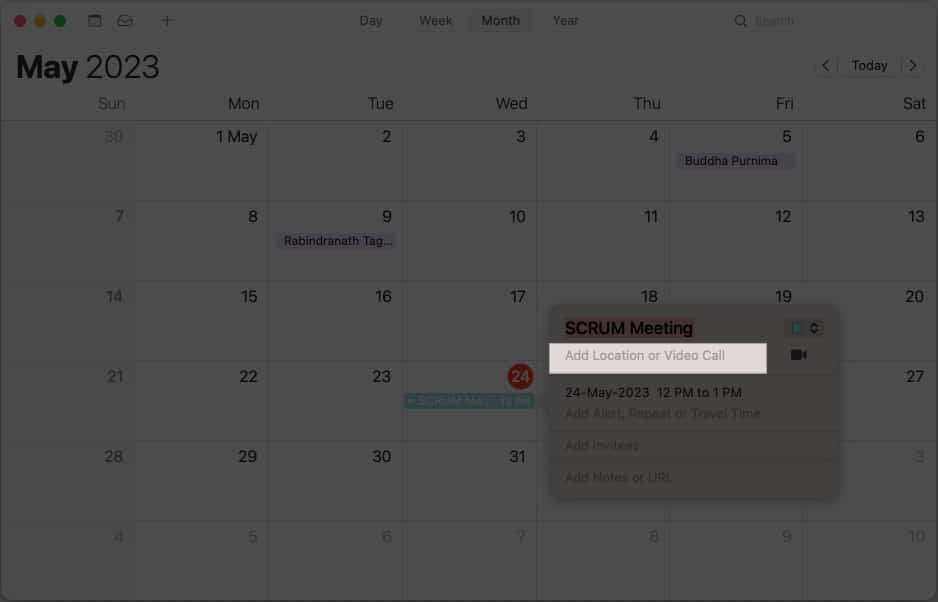
- Type FaceTime and select FaceTime from the results.
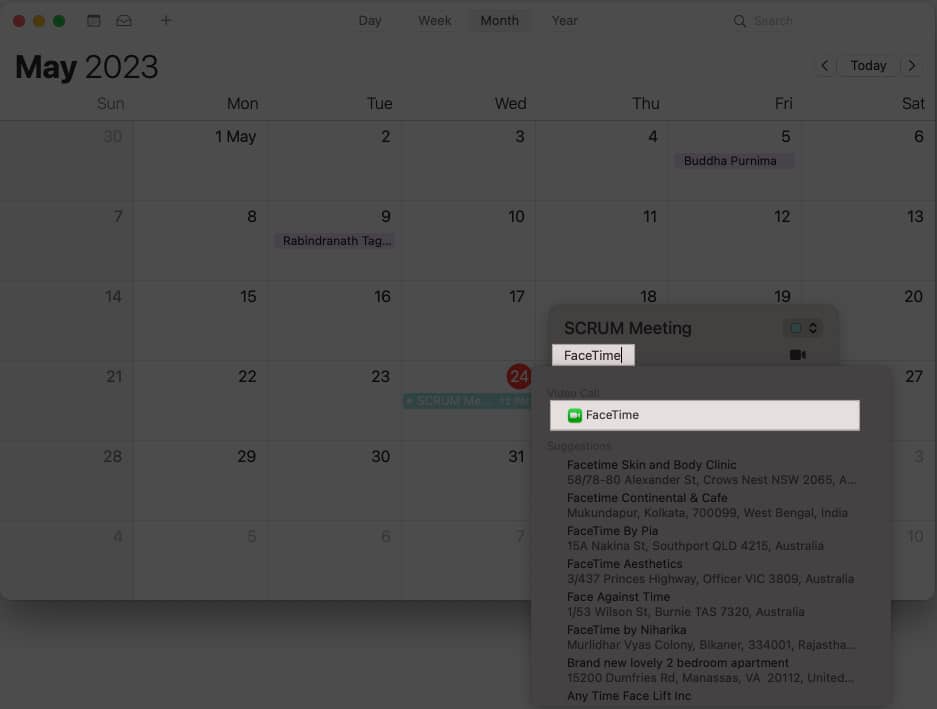
- Alternatively, you can tap the camera icon and select FaceTime directly.
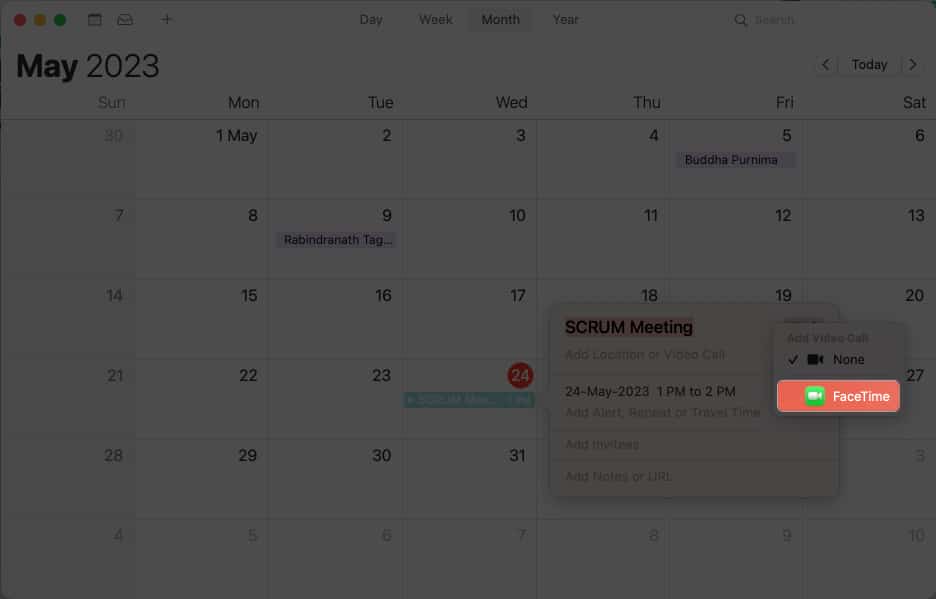
- Here, you can modify the event to your preference.
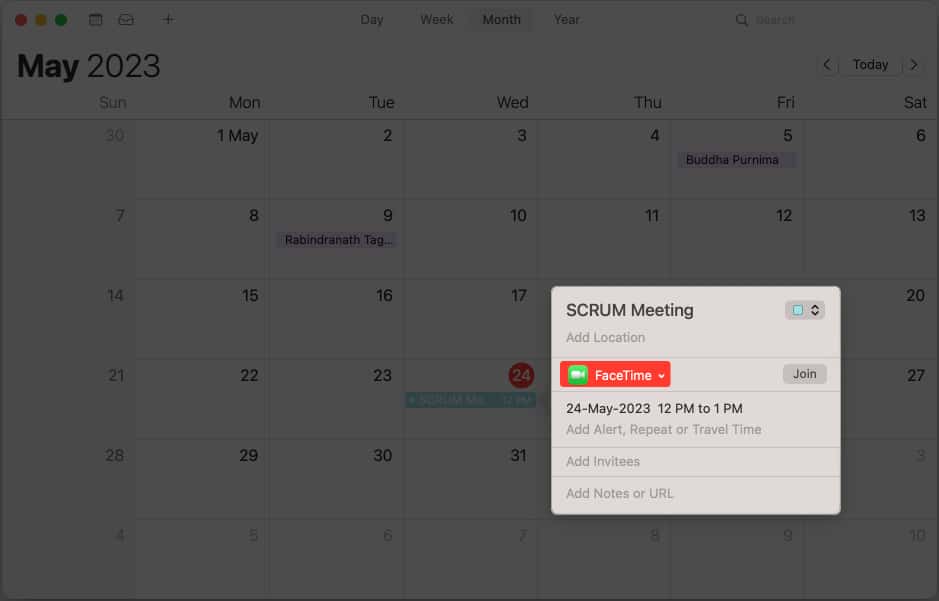
Edit or delete scheduled FaceTime calls on Mac
- Launch the Calendar and locate the event.
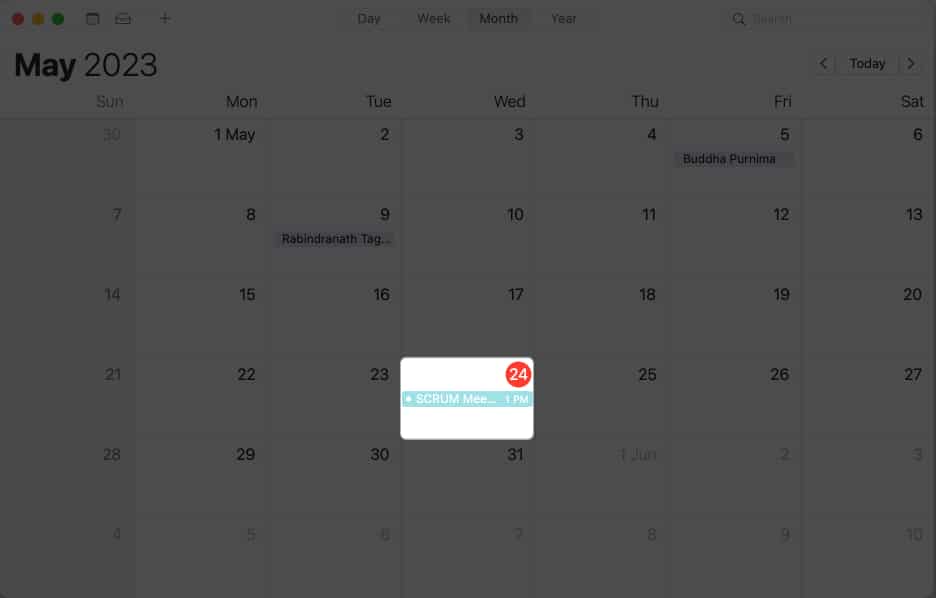
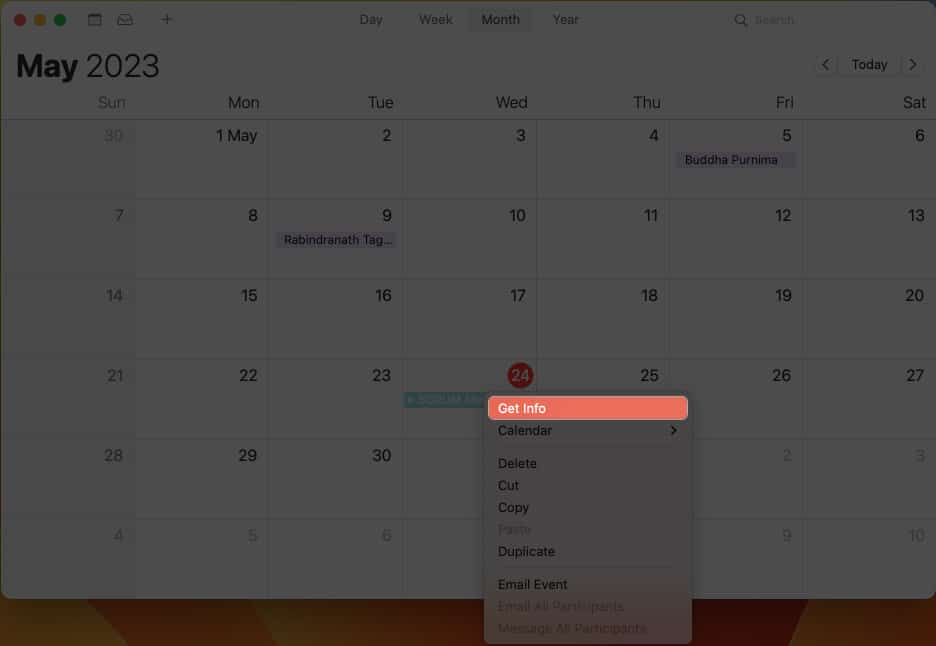
- Right-click the event and access the Get Info option.
- Now, make the required changes and close the pop-up window.
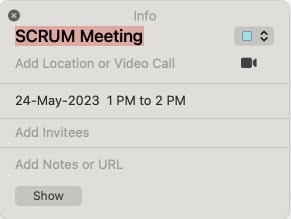
Note: To delete the scheduled call, right-click the event → Delete.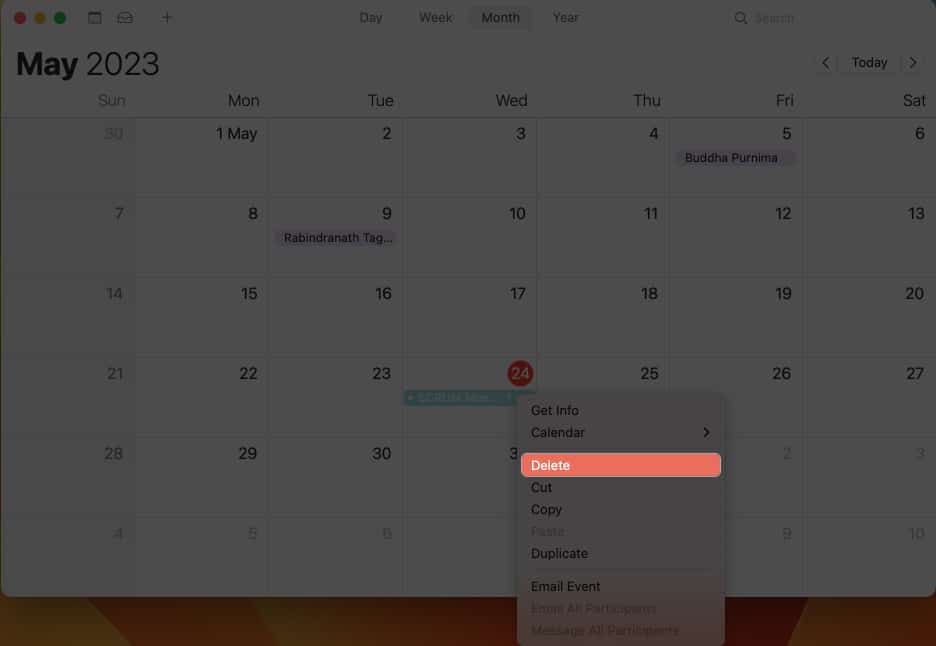
Become an iGeeksBlog Premium member and access our content ad-free with additional perks.
The techniques for scheduling a FaceTime call are insanely convenient. But wait until I tell you about the next one. Did you know you can organize a FaceTime call and share the link to it? The receiver can then use this link to jump on the call as many times as possible at a fitting time.
On iPhone and iPad
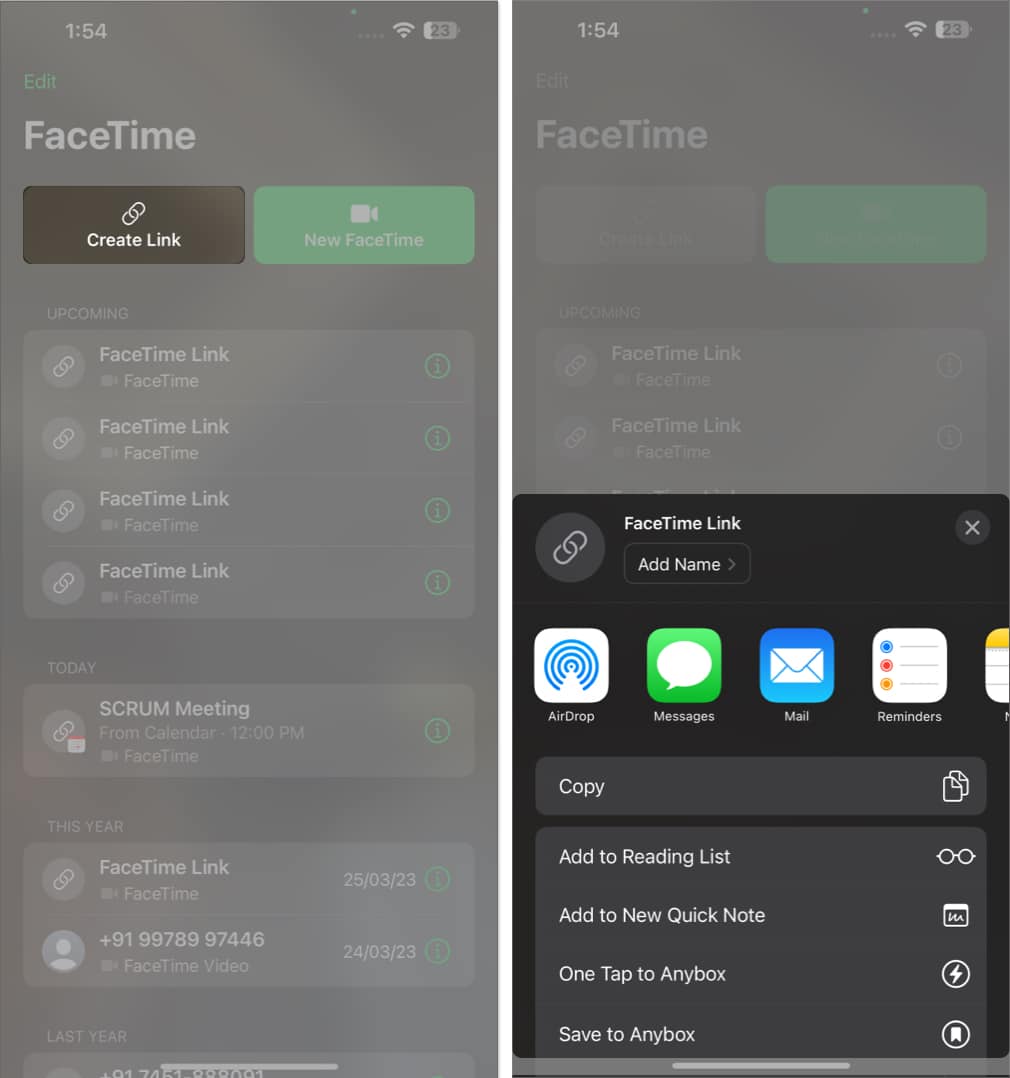
- Open FaceTime on your device.
- Tap Create Link.
- Share the same via any medium that is feasible to you.
On Mac
- Launch FaceTime → Click Create Link.

- You’ll be prompted with a list of options you can use to share the link with the significant user.

Note: This link can only be terminated by the owner and is set to last indefinitely. Hence you can use it over and over again if you desire.
Wrapping up
Gone are the days when you had to set up or organize a call with seconds on the clock. This guide can help you to schedule a FaceTime call on your Apple device.
Thank you for reading. Please share your thoughts in the comments below.
FAQs
Scheduling a FaceTime call in Calendar does not require an internet connection. However, you must have an active cellular or Wi-Fi connection in your device for a successful FaceTime call.
Yes, you can use the “Invitees” option to add multiple participants to the event. This will automatically result in the setting up of the group FaceTime.
Read more:
