If you’re trying to move the files and folders on your Mac, to make your Mac a bit organized. We have a variety of ways to move your items, you can create a file structure that increases your productivity or simply helps you find what you need faster.

We’ll show you how to move files and folders on macOS using drag-and-drop, the shortcut or right-click menu, Terminal, and more. This way, you can use whichever method makes more sense or that you’re most comfortable using.
- Using drag-and-drop on your Mac
- Using the right-click menu on Mac
- Using Terminal
- Using the title bar on Mac
Method 1: Using drag-and-drop on your Mac
The simplest way to move files and folders on Mac is with drag-and-drop. You may already be familiar with this method when rearranging icons, widgets, and shortcuts on your desktop, but it works just as well for moving items to different locations on macOS.
1. Move between two open windows
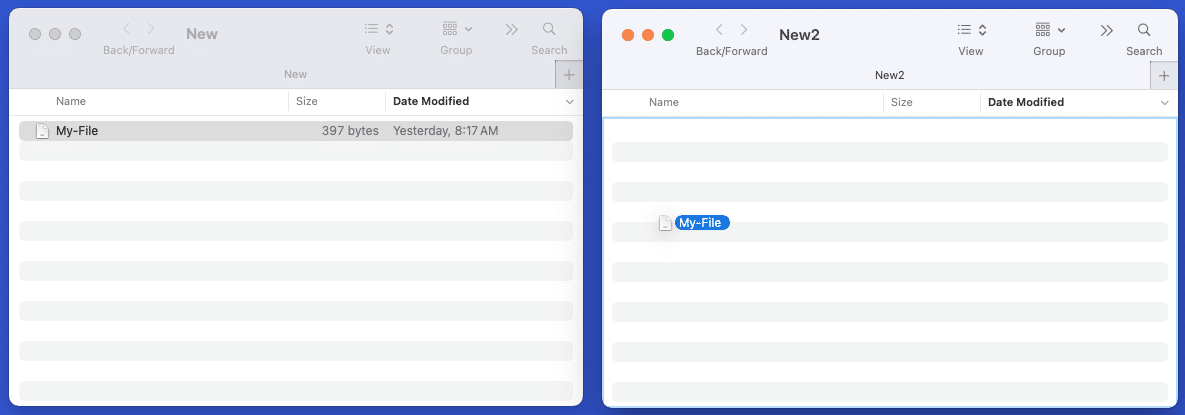
You can move a file or folder between two open windows by dragging it from the first window to the second. When you release it, you’ll see the item in its new location.
2. Move files and folders in the same window
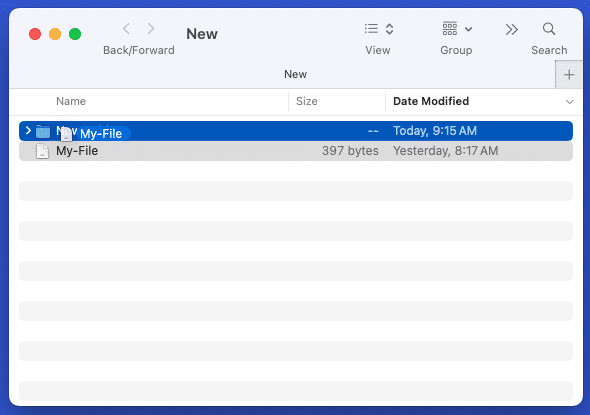
If you want to move an item within the same window, for example, move a file into a subfolder, you can do this as well.
Drag the item up or down to the location you want → Release when the file is over the folder
3. Use tabs in Finder app
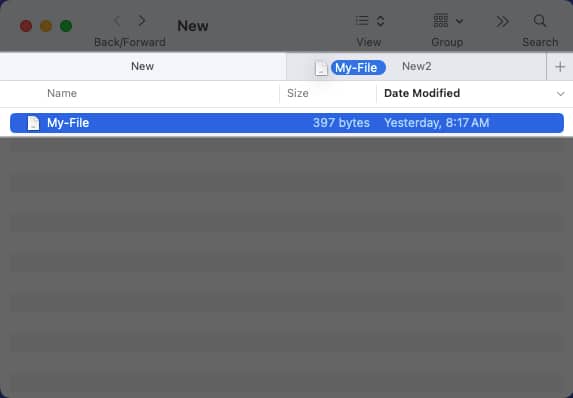
You can also move a file or folder using the tabs in Finder. Drag the item from the current tab onto the other tab and release.
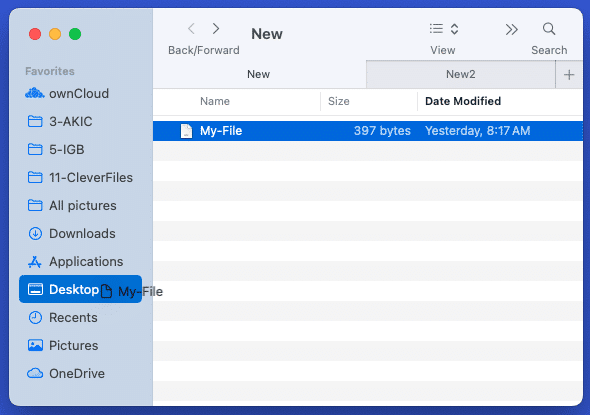
Another way to use drag-and-drop to move items is within the Finder sidebar.
Drag the item from its current spot into the sidebar location where you want it moved.
5. Moving files or folders with same name
If you move a file or folder to a location that already has one with the exact same name, you’ll receive a message letting you know. From there, you can choose to replace or keep the files or replace or merge the folders. Let’s take a look at how this works.
Here, we move a file using drag-and-drop to a folder where a file already exists with the same name. You’ll see a message pop up asking if you’d like to replace, keep both, or stop.
- Replace: Overwrite the existing file with the moved one.
- Keep Both: Keep both files and rename the moved one by adding “copy” to the name.
- Stop: Do not move the file.
While similar, you do have another option when moving a folder with the same name. You can choose to replace or stop, just like with files, but you can also merge the folders.
- Replace: Overwrite the existing folder with the moved one.
- Merge: Combine the folders into a single folder containing all items from both. Note: You’ll only see the Merge option if one folder contains items that aren’t in the other.
- Stop: Do not move the folder.
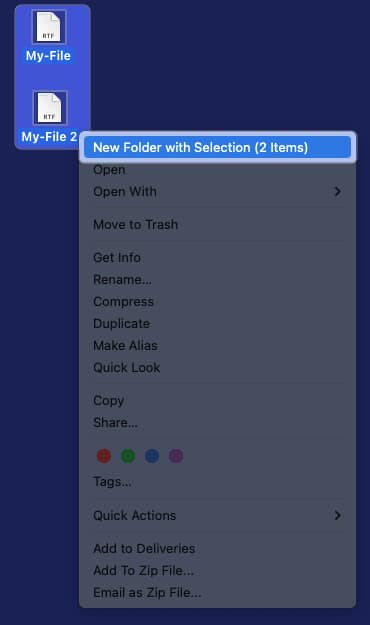
Another way to move both files and folders on Mac is to a new folder. If you do this with folders, those you move become subfolders in the new one. You can do this easily by selecting the items and using the shortcut or right-click menu.
- Do one of the following to select the files or folders:
- Select adjacent items by choosing the first one, holding Shift, and choosing the last one in the group.
- Select non-adjacent items by choosing the first one and holding Command as you choose each additional item.
- Right-click or hold Control and click to display the menu.
- Pick New Folder With Selection (X Items).
- Give the new folder a name and press Return.
You’ll then see your files or folders within the new folder you created.
Method 3: Using Terminal
Maybe you like to manage items on your Mac using Terminal. You’ll be glad to know that you can move files and folders with Terminal commands.
- Open Terminal using Launchpad or from Applications → Utilities as you usually would.
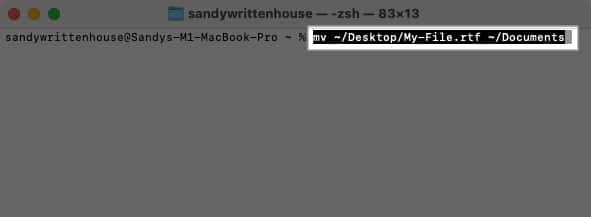
- Then, enter the Move command (mv), which includes the current file or folder location and the new one – basically a shortened file or folder path.
- As an example, we’ll move the file named My-File.rtf from the Desktop folder to the Documents folder with this command:
mv ~/Desktop/My-File.rtf ~/Documents
- As an example, we’ll move the file named My-File.rtf from the Desktop folder to the Documents folder with this command:
- Press Return to run the command, and you should see your file in its new location.
To move a folder, simply use the locations and names of the current and new folders.
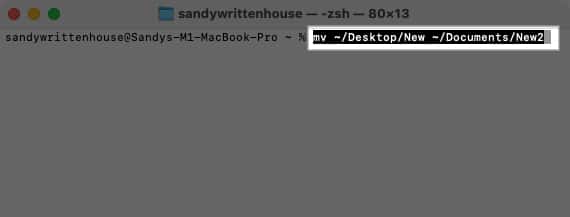
- Here, we’ll move the folder named New in the Desktop folder to the folder named New2 in the Documents folder using the following command:
mv ~/Desktop/New ~/Documents/New2 - Press Return to run the command, and you should see the first folder move into the second.
Method 4: Using the title bar on Mac
One more way to move an item on your Mac is using the title bar. This only works for files but gives you a quick way to choose its new location. Let’s look at a couple of examples using different apps.
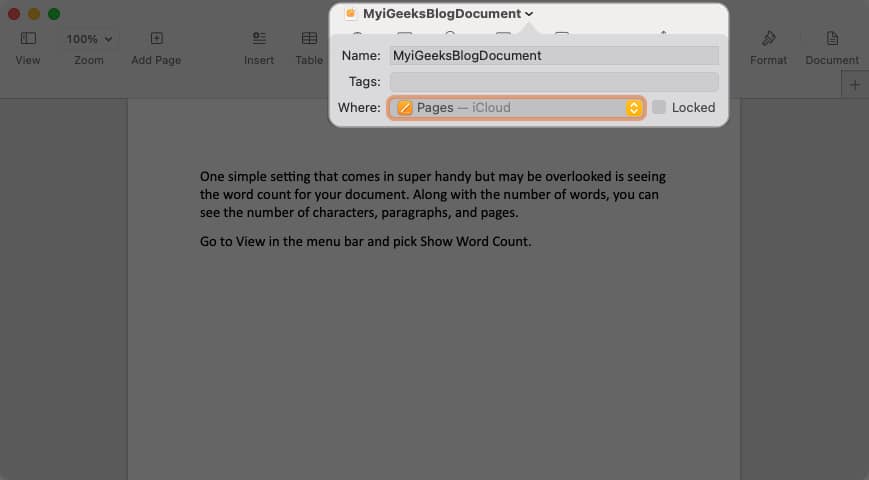
First, we’ll move our Pages document from its existing location to a new one.
- Click the arrow next to the file name in the title bar.
- Select or enter the new location in the Where field.
- Press Return, and your file will be moved to its new spot.
As another example, we’ll move our Microsoft Word document.
- Click the arrow next to the file name in the title bar.
- Select or enter the new location in the Place field.
- Press Return, and your file will be moved to its new spot.
Although the names of the location fields may vary by application as you can see above, you can easily move your current document using this title bar method.
Move items with ease
Whether you use one single method or a combination of a few, you can quickly and easily move files and folders on your Mac. Create a sensible file structure, place regularly used folders on your desktop, and find files faster with a simple move. Let us know which method you prefer for moving files or folders!
Read more:
