Looking to get quick directions to your home? With Apple Maps, you can easily add your home address for seamless navigation. In this guide, I will walk you through how to add or change your home address in Apple Maps on your iPhone, iPad, or Mac.
- How to add home address to Apple Maps on iPhone or iPad
- How to edit or delete home address in Apple Maps on iPhone or iPad
- How to add home address in Apple Maps on Mac
- How to edit or remove home address in Apple Maps on Mac
How to add home address to Apple Maps on iPhone or iPad
There are multiple easy ways to add your home address in Apple Maps. Here’s how you do it.
Method 1: Add home address from Favorites menu
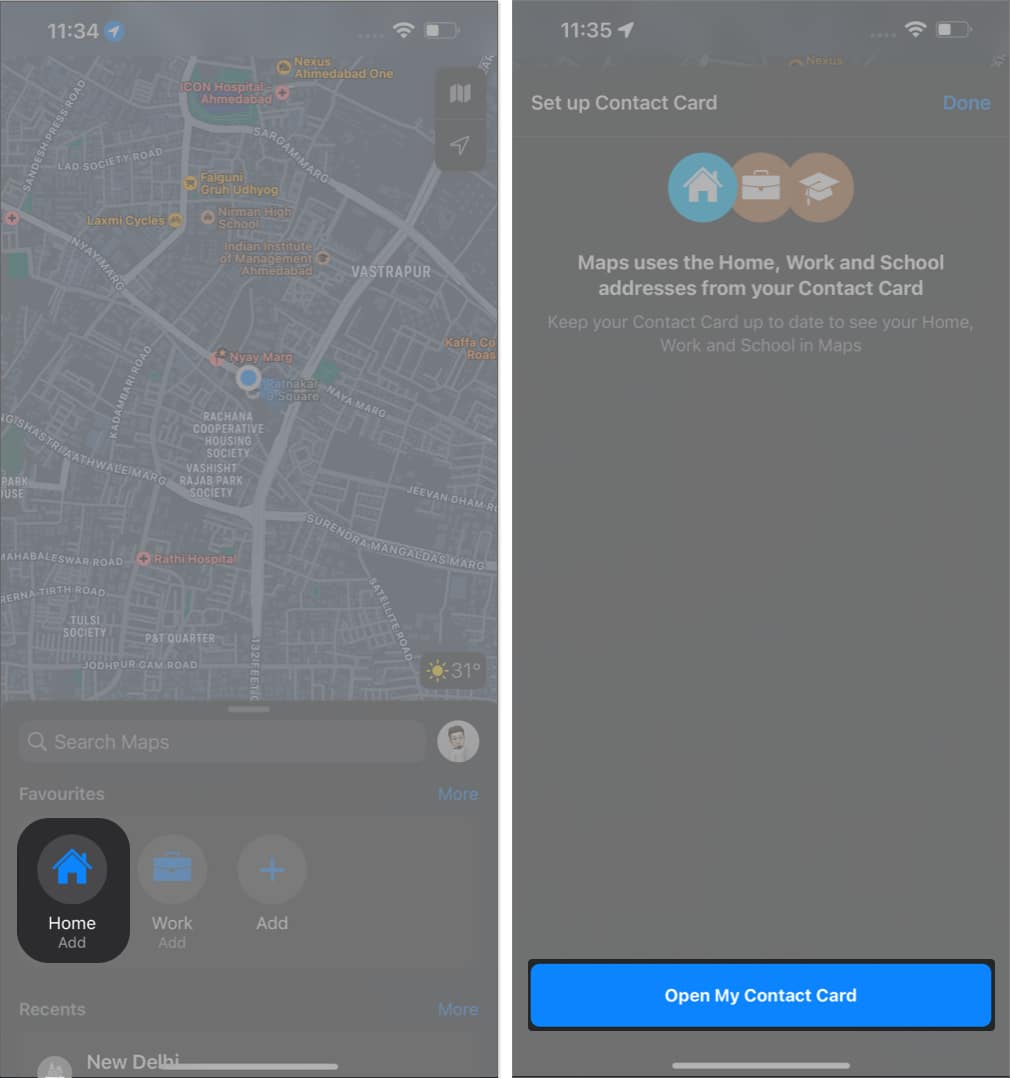
- Launch Apple Maps → Swipe up the Search section.
- Select Home under Favorites.
- Tap Open My Contact Card.
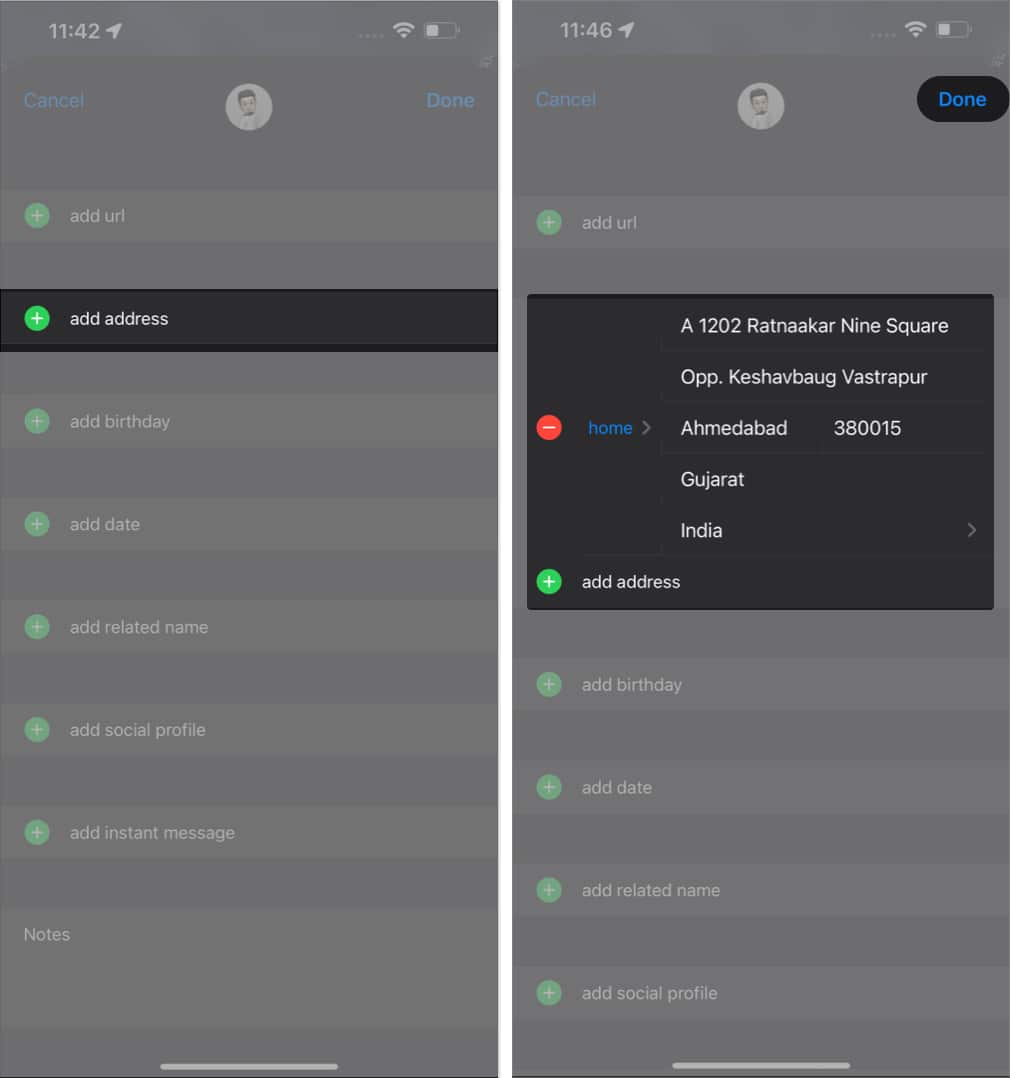
- Hit (+) add address → Fill in your complete address → Tap Done.
Method 2: Add home address from profile menu
- Tap your profile icon beside the search bar.
- Tap Favorites → Home.
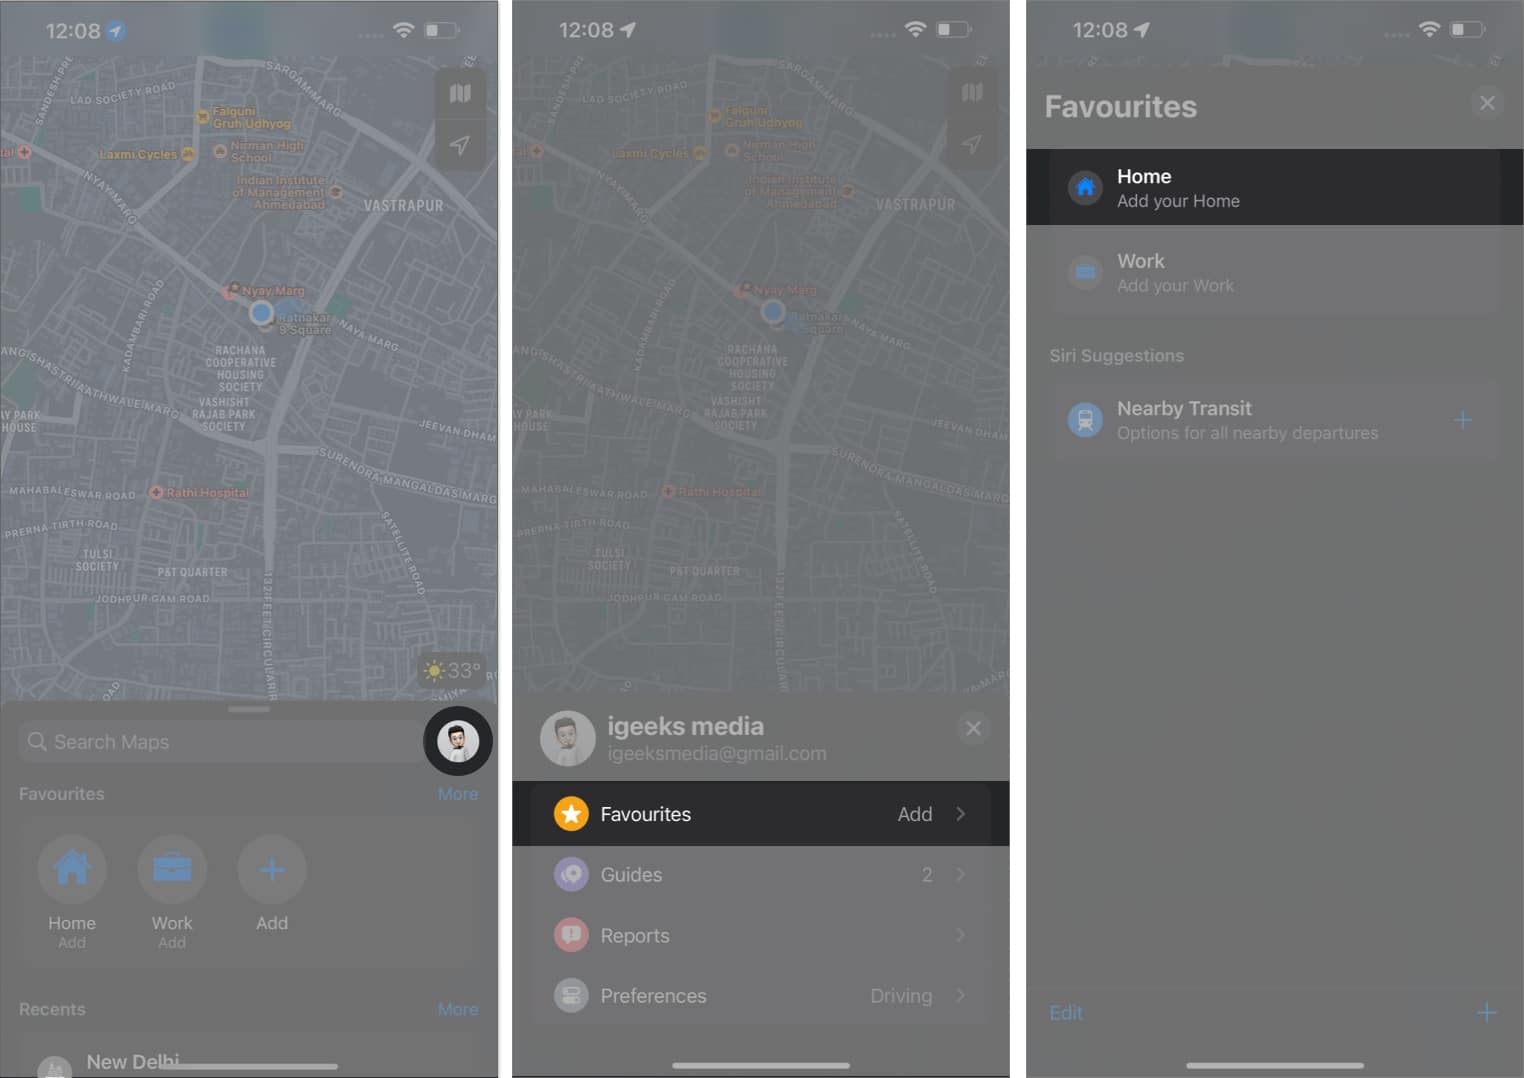
- Tap Open My Contact Card.
- Select add address → Fill in your details → Hit Done.
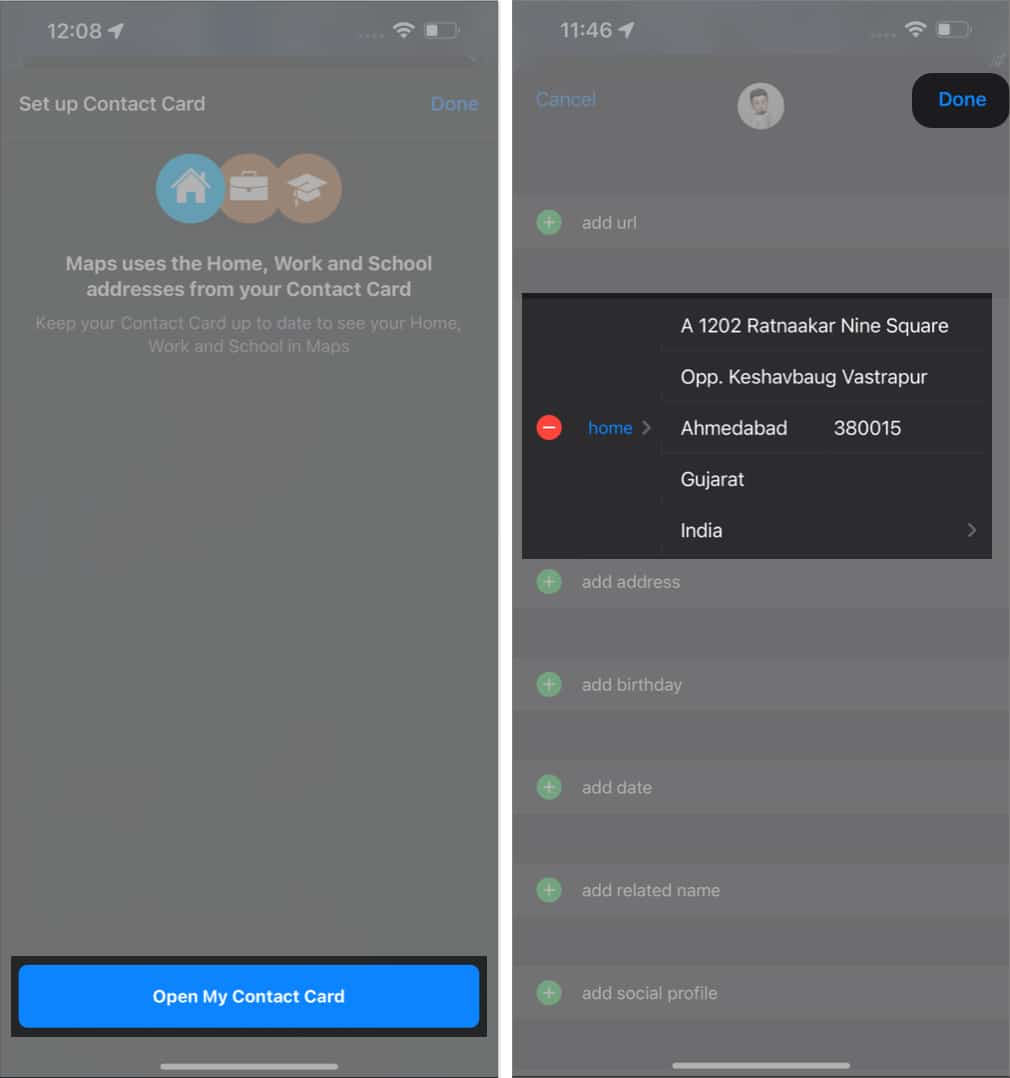
Note: Whenever you search for Home from your search bar, you’ll be redirected to the respective address.
How to edit or delete home address in Apple Maps on iPhone or iPad
However, if you desire to get rid of the previously saved address to add a new one, it’s pretty simple. Just follow the steps mentioned below:
Method 1: Edit or delete home address from Contacts app
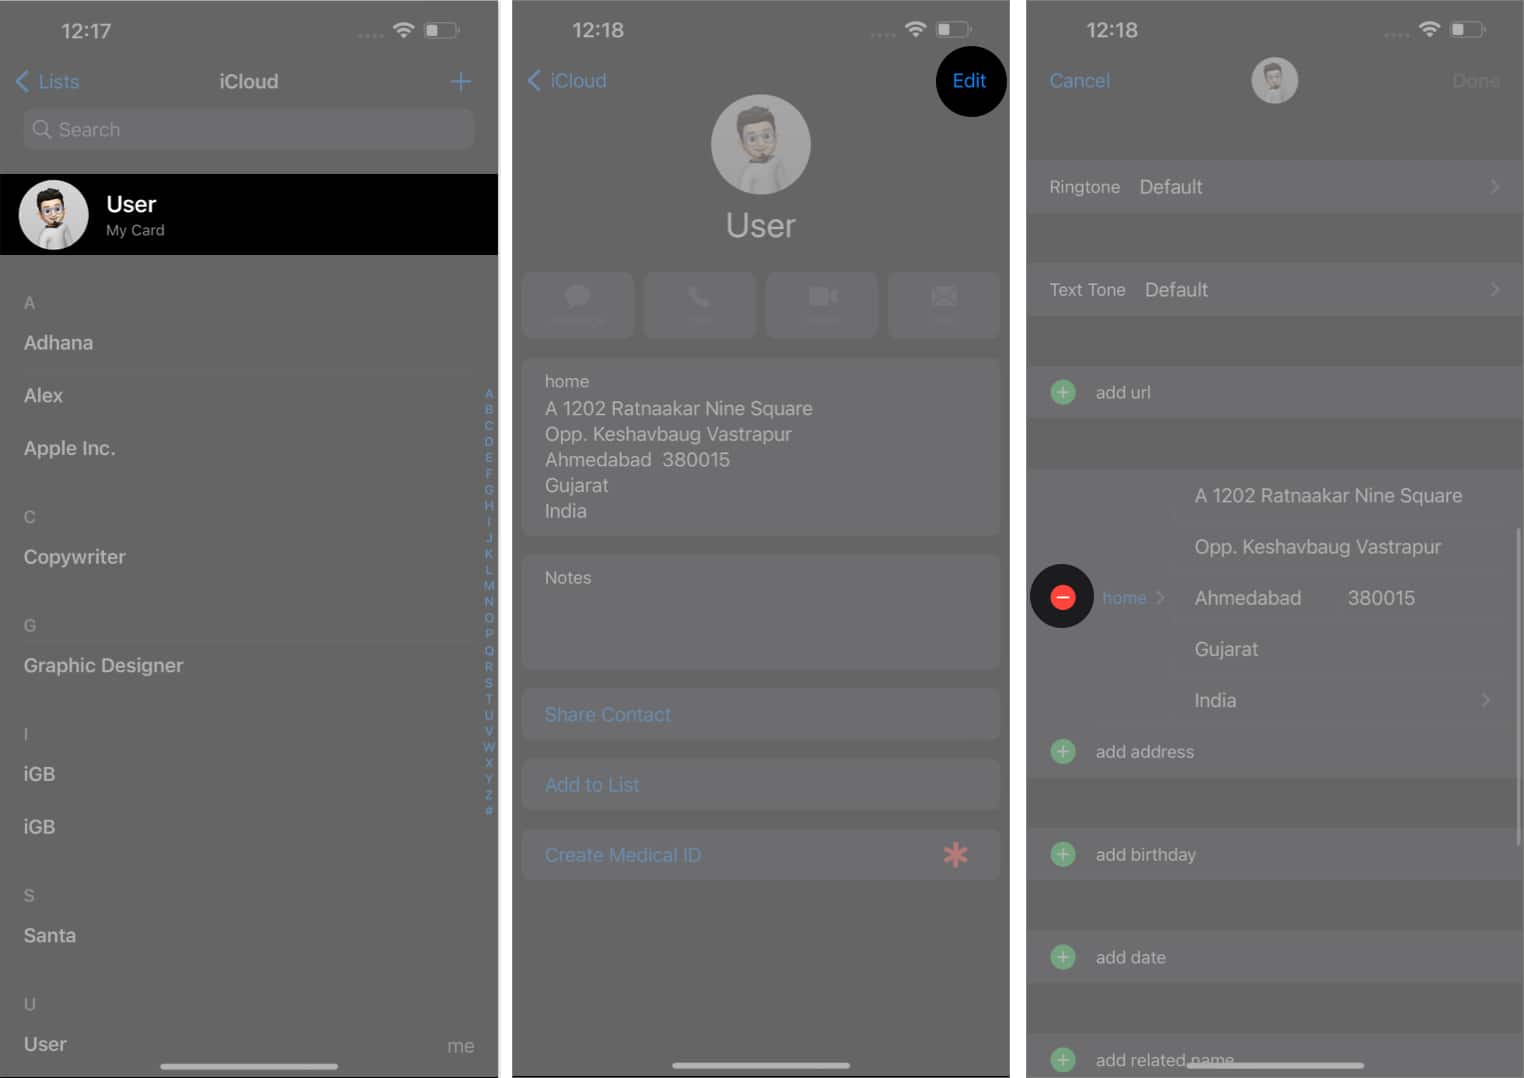
- Open Contacts.
- Navigate to your profile → Tap Edit.
- Here, you can edit the information on the address card by simply typing the new address → Then tap Done to save changes.
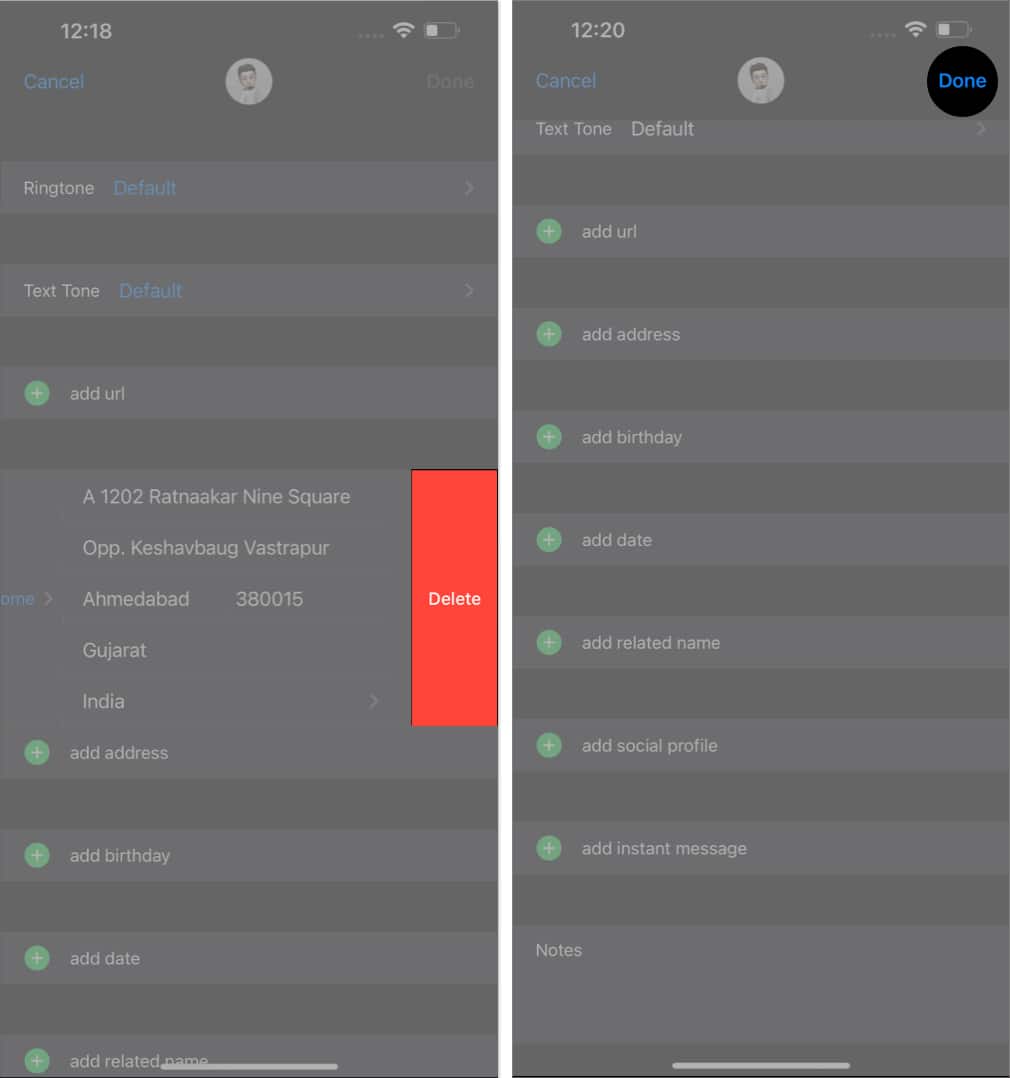
- To delete the address, you can tap the minus sign (-) on the left side of the address.
- Select Delete → Done to remove the address.
Method 2: Change or remove home address in Apple Maps app
- Launch Apple Maps → Select Home under Favorites.
- Tap Open My Contact Card.

- Now, follow steps 2 to 4 from above.
How to add home address in Apple Maps on Mac
Apple is known for its well-established ecosystem. So, don’t feel left out if you have been using Apple Maps on Mac. Let’s overview the steps to add a home address on Mac.
Method 1: Using Contacts app
- Launch Contacts.
- On your profile, click Edit.
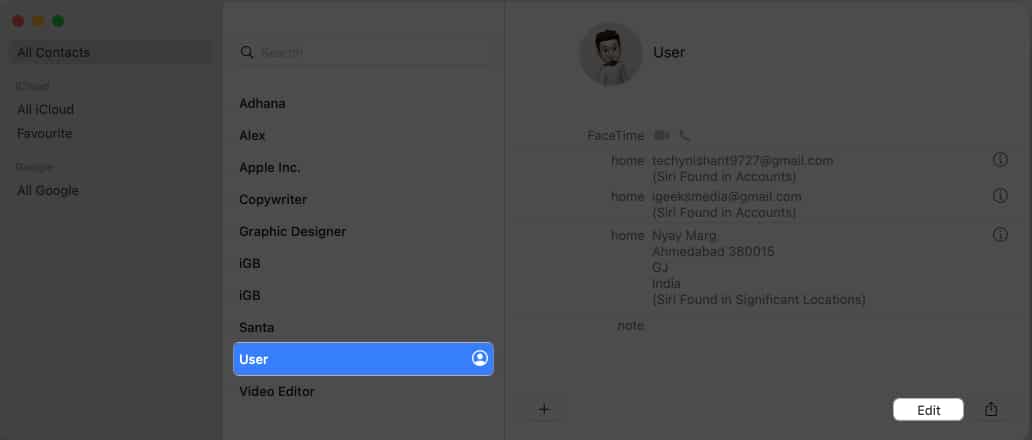
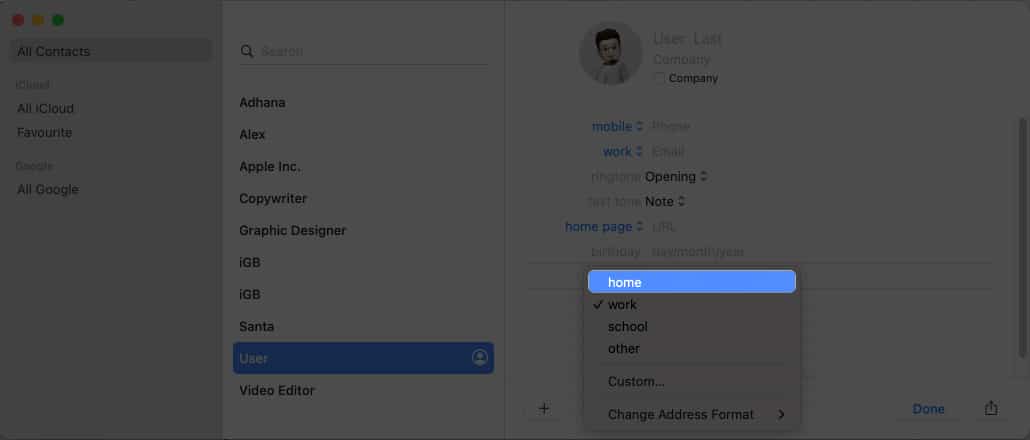
- Select home in the address section
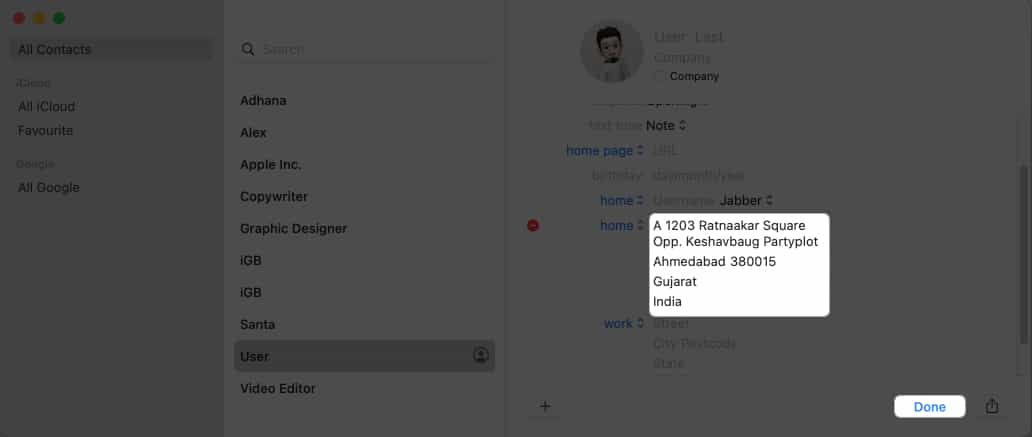
- Enter your home address details → Click Done.
Method 2: Using Apple Maps
- Open Apple Maps.
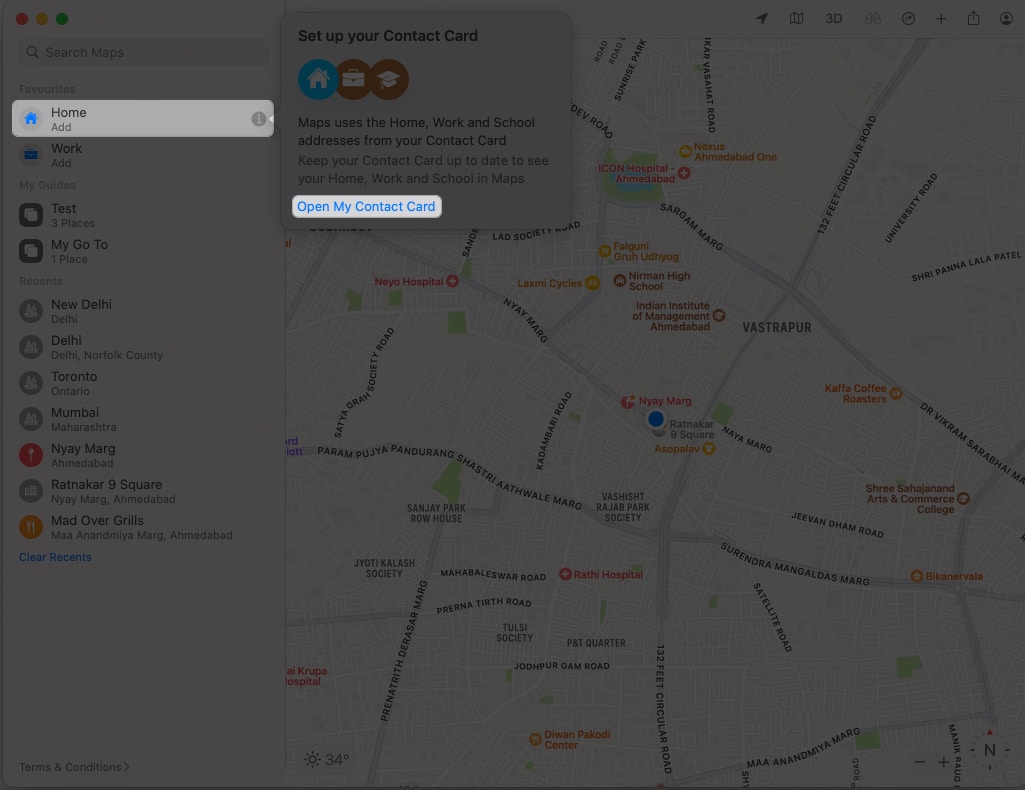
- Select Home under Favorites → Click Open My Contact Card.
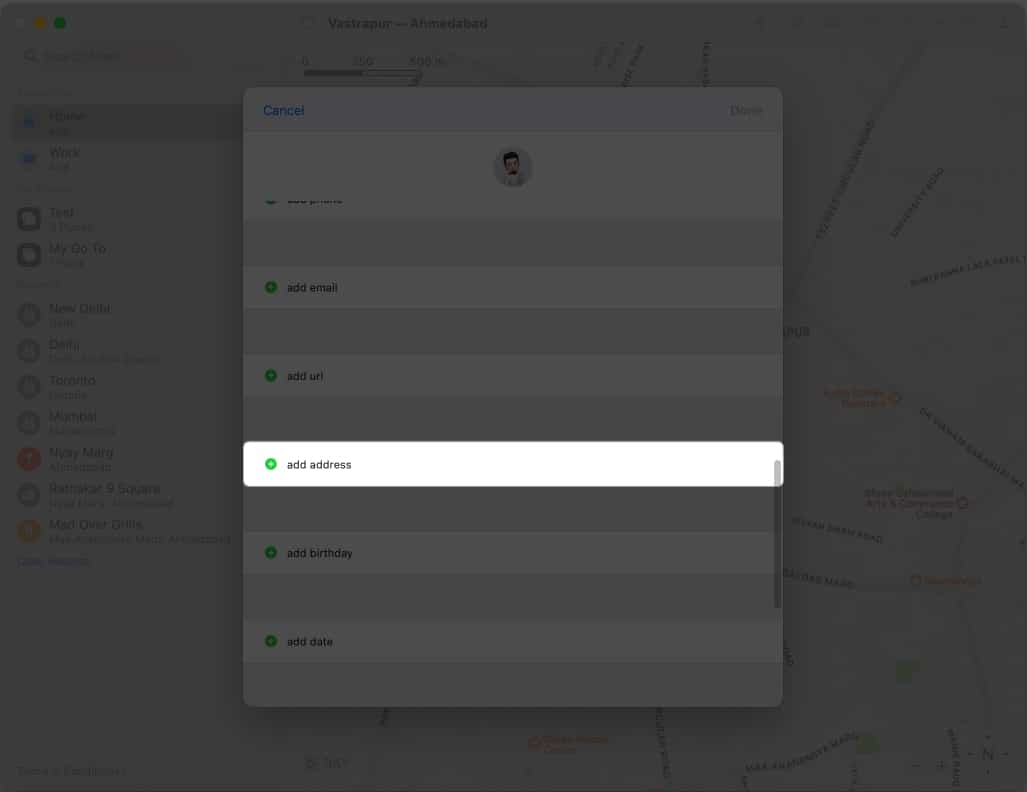
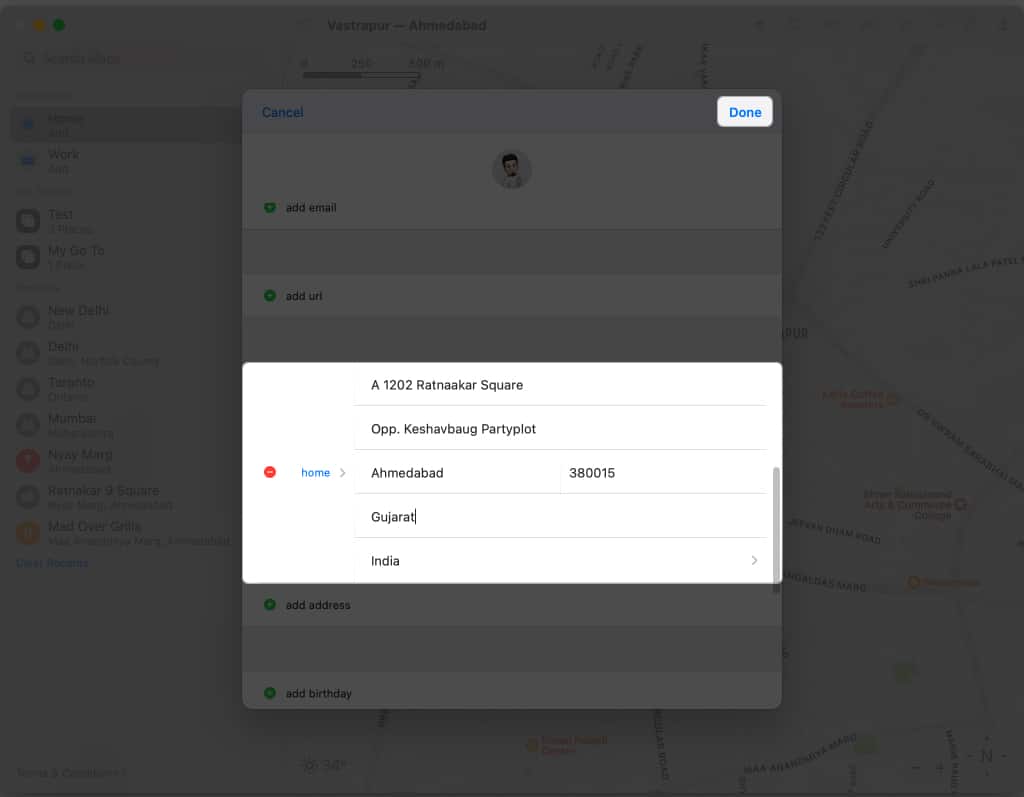
- Click add address.
- Fill in the section with your address → Click Done.
How to edit or remove home address in Apple Maps on Mac
Removing or changing the saved address on Mac is pretty simple. Let’s have a step-by-step breakdown.
Become an iGeeksBlog Premium member and access our content ad-free with additional perks.
Method 1: Using Contacts app
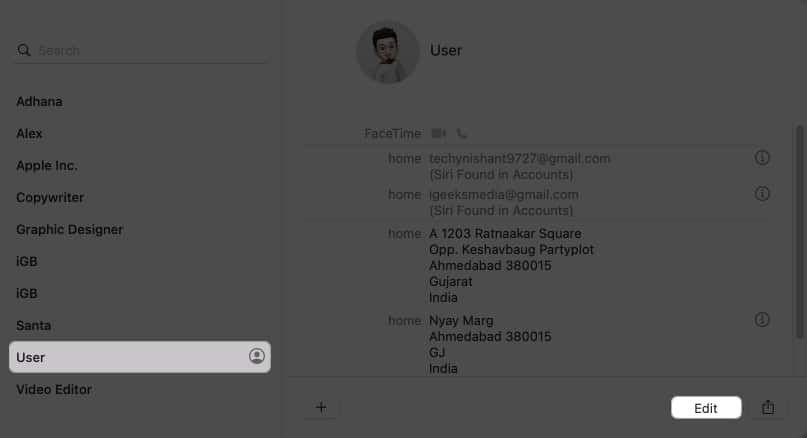
- Open the Contacts app → Go to your profile.
- Select Edit.
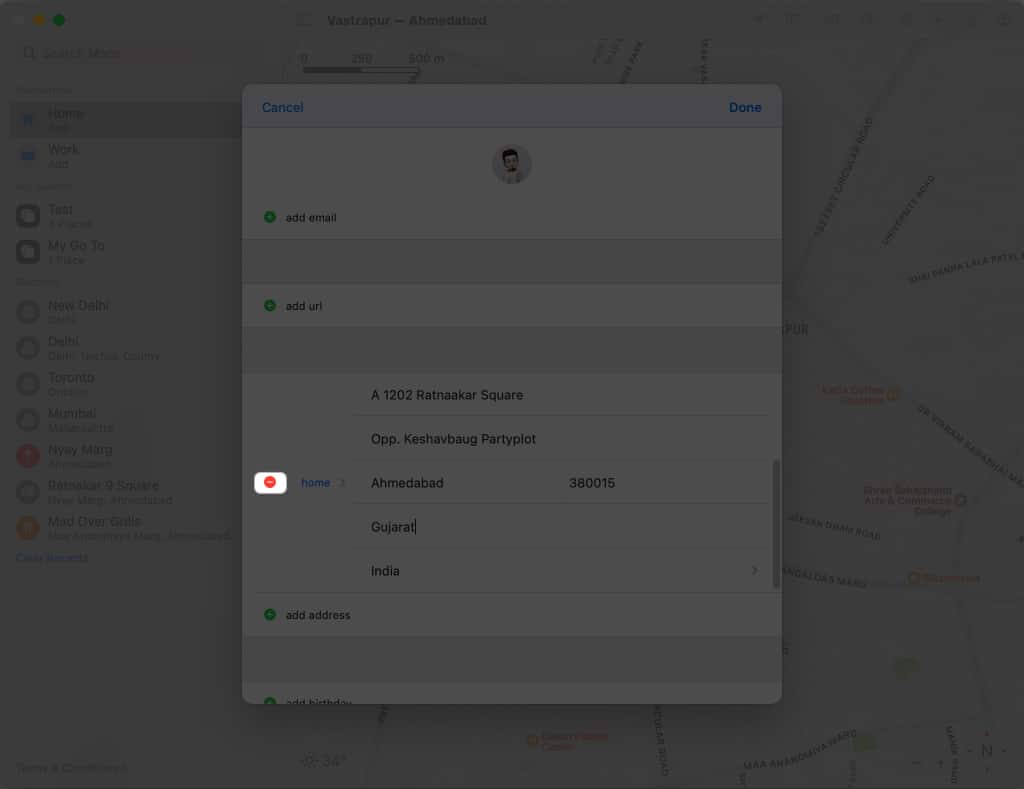
- Click the minus sign (-) on the left of the saved address.
Type new details in each section to edit your home address. - Click Done.

Method 2: Using Apple Maps
- Open Apple Maps → Open your Contact Card, as previously mentioned.
- Navigate to the home address → Click the minus sign (-).
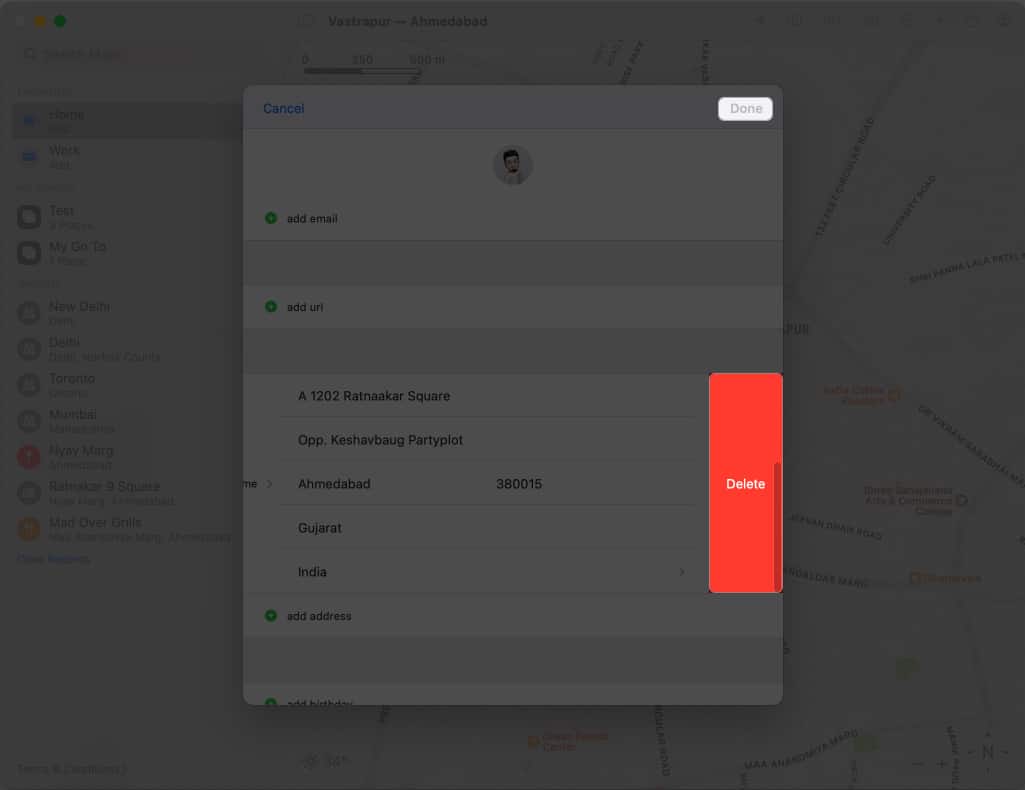
- Hit Delete → Done.
You can rename your home address if you want to update your home address with a new location. You don’t have to delete and re-add it.
Troubleshooting common issues in Apple Maps
In Apple Maps, you’ll need to update your address if you move to a new house or plan to do so. Adding or changing your address in Apple Maps is easy, but there are some common issues you need to be aware of.
- Ensure you are signed in with your Apple ID. This is important as Apple Maps stores your home address connected to your Apple ID.
- When changing your address in Apple Maps, enter the address on your official documents. Entering an incorrect address can cause issues when getting directions on Maps.
- Ensure you are using the latest version of Apple Maps. Navigate to the App Store and select your profile to check if an update is available.
- You must turn on Location Services. Go to Settings → Privacy & Security → Location Services. Toggle on Location Services.
The tips outlined above should cater to your problem without any hassle. However, if you still face issues, contact Apple Support for further assistance.
Unfortunately, you can only add one home address in Apple Maps. However, you can add multiple addresses to your Favorites list, making it easier to access frequently visited locations.
You cannot add a custom label to your home address in Apple Maps. However, you can add notes to your Favorites list, which could include a custom label for your home address.
No, changing your home address in Apple Maps will not affect your contact card. However, changing your home address in your contact card will update your home address in Apple Maps.
Your home address is private in Apple Maps and will not be shared with anyone. It only provides you with navigation and directions to and from your home.
Save your address now!
Now you can easily add or change your home address in Apple Maps on your iPhone, iPad, or Mac, making navigation to and from your home much more accessible. In case of any errors, you can use the troubleshooting tips mentioned to resolve the issue.
Read more:
