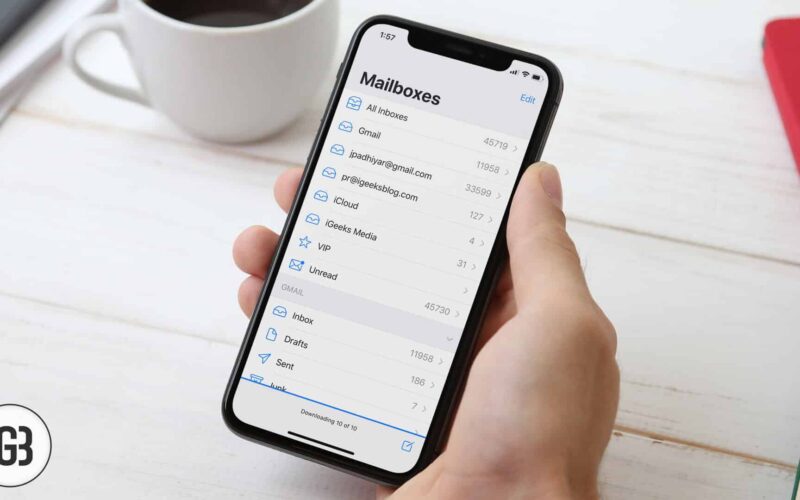
Whether it is personal or professional, your mail id is what you frequently check in a day. Even after relentless attacks of messaging apps like WhatsApp and all, email has never lost its charm and importance. For important communication, people prefer this mail app to other apps.
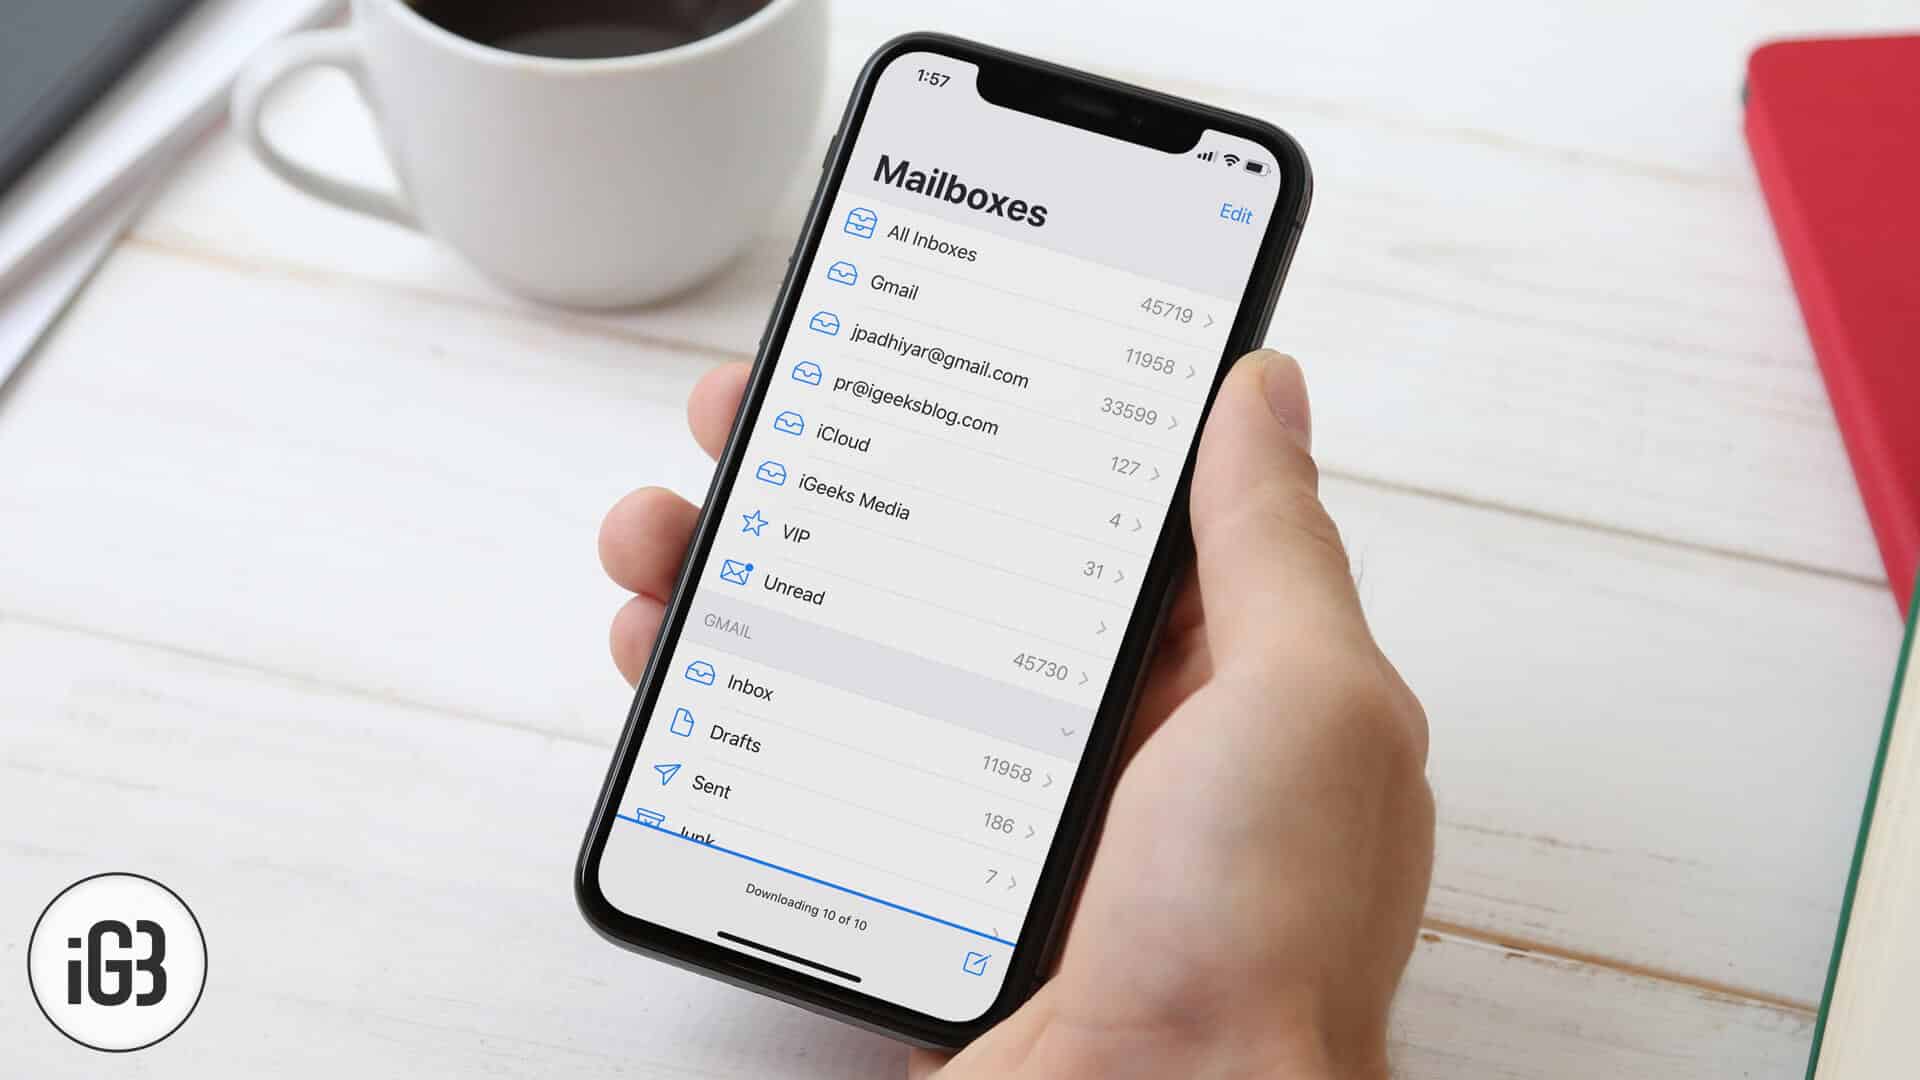
It is quite acceptable that you will get anxious when something wrong happens to your mail app on your iPhone. It is now quite normal that people have set up their emails ids on iPhone so that they can quickly send and receive some important emails. But when they encounter this “Cannot Get Mail” error on their iPhone and iPad, they are the most annoying.
Your annoyance wouldn’t help you. There can be some reasons behind this error. The email server may have encountered some technical glitch; or you need to check your internet connection, which could be facing some interruptions. There can be some issues with your email settings. In any case, you need some solution. What you need is to follow this information.
How to Fix “Cannot Get Mail” Error on iPhone and iPad
Refresh Your Inbox
If Wi-fi connection is emitting poor signals, your email app may face some downtime, and therefore, you get this error. Best solution is to swipe down on the screen when you have opened the inbox. You can also shut down the Wi-fi connection and restart it. If you are using mobile data, toggle Mobile Data OFF and then ON (Settings → Mobile Data).
Quit Mail App
If refreshing inbox doesn’t help, quit Mail app forcefully. It is quite simple by launching app switcher and swiping up the app. Open the Mail app again and check emails in the inbox.
Is your internet connection working properly?
When you are in the basement or a lift, your mobile data doesn’t work appropriately. Once you are in open, recheck the email app by refreshing your inbox. If you are using Wi-fi connection, you need to go close to the router to check whether you are getting perfect signals on your device.
Delete your mail account and add it again
There could be some problems from the server-side; an email server may not accept the incoming and outgoing server information. In this case, you should delete your email account from your iPhone and add it again. Allow the Mail app to auto-configure settings; this will refresh your email’s inbox.
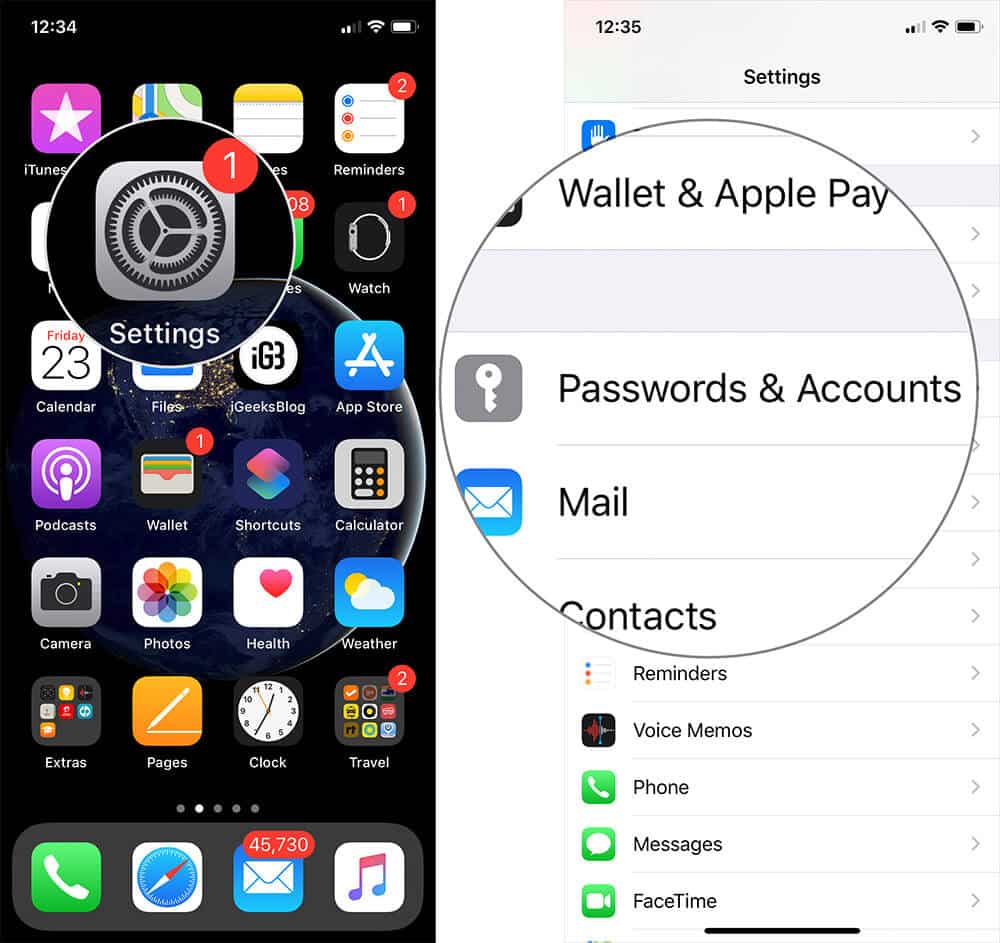
Step #1. Open Settings app on your iPhone → Scroll down and tap on Passwords & Accounts.
Step #2. Tap on the email account you want to delete.
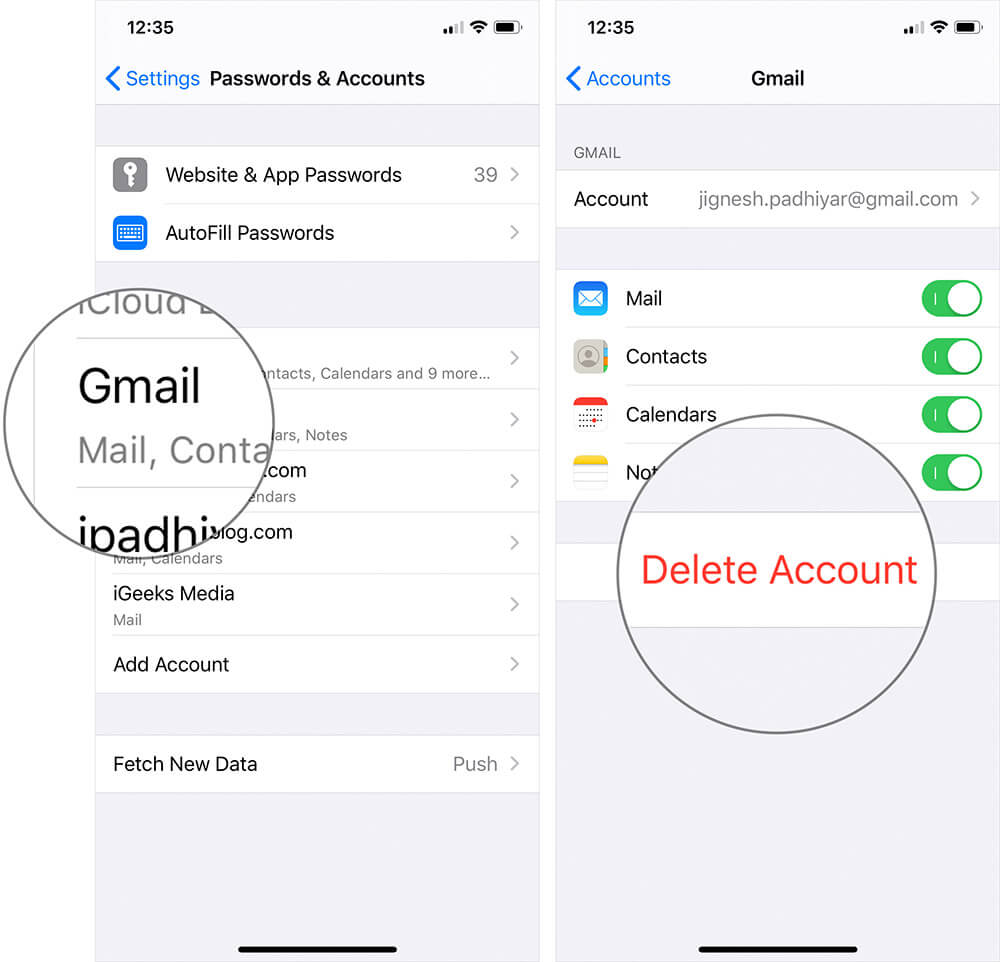
You will be asked to confirm your action.
Become an iGeeksBlog Premium member and access our content ad-free with additional perks.
Step #3. Tap on “Delete from My iPhone.”
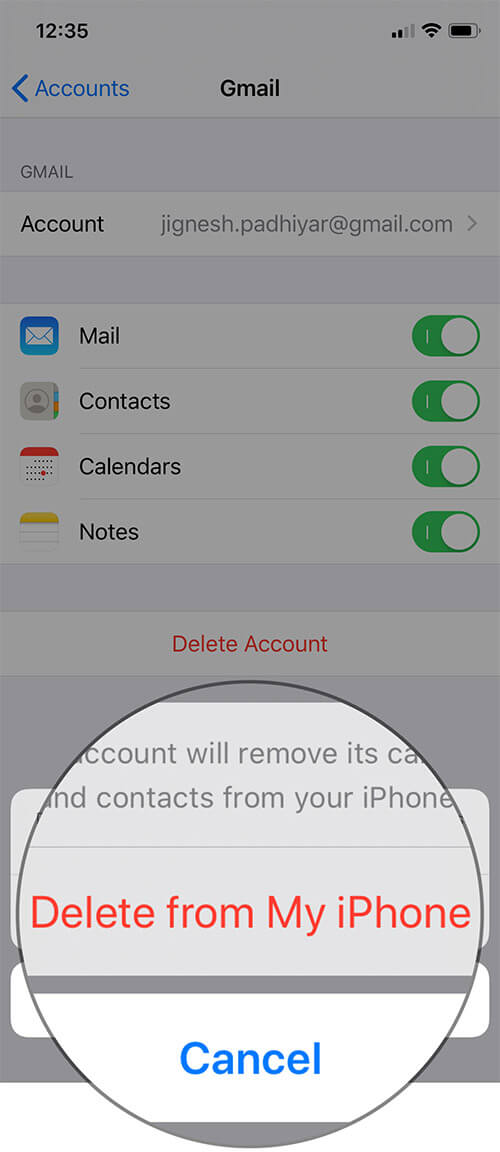
Your email account will be deleted for good. Now you can add the same email account to your iPhone.
Follow the first two steps as mentioned above.
Step #4. Tap on Add Account option. Choose which account you want to add from the list of email providers.
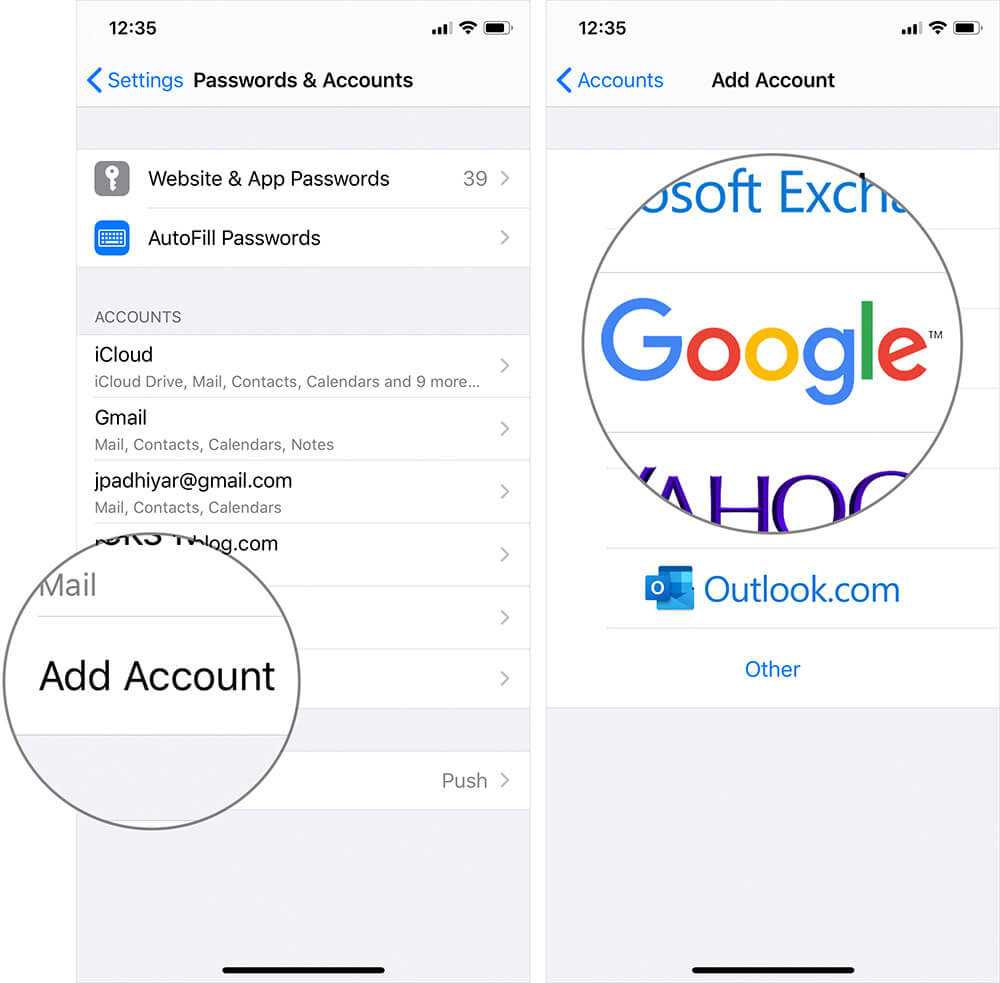
Step #5. Login with your email id and password.
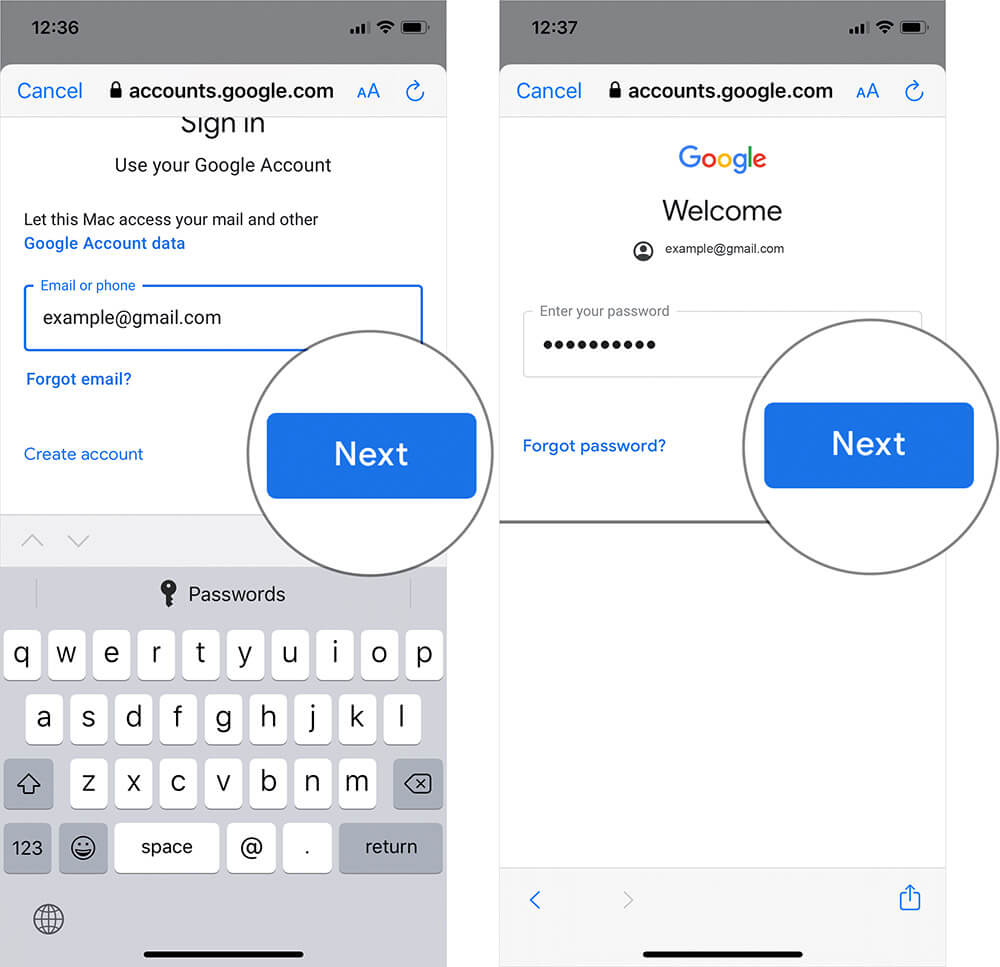
Now check the inbox in your email account, which should now be working well.
Configure server, port, and authentication options manually
It has sometimes been noticed that email server doesn’t give you entry for two reasons: your ISP is blocking some ports or the incoming and outgoing server settings are incorrect.
In this situation, you can fix the problem by configuring the server, port and authentication options manually. Follow the steps mentioned below:
Step #1. Open the Settings app on your iPhone → Scroll down and tap on Passwords & Accounts.
Step #2. Now tap on the email account that has issues → Next, tap on Account option → Tap on SMTP which is right under the OUTGOING MAIL SERVER section → Now tap on Gmail SMTP Server.
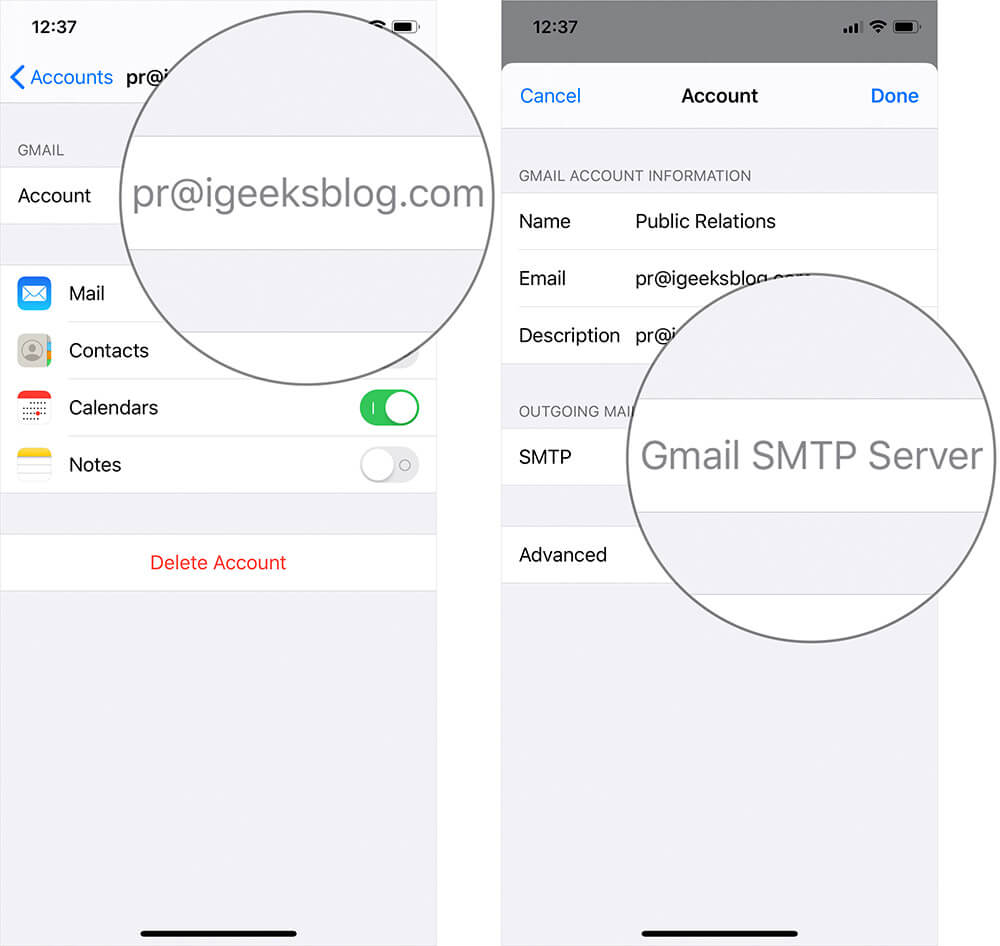
Step #3. Turn it Off to fill the details manually.
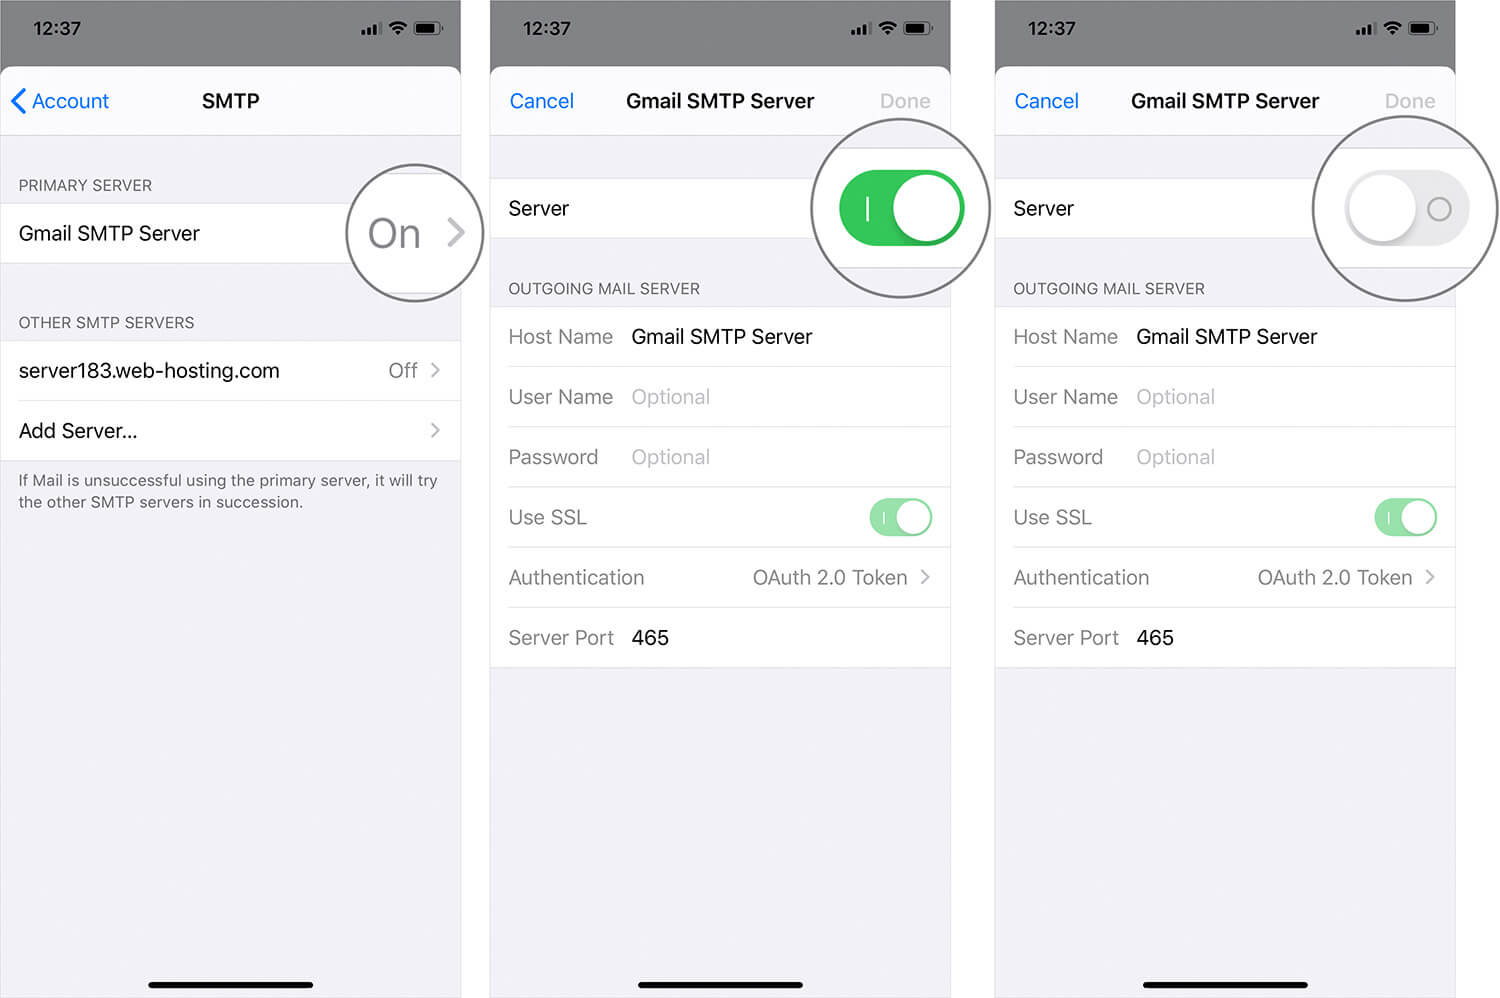
Step #4. Under the OUTGOING MAIL SERVER section, fill in necessary details before Host Name (server address), Username (email id), Password, SSL, Authentication, and Server Port.
Once you fill in the details for the OUTGOING MAIL SERVER, it is time to fill in details of INCOMING SETTINGS.
Follow the first three steps as mentioned above.
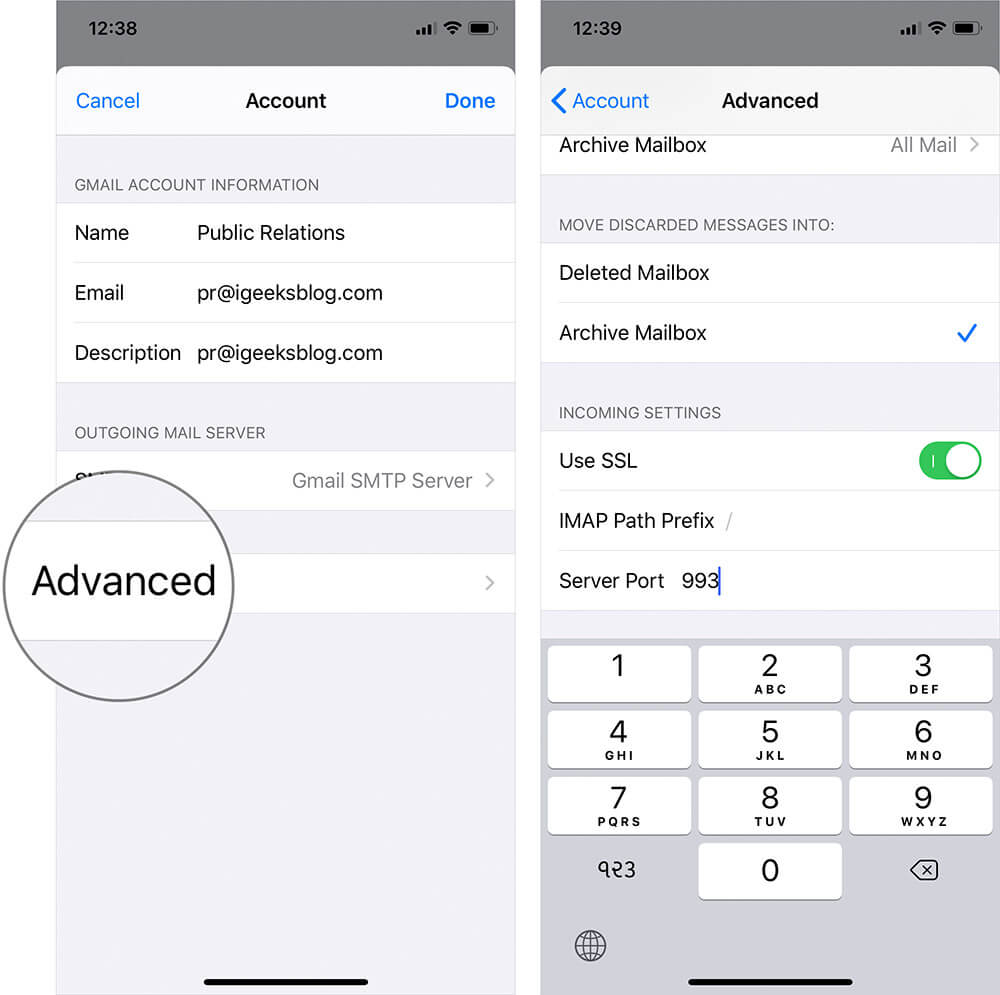
Step #5. Tap on Advanced option. You will find four major sections on the screen now. You need to pay attention to the INCOMING SETTINGS section. Adjust the SSL, IMAP Path Prefix and Server Port number.
Once everything is done, just quit the Settings app from app switcher and open the Mail app on your iPhone to check the inbox, which should be working properly now!

