Having the same wallpaper all day, every day, is boring. I also got bored of manually changing my wallpaper daily, so I started to dig in. And thankfully found a feature where you can automatically change the wallpaper on your Mac.

Interestingly, you do not need third-party apps to change the wallpaper automatically. And rest assured, as the process isn’t very tedious, you also get fresh new wallpaper daily (or every hour). There are just two key steps involved, make a folder of wallpapers you want and then put them in automatic rotation.
Here’s how to make the wallpapers change automatically on your macOS device.
- Create a folder for automatic wallpaper change on Mac
- Change Mac wallpapers automatically through System Settings or Preferences
Create a folder for automatic wallpaper change on Mac
Now, there are two methods to do so:
1. Use the Photos app to create a wallpapers folder
Here’s what you need to do if you sync images between iPhone or Mac or if the wallpapers are stored in the Photos app.
- Open Photos app on Mac.
- Select the images you want to set as wallpaper and secondary click (right click).
- Click Add to → New Album.
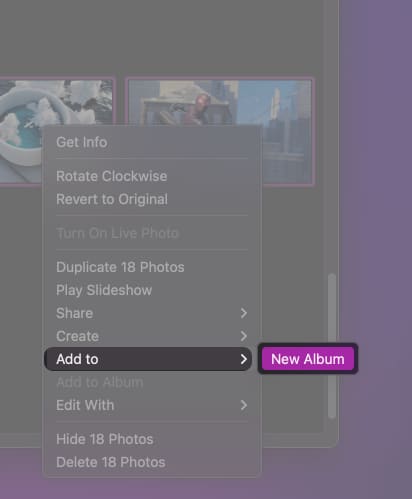
- You will find a new album under My Albums.
- Rename and save the album.
Note: If you want to add more images to the Photos app, simply select the photos → secondary click (right click) → Click Share → Add to Photos.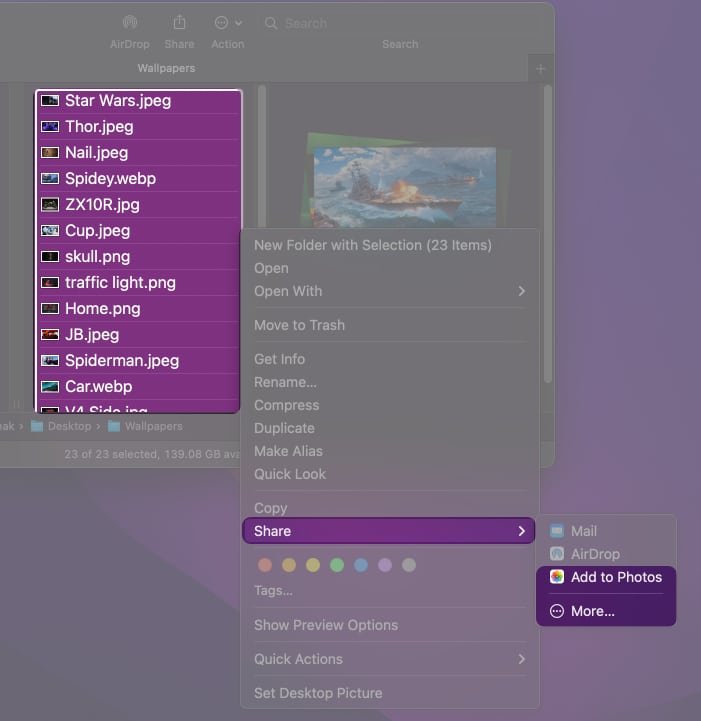
2. Create a wallpaper folder on Mac
- Select all the images you want to use as wallpaper and add them to one folder.
- Place the folder wherever you want, but remember the path of the folder as it will be essential in the next step.
Change Mac wallpapers automatically through System Settings or Preferences
Notably, Apple has made some major changes to System Preferences in macOS Ventura. Thus the steps would vary according to which OS you’re currently using. Here’s a thorough guide to both.
Become an iGeeksBlog Premium member and access our content ad-free with additional perks.
Automate Mac wallpapers when using macOS Ventura
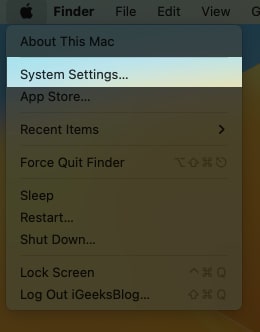
- Click the Apple logo at the top right corner of the screen and select System Settings.
- Scroll down to the Wallpaper section.
- Click Add Folder or Add Photo Album, depending on your previous steps. (you might have to scroll down).
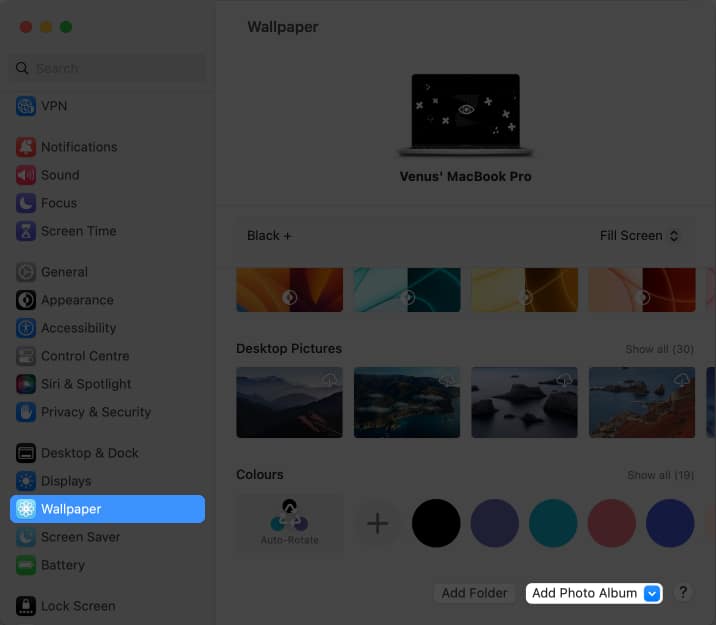
- Select the folder/album created in the previous step.
- Click Choose.
- Now click Auto-Rotate (the first image in the album).
- From the Change Picture option, select the time interval you want.
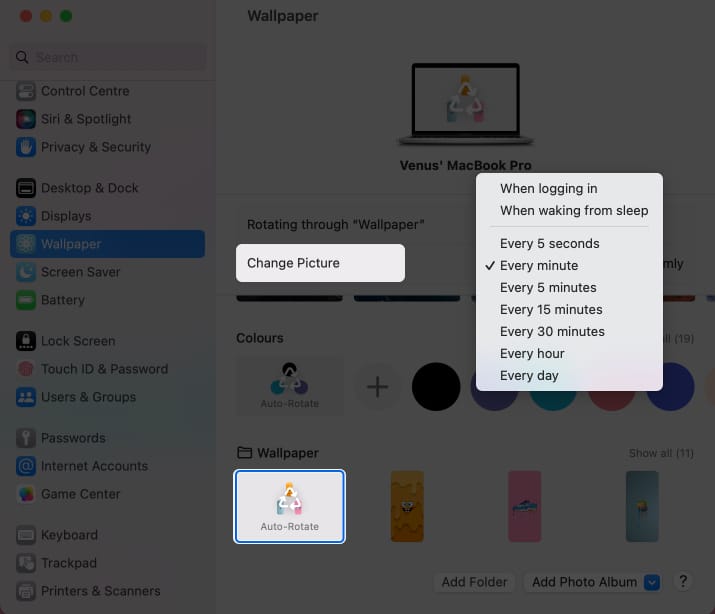
- Also, check Randomly.
How to change wallpapers automatically in macOS Monterey or earlier
- Click the Apple logo → System Preferences.
- Select the Desktop & Screen Saver option.
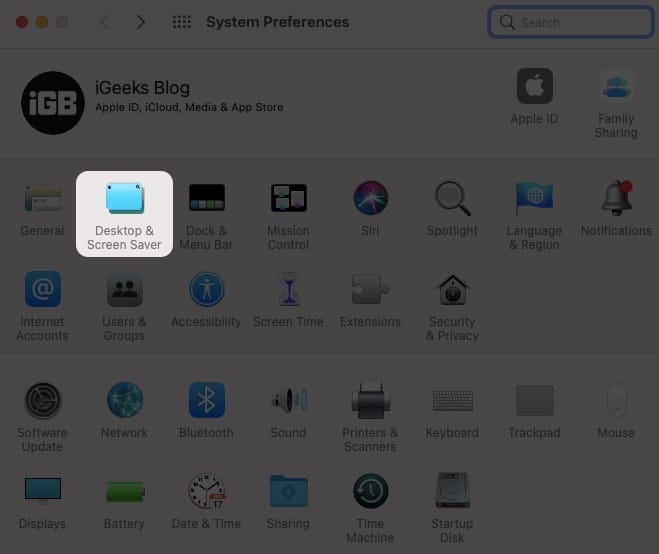
- Here,
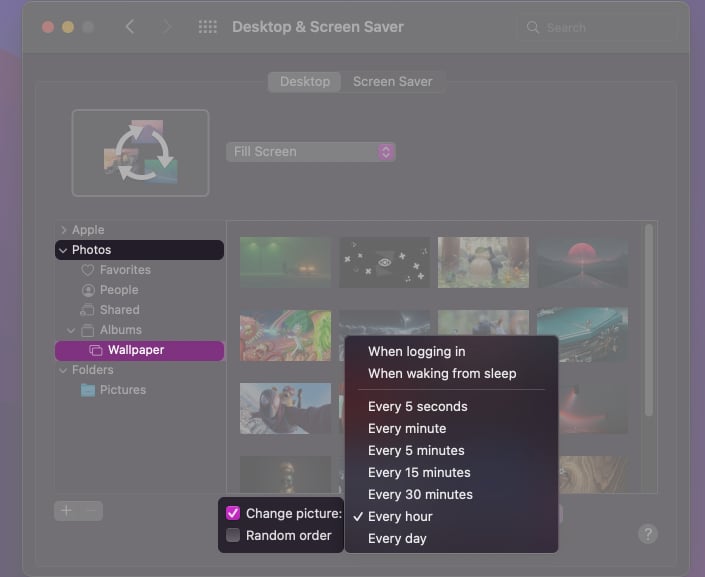
- Select Photos → Under the Albums section, select the wallpapers album.
- Select Folders →plus + icon → select the wallpaper folder.
- Click Choose.
- Now, select the “Change picture:” checkbox and then select the frequency by opening the drop-down list beside it.
- You can also select the checkbox that reads “Random Order.”
Thanks to automatic syncing, whatever images you add to the wallpaper album will also be added to the list of images to be set as wallpaper.
I hope you followed these steps and have successfully set the wallpaper to change automatically on your Mac. If you have any doubts, leave a comment below, and I’ll get back to you with answers as soon as possible.
Read more:
