Key Takeaways
- Immediate actions after dropping AirPods in water: Swiftly clean with a microfiber cloth, tip upside down to drain excess water, and use Siri or a shortcut to eject water without inserting it into your ears.
- Effective Drying Techniques: Forget rice; opt for desiccant or silica gel packets, place AirPods upside down in a warm space, check the sound quality after 24 hours, and consider a replacement if issues persist.
- Understand the IP ratings: Older AirPods lack water resistance, while newer models like AirPods Pro offer varying levels, but none are fully waterproof.
When the sun is out, you might enjoy yourself in the water. Unfortunately, dropping your AirPods in water might ruin your beautiful day.
If you panic and put your AirPods and the charging case in a bag of rice, then you’re doing it wrong. This guide will tell you what to do if you drop your AirPods in water. So, let’s not waste any time and get on with it.
Water resistance vs. waterproof
Apple has released six AirPods models to this date, and the AirPods 1st and 2nd generations and AirPods Max don’t have any IP rating. However, you get to see IPX4 water and sweat resistance on the AirPods Pro, 2nd-generation AirPods Pro, and 3rd-generation AirPods. Also, we can assume that the upcoming AirPods models will have water and sweat resistance.
The IP rating signifies if a product can withstand dust and water on different levels. That said, there’s a difference between water resistance and waterproofing. Water resistance can prevent water from getting inside the product, whereas waterproofing indicates the product withstands extended periods of submersion in water.
AirPods with water and sweat resistance can resist water splashes but can’t stop water from getting inside since they aren’t waterproof or sweatproof. Furthermore, the resistance decreases with regular usage as the seals get weaker over time.
When it comes to charging options, no charging cases are water resistant, except the 3rd-generation AirPods’ charging case, which is water and sweat-resistant.
Note: You can’t claim a warranty (not even Apple Care+) if your AirPods get liquid damage.
What to do if you dropped your AirPods in water?
Now that you’ve understood the difference between water resistance and waterproofing, let’s look at the first things you need to do right after your AirPods fall into the water.
1. Clean them with a microfiber cloth
As soon as you take the AirPods out of the water, you’ll need to clean them with a dry cloth; it could be a dry towel, a microfiber cloth (recommended), or a napkin.
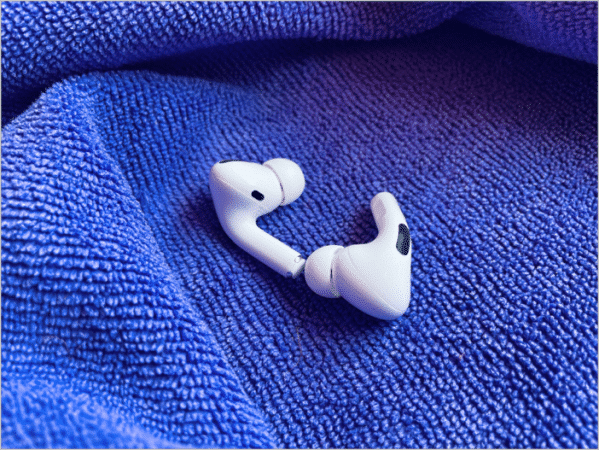
However, you should use a slightly moist cloth if juices or something similar fall on your AirPods. Remember to clean only their surface and not push the water inside; otherwise, the chance for damage will increase.
You can also take a cotton swab and clean the AirPods charging case with little to no pressure. Also, don’t insert anything pointy inside the charging port since it houses tiny connectors required for charging.
2. Tip the AirPods and the charging case upside down
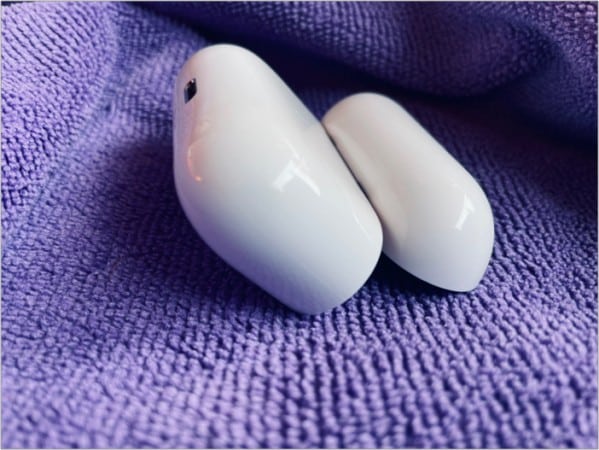
If you dropped your AirPods charging case along with the AirPods, placing them upside down with the lid open and not touching it for a few hours is best. Doing this will drip the excess water from the AirPods case.
3. Eject water from AirPods using Siri or other tools
Before ejecting water from your AirPods, remove the silicon tips if you’ve AirPods Pro and change a few AirPods settings.
- Connect AirPods to your iPhone.
- Open Settings on your iPhone.
- Select Bluetooth from the list.
- Tap the “i” button next to your AirPods.
- Turn off the Automatic Ear Detection toggle. If you’ve AirPods Pro, set it to Transparency mode.
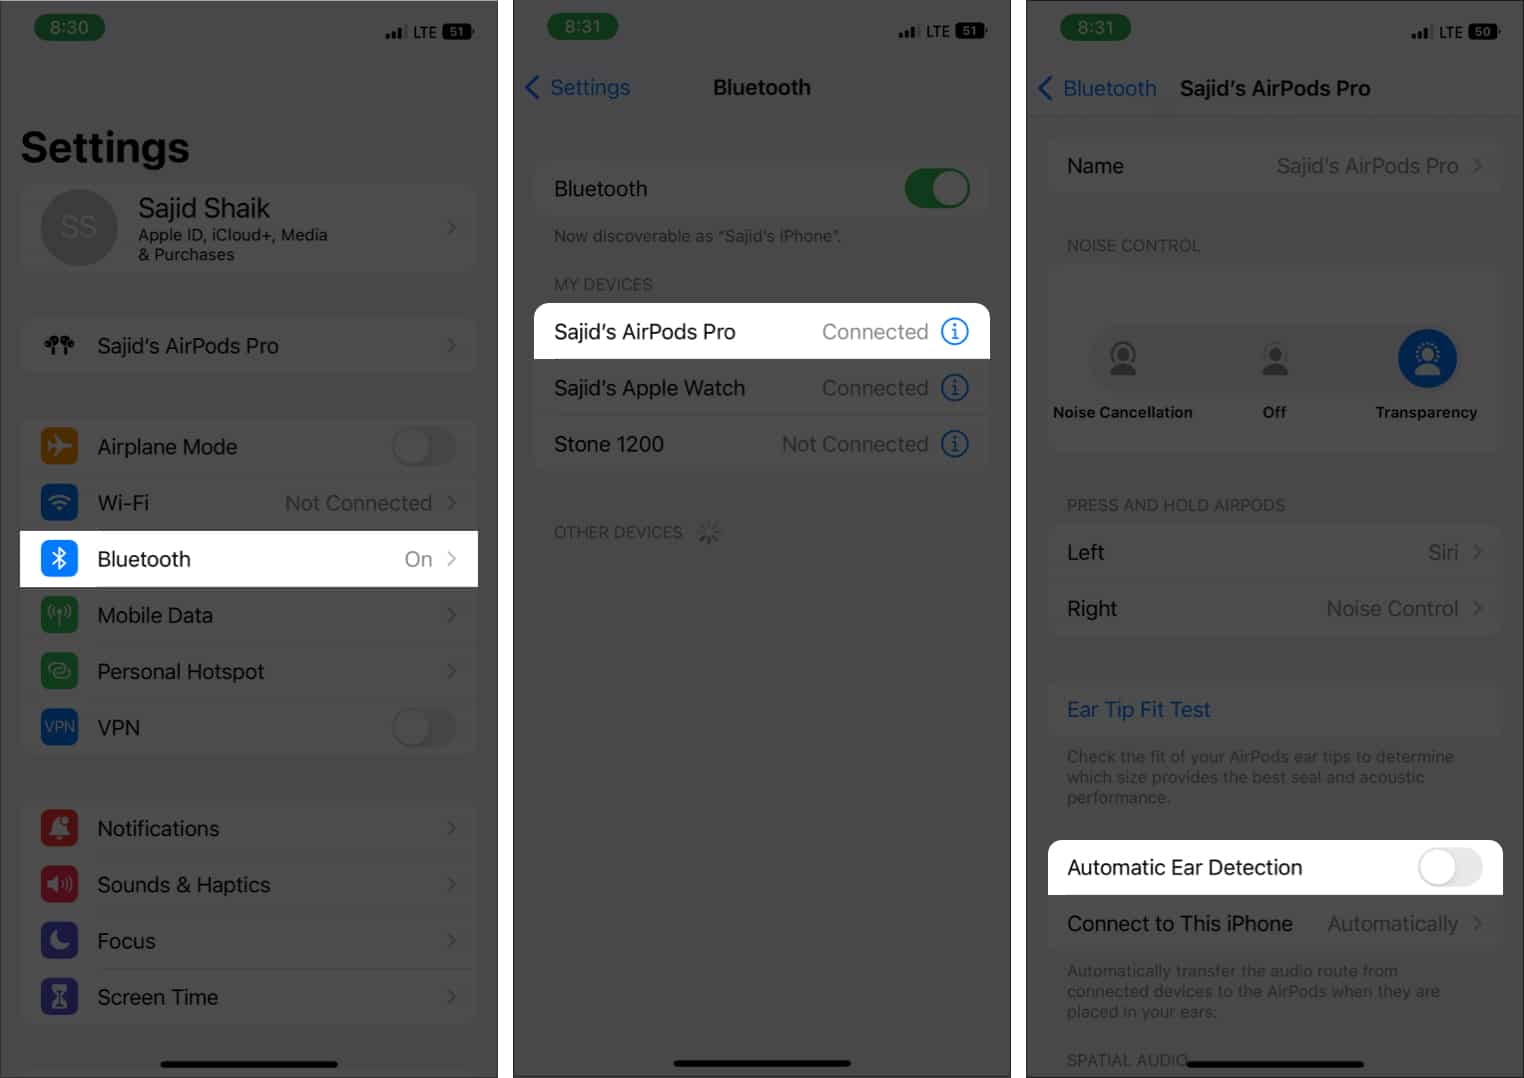
Remove the AirPods from your ear and keep them aside. There’s a way to eject water from your AirPods: the Siri shortcut.
Caution: Don’t insert the AirPods in your ears when ejecting water. The high-frequency audio might damage your ears, and the water discharged from your AirPods can cause ear infections.
Become an iGeeksBlog Premium member and access our content ad-free with additional perks.
Using Siri to eject water
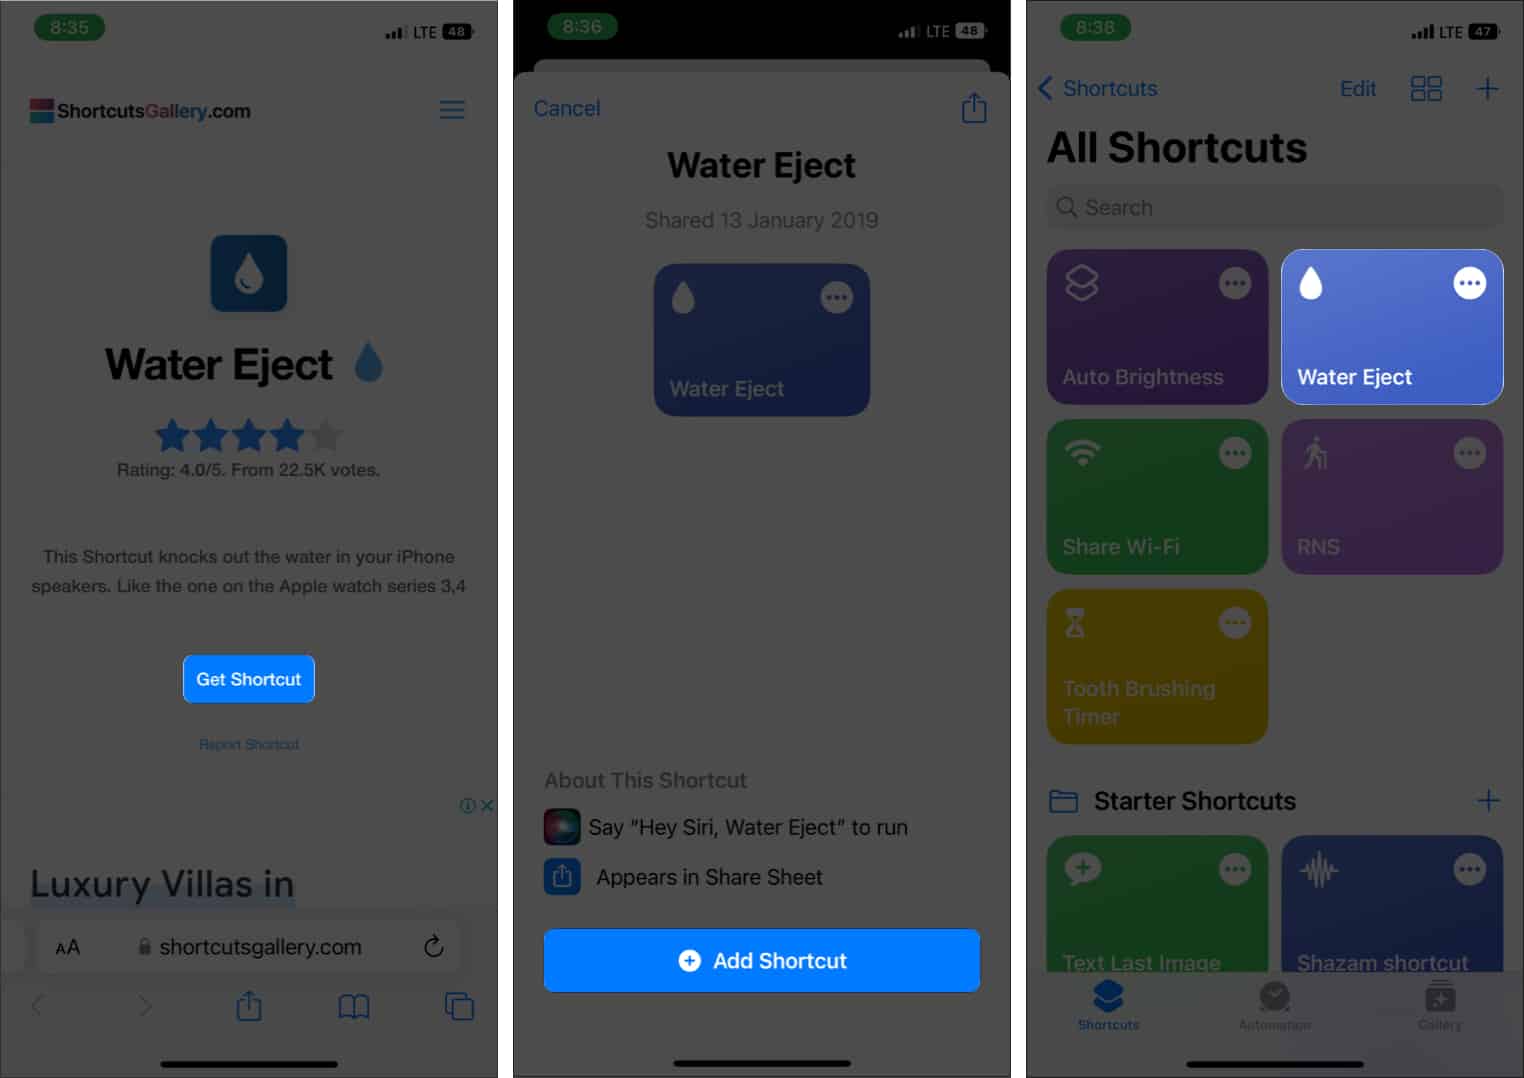
- Go to this page on your iPhone and tap the Get Shortcut button. The Shortcuts app will automatically open on your iPhone.
- Tap the Add Shortcut button to add it to your Siri shortcuts app.
- Go to the Shortcuts tab and then tap the Water Eject shortcut.
- Tap Begin Water Ejection from the options.
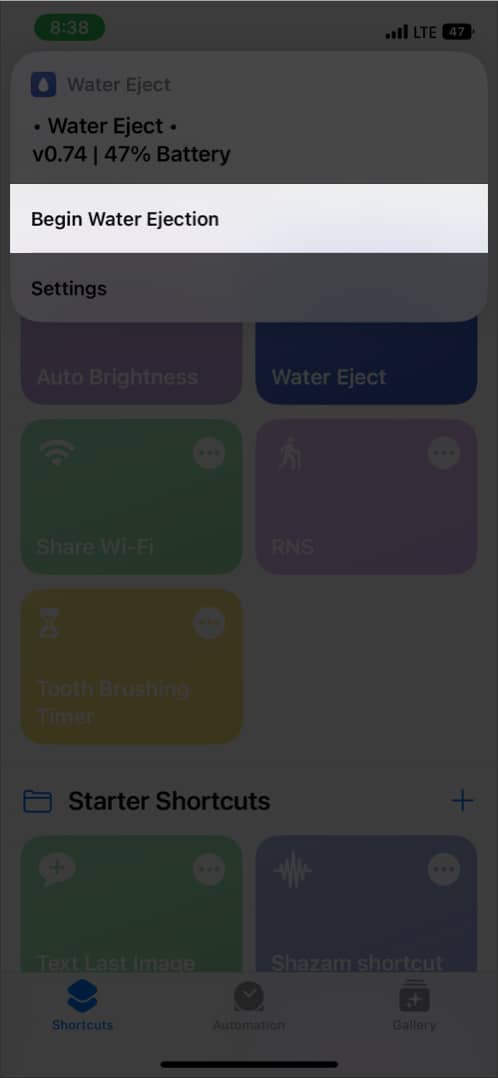
You’ll hear a sound from your AirPods for about 12 seconds, and it will eject water. Alternatively, you can invoke Siri and say, “Water eject,” and it’ll run this shortcut.
4. Dry the AirPods with desiccant/silica gel packets
You’ll do more harm than good if you plan to put your AirPods in uncooked rice because dust, starch, and even tiny grains of rice can get into your AirPods and cause more problems further.

Instead, you can use desiccant or silica gel packets to dry the remaining moisture from your AirPods and leave them for a day. They can even absorb a tiny amount of water, and that’s why you see them in some devices’ packaging.
If you don’t find silica gel packets, you can get some crystal-based cat litter from a pet store comprising the same component as silica gel.
5. Put them under a fan or slightly warm environment
You can place your AirPods under a fan or in a slightly warm room to let them dry faster. As mentioned above, put them upside down to allow sufficient airflow.
It would be best if you didn’t overheat them, or it’ll damage your AirPods permanently. Also, avoid putting them under direct sunlight or in a microwave oven.
6. Check the sound quality of AirPods
After drying your AirPods for 24 hours or more, you should check your AirPods to see if they’re working or not. Connect them to your Apple devices using Bluetooth and listen to a few of your favorite songs.
If they sound right, you’re good to go, but I recommend you not use them for another day to eliminate any leftover moisture in your AirPods.
7. Replace AirPods if still not working
Your hopes are pretty limited if your AirPods aren’t working even after all these steps. You can wait another day or two to see if they’re working fine; if they aren’t, it’s time to get a replacement.
If you’re confused about which one to get, this AirPods 3rd Gen and AirPods Pro comparison should give you a better idea of two of my favorite devices.
Tips to avoid water damage in AirPods
If you want to ensure that your AirPods don’t suffer water damage, follow these recommendations below.
- Don’t take your AirPods with you when you’re going to swim or anywhere close to the water. Also, never take them out in the rain.
- Empty the pockets of your jeans, pants, or shirts before getting them to the laundry.
- Don’t keep the AirPods close to any spillable liquids like water, juice, coffee, or anything spillable.
- Get a waterproof case for AirPods. You can also get waterproof cases for your AirPods Pro if you have those. Remember that it’ll protect your AirPods only if the lid is closed. Water can still enter when the lid is open.
- Don’t take or wear your AirPods into a steam or sauna room to avoid the steam getting inside your AirPods.
Wrapping up…
AirPods are a great companion to your Apple devices for listening to music. These were a few essential things you had to do after dropping your AirPods in the water. Follow the above tips to avoid doing so.
Also, clean your AirPods regularly before putting them into the case. Get Apple Care+ for your AirPods if you want to worry less about them.
Read more:
