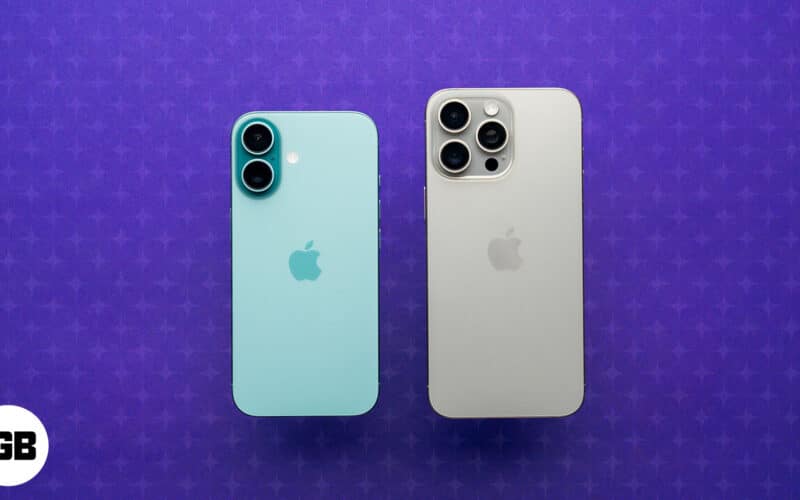
So you finally switched to an iPhone? Welcome! This is your quick start guide to make the most of your precious new device. We’ll cover the top tips for new iPhone users, helpful things to know, and much more.
On the surface, an iPhone is just another smartphone, but inside, it’s packed with unique features that you’ll want to take advantage of. Let’s get right into it and check out some of the best tips for new iPhone users.
- Set up Apple ID
- Enable Find My
- Set up Medical ID
- Customize control center
- Get familiar with Siri
- Set up Focus (iOS 15)
- Scroll less
- Use Spotlight search
- Type smarter
- Explore accessibility settings
- Use AirDrop
- Mute camera shutter sound
- Use trackpad
- Delete numbers in the calculator app
- Search within a webpage using Safari
1. Set up Apple ID
When you first set up your new iPhone, you will be prompted to create your Apple ID. This free account lets you buy content from the App Store and use your iPhone’s awesome features like iMessage, FaceTime, iCloud, FindMyPhone, Apple Music, etc.
Although it’s not mandatory to make an Apple ID, you won’t get much use out of your iPhone without it, so it’s essential to set it up first. If needed, you can check out our article on creating an Apple ID.
2. Enable Find My
Safety first! iPhones come with a built-in security feature that tracks you down or remotely wipes the device if it gets lost or stolen. This is known as Find My, and it’s part of the standard iPhone set-up process after creating your Apple ID. In case you need to do it separately, read our detailed guide about using Find My.
3. Set up Medical ID
Life is unpredictable, and you never know when an emergency can happen. The Medical ID on your iPhone stores vital information about your health that can be useful for first responders if you have a medical emergency.
For instance, it can include details about your allergies, medications you take, and emergency contacts. Since it can be a potentially life-saving feature, check out our guide to using Medical ID.
4. Customize Control Center
The Control Center is a handy quick-access area on your iPhone. To open the Control Center, swipe down from the top-right corner on a device with FaceID or swipe up from the screen’s bottom on a device with Touch ID.
From here, you can perform specific common actions with a tap, and the best part is you can customize it to suit your needs. For instance, you can use the Control Center to turn Wi-Fi on or off, switch the Wi-Fi network, control media, turn on or off the flashlight, adjust the screen brightness, etc.
For all the details, check out our ultimate guide to using the Control Center.
5. Get familiar with Siri
Siri is one of the most prominent iPhone features. This personal assistant can help you by responding to all your questions and fetching any information you need. You will be guided to set up Siri when you first set up your phone but can also do it later by going to Settings → Siri & Search.
One of my favorite Siri features is called Speak Selection. This makes the voice assistant read out highlighted text to you from a webpage, message app, etc.
To enable this feature, go to Settings → Accessibility → Spoken Content → toggle on Speak Selection.
After this, you will see a Speak option when you highlight some text. This can be pretty nifty when you’re reading long articles or books on your phone.
6. Set up Focus (iOS 15)
iOS 15 is packed with great features, and my favorite is Focus. This reinvents the Do Not Disturb functionality on your phone to provide greater customization. It allows you to set up different modes such as Work, Driving, Gaming, etc., and you can customize which alerts to see when any given mode is activated.
So, for instance, I’ve set up my Work mode to only allow notifications from my work apps and calls from coworkers. This prevents unnecessary interruptions and distractions so that I can concentrate on getting things done.
Read our article about how to use Focus mode to set it up on your iPhone.
7. Scroll less
Do you ever scroll so much that it takes ages to return to the screen’s top? Well, here’s one of the best iPhone tips every new user should know. Just tap at the screen’s top, and you will automatically return to the top of whatever you’re scrolling through. Pretty nifty!
8. Use Spotlight search
Spotlight makes it super easy to find what you’re looking for on your iPhone. It can be a game-changer once you master how to use it. For instance, you can use Spotlight to quickly find events on your calendar, files, apps, tv shows, etc. Moreover, you can use it to search for objects, places, animals, and even text in the Photos app.
Read our article on Spotlight to learn more about this handy feature that every new iPhone user will love.
9. Type smarter
One of the coolest things about the iPhone keyboard is the text replacement feature. You can use this to create shortcuts for typing longer phrases. For instance, if you type “omw,” it will automatically become “On my way!” That one’s already set up by default, but you can create more of your own.
Here’s how to customize text replacement:
- Go to Settings → General → Keyboard.
- Tap Text Replacement.
- Tap the + icon at the top.
- Type in the full phrase and the shortcut to it.
You can also use this feature to make it easier to find certain emojis. For instance, if you love using the smiley with sunglasses, you can name it coalface. Now, whenever you type this, it will automatically add the emoji without searching for it.
Another thing you shouldn’t miss is adding the emoji keyboard. This can be done when first setting up your device or anytime using the steps below:
- Go to Settings → General → Keyboard → Keyboards.
- Tap on Add New Keyboard..
- Choose Emoji and you’re done!
Don’t miss our article on the best iPhone keyboard tips for more helpful information like this.
10. Explore Accessibility settings
iOS has some great accessibility features that make it easier to use your iPhone more comfortably. For instance, there’s AssistiveTouch. When enabled, this displays a floating button on the screen, which you can use for numerous shortcuts such as taking screenshots, accessing the Notification Center, etc.
You can customize Assistive Touch in Settings → Accessibility → Touch → AssistiveTouch.
Then, there’s Guided Access that restricts users to a specific app. It’s particularly handy when a child is using your phone.
Once the feature is enabled, you can restrict actions like using the Sleep/Wake Button, Volume Buttons, the Motion button, Keyboards, and Touch. Further, you can also restrict certain areas on the screen by drawing a pattern around the portion you want to block. You can learn more about this in our detailed Guided Access article.
Another handy accessibility feature is Shake to Undo. This lets you quickly delete any text you’ve typed so that you can start from scratch. For instance, if you’ve written a long text message but want to get rid of it, just shake your phone a bit and a dialog will pop up asking if you want to undo typing.
Note that you can enable or disable this feature by going to Settings → Accessibility → Touch.
11. Use AirDrop
Last but not least, I have to mention my personal favorite feature about the Apple ecosystem, AirDrop. This makes it super easy to share files between Apple devices. You can wirelessly share photos, videos, documents, etc., with other iPhones, iPads, or MacBooks nearby and connected to the same Wi-Fi network as your device.
To use this feature, select AirDrop from the share sheet whenever sharing an item. Then, select the device you want to send to.
The recipient can accept or decline the sent item. You can also control who can discover you on AirDrop by going to Settings → General → AirDrop.
12. Mute camera shutter sound
Want to mute the shutter sound when you click pictures? Unfortunately, the iPhone doesn’t have an option for this within the camera settings. But there’s a simple workaround: the mute switch on the side of your iPhone.
When you mute your iPhone, the shutter sound is muted too. Of course, this isn’t a perfect solution, but it’s good enough because you can use the mute switch only when you use the camera and turn it back on after you’re done.
13. Use trackpad
Many of you may not know that iOS comes with a hidden trackpad to make editing text pretty simple. To invoke this super handy feature, all you need to do is press and hold the space bar (or anywhere on the keyboard on a 3D Touch-supported device).
Once you are in the trackpad mode, you can drag your finger to move the cursor. Besides, it will also let you comfortably select text. To find out more about it, head over to our explainer on how to select text using an iPhone keyboard as a trackpad.
14. Delete numbers in the calculator app
I was confounded to see that there is no erase key in the iOS calculator app. This means if you make a mistake typing in numbers for your calculations, you can’t rectify it and will have to start from scratch again.
Although you have the option to use third-party calculator apps, it’s super easy to erase a number you just typed. Simply swipe left or right on the black area where the number appears, and the digits will be erased.
15. Search within a webpage using Safari
Are you a fan of the “Find” option available on a computer? It lets you search for a specific word or phrase on the screen. Well, you can do the same in the Safari browser on your iPhone.
To search for a specific word on a webpage, tap the address bar and type the word you’re looking for. Then scroll down to the “On This Page (x number of matches)” option.
When you tap that result, you will see the Find Keyword bar at the bottom of the website and can use the arrows to skip to wherever the keyword is used.
If you are all set, try these advanced features…
Once you’ve got the basics in place, go ahead and try some iMessage tips or optimize your iCloud experience. Further, learn how to use the Mail app like a pro and make the most of the Notes app. Apart from the default apps, here’s how you can keep your iPhone safe and secure.
And if the iPhone is for kids…
The iPhone is a family-friendly device and offers great parental control options. You can also try third-party parental control apps and use Screen Time to limit how long children spend on certain apps. Further, you can stop kids from buying apps to prevent accidental purchases.
That wraps up the essential things to know for first-time iPhone users. Is there any other information you’d like about using your device? Let me know in the comments below.
You might also like to read: