We all love to create and document memories with our loved ones through photos and videos on our iPhones. But what’s the use of making memories with loved ones when they’re confined to your iPhone?
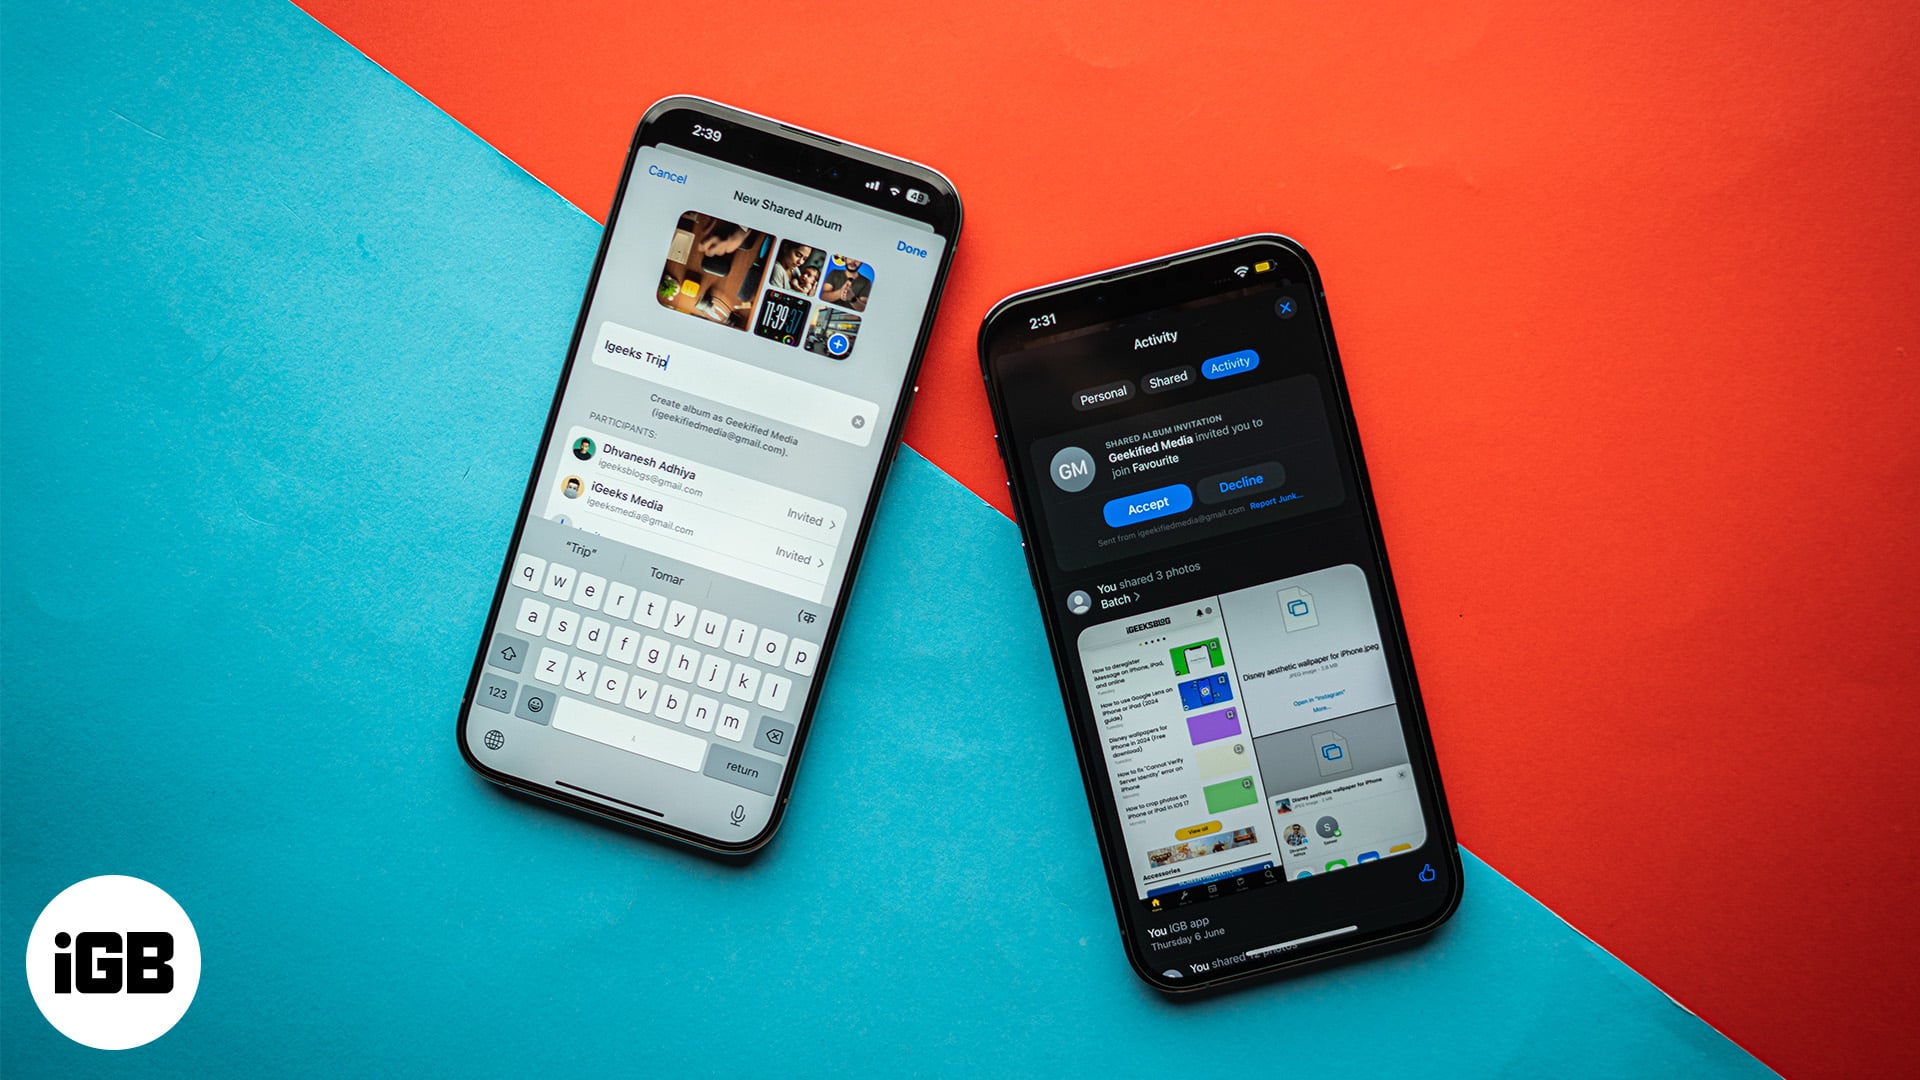
This is exactly where the iCloud Shared Albums feature comes in handy. A Shared Album allows you to share photos and videos and collaborate with participants in real time.
While creating a shared album is easy, accepting the invite to join has countless iPhone users confused. Keep reading to learn how to accept a Shared Album invite on an iPhone and iPad.
To use Shared Albums on your iPhone, you must ensure it’s turned on, as you won’t receive the invite if it isn’t.
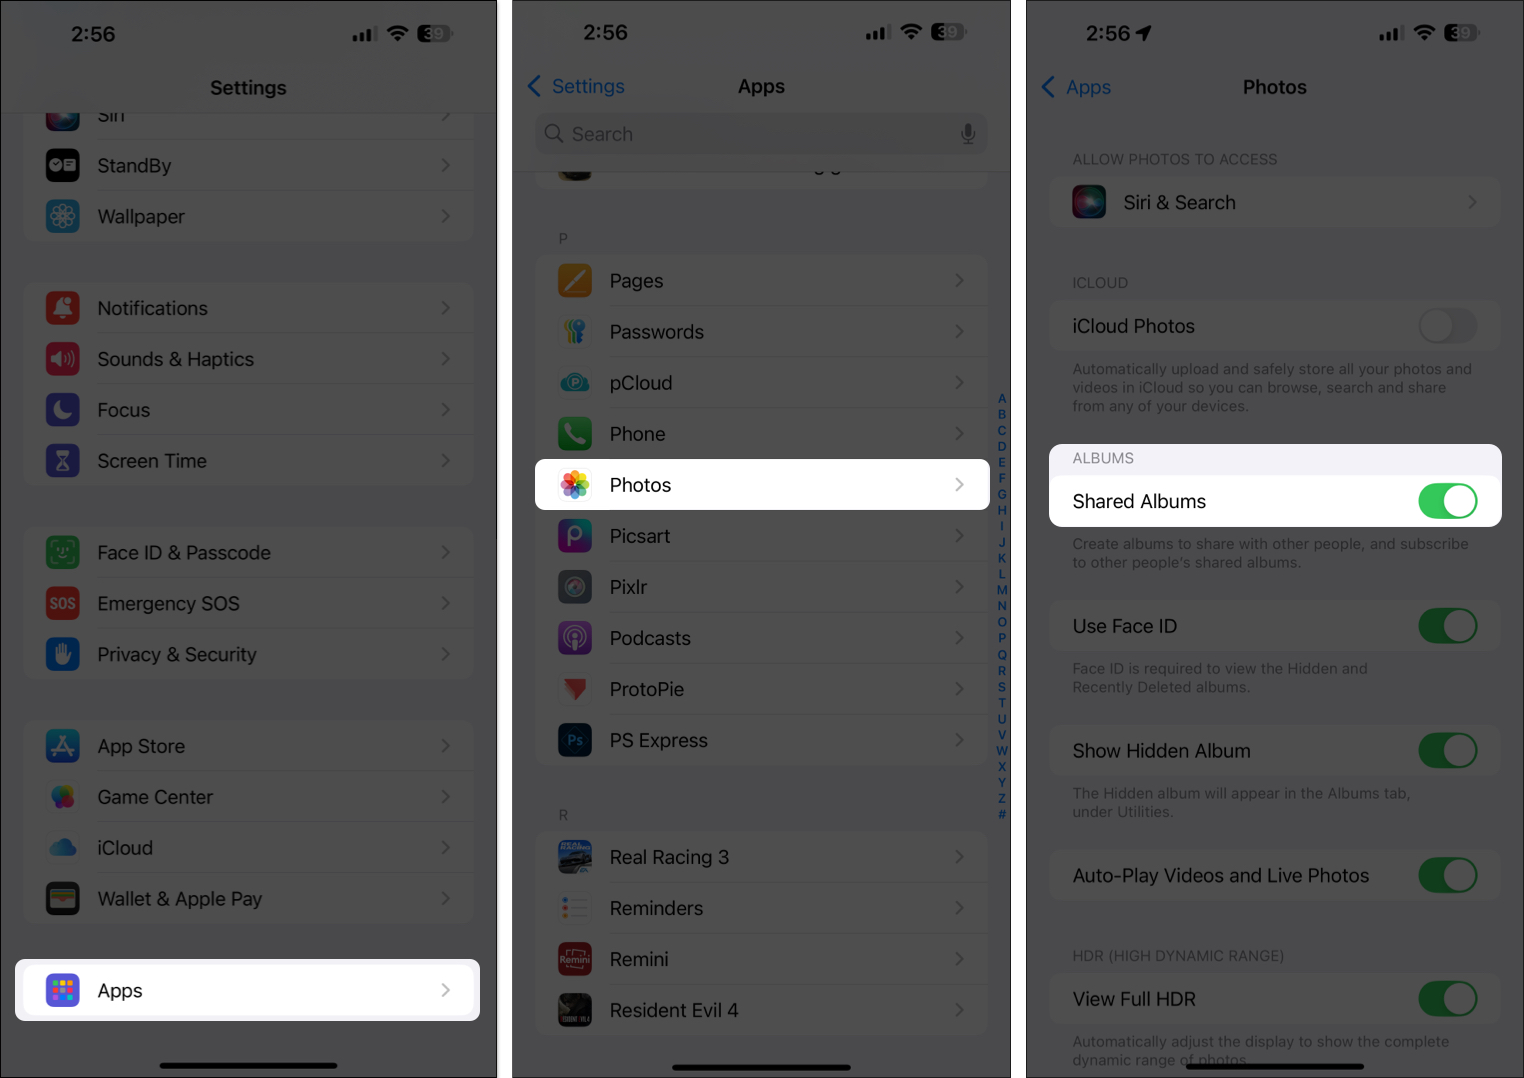
While the feature is turned on by default, it’s possible that you may have turned it off at some point. Here’s how to verify if Shared Albums is turned on and enable it if it isn’t:
- Open the Settings app.
- Scroll down and select Apps.
- Here, locate and tap on Photos.
- Finally, toggle on Shared Albums if it isn’t already.
If you’ve toggled on the Shared Album feature just now, ask your friend to share the invitation to join it again. Once you receive the invitation, you can accept it and start collaborating on it, as shown below.
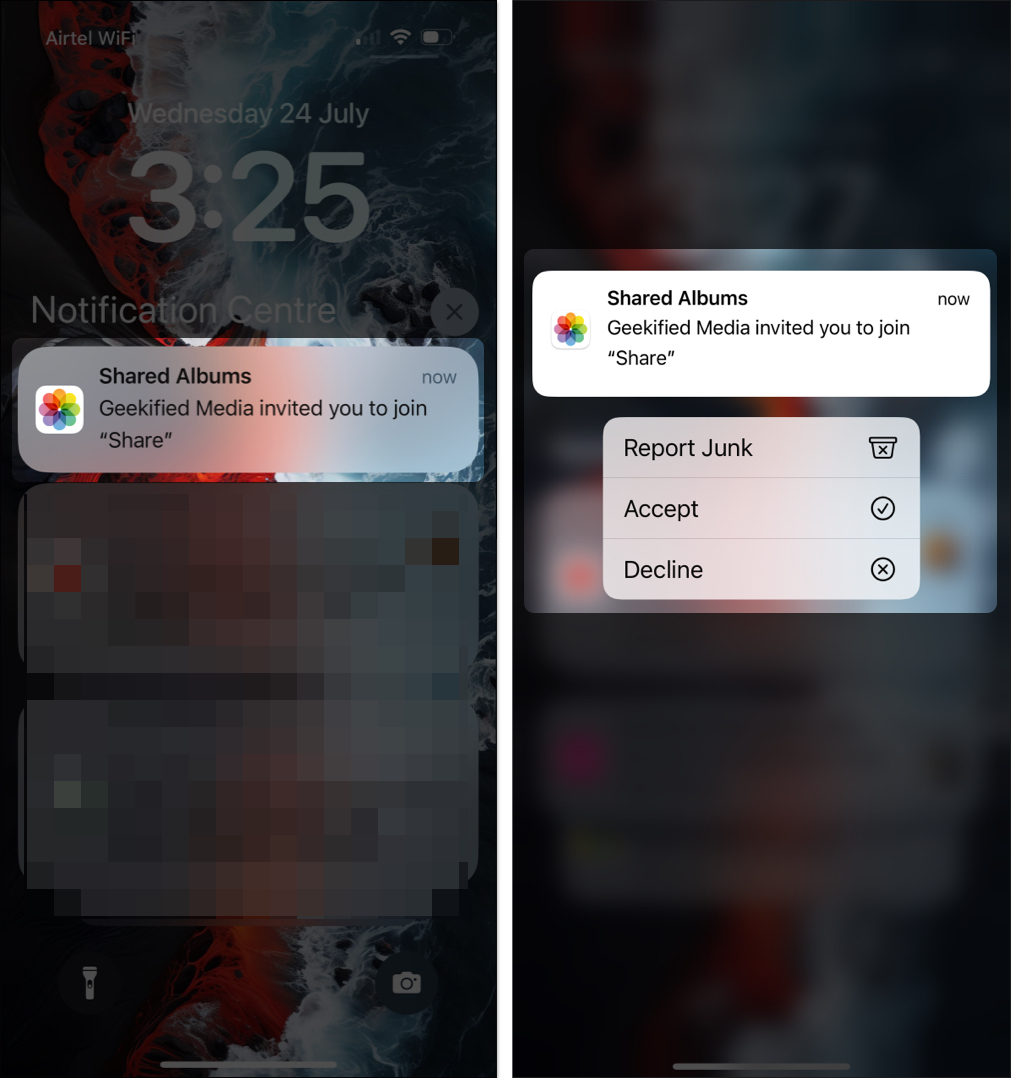
- Swipe down from the top-left of the iPhone screen to access the Notification Center.
- Locate the Shared Album Invite notification and long-press on it.
- Next, tap the Accept button to accept the invitation.
- Alternatively, tap the Decline button if you’re unaware of the person who sent you the invite.
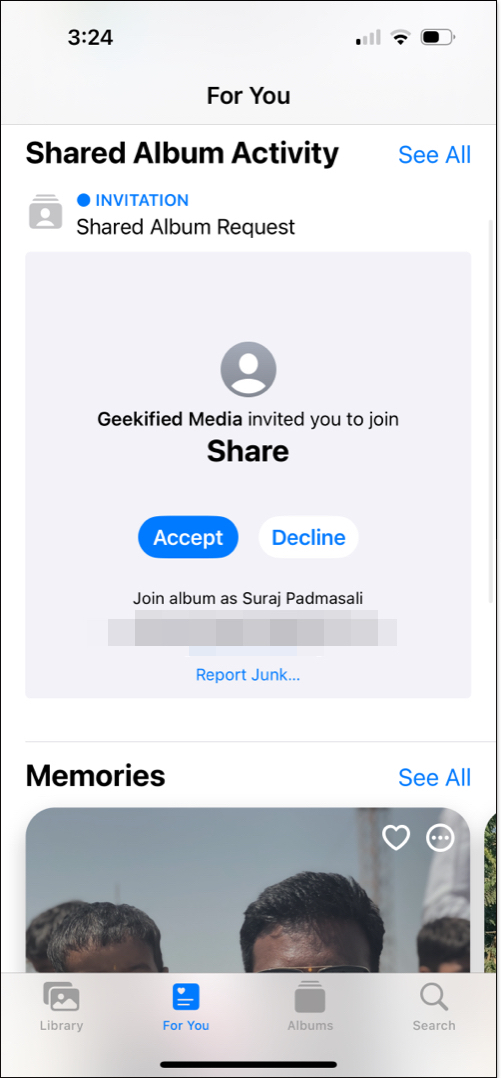
- Open the Photos app and go to the For You tab.
- Scroll down to the Shared Albums section and tap on it to see the Shared Album invite you’ve received.
- Tap the Accept button on the invite to accept the invitation and start collaborating.
iCloud Shared Albums is a great way to engage and collaborate with your loved ones. However, there may come an instance when you may no longer want to be part of a Shared Album. In that case, you can leave the shared photo album like this:
Become an iGeeksBlog Premium member and access our content ad-free with additional perks.
- Open the Photos app and go to the For You tab.
- Scroll down to the Shared Albums section and tap on it.
- Here, select the Shared Album you want to leave.
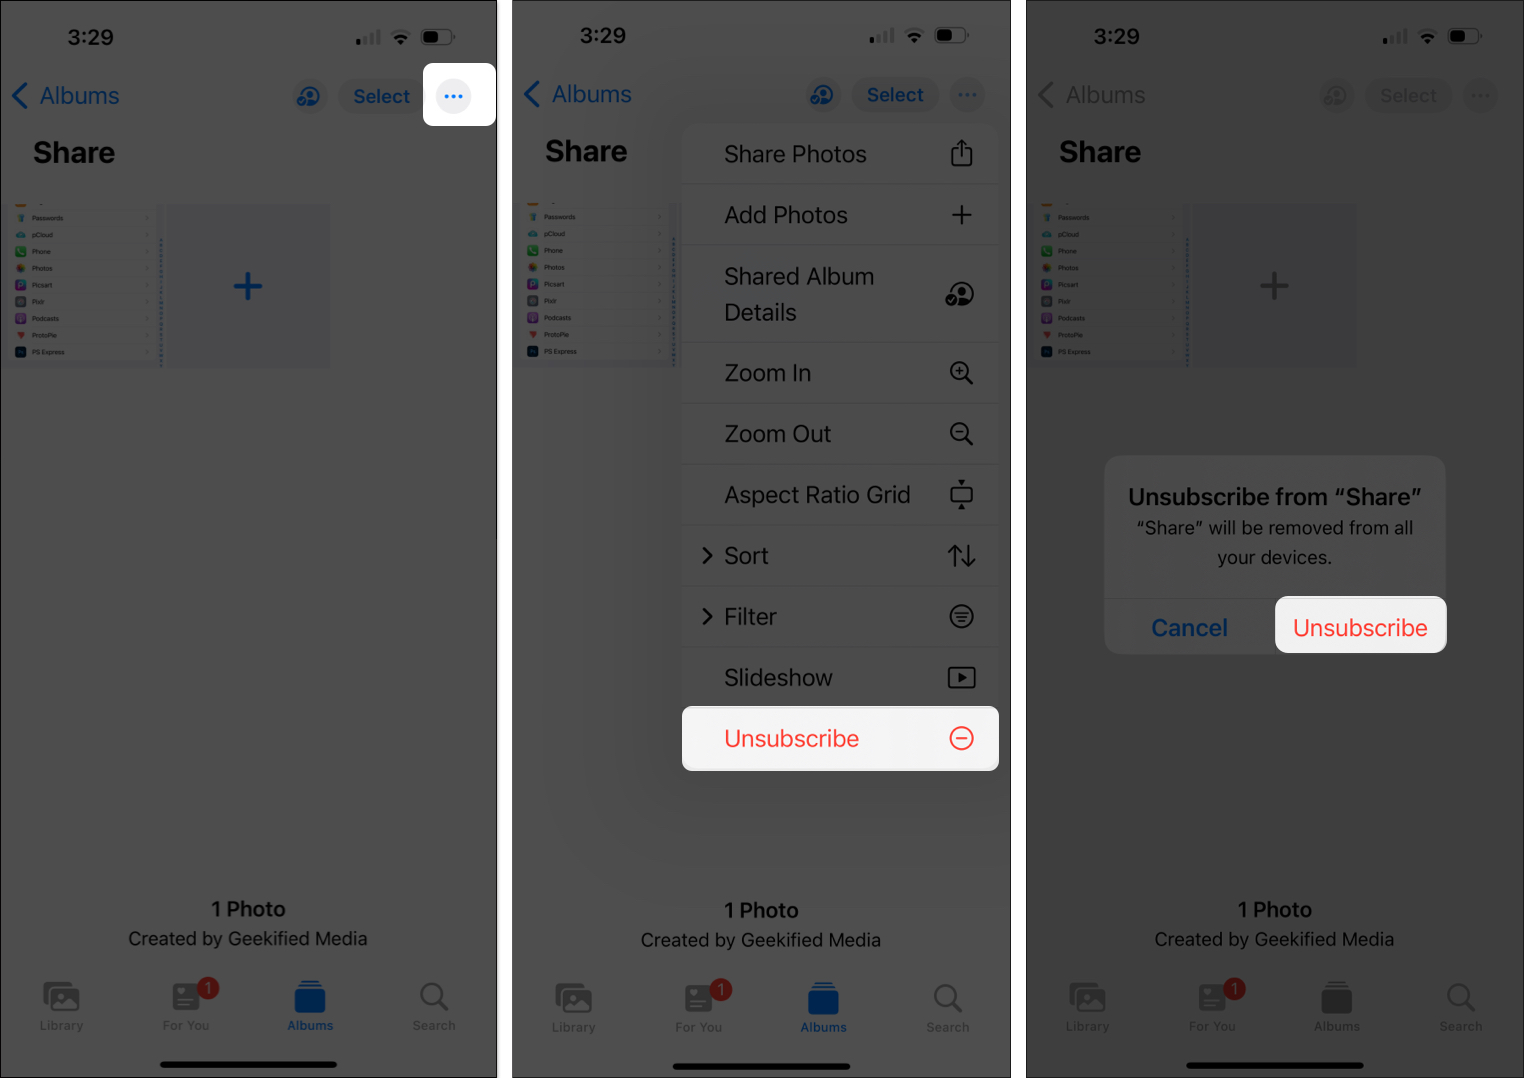
- Tap the three-dot icon button in the top-right corner and select Unsubscribe from the available options.
- Next, tap Unsubscribe again when the confirmation prompt appears to confirm removing yourself from the Shared Album.
Enjoy shared memories…
Now that you know how to accept Shared Album invites on an iPhone, you can see the Shared Album’s contents and leave your comments under photos and videos for everyone to see. In addition, you can also collaborate on the Shared Album by sharing your own photos and videos.
Shared Albums doesn’t just help you collaborate easily with others, but it also ensures you enjoy increased privacy and high-quality images without relying on any third-party apps.
If you still have some questions, feel free to comment below.
If you’re unable to use Shared Albums on your iPhone, make sure you’ve turned on the iCloud Photos feature in the Photos app settings.
You don’t need to accept a Shared Album invite on multiple Apple devices signed in with the same Apple ID. If you’ve turned on iCloud Photos, you’ll see the Shared Album on all your devices.
You’ll need to ask the sender to resend the Shared Album invite.
Yes, you can. All you need to do is head to the Shared Album in the Photos app > People tab and turn on Public Website. This will publish the content in the Shared Album to a public website that anyone with the website link can access.
Read more:
