Key Takeaways
- Alternate Appearance Face ID lets authorized individuals, such as your child or spouse, access your iPhone quickly. You can use this for emergencies or to manage devices you care for.
- To add another person to Face ID on iPhone, Open Settings > Face ID & Passcode, enter your passcode, tap “Set Up an Alternate Appearance,” follow on-screen instructions, and choose whether to set up Face ID with a mask. Remember, you can only have two faces for Face ID and adjust app access in Face ID & Passcode settings.
Wondering if you can set up two Face IDs on your iPhone? You might be considering a major change to your appearance or even setting up Face ID for multiple users on your iPhone. Whatever your reason, we’ll walk you through the steps to add another Face ID on your iPhone.

Why add second Face ID on iPhone?
Have you drastically changed your face’s appearance? Maybe you’ve grown a mustache or shaved off your beard. By setting up another Face ID on your iPhone, you can ensure that your phone recognizes you and allows you access even when you change your appearance or change it back.
You might also want to add person’s Face ID. Maybe you manage your child’s device and want fast access to unlock it. Or, perhaps, you want to allow your significant other quick access to your device in case of an emergency.
Just keep in mind that if you allow another person to set up Face ID on your iPhone, they’ll also have access to your personal information, the ability to make purchases, and can sign into apps that use Face ID.
Things to keep in mind:
- You are only allowed two faces for Face ID on iPhone.
- You can adjust the apps using Face ID by going to Settings → Face ID & Passcode.
- Face ID is available on the iPhone X series and newer.
- Check out our full tutorial if you’re interested in setting up an alternate Face ID while wearing a mask.
How to add a second Face ID on iPhone
If you haven’t set up your initial Face ID yet, you must do so before you can create the alternate appearance. Assuming you already have a Face ID on your iPhone, follow these steps to create a second one.
Become an iGeeksBlog Premium member and access our content ad-free with additional perks.
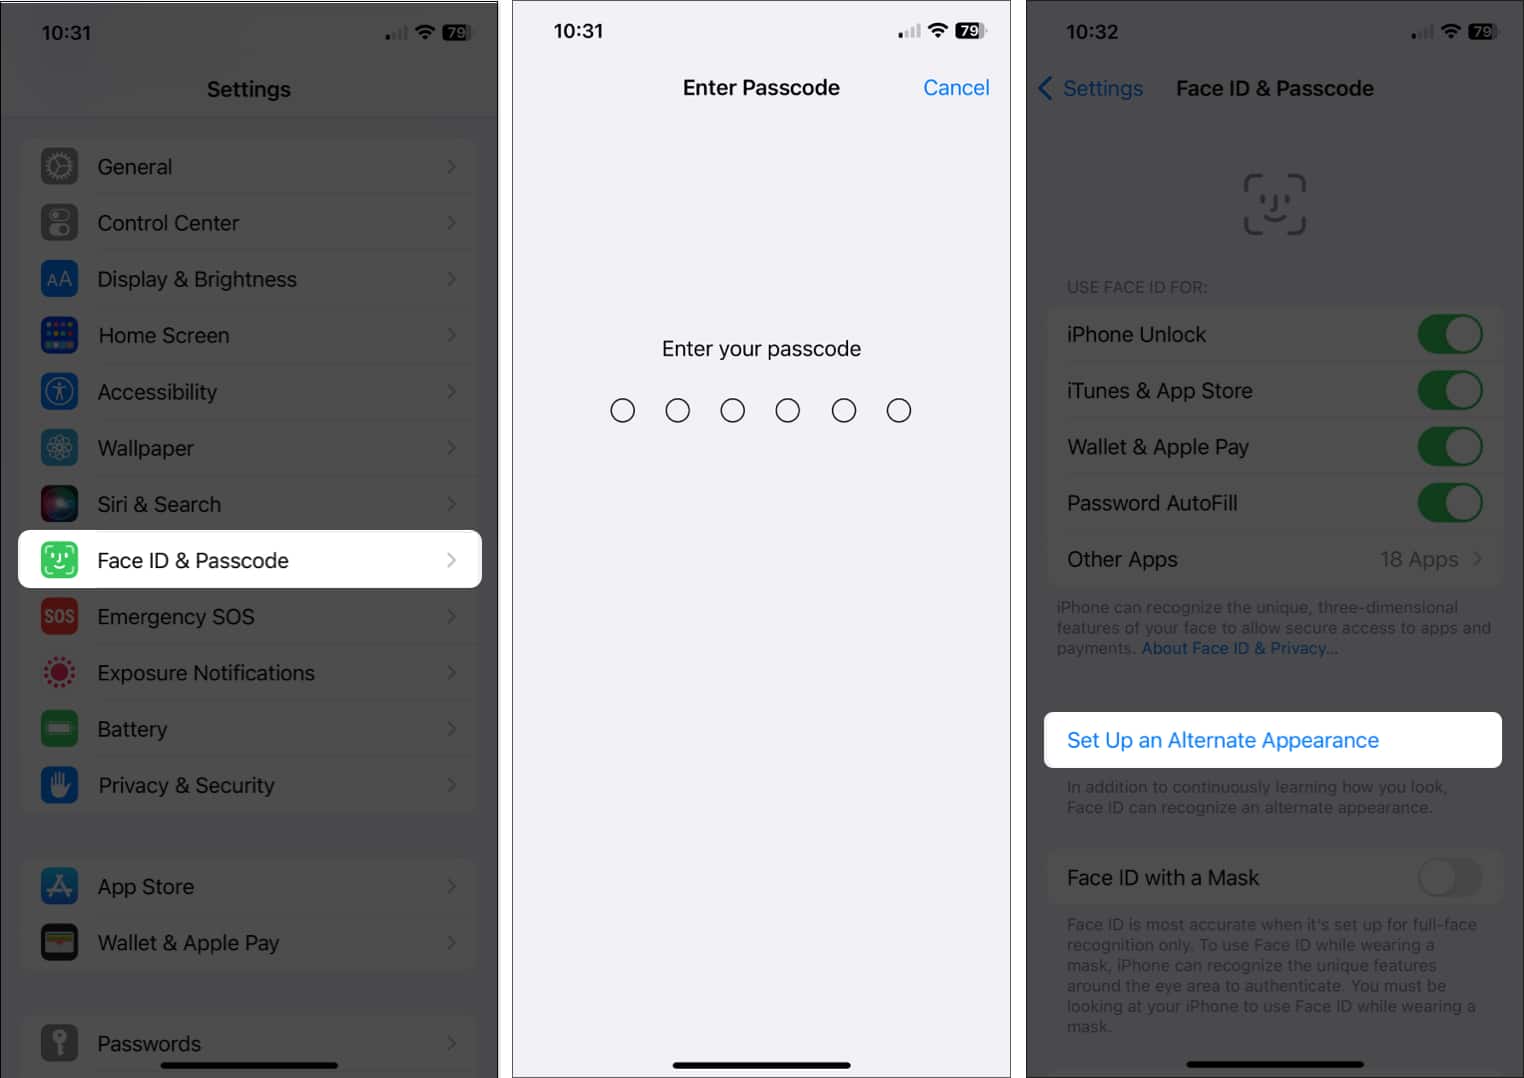
- Open the Settings app → Select Face ID & Passcode.
- Enter your passcode.
- Tap Set Up an Alternate Appearance

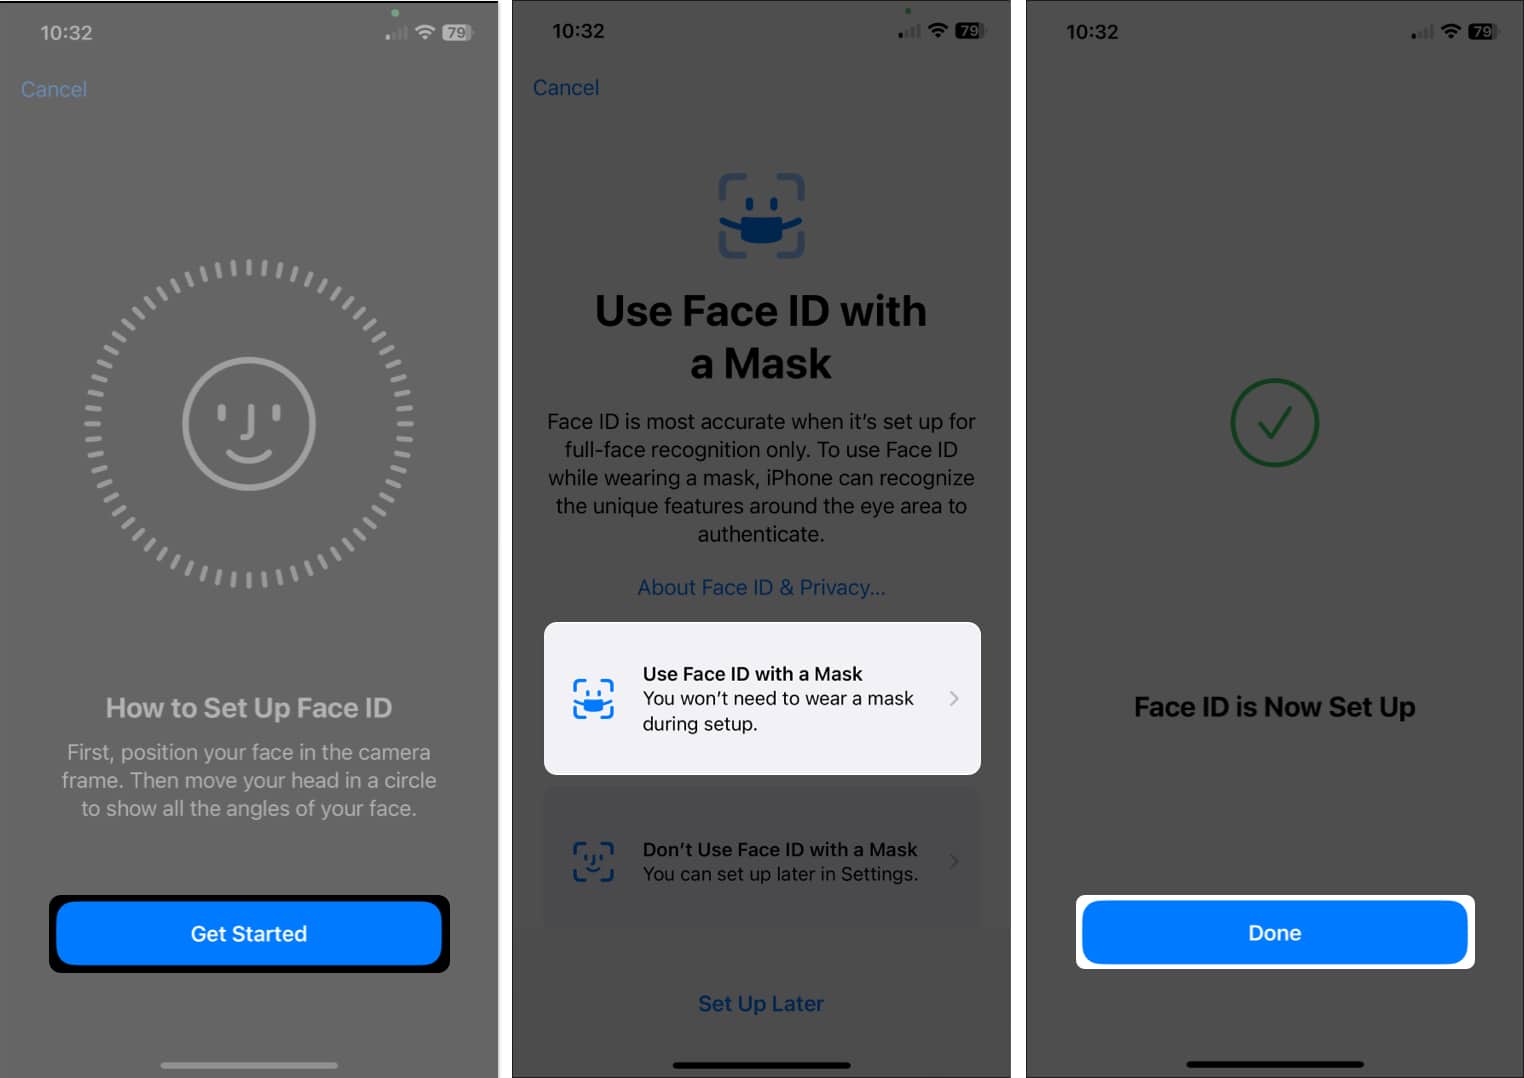
- Read the brief description and select Get Started to begin.
- Follow the onscreen instructions for moving your head within the frame and tap Continue.
- When you finish, you may be prompted to set up Face ID with a mask. Make your selection from the options.
- Once you successfully set up Face ID, you’ll see a message letting you know. Tap Done to finish and return to the Face ID & Passcode settings.

How to remove Face ID on iPhone
If you decide later to remove the alternate appearance you set up on your iPhone, you can reset your Face ID in just a couple of steps. Note that this removes all Face ID’s you have set up, not only the additional appearance.
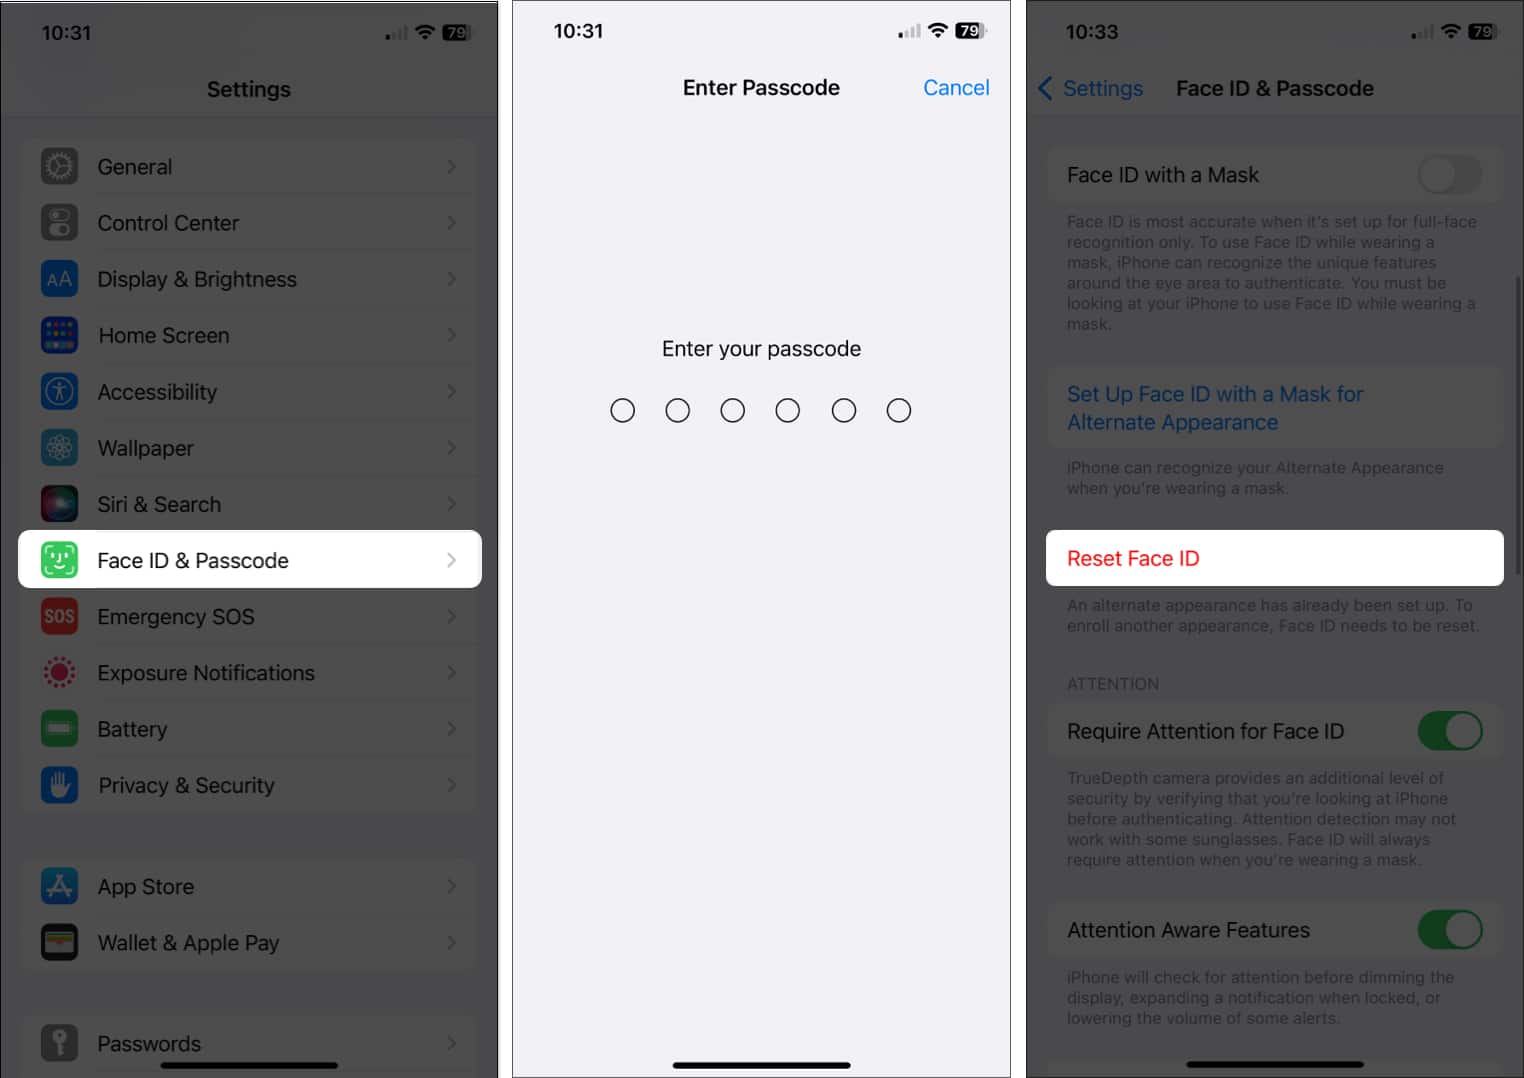
- Open Settings → select Face ID & Passcode.
- Enter your passcode.
- Tap Reset Face ID.

You will not be asked to confirm this action. If you like, you can then select Set up Face ID to begin again with a single appearance.
Face ID for fast access!
Setting up a second Face ID on iPhone is handy if you completely change your appearance. If you need access to someone else’s device or want to provide access to your own iPhone to another person, just keep in mind what that entails.
Are you going to add an alternate appearance on iPhone? Feel free to share why or why not!
Read more:

