Missing important alerts while you are busy working or binging something on your Mac? Stop that now! With an interesting macOS Accessibility feature dubbed as Speak announcements, you can listen to those alerts without disruption.
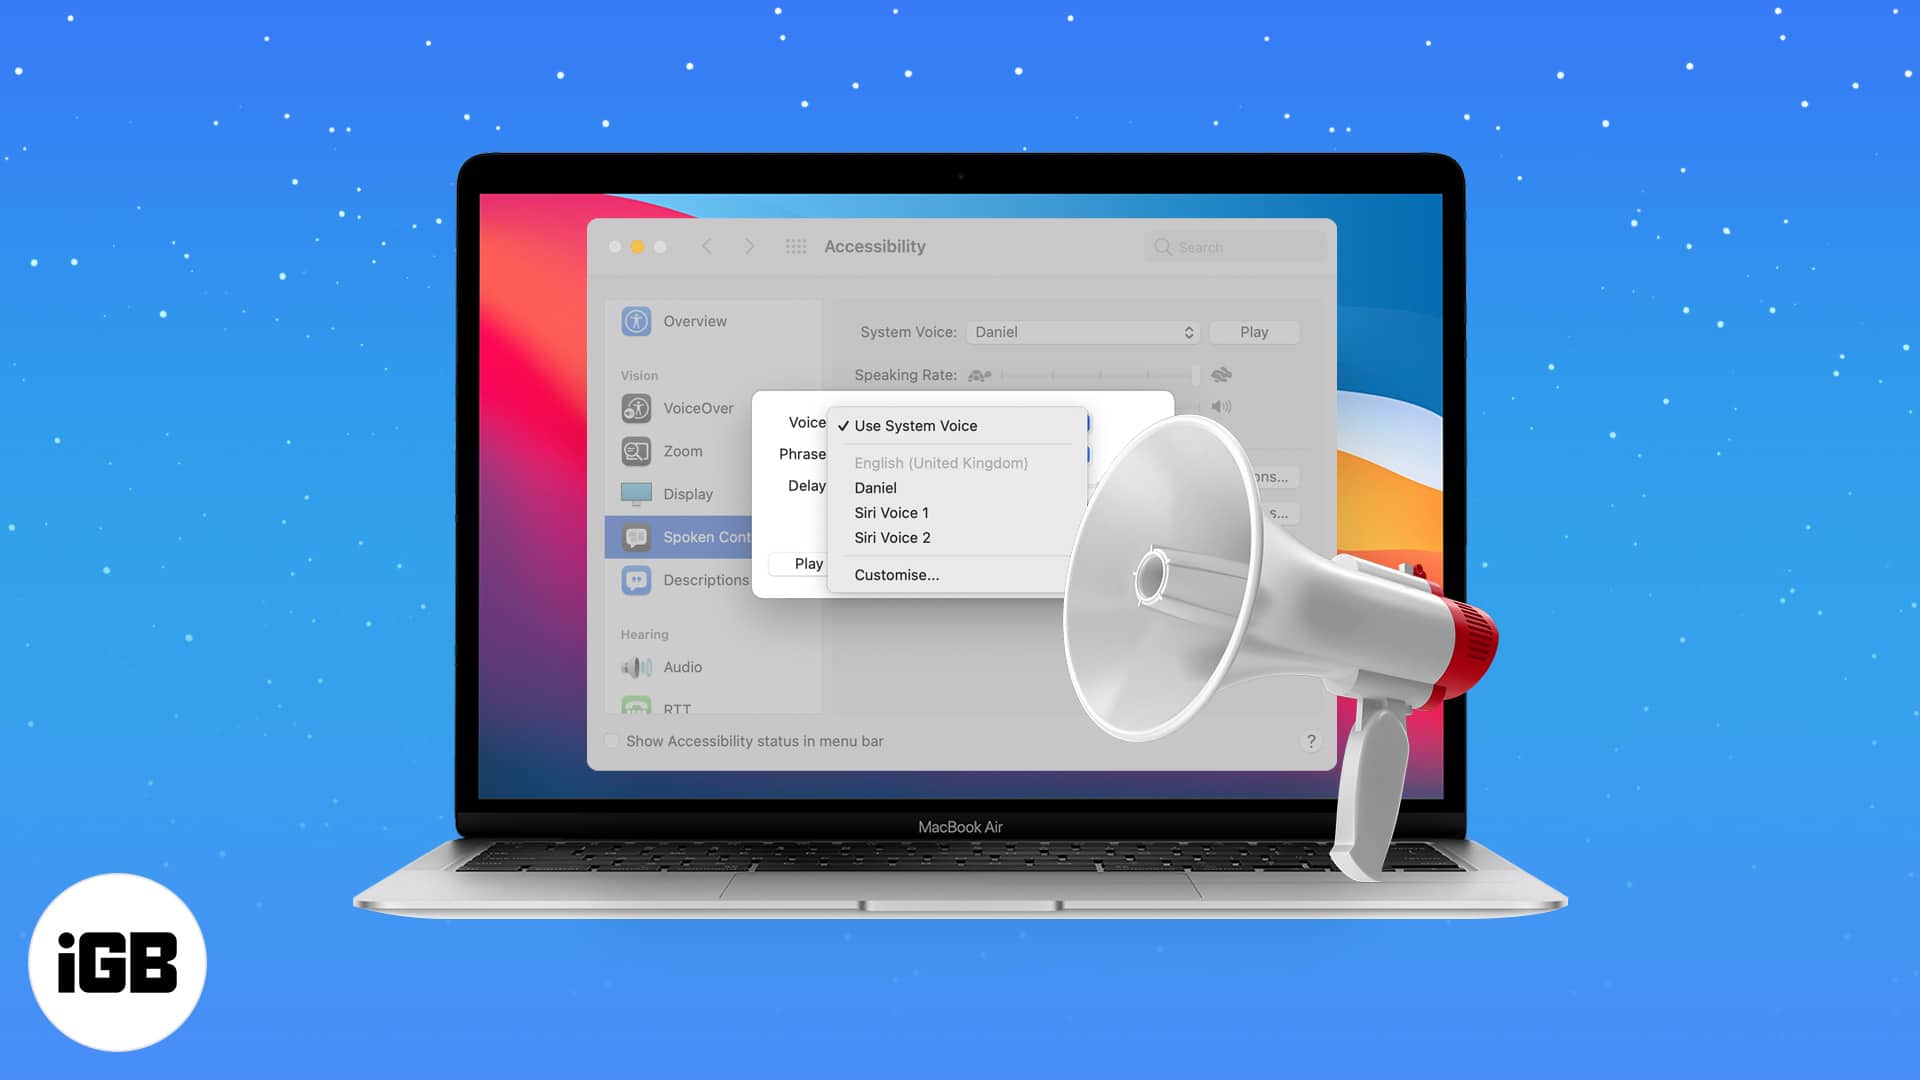
Wondering how to do that? Enable announce alerts and let Siri speak up the notifications in the background, so you are always on top of things. How? Just keep reading and scrolling!
- Why should you enable Speak announcements on Mac?
- How to turn on Speak announcements in macOS Monterey and Big Sur
- How to enable speak announcements in macOS Catalina and Mojave
Why should you enable Speak announcements on Mac?
Apple smartly incorporates special Accessibility features to enable seamless device usage to differently-abled users. The Speak announcements tool is designed to help users with vision impairments.
The idea is that Siri will announce all incoming notifications, keeping the users well-updated. We can use this feature to our advantage and ensure that we don’t miss an important update.
And not just while working, but this one is also a cool hack for when you are away from the Mac. Siri can grab your attention and give you updates while eating, chatting, playing mobile games, or more.
How to turn on Speak announcements in macOS Monterey and Big Sur
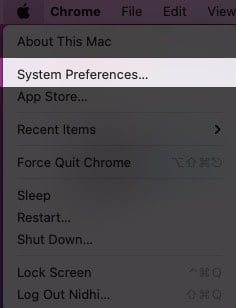
- Click the Apple menu and select System Preferences from the menu.
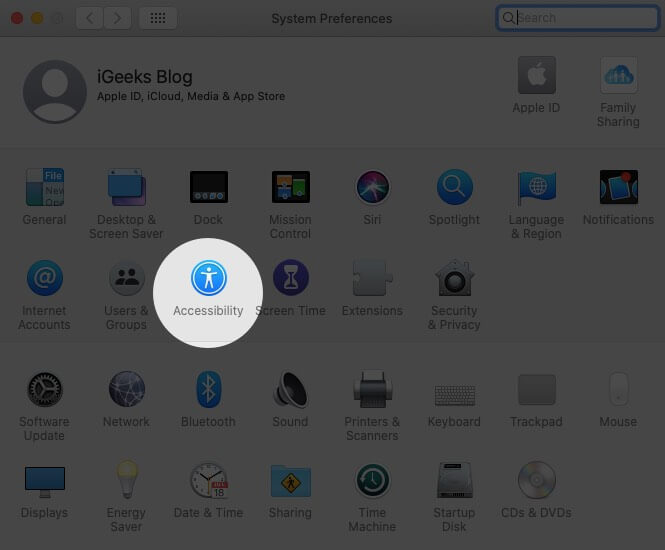
- Here, choose Accessibility.
- Select Spoken Content from the left Sidebar.
- Check the box next to Speak announcements.
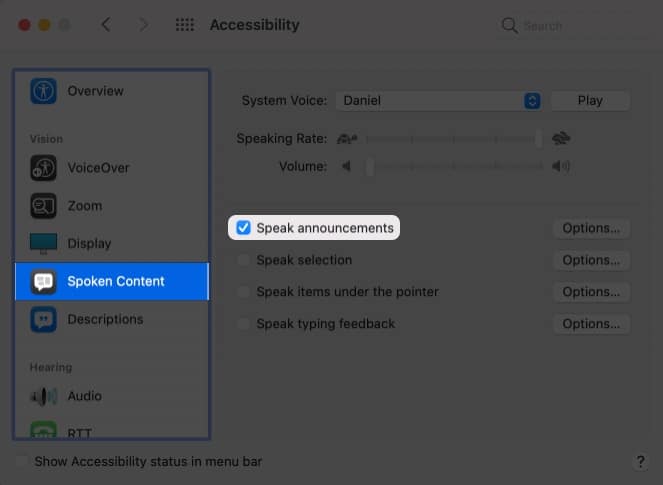
And just like that, your Mac will start announcing all notifications. Amazingly, you can also customize these notifications to the T. Skip to the next section to know how.
How to manage message announcements on Mac
When we enable speak announcements, three key settings are available to us, namely –
- Voice – Select the voice tonality, accent, language, and gender for the announcement sound.
- Phrase – Program Siri to say something special before announcing the message; let’s say the application name or pardon me.
- Delay – Decide how long Siri should wait before it announced the message. Do you want to be notified instantaneously or after a minute.
To access these settings:
- Go to the Accessibility → Spoken Content.
- Click Options next to Speak announcements.
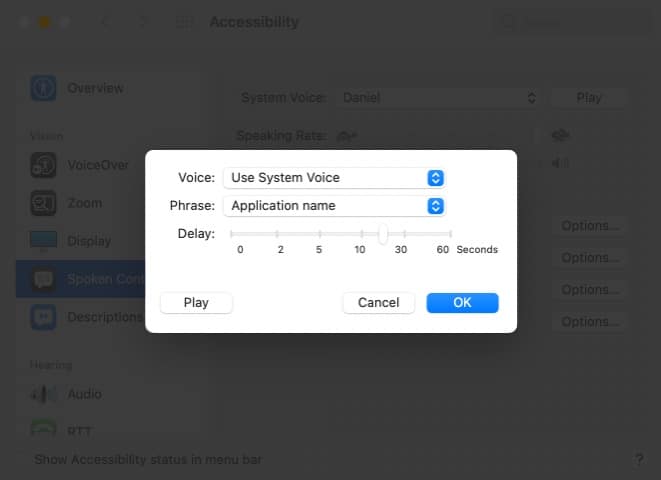
- Now, let’s explore these options .
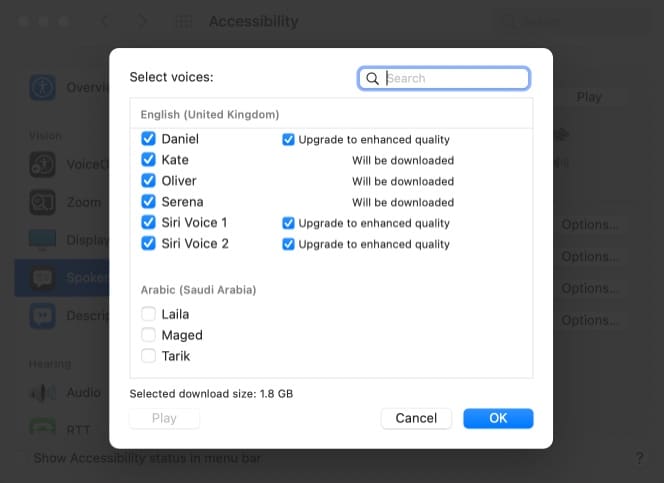
- Voice – Click it to reveal the drop-down menu, select a voice from the option or Customize to find the right match.
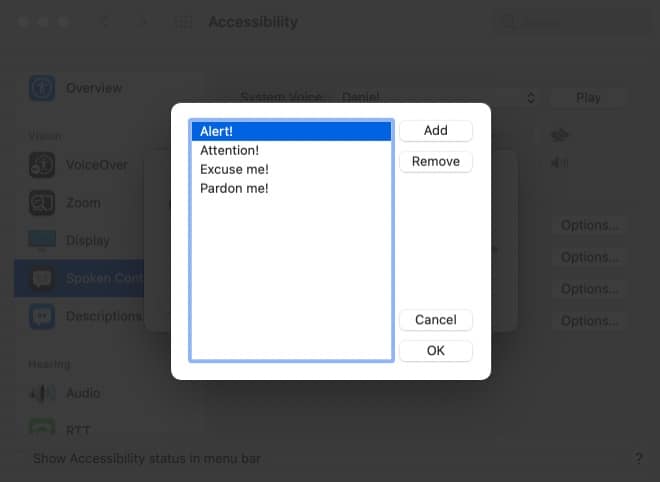
- Phrase – Once you open the drop-down menu, choose a preferred phase or select Edit Phrase List to make a custom one.
- Delay – Move the slider to a preferred time gap.
4. Now, hit Play to see how the alerts will sound. And once satisfied, click Ok to confirm the changes.
Become an iGeeksBlog Premium member and access our content ad-free with additional perks.
How to disable message announcements on Mac
While the feature is quite helpful, it could also be distracting. And all thanks to the FOMO (fear of missing out) syndrome, we might hamper our productivity severely. Thankfully, you can quickly turn off the feature.
Go to Accessibility → Spoken Content → and deselect the check box next to Speak announcements.
How to enable Speak announcements in macOS Catalina and Mojave
- Click the Apple icon → System Preferences → Accessibility.
- Select Speech from the Sidebar.
- Check the box next to Enable announcements.
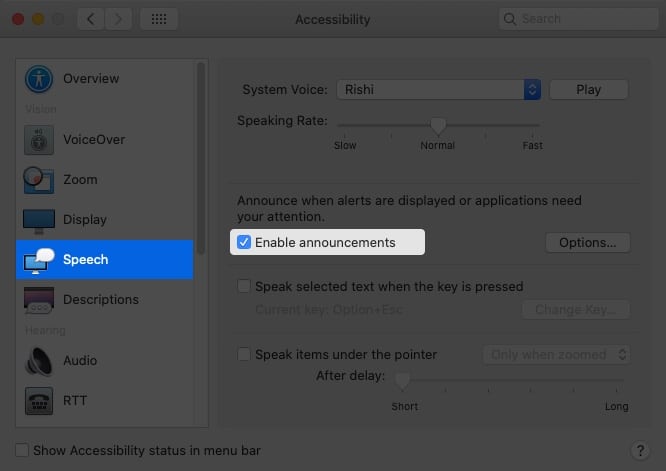
Ta-da! It’s done. To customize the settings, tap Options and choose the preferred Voice, Phrase, and Delay.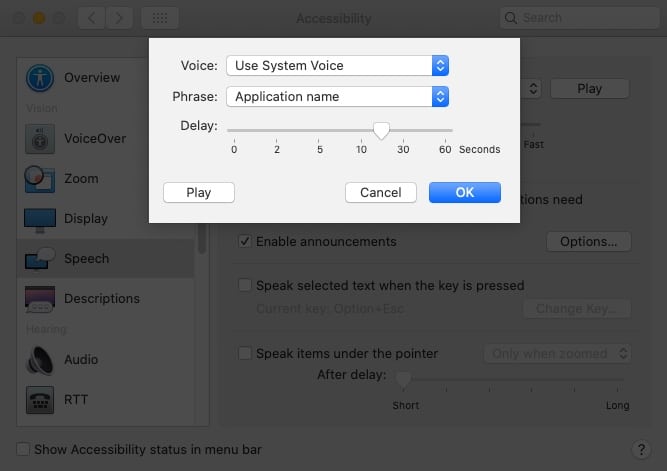
Plus, you can disable the feature as quickly, uncheck the box next to Enable announcements.
Apple’s Accessibility features are indeed a gem for every user. These simple hacks could simplify day-to-day tasks, allowing us to be more productive and active. Do you use any Accessibility features? Share your tricks and hacks with us in the comment section below.
Here are some of our favorite hacks:
- iOS 15: How to use background sounds on iPhone
- How to remove vocals from any song on Mac
- 4 Ways to be more productive on a Mac
- Notification badges not showing on Mac? 7 Ways to fix it!
