Do you often find yourself with such a poor Wi-Fi signal that it’s impossible to visit websites, use apps, or stream videos? I know this situation can be frustrating, so I have come up with some easy solutions to fix this issue. Walk me through this guide as I demonstrate a few simple tricks to boost your Wi-Fi signal and improve Wi-Fi performance on your iPhone and iPad.

1. Restart your router and iPhone
People often overlook restarting and jump to other fixes. Restarting your router is a common way to fix the problem quickly without much effort.
To restart your Wi-Fi router, you can use the physical ‘Reset‘ button on it.
- Alternatively, you could also power it off and on using the switch on the wall outlet (or by unplugging and plugging it back in).
- I’d also recommend visiting your router’s brand website or contacting their customer support to check if there’s a firmware update for it.
In the meantime, restart your iPhone as well. To do that:
- Press and hold the Volume Up or Down and the Power/Side Button together at once.
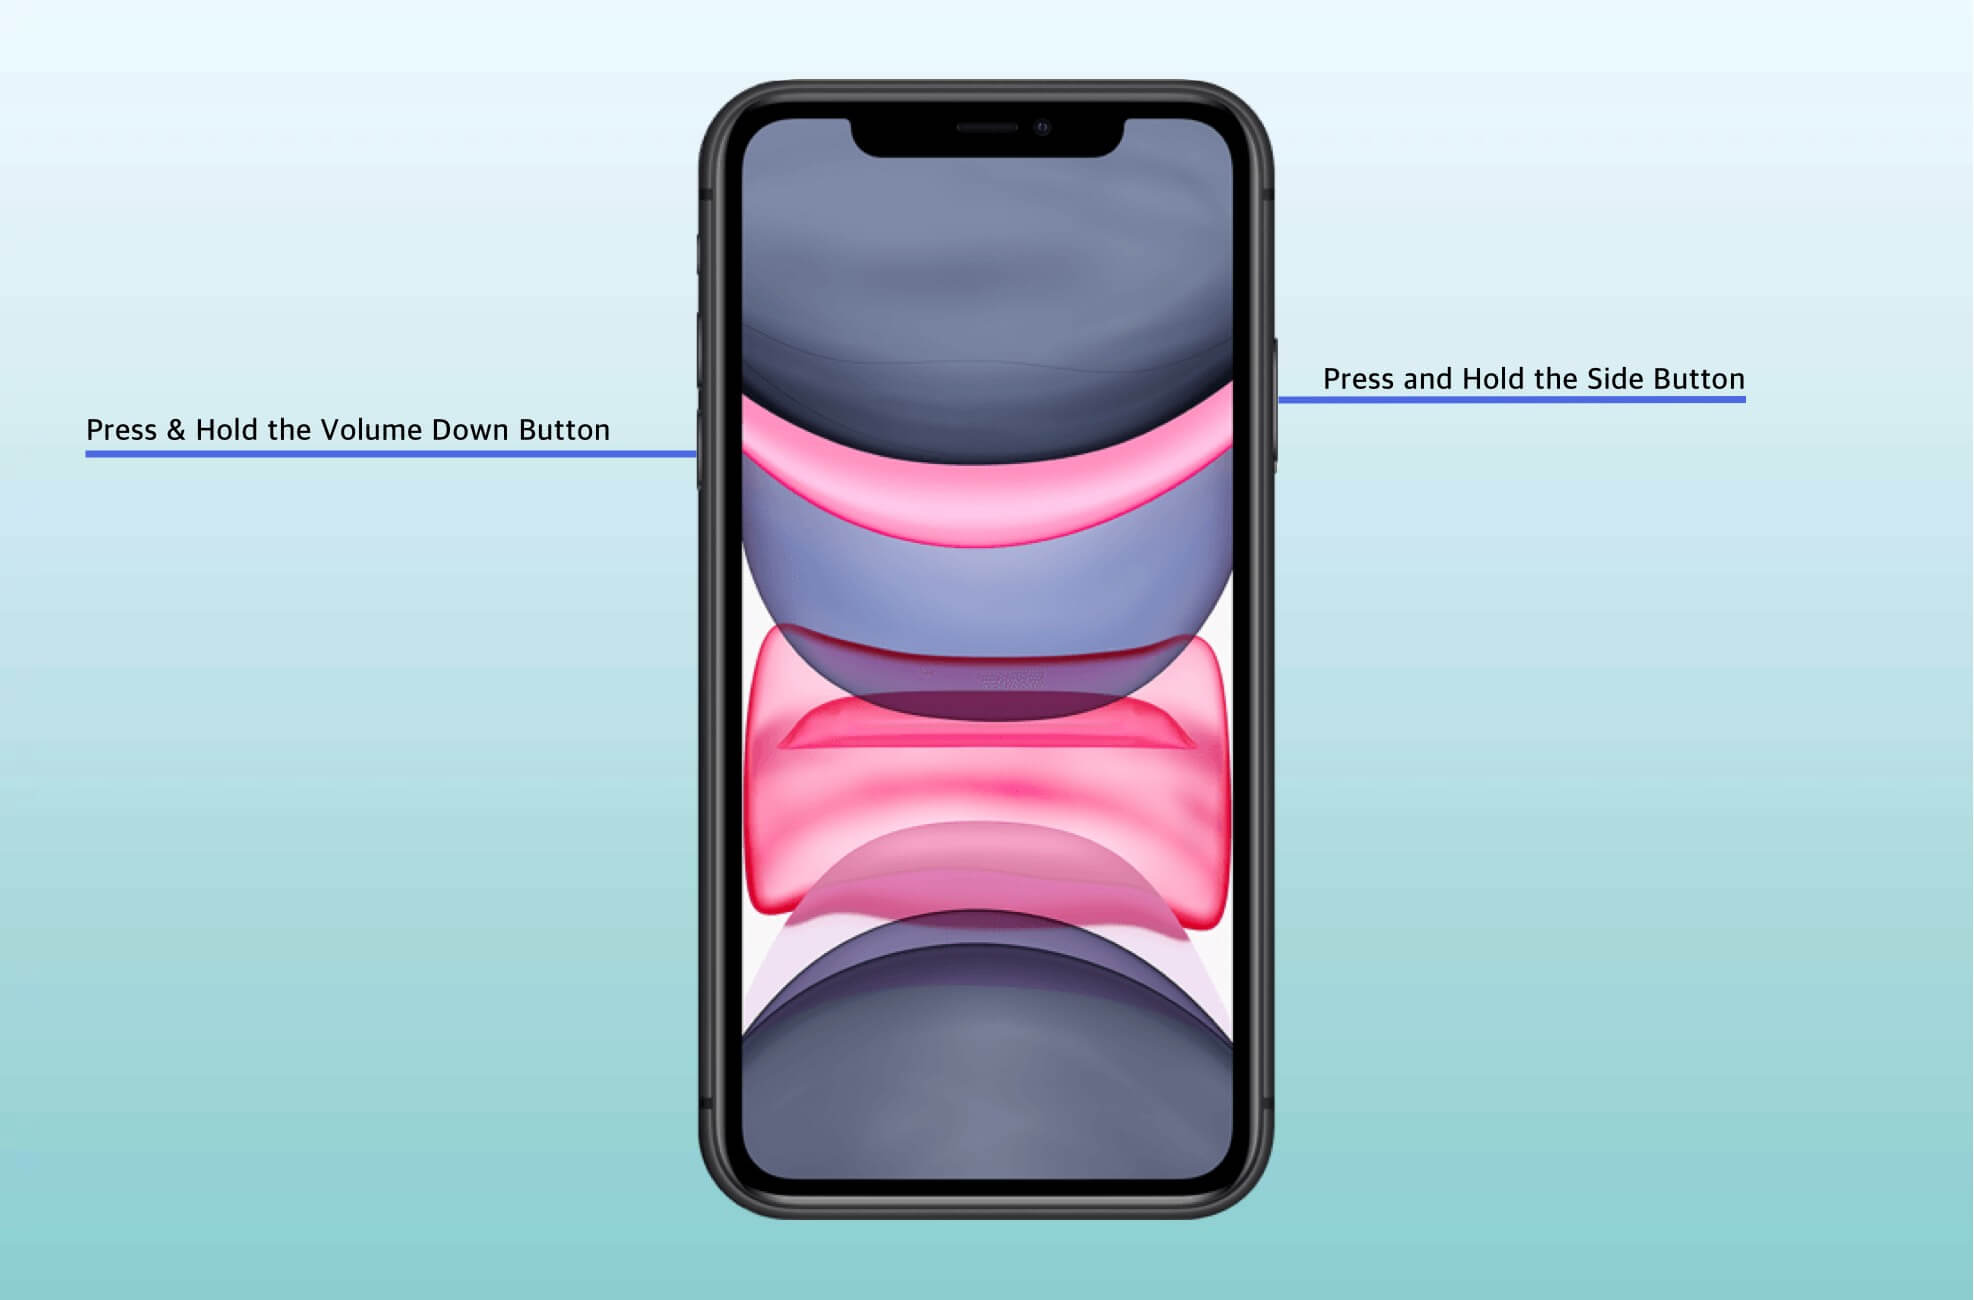
- Now, swipe from left to right on the slide to power off toggle to switch off your iPhone.
- Wait for at least 20-30 seconds. Then press and hold the Power Button to restart your iPhone.
2. Ensure no or minimal blockage between router and iPhone
Distance and barricades significantly degrade Wi-Fi signal strength and its ability to provide a consistent user experience.
If you continuously face weak signals, consider moving closer to the router. Similarly, if multiple thick walls exist between your router and your iPhone or iPad, try bringing the router closer.
Instead of having the router in one corner of the house, see if you can set it up somewhere in the middle so that the signals adequately reach every side of the house.
3. Forget and rejoin Wi-Fi
Before you proceed with this, make sure you know your Wi-Fi password. If you don’t know it and can’t figure it out, skip this solution and move on to the next.
- Open Settings on your iPhone → Tap Wi-Fi.
- Tap the info (i) icon next to the connected Wi-Fi name.
- Tap Forget This Network → Forget.
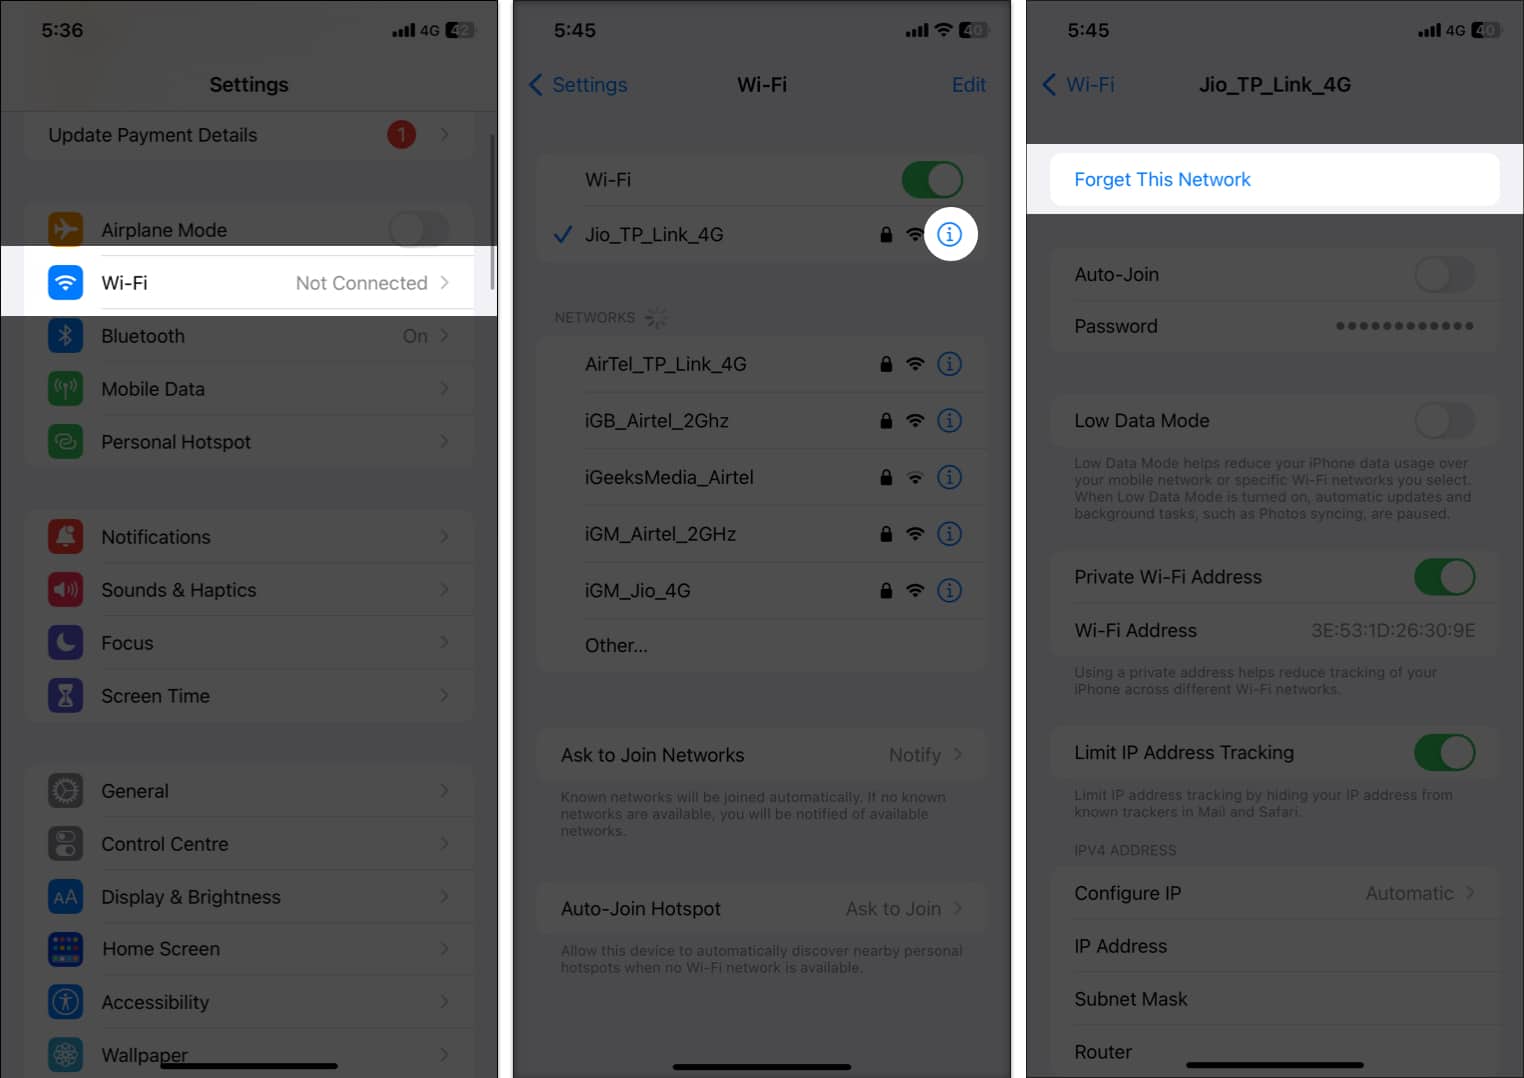
- Close the Settings app. Then go back to Settings → Wi-Fi.
- Then tap your network name → Enter its password → Select Join.
4. Remove thick iPhone case
If you use a thick case or something similar, consider removing it in favor of a lighter option.
A hefty outer protection layer may cause a bit of interference between the iPhone’s Wi-Fi antenna and the signal. So, for best results, choose a thinner iPhone case.
5. Update your iPhone
Besides introducing new changes to boost the Wi-Fi signal on your iPhone, I’d advise installing iOS updates to eliminate bugs and improve the overall usability of the device.
Become an iGeeksBlog Premium member and access our content ad-free with additional perks.
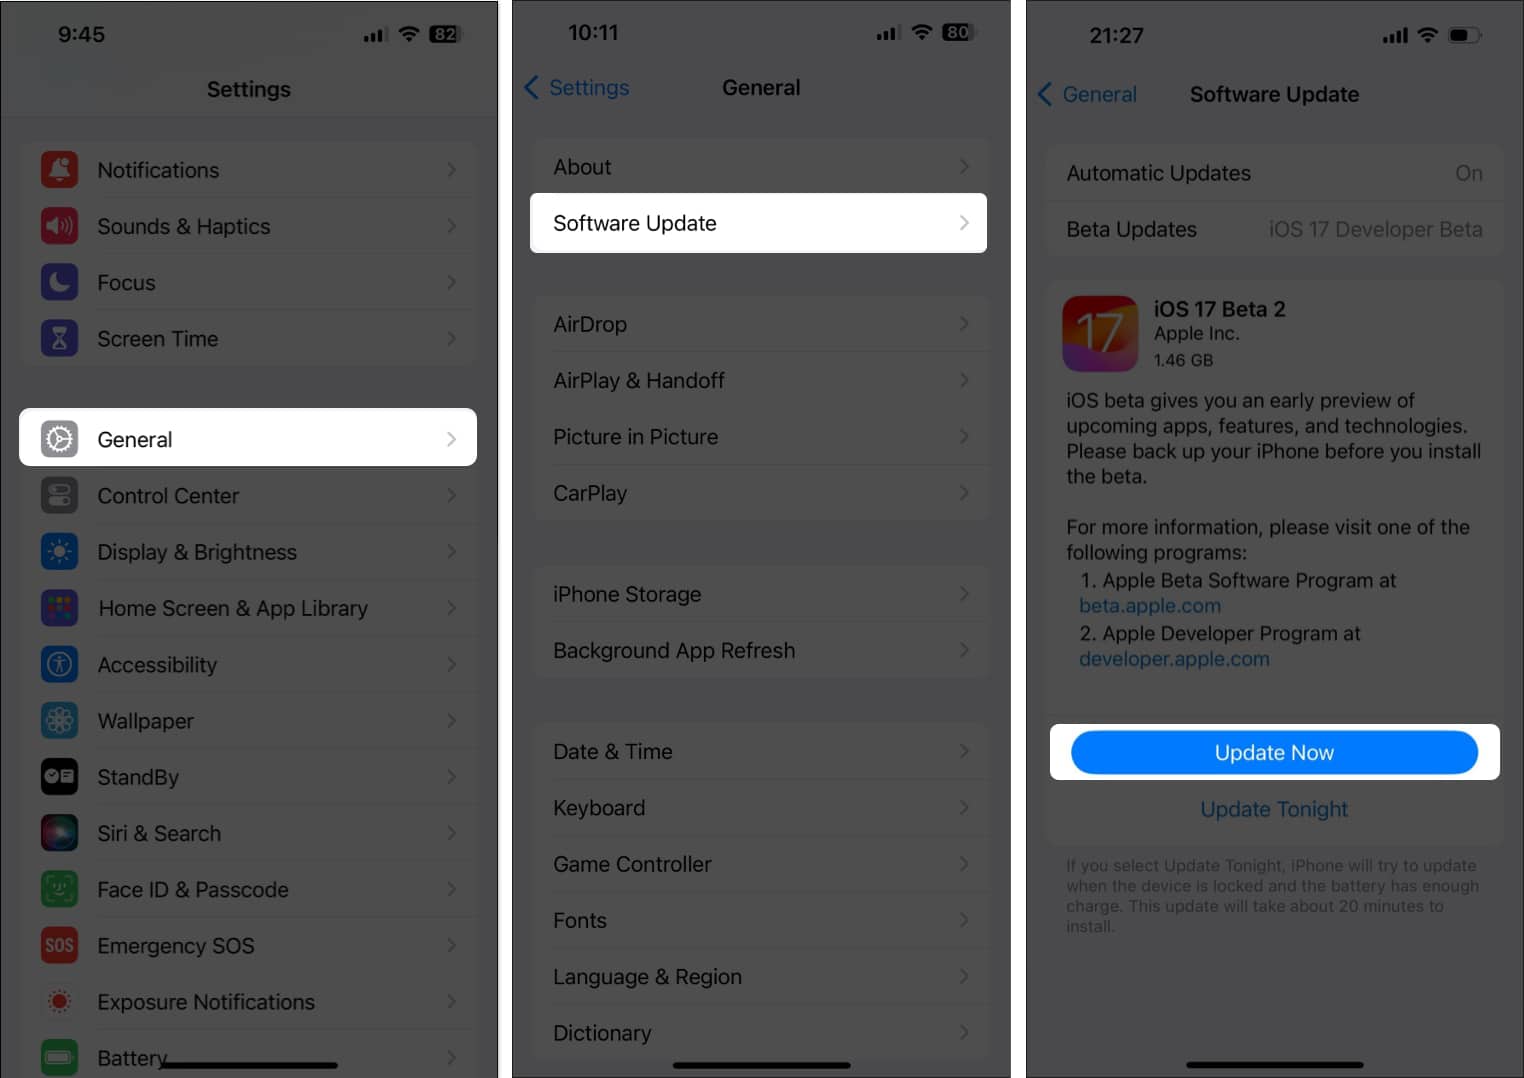
- Go to Settings → General → Software Update.
- Tap Update Now if a new update is available.
6. Reset All Settings
This will revert all custom settings like saved Wi-Fi networks and Bluetooth devices, VPN configurations, Home screen layout, etc., to the default state. However, personal stuff like apps, music, pictures, and videos will stay unaffected.
- Go to Settings → General → Scroll down to Transfer or Reset iPhone.
- Tap Reset All Settings.
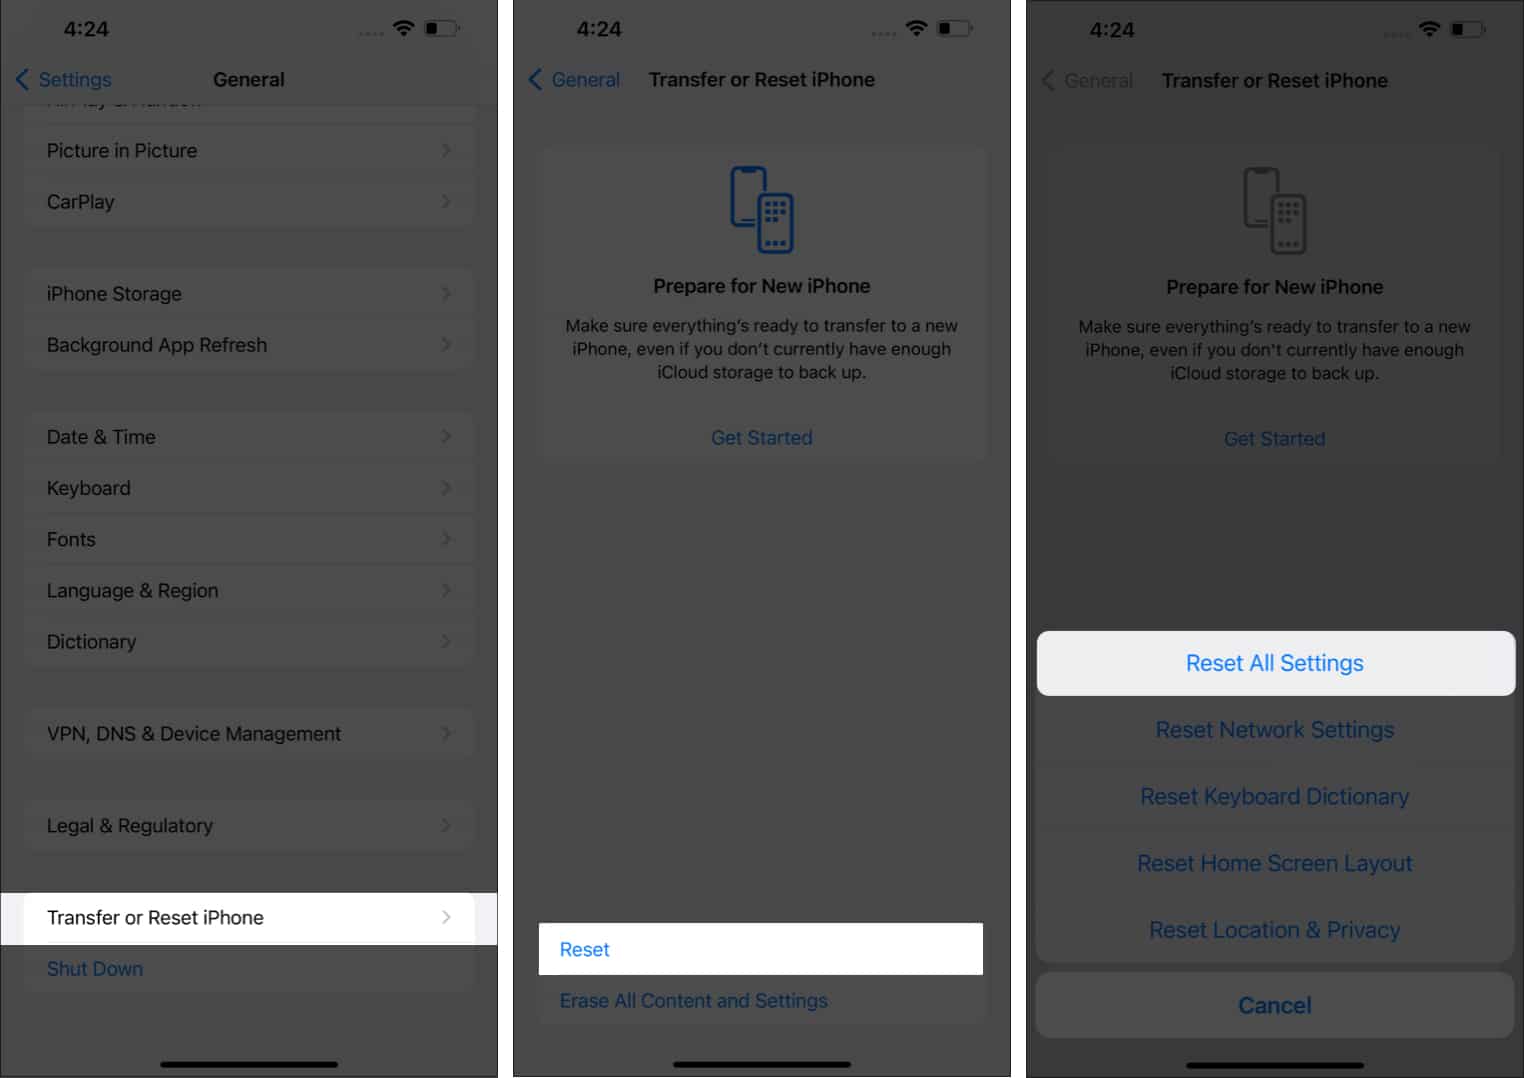
- Enter the iPhone passcode and confirm your choice.
- After the reset is complete, open Settings → Wi-Fi and connect to the desired network by entering its password.
7. Change DNS on iPhone
Sometimes, switching to a custom DNS might help improve the Wi-Fi signal on your iPhone. We have a separate step-by-step guide that shows you how to change the DNS on your iPhone. Look it over and see if it can’t help you out. If this solution doesn’t bring any luck, the same linked article will show you how to revert to the default DNS configuration.
Note: If you’re using a VPN, please turn it off. You might immediately experience comparatively faster speeds. Go to Settings → Toggle off VPN.
8. Contact your internet service provider
If you see extreme throttling in Wi-Fi speed, contact your ISP and ensure there’s no pending bill or server outage. Upon payment default, some companies significantly reduce the bandwidth rather than cutting service off entirely. Once you clear any charges, your service will be restored to normal speed.
Additionally, it’s also possible that there’s a temporary service outage in your area. Contacting the internet provider and explaining to them about low speeds might help.
9. Invest in a better router
Finally, it may also be a good idea to invest in a high-end router with a better range and feature set. Try doing some research on the web to find the router best suited for your house.
You could also visit a few local shops and ask their opinion on the best router for your situation. If you have floor space to spare, you should learn more about mesh networks.
10. Use range extenders
If you’re experiencing weak Wi-Fi signal strength on your iPhone, especially when you’re far from the router, a range extender can be a great solution.
Range extenders act like mini-routers, receiving the existing Wi-Fi signal from your router and amplifying it, extending its reach to a wider area.
Signing Off…
Were you successful in learning how to boost the Wi-Fi signal on your iPhone? We hope you were. In the comments, let us know which solution worked for you.
If you have any other Apple-related questions, we’re happy to hear those, too!
READ NEXT:

