Whether you want to cut down on your expenses or the subscription benefits no longer excite you, knowing how to manage or cancel an app subscription is essential. While it is hard to keep track of all your active subscriptions, Apple has made this complex task relatively straightforward on all its devices. In this article, I will show you multiple ways to cancel subscriptions on your iPhone, iPad, Mac, and Apple Watch.
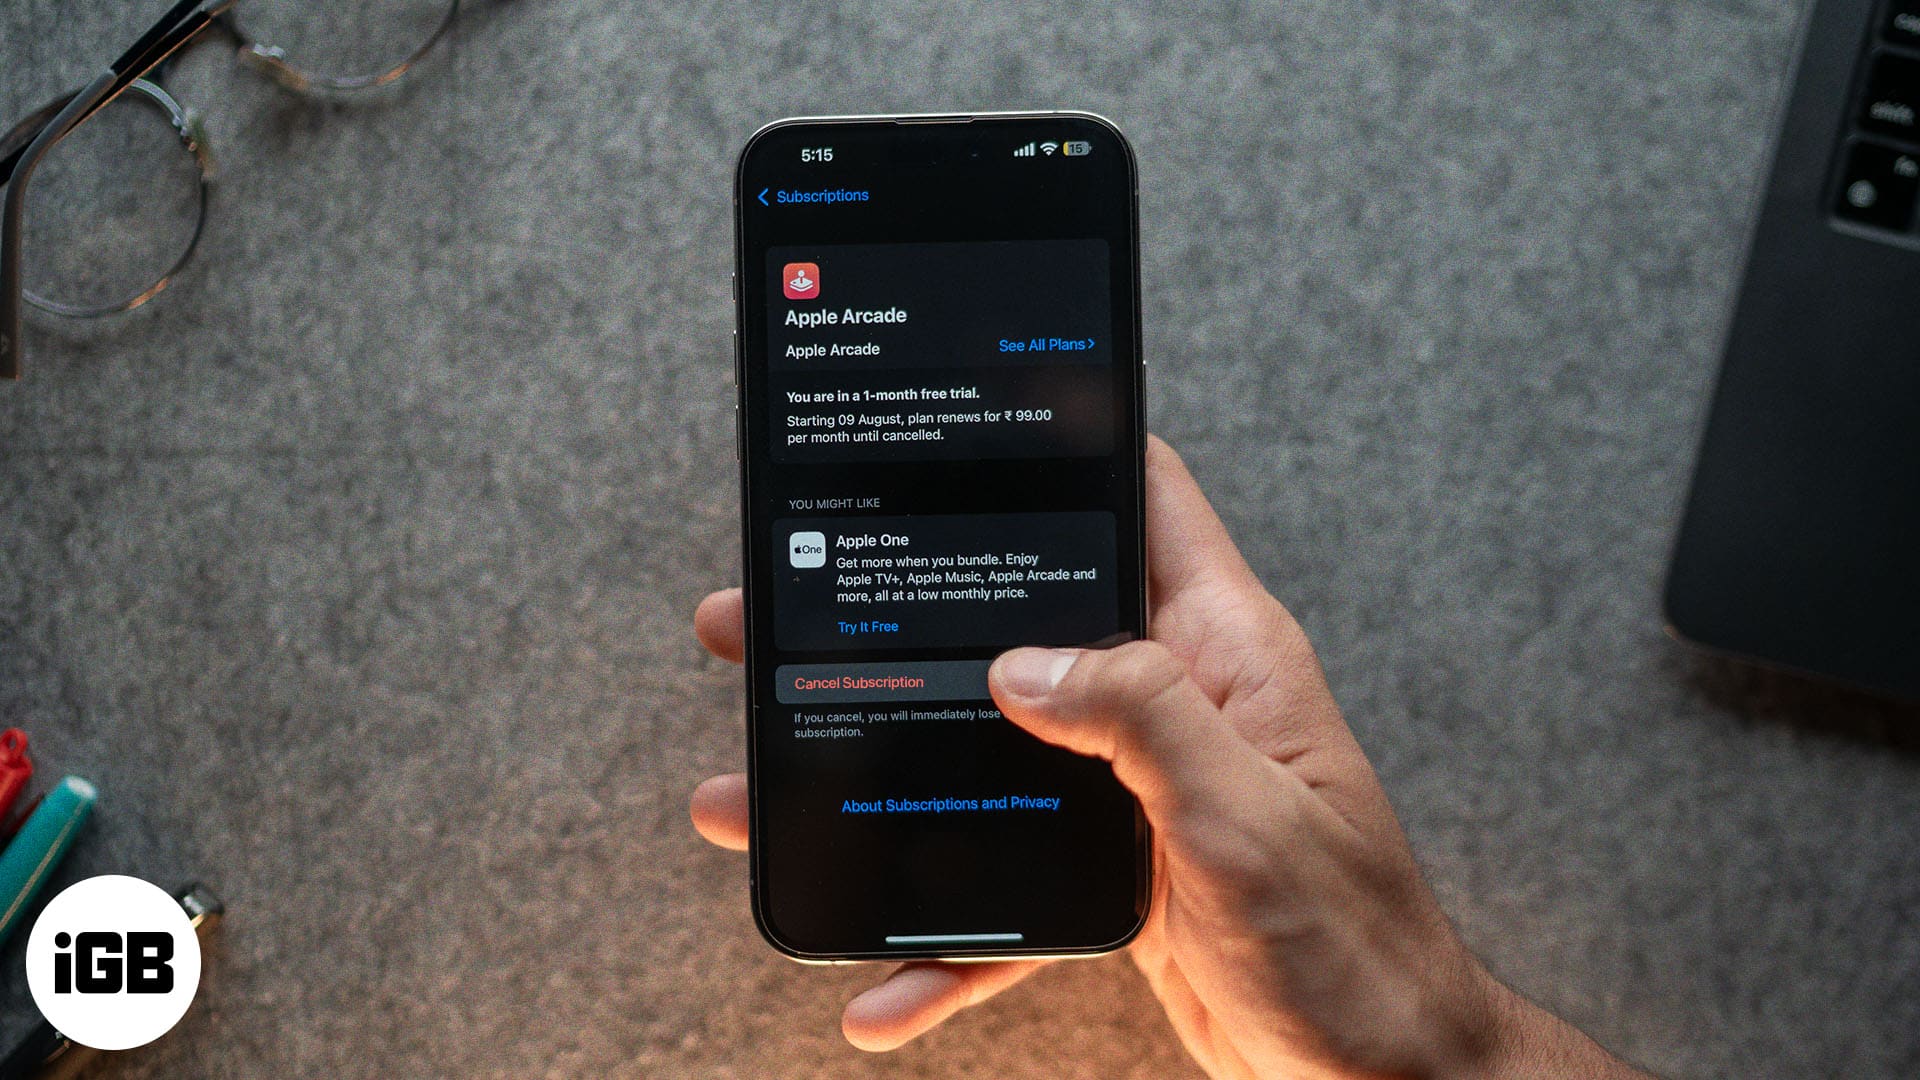
Table of Contents
Which subscriptions can you cancel?
Before you cancel or manage subscriptions on your iPhone, you’ll want to know which subscriptions you can cancel directly from your iPhone.
Simply put, you can cancel all those subscriptions directly from your iPhone that are connected to your Apple ID and were set up through the App Store. If you have subscriptions that are not connected to your Apple ID, such as a Netflix subscription, you can cancel them through the company’s app or website or by contacting customer support.
How to cancel subscriptions on your iPhone or iPad
Remembering all your active subscriptions can be a task. Thankfully, Apple offers a complete list of all the apps with active subscriptions in a single place on your iPhone, making managing and canceling them easier. Below, we check out two ways to cancel a subscription on an iPhone.
Via Settings
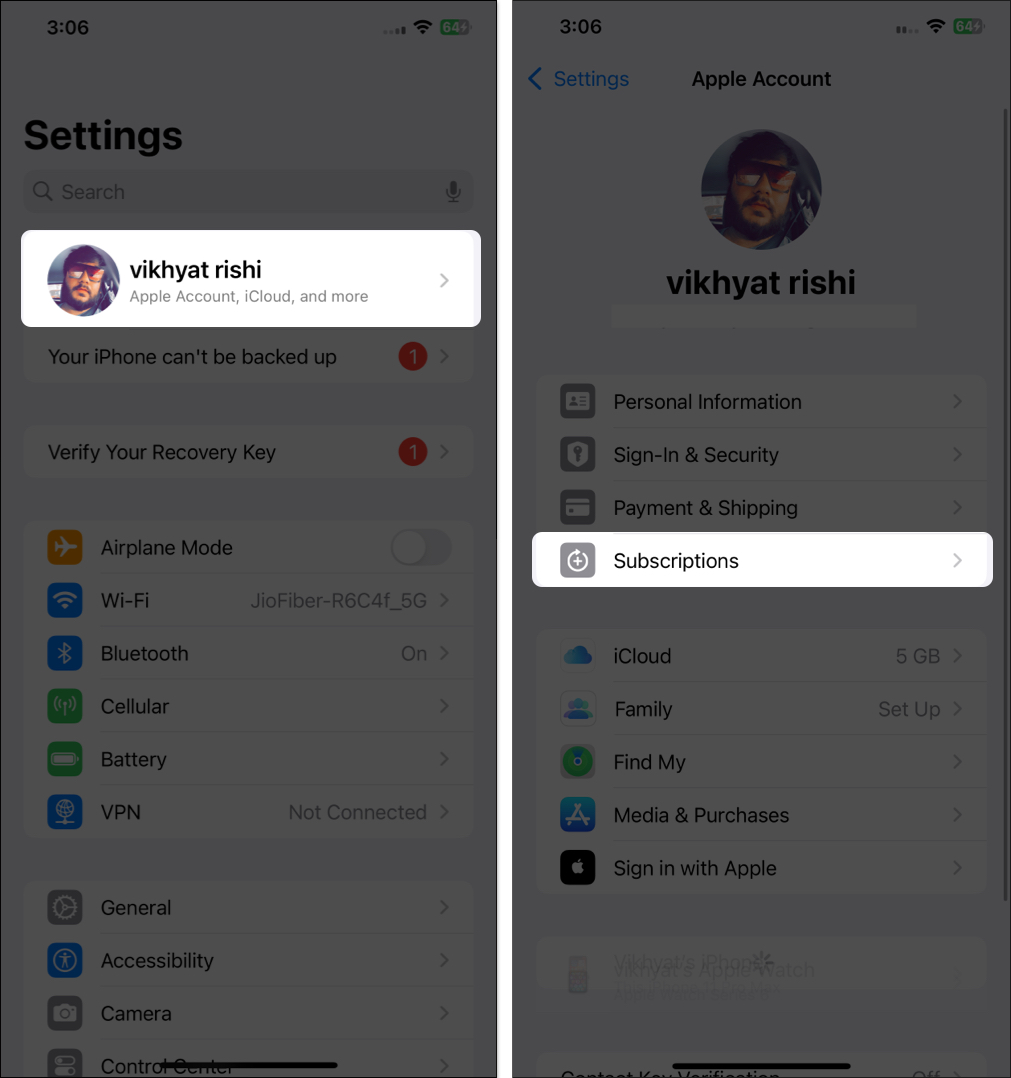
- Open the Settings app on your iPhone.
- Tap on your name and photo at the top.
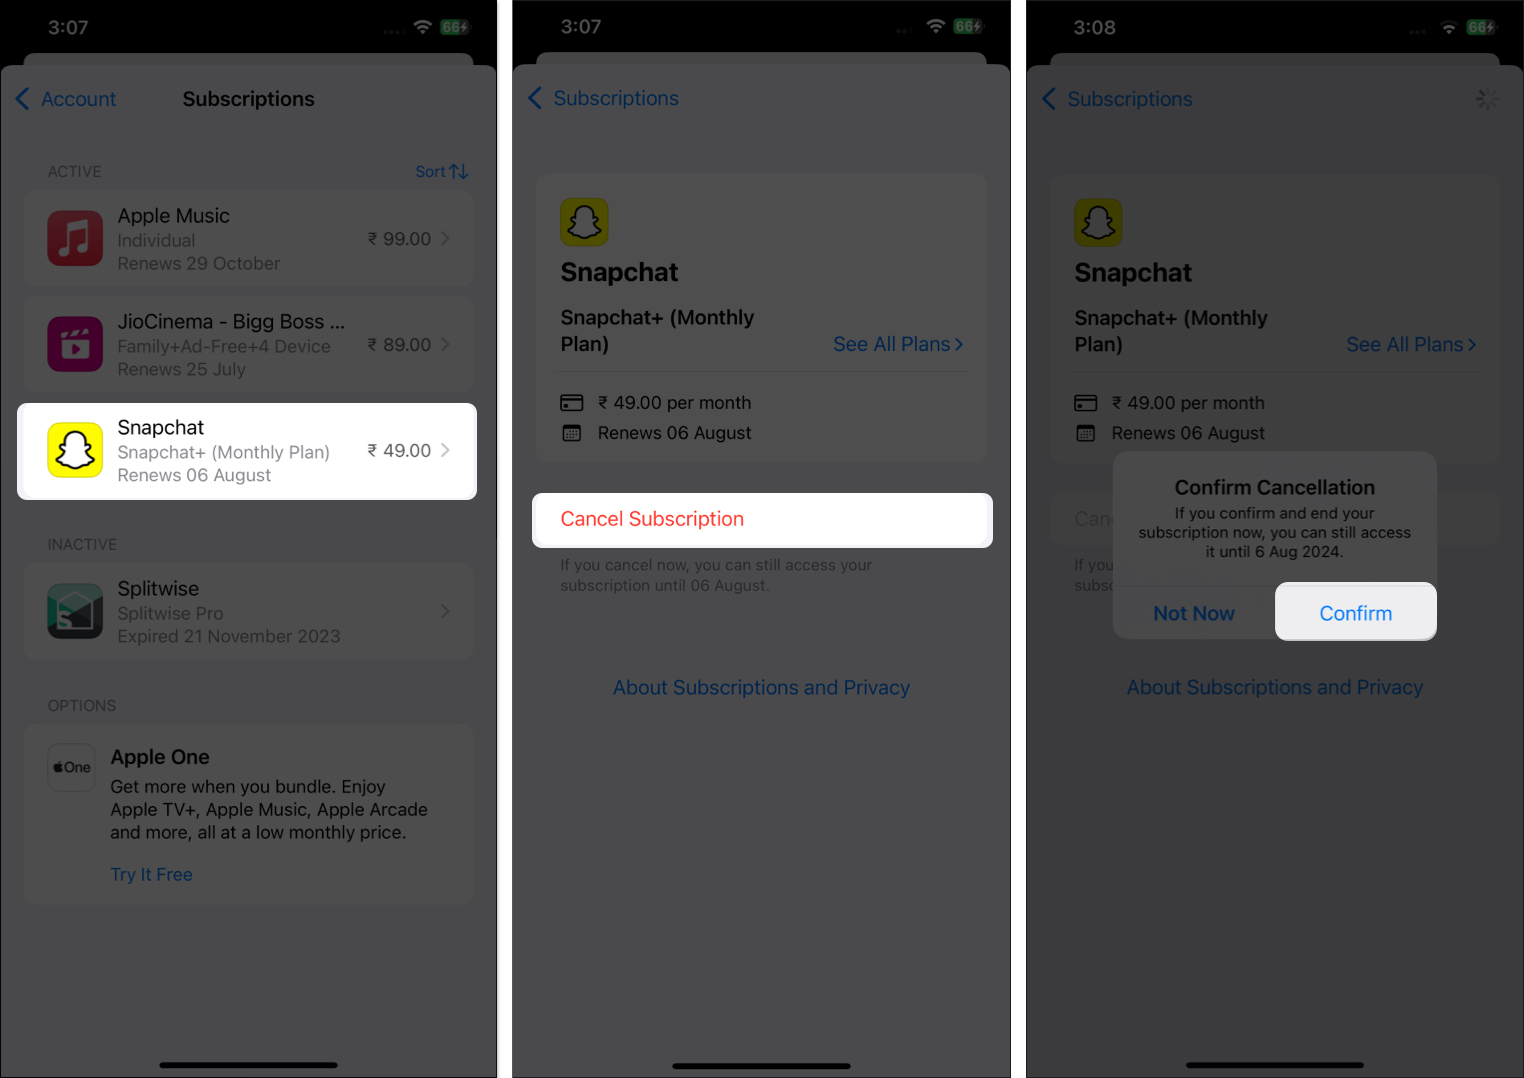
- On your account page, tap on the Subscriptions tab. This will open a list of all the active and inactive subscriptions you have.
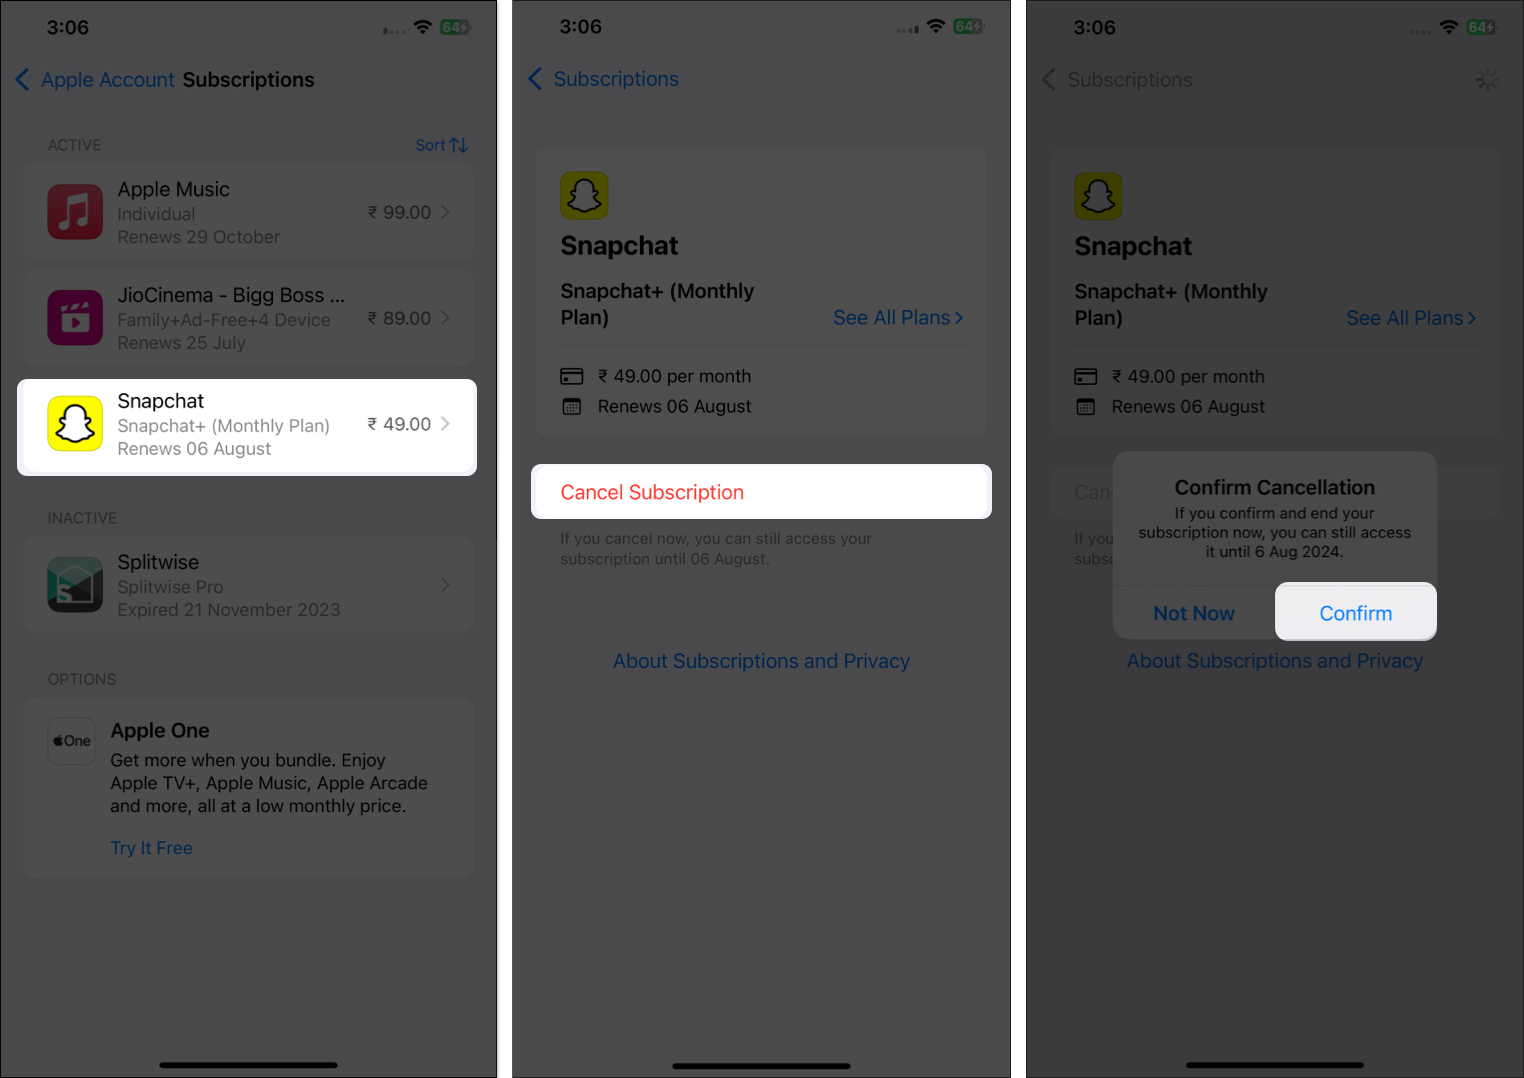
- Next, tap on an active subscription under Active that you want to cancel.
- Tap on Cancel Subscription on the subsequent page.
- Finally, tap the Confirm button on the confirmation prompt that appears to confirm canceling the subscription.
Via App Store
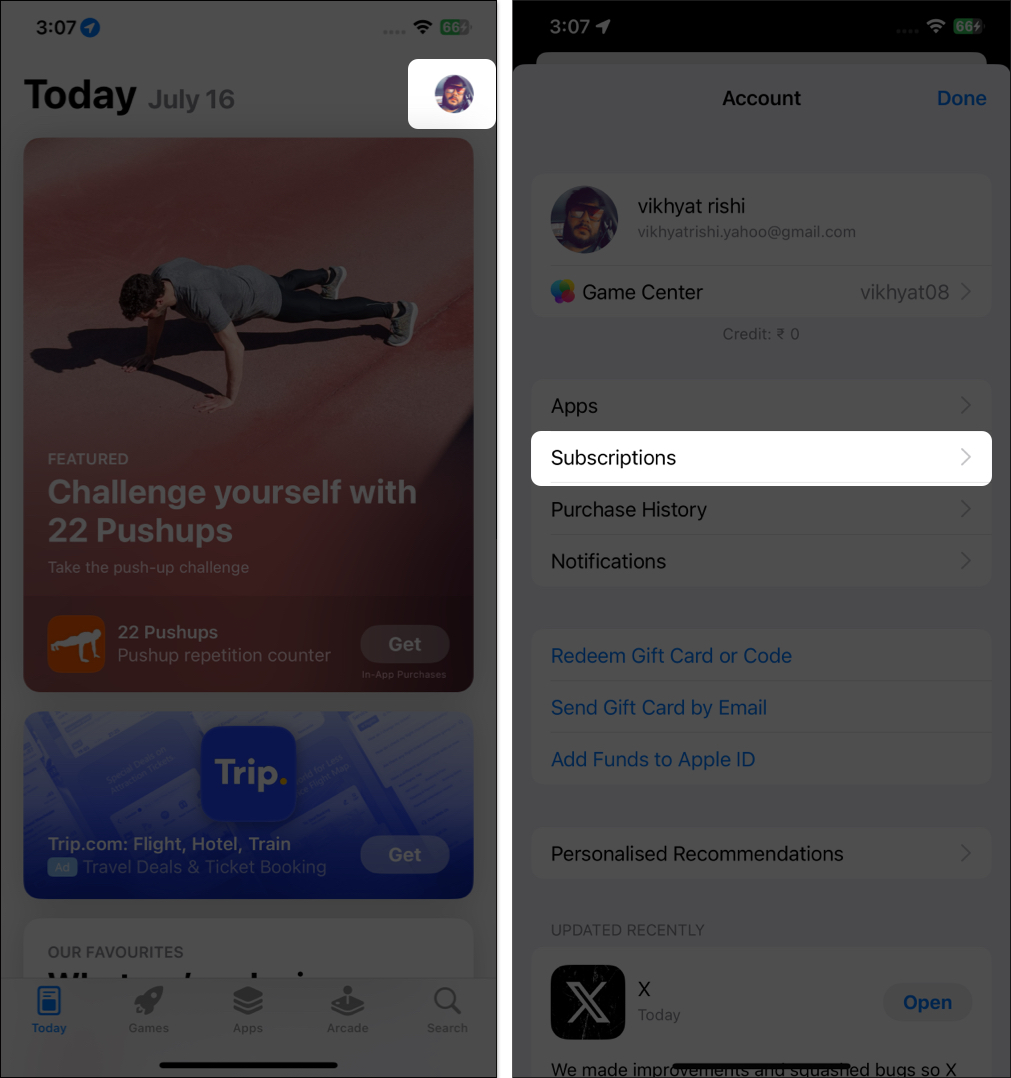
- Open the App Store on your iPhone.
- Tap your profile icon in the top-right corner.
- Here, tap on Subscriptions.
- Next, tap on the app subscription you want to cancel.
- Tap on Cancel Subscription, then tap the Confirm button on the confirmation prompt to confirm cancellation.
How to cancel subscriptions on your Mac
Like the iPhone and iPad, you can cancel an active subscription on a Mac via Settings and the App Store. However, the steps to do so differ greatly.
Via Settings
- Open the System Settings on your Mac.
- Click on your name and photo at the top in the left sidebar.
- On the account page, click on Media & Purchases.
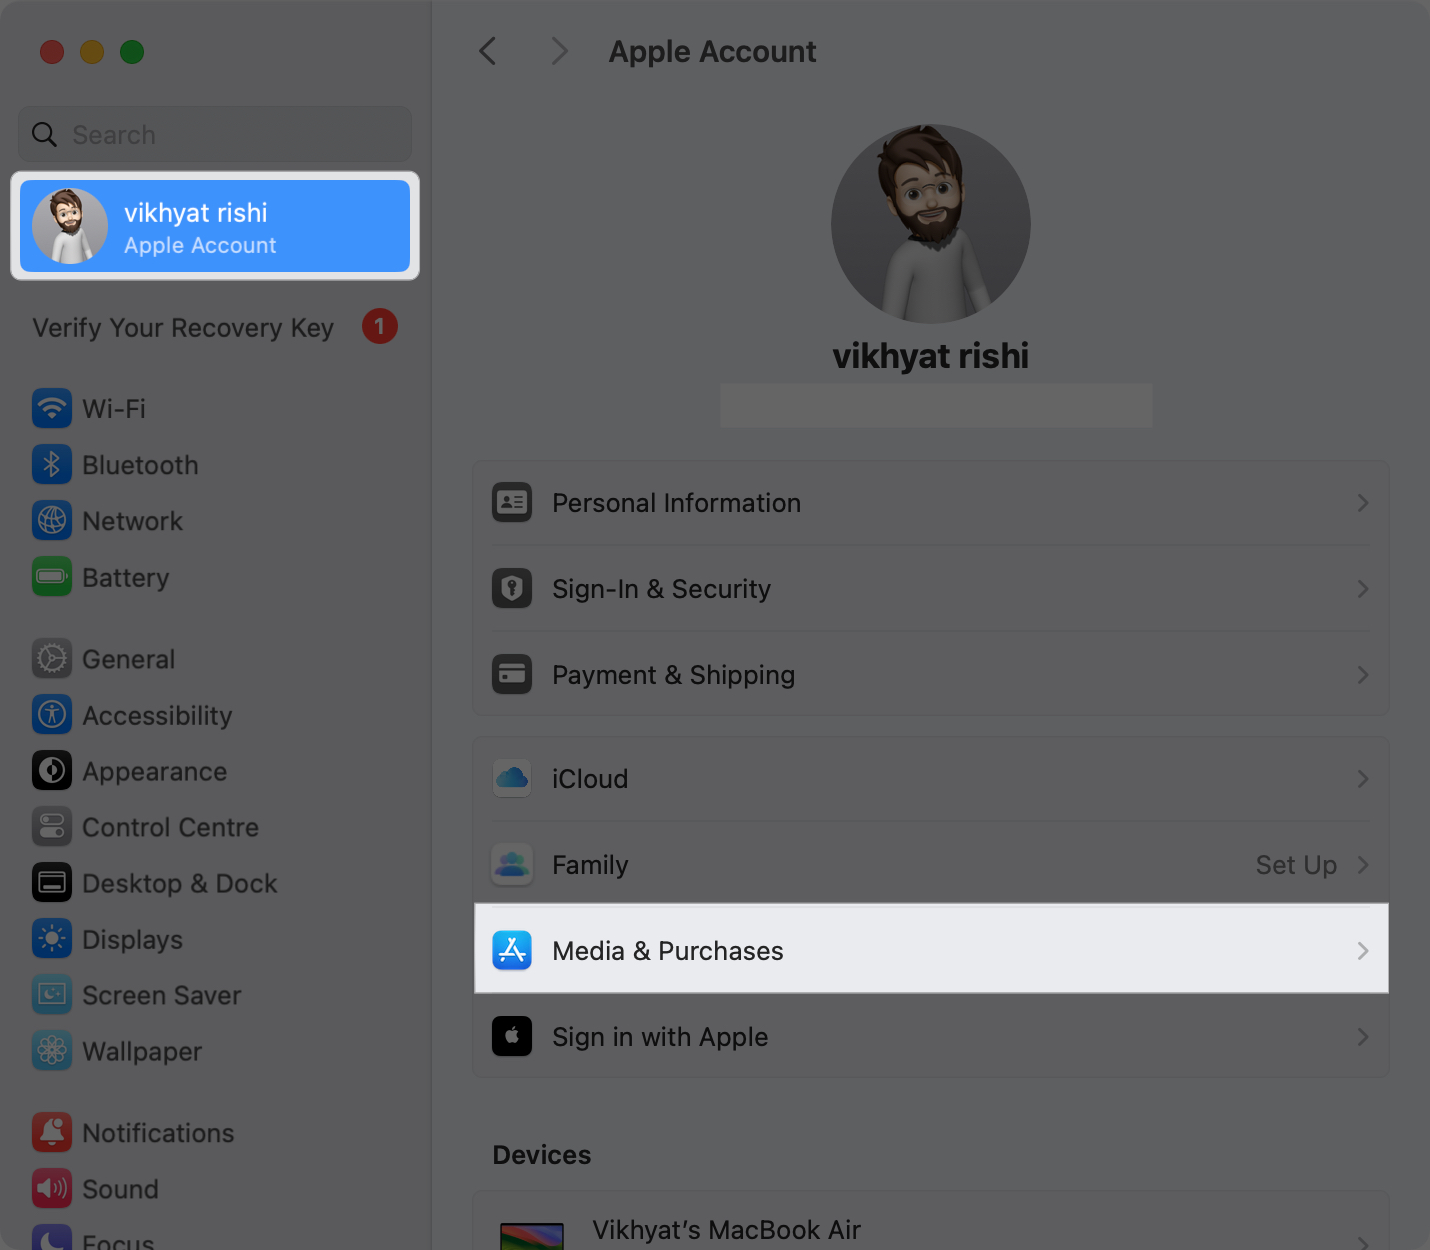
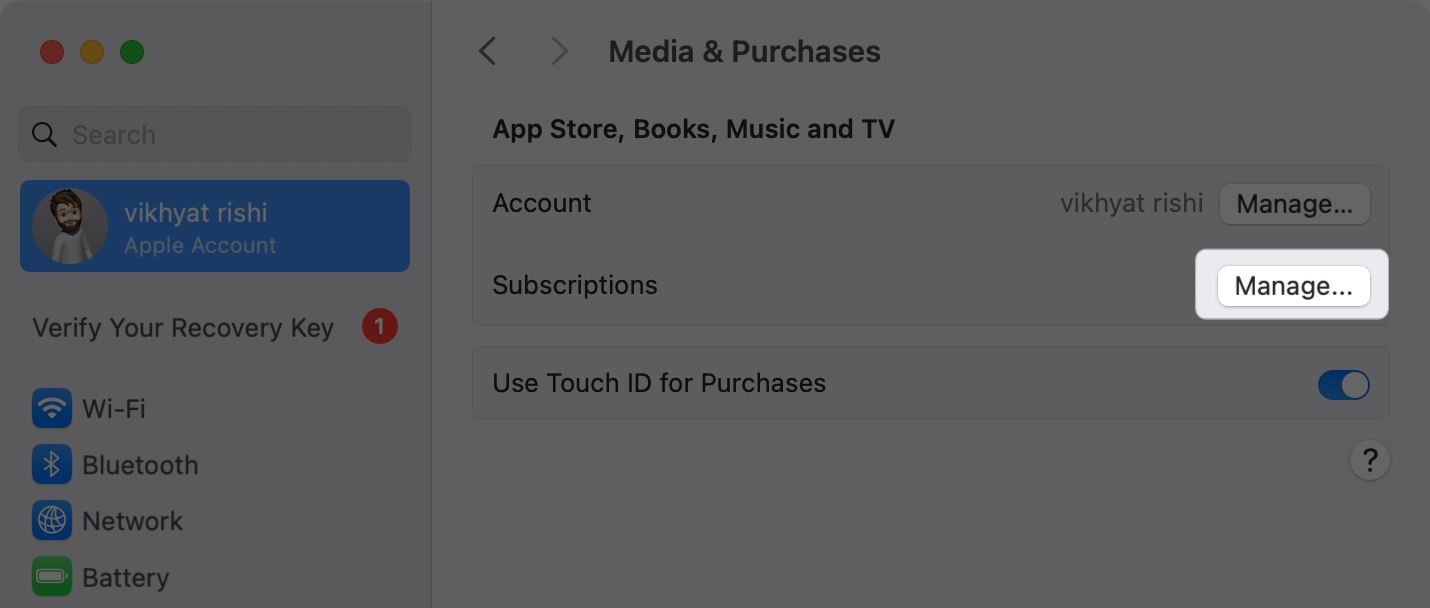
- Next, click the Manage button next to Subscriptions.
- Now, click on the active subscription you want to cancel.
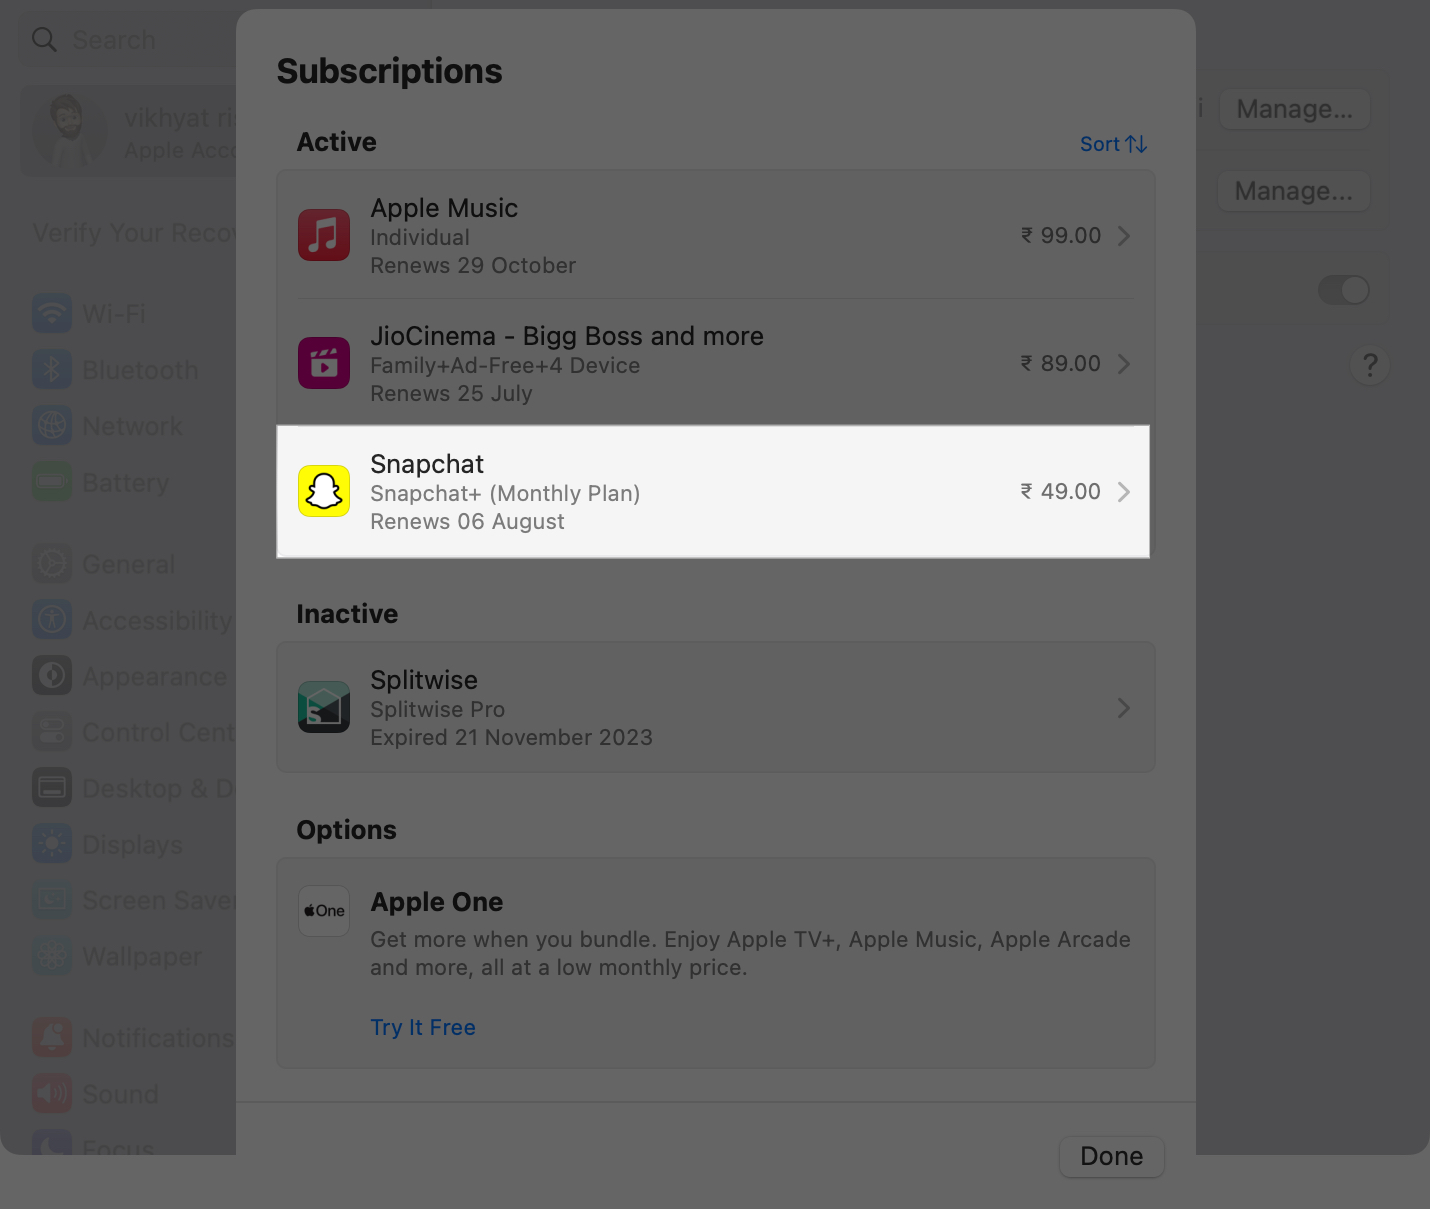
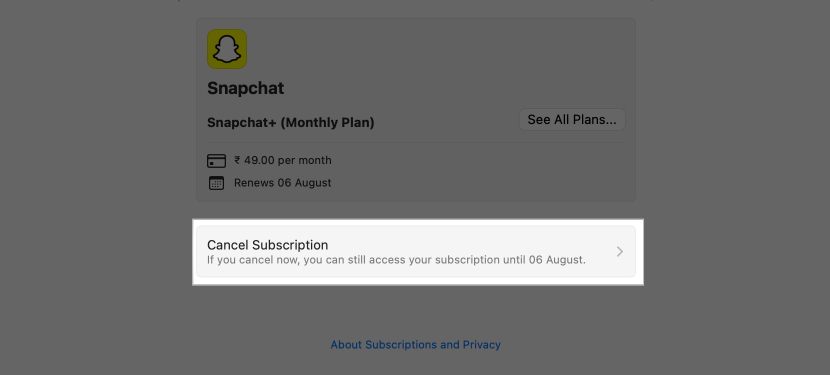
- Finally, click on Cancel Subscription, then the Confirm button to confirm your decision.
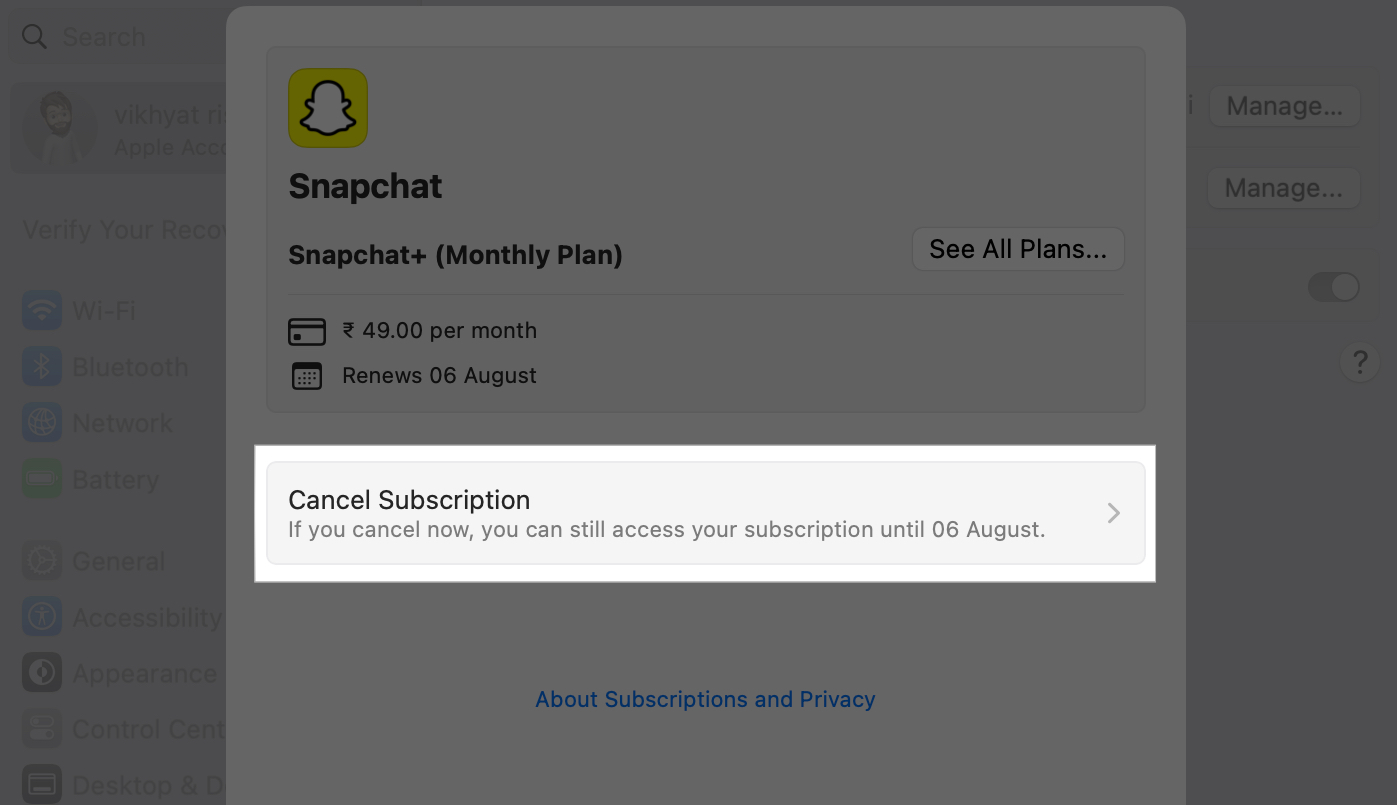
Via App Store
- Open the App Store on your Mac.
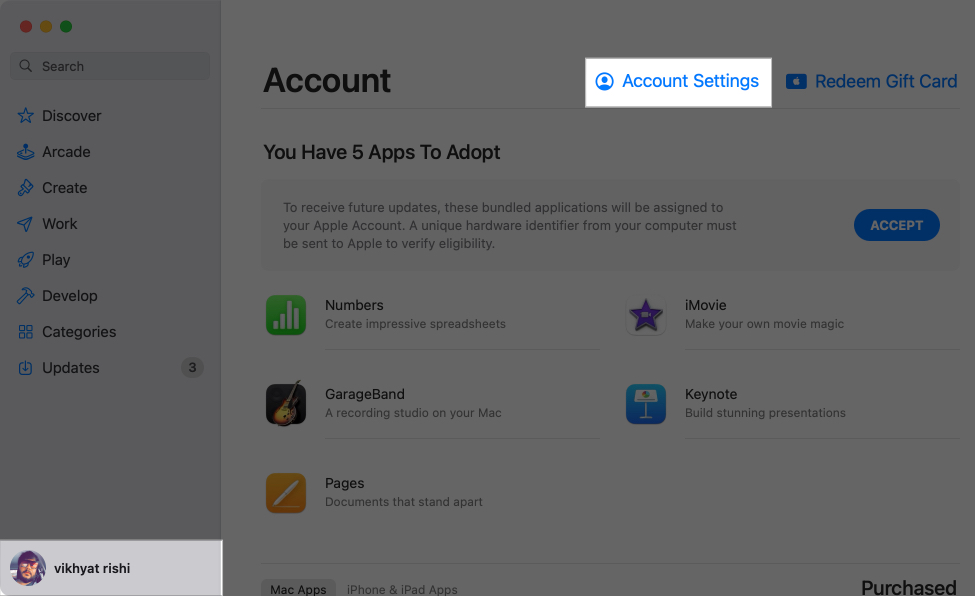
- Click on your profile icon in the bottom-left corner.
- Click on Account Settings on the Account page and sign in with your Apple ID.
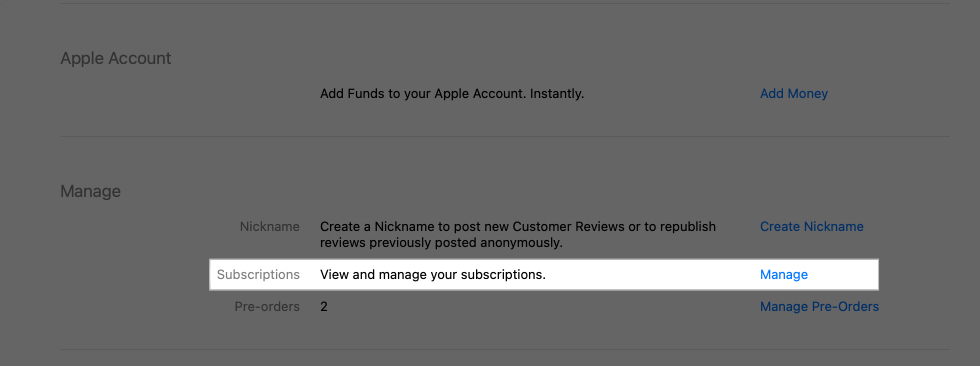
- Now, scroll down to the Manage section and click on Manage next to Subscriptions.
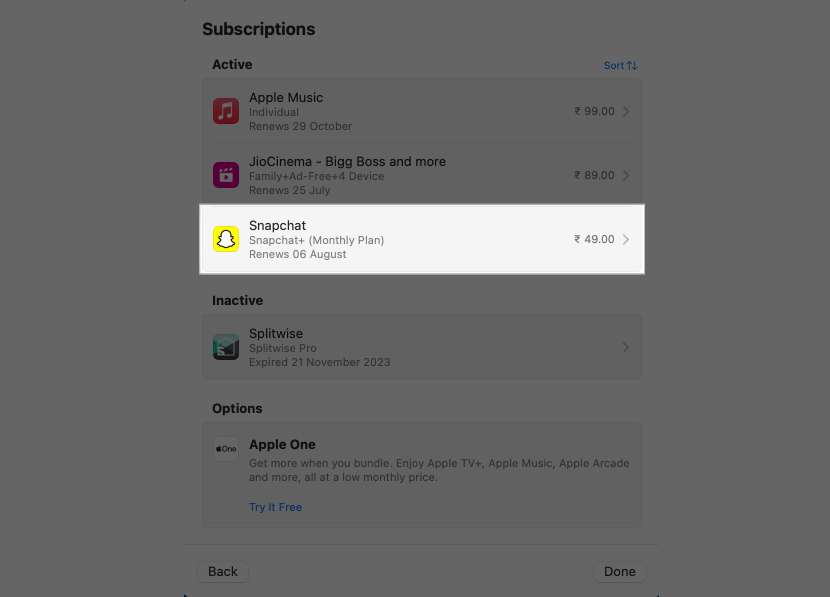
- Select the subscription you want to cancel.
- Click on Cancel Subscription, then the Confirm button to confirm canceling your subscription.
How to cancel subscriptions on your Apple Watch
Thanks to the Apple ecosystem, each subscription that can be canceled through your iPhone and Mac can also be canceled through the paired Apple Watch. Here’s how:
Become an iGeeksBlog Premium member and access our content ad-free with additional perks.
- Open the App Store on your Apple Watch.
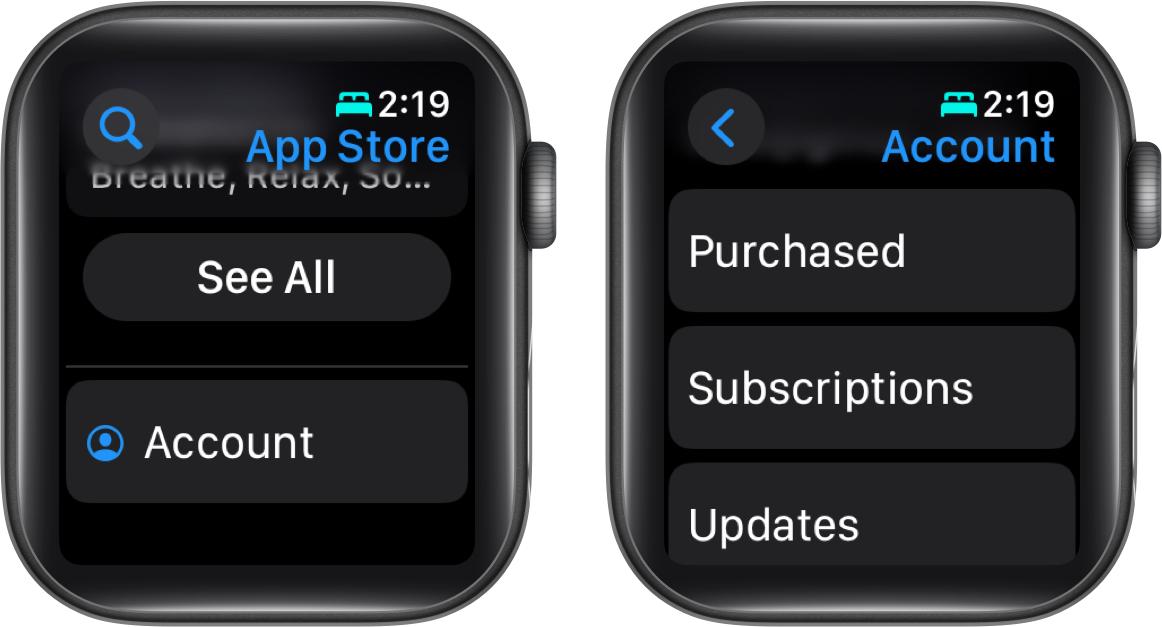
- Scroll to the bottom and tap Account.
- Here, tap on Subscriptions, then select the subscription you want to cancel.
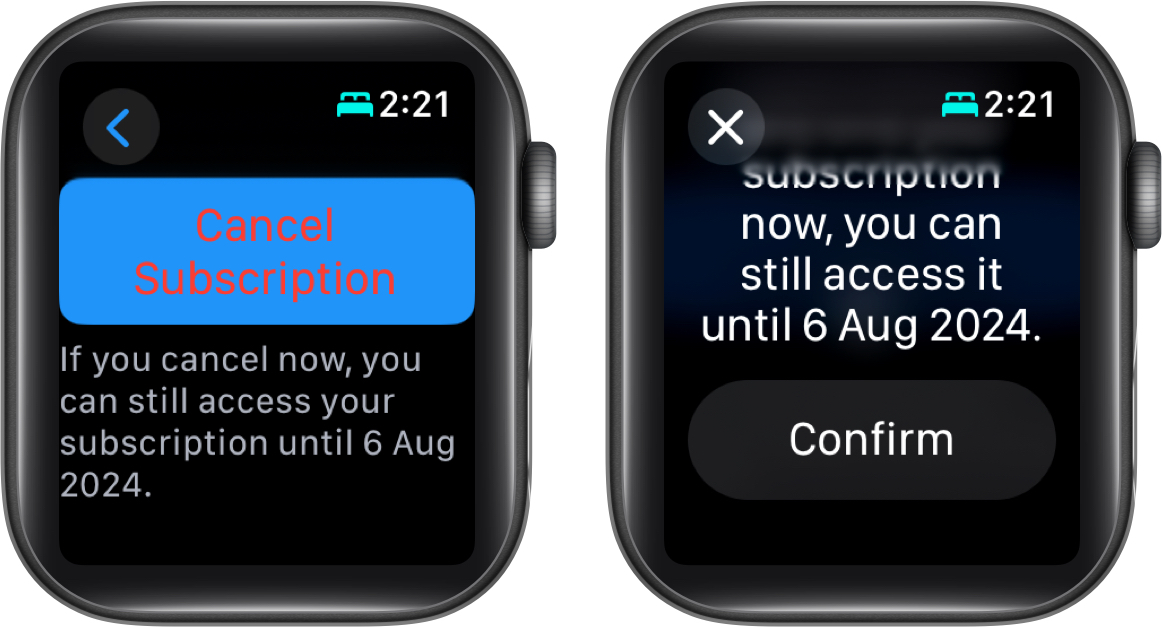
- Next, scroll to the bottom and tap the Cancel Subscription button.
- Tap the Confirm button to confirm your decision.
How to cancel a subscription on an iPhone if you can’t find it
There may be instances where you simply can’t find a subscription on your Apple device. It may be due to a different Apple ID being used for the subscription or because you bought it directly from the company’s website. Here’s what you can do in such cases:
- Open the Mail app on your iPhone.
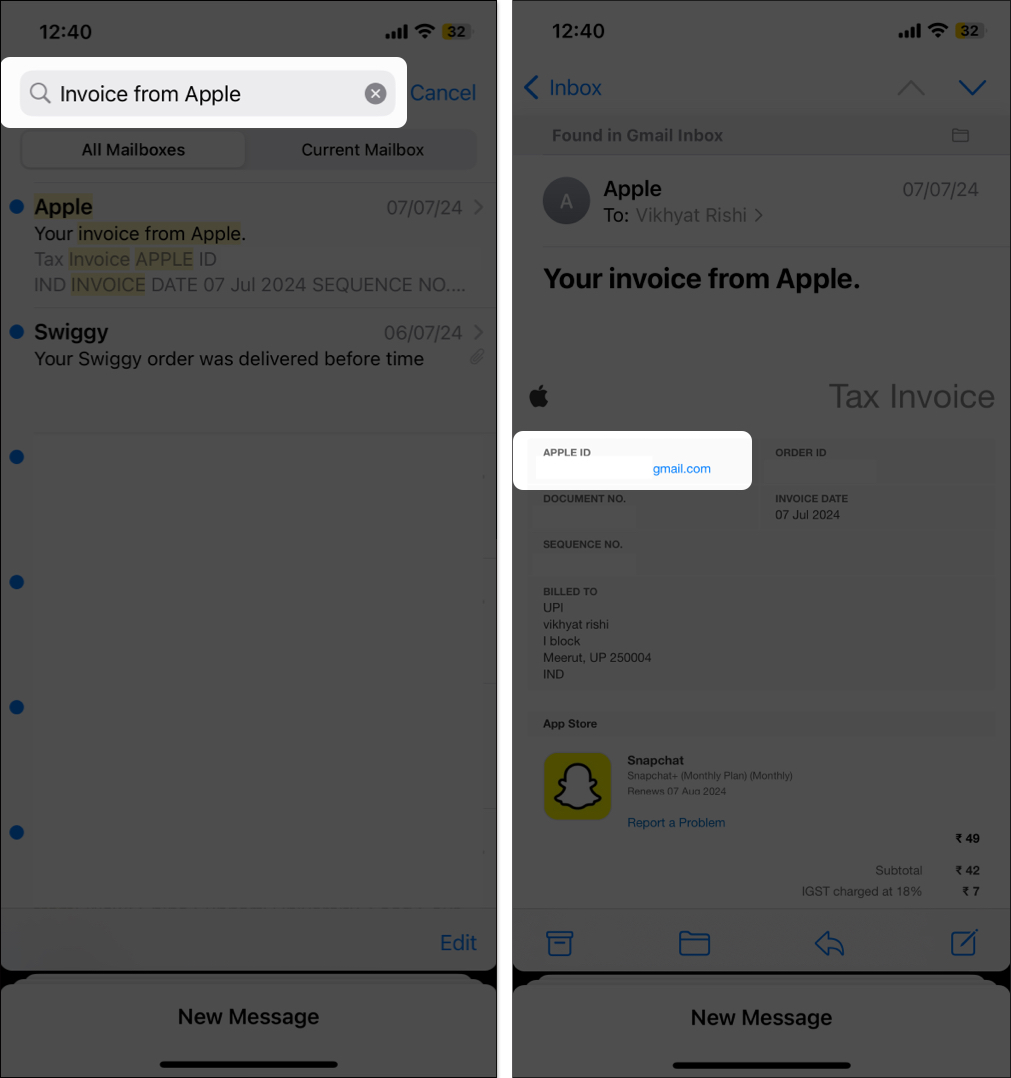
- Enter the phrase receipt from Apple or invoice from Apple in the search bar at the top to find the subscription invoice emails.
- Open the subscription invoice and inspect which Apple ID is being used.
- If the Apple ID that appears differs from yours, but you have access to it, sign in with it on your iPhone and follow the steps we discussed in the previous section.
- If the Apple ID being used for the subscription is your friend’s or a family member’s, ask them to cancel the subscription on your behalf.
- If you can’t find the subscription email, you may have bought the subscription directly from the company, not through Apple. You can view your bank or credit card statement to know which company is billing you. Once done, you can cancel the subscription using the company’s app or contact customer support.
How to reactivate a canceled subscription on your iPhone
You can have many apps on your iPhone whose subscriptions are useful but only for a particular period. For example, the Splitwise app’s subscription is only useful to me when I am on a trip with my friends; after that, it is useless for the time being. That’s why I keep canceling and resubscribing to Splitwise often. Here’s how you, too, can do this:
- Head to the subscription list in the App Store or the Settings app on your iPhone.
- Here, tap the app under the Inactive subscription section to which you want to resubscribe.
- Next, tap the Renew button and confirm with your Face ID or Apple ID password.
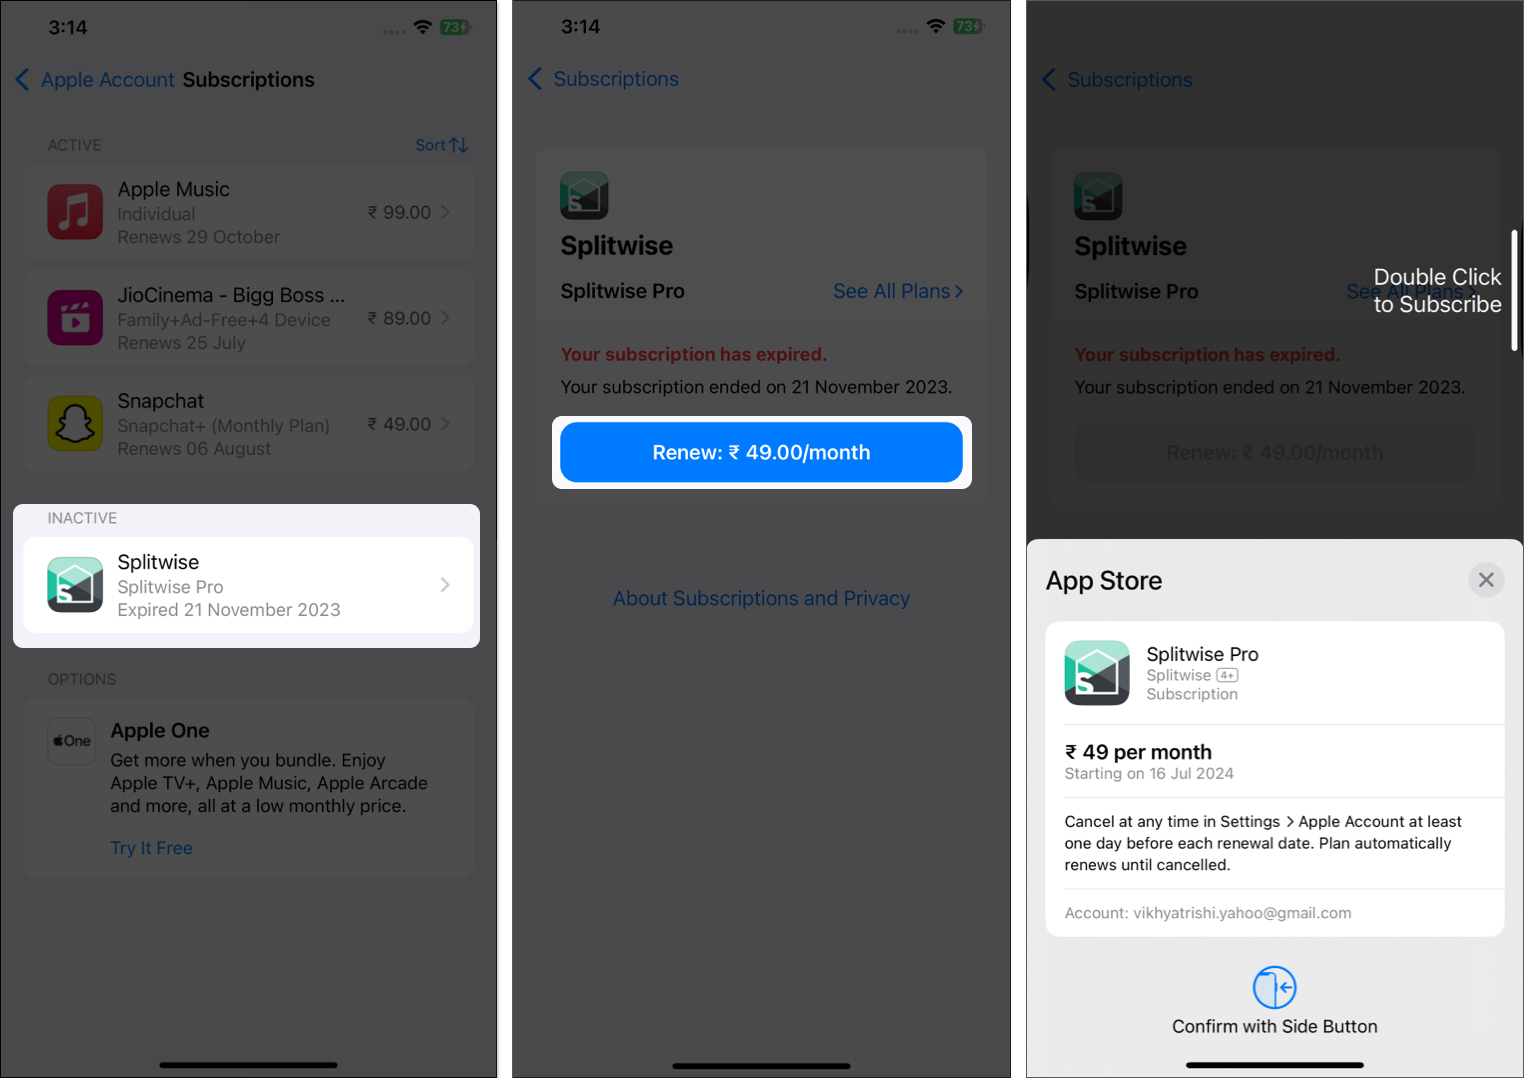
- Alternatively, tap on See All Plans to subscribe to a different plan.
Signing off…
Now you know how easy it is to cancel a subscription on your iPhone. So, going forward, you can ensure you are only paying for the services you use regularly.
Please note that canceling the subscription will not immediately terminate the related services. You can still enjoy the subscription benefits until the end of the current billing period.
If you have any questions or run into any issues, comment below, and we’ll be happy to provide a resolution.
FAQs
Open the App Store and go to Account > Subscriptions, and you’ll see a list of all your iPhone subscriptions on your screen.
Any subscription that isn’t connected to your Apple ID can not be canceled directly from the iPhone.
If you can’t access your Apple subscriptions, ensure you are signed in with the same Apple ID you used to buy the subscription and try again.
Read more:
