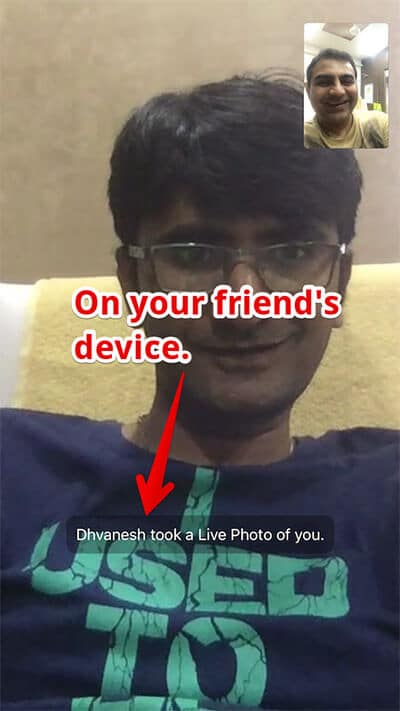
Having already made a quick guide on how to take Live Photo from FaceTime call on iPhone and iPad, I have now set my sights on getting it done for Mac as well. To use this new feature, both the participants in the video chat must have macOS High Sierra or later on their device. Besides, whenever you capture the photo of your friend during the call, he/she will be notified about it. So, you can’t snap the pic of your friend secretly.

How to Enable FaceTime Live Photos on Mac
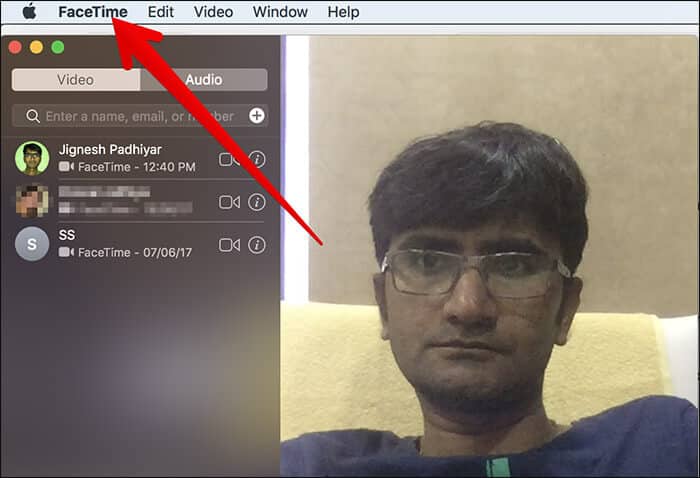
Step #1. Open FaceTime app on your Mac.
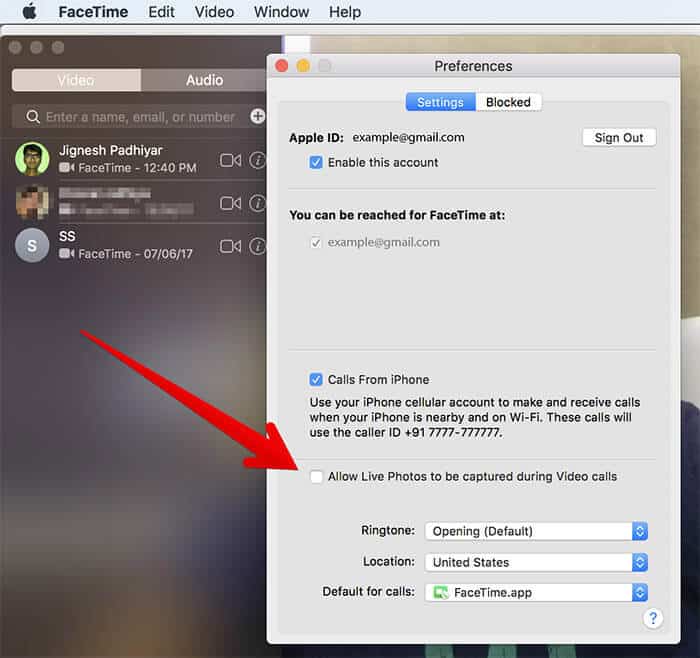
Step #2. Now, tap on FaceTime menu at the top left corner.
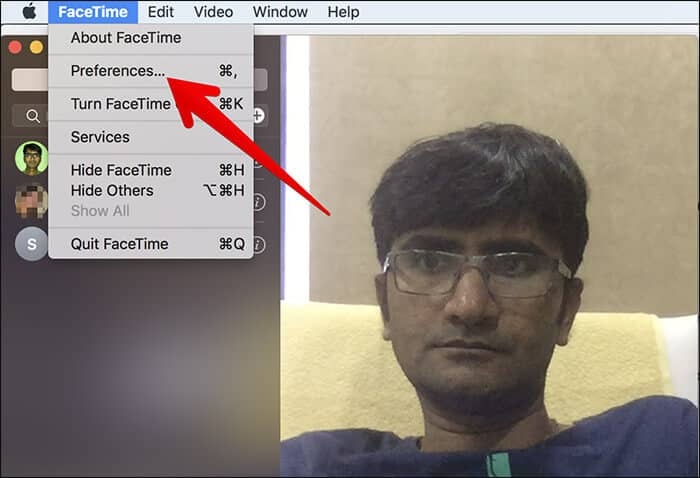
Step #3. Next, you need to select Preferences.
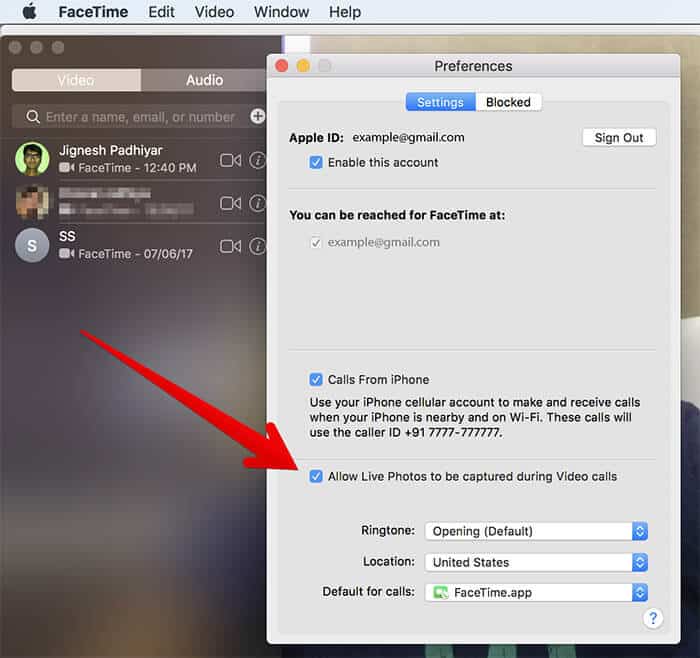
Step #4. Now, you have to check the box next to Allow Live Photos to be captured during video calls; if it’s not already enabled.
How to a Take Live Photo in FaceTime on Mac
Step #1. Make a FaceTime call from your Mac.
Step #2. During the call, click the shutter button at the bottom corner of the screen.
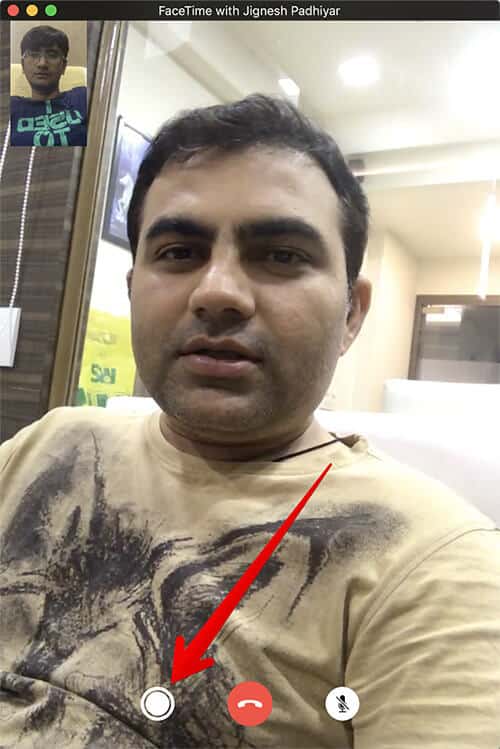
That’s it! You have captured the photo. Your friend will now get a notification about it.
Access FaceTime Live Photos on Mac
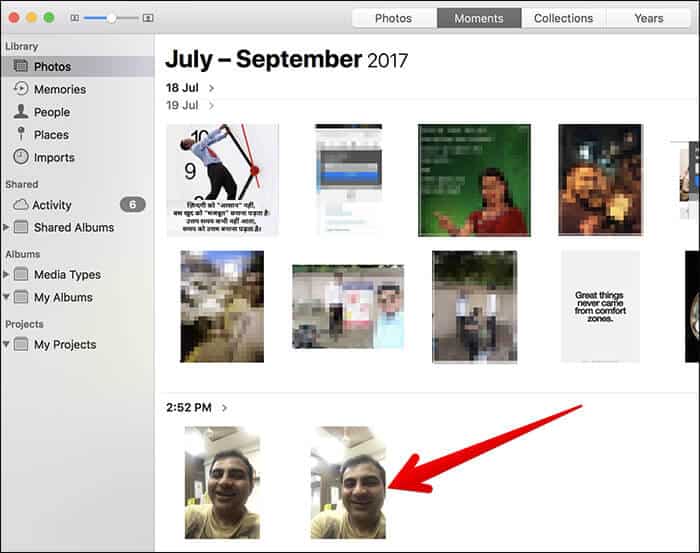
Want to view the shots you have just snapped? Head over to your Photos app.
Step #1. Open Photos app on your Mac.
Become an iGeeksBlog Premium member and access our content ad-free with additional perks.

Step #2. Now, click on Photos section and check out the latest images.
Edit FaceTime Live Photos on Mac
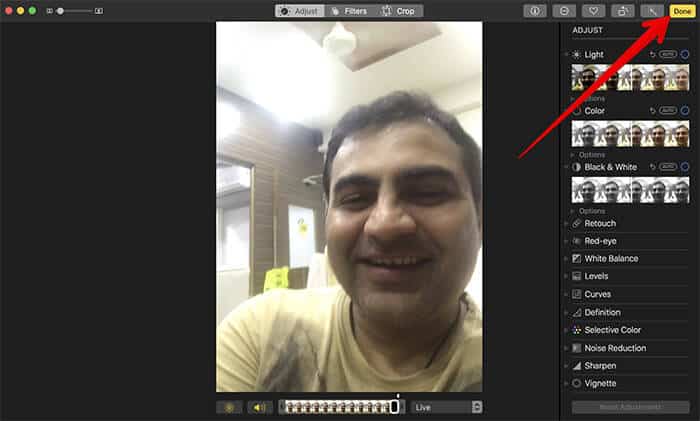
The Photos app consists of a number of powerful editing tools to let you decorate your Live Photos to your best liking.
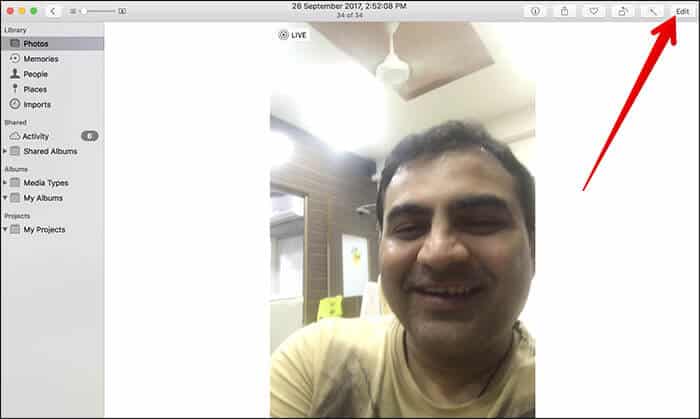
Step #1. Open Photos app → head over to the Live Photo you want to edit and select it.

Step #2. Now, click on Edit at the top right corner.
Step #3. Take the full advantage of all the superior editing tools to embellish your image. For instance, you can adjust the light, crop the image, choose your favorite filter, reduce noise, and more.
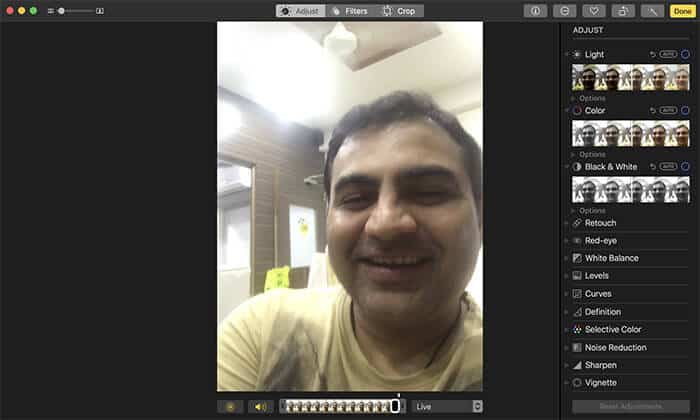
Step #4. In the end, make sure to click on Done at the top right corner to confirm the change.
How to Prevent Anyone from Capturing Live Photos in FaceTime on Mac
No longer want anyone to snap your photo during the chat? Worry not, you can easily disable this feature.
One thing you need to know that you will still be able to capture the photo of the person on the other side of the chat as long as it’s enabled on their device.
Step #1. Open FaceTime on your Mac → Click on FaceTime menu.
Step #2. Click on Preferences → finally, uncheck the box next to Allow Live Photos to be captured during video calls.
Any question?
What’s your take on this new feature in FaceTime on Mac? Share your feedback in the comments below.
You may want to take a peek at these posts as well:
