Key Takeaways
- With Mac Virtual Display, you can see your Mac screen in your Vision Pro view and move your pointer between devices.
- To connect Mac to Vision Pro: When wearing your Apple Vision Pro, look at your Mac display and tap the Connect button that appears above your Mac.
- Alternatively, open the Control Center > Tap the Connection icon > Select your Mac.
While there are plenty of cool things you can do with your Apple Vision Pro, one that you definitely have to check out is connecting it to your Mac. This seamless integration is made possible through a feature known as Mac Virtual Display.
It allows you to bring your Mac screen front and center on your Apple Vision Pro, thereby providing you with the experience of interacting with a portable 4K screen! In this article, I’ll tell you everything you need to know about connecting your Mac to Apple Vision Pro.
Requirements to use Mac Virtual Display for Vision Pro
Before you connect your Mac to Apple Vision Pro, be sure to review the following requirements. These can help you avoid connection problems.
- You must be running macOS Sonoma or later and have the latest version of visionOS on Apple Vision Pro.
- You must be signed in with the same Apple ID on both devices and use two-factor authentication.
- You must have the devices within 30 feet (10 meters) of each other.
- You must have both Bluetooth and Wi-Fi turned on and not be sharing your internet connection on either device.
- Ensure you’re not using Apple Vision Pro’s Guest User feature. Mac Virtual Display doesn’t work in this mode.
If you want to share your pointer between devices, you must have Handoff enabled.
- On Mac, go to System Settings → General → AirDrop & Handoff and turn on the toggle.
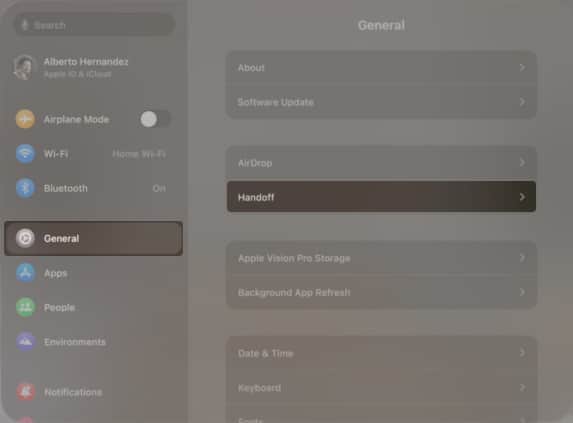
- On Apple Vision Pro, go to Settings → General → Handoff to turn on the feature.
How to connect Mac to Vision Pro
If you meet all of the above requirements, then connecting Apple Vision Pro to your Mac desktop is a breeze.
Connect a Mac laptop:
- Put on Apple Vision Pro as you normally would.
- Make sure your MacBook display is on, then look at the screen.
- Select Connect, which appears in the Vision Pro view above your Mac.
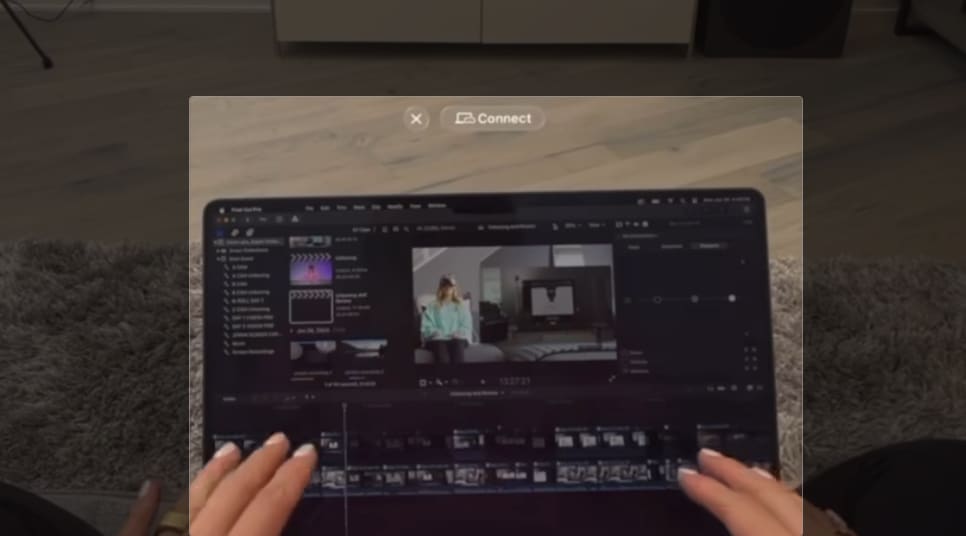
If you don’t see the Connect button, just head to the Control Center and follow the same steps you would for connecting a Mac desktop – mentioned below:
Become an iGeeksBlog Premium member and access our content ad-free with additional perks.
Connect a Mac desktop:
- Open the Control Center on Mac.
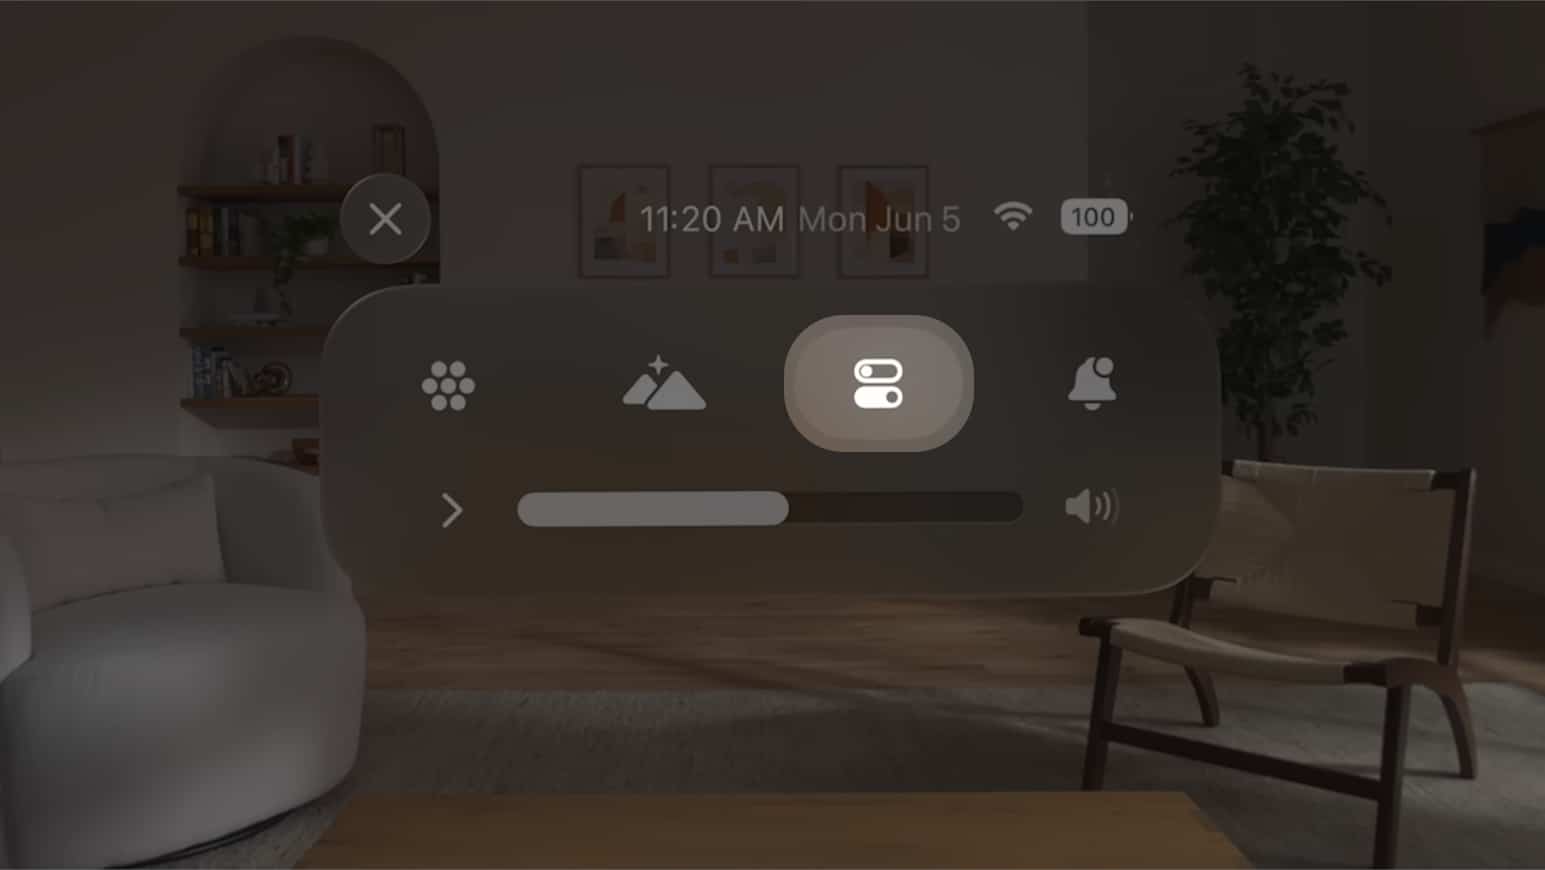
- Tap Mac Virtual Display button (an image of Mac next to Vision Pro).
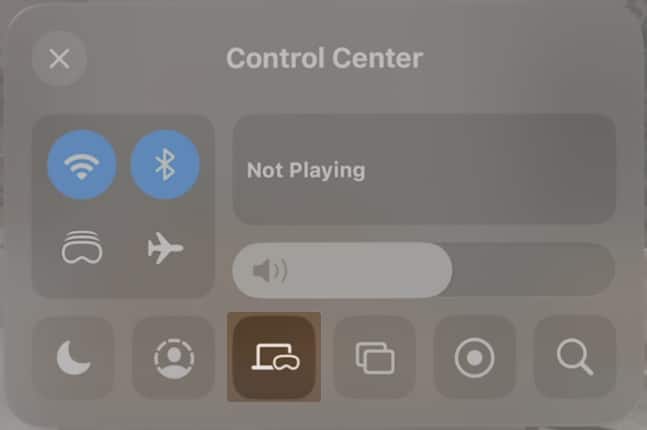
- Pick your Mac.
That’s it!
How to control Mac Virtual Display
Once you have connected Vision Pro to your Mac, you can then use the same gestures for moving and resizing apps on Apple Vision Pro to adjust the size of your Mac screen.
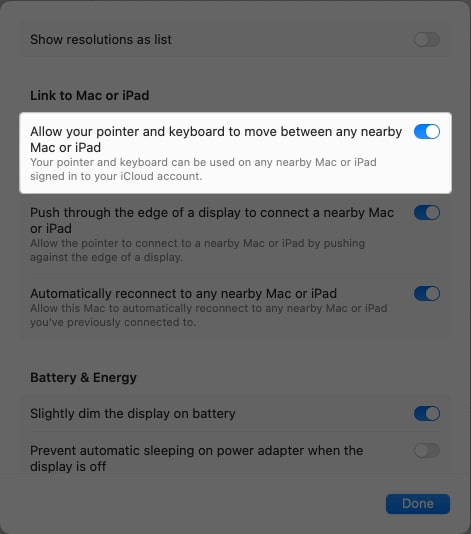
You can use your Mac’s mouse or trackpad as usual, and when you move it off the edge of one screen, it will appear on the other device. To ensure this is possible, enable the following:
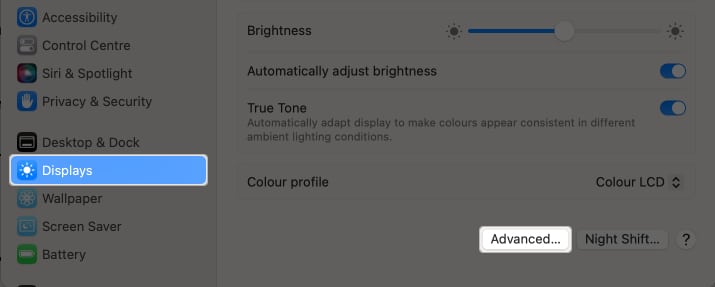
- On your Mac, go to System Settings → Displays → Pick Advanced.
- Toggle on Allow your pointer and keyboard to move between any nearby Mac or iPad.
Choose Mac display and resolution
If you have more than one screen connected to your Mac, the Mac Virtual Display will only show the one you have set as the main display.
If your Mac has an Apple silicon chip, it can show up on Apple Vision Pro in 4K resolution. But if your Mac has an Intel chip, it can appear in resolutions up to 3K.
To change the resolution of your Mac’s display on Apple Vision Pro, go to the System Settings on your Mac → Click Displays → Pick from the different resolution options.
If you want to see more choices, you can turn on the “Show all resolutions” setting.
Disconnect Mac Virtual Display
To turn off or disconnect your Apple Vision Pro from your Mac, simply tap the close (X) button at the bottom of your Mac window.
A Mac screen like you’ve never seen!
By connecting your Mac to Apple Vision Pro, you can work and play in a whole new way. Be sure to give it a try, and let us know what you think!
Read more:
