With so many email clients available, it is common to get confused about which one to choose. However, an iCloud email is the best option if you are an Apple user. It is free to create and offers all the capabilities you get in other email clients, along with 5 GB of free storage space. This post details how to create a new iCloud email on an iPhone, iPad, or Mac and why you should consider using it.
How to create a new iCloud email on iPhone or iPad
You can create an iCloud email address in two ways: while setting up the Apple ID or at any time after that.
If you plan to create one while setting up the Apple ID on your new iPhone, just make sure your Apple ID ends with @icloud.com. An iCloud email will be automatically created alongside it.
Suppose you skipped the above and set up your Apple ID using your phone number or another email service, like Gmail. You can still create a primary iCloud email from iPhone Settings.
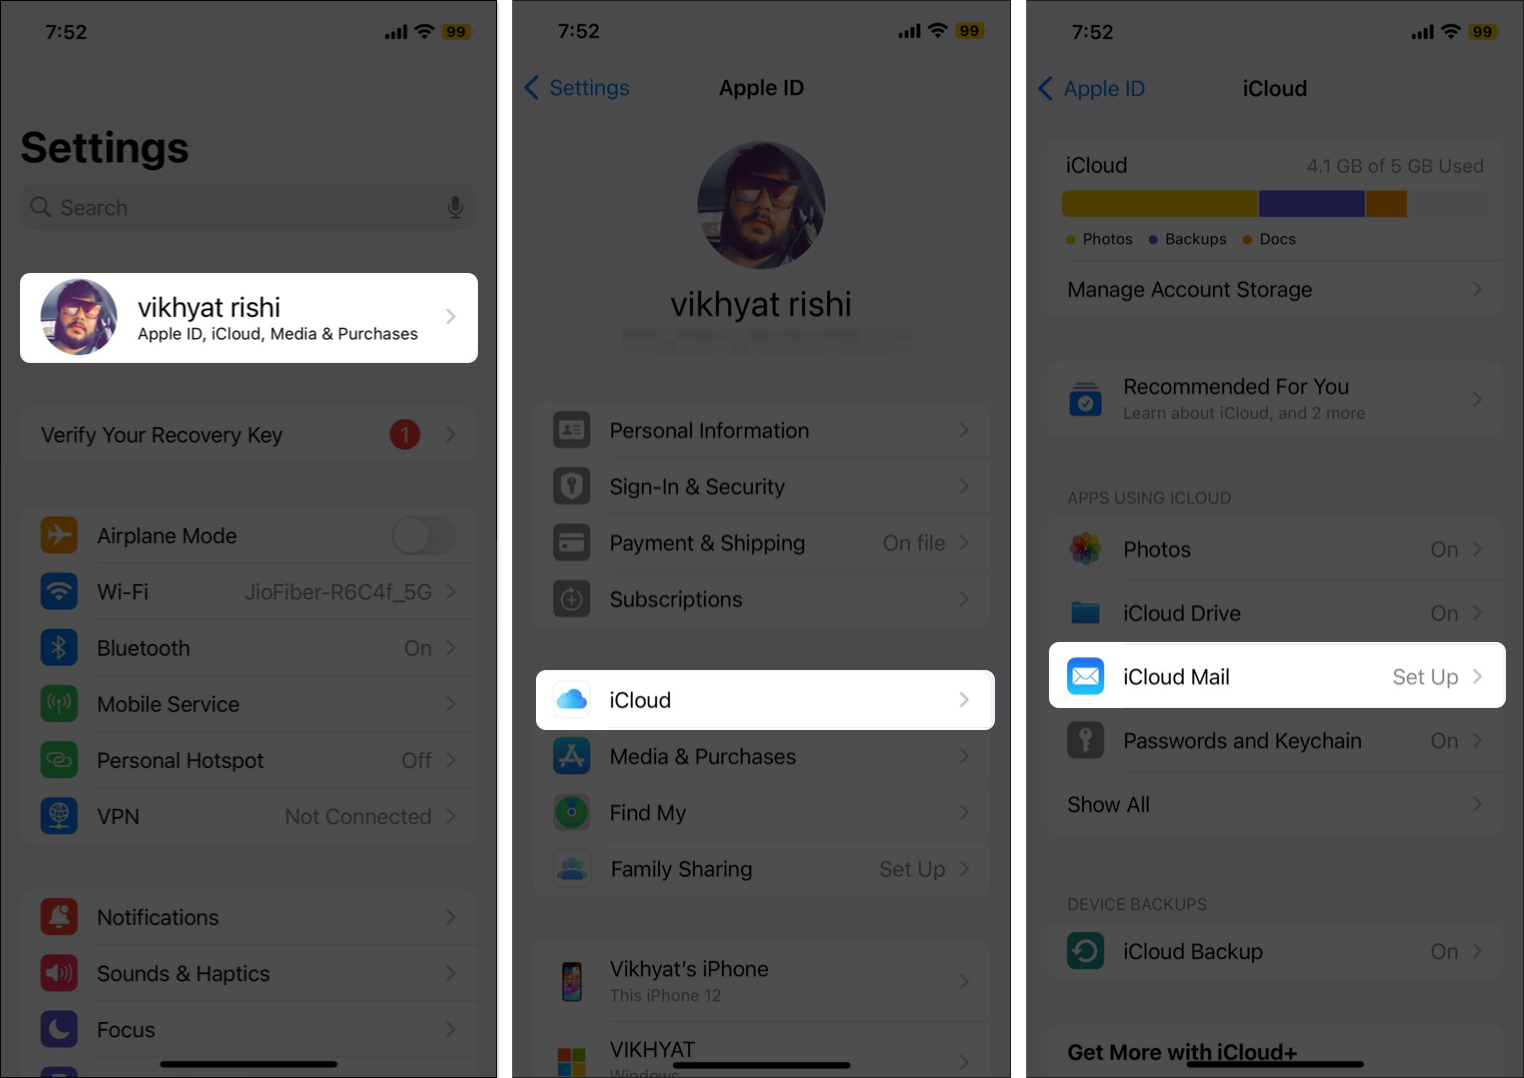
- Open Settings → Tap your Apple ID (Name and Photo) tab.
- Select iCloud.
- Tap iCloud Mail under the Apps Using iCloud section.
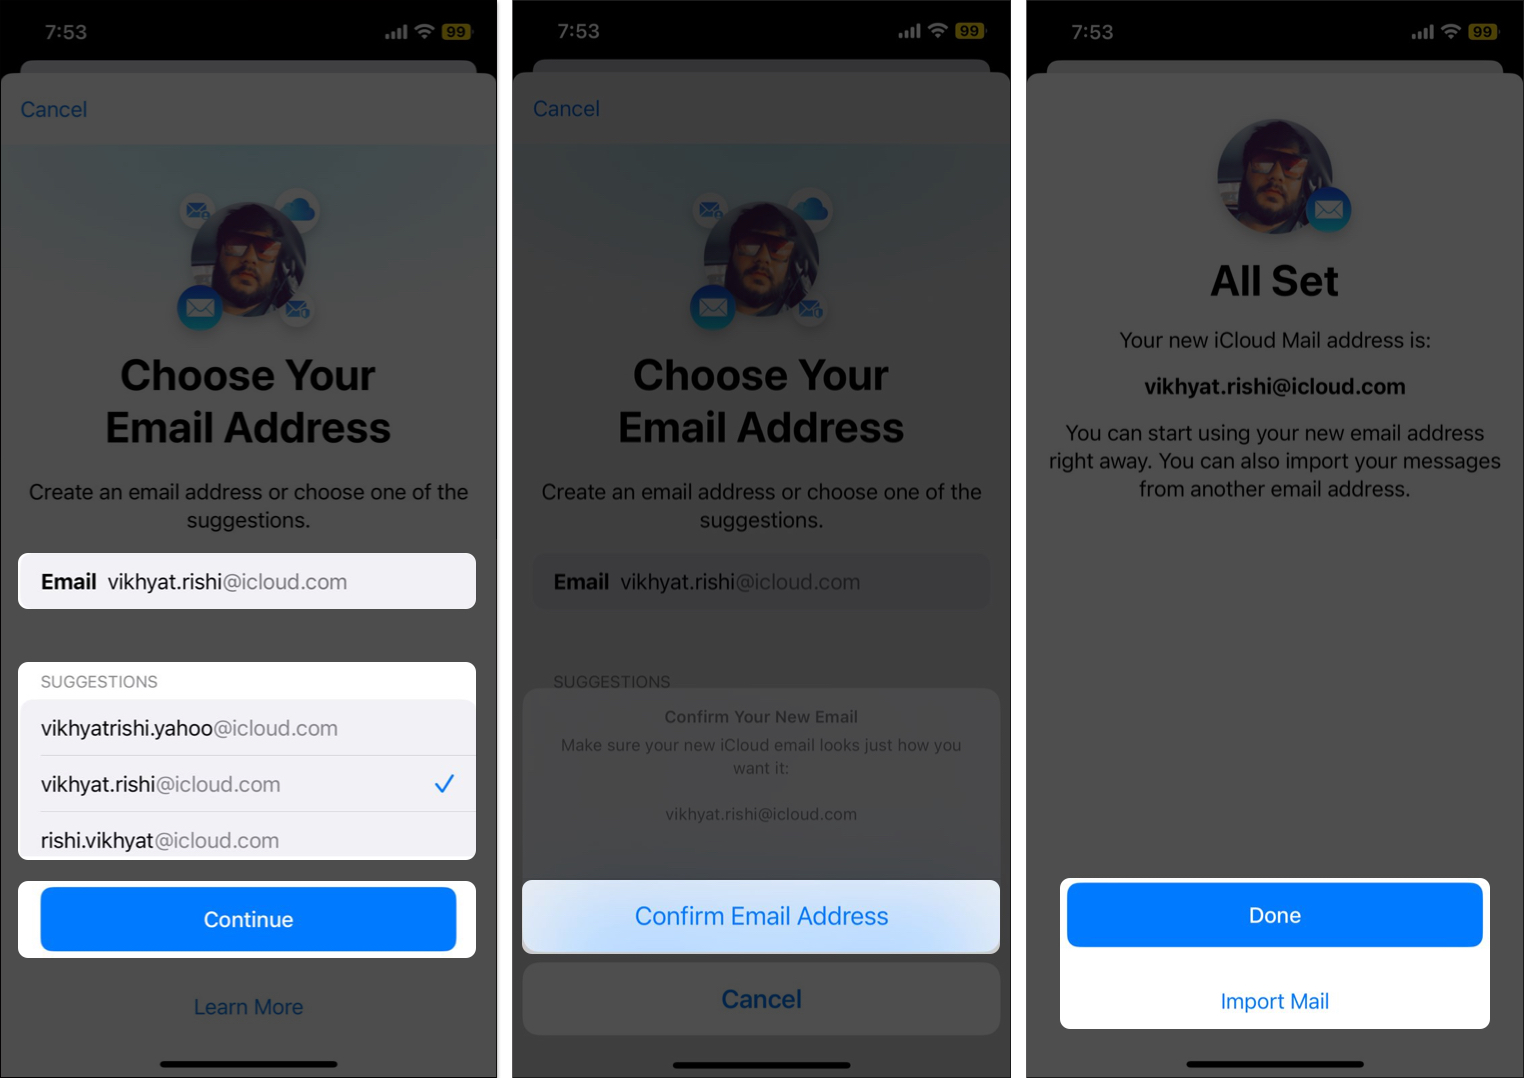
- Now, enter the name you want to use or select one from the available suggestions and tap Continue.
- Select Confirm Email Address when the confirmation prompt appears.
- Now, tap Done to finish the setup or Import Mail to import your messages from another email address.
Once you finish creating an iCloud email, you can easily access it by logging into iCloud Mail on your iPhone or iPad. You can also set up iCloud to work with your custom domain.
How to create iCloud email on Mac
Like iPhone and iPad, the steps to create a new iCloud email on a Mac are also pretty straightforward, and you can do so with just a few clicks.
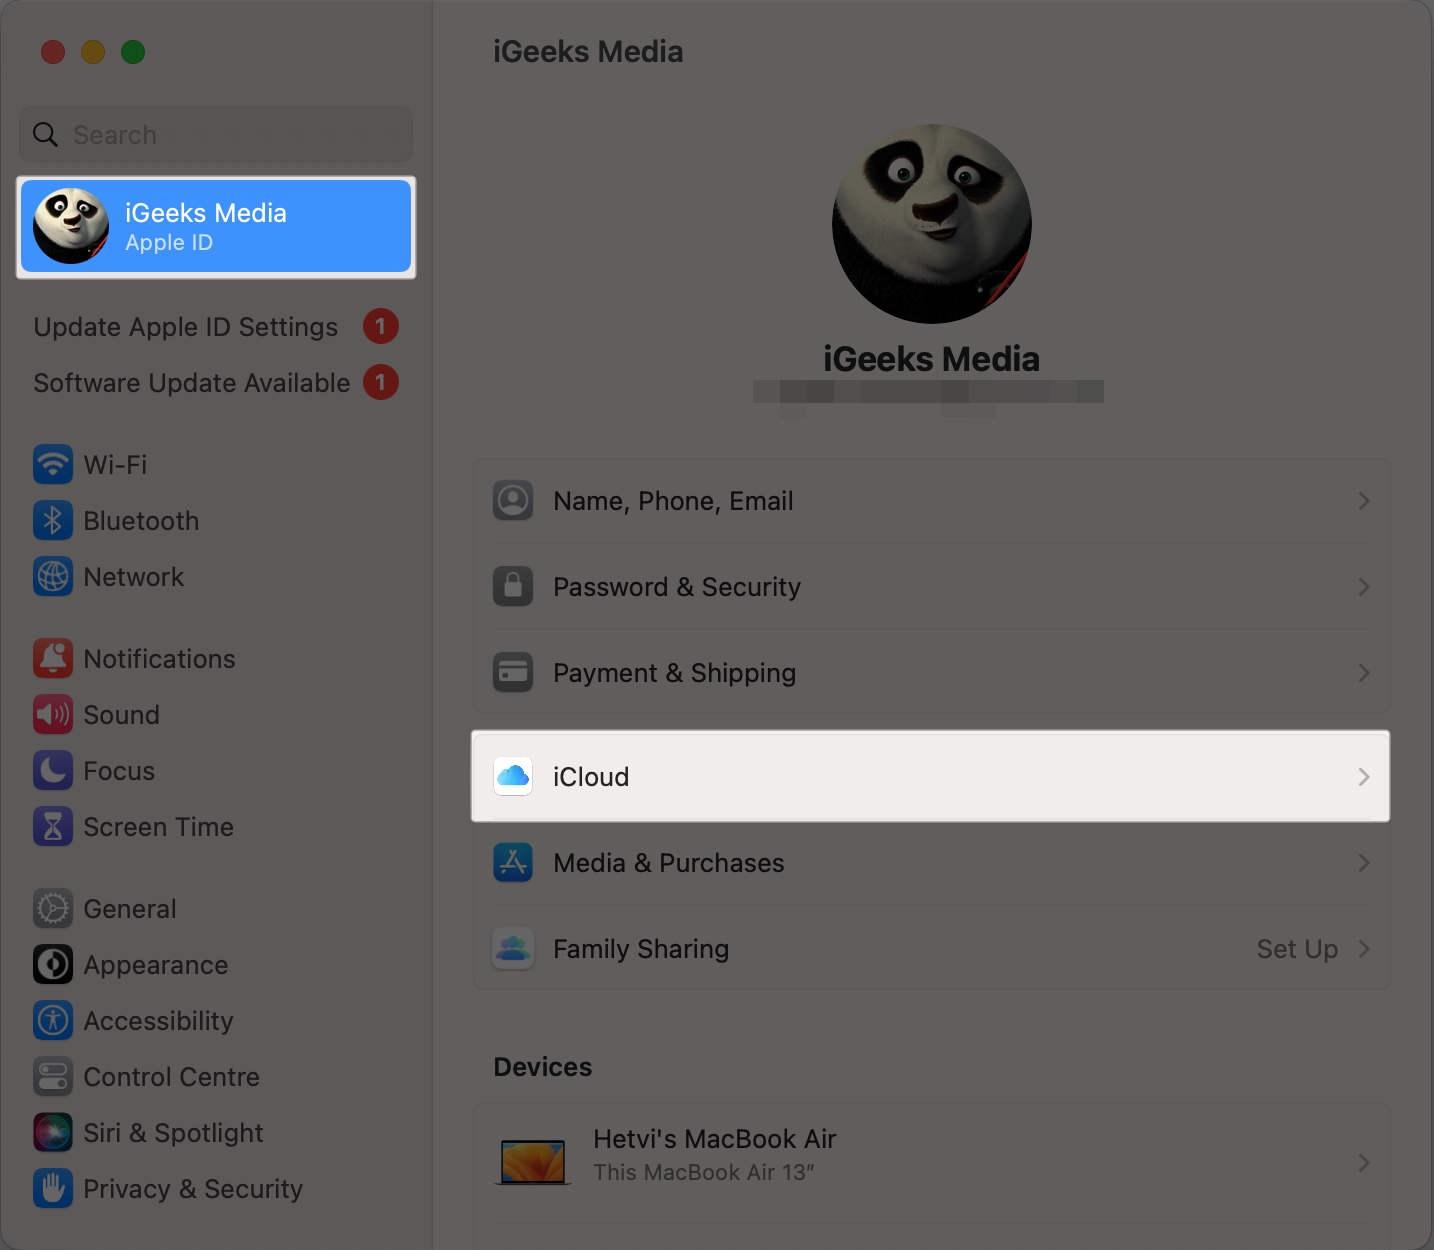
- Click the Apple logo at the top → Go to System Settings.
- Pick on Your Name on the left → Select iCloud on the right.
- Select iCloud Mail under the Apps Using iCloud section.
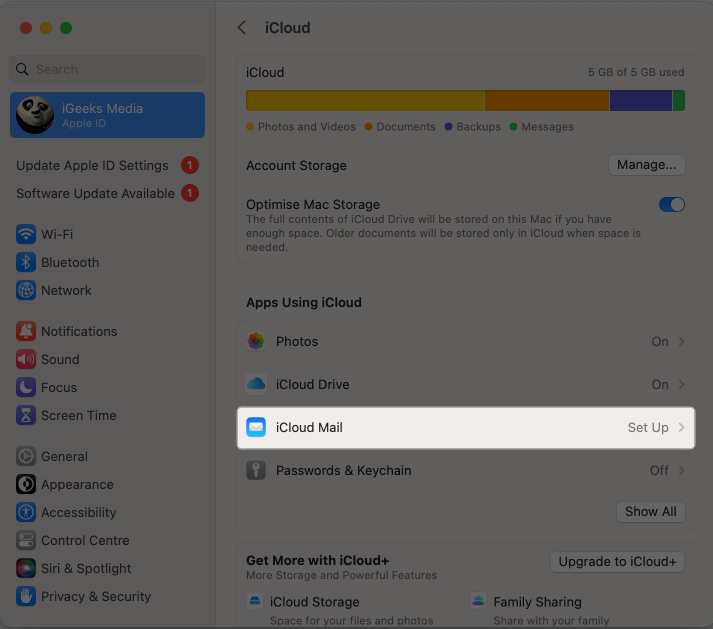
- Toggle on Sync This Mac.
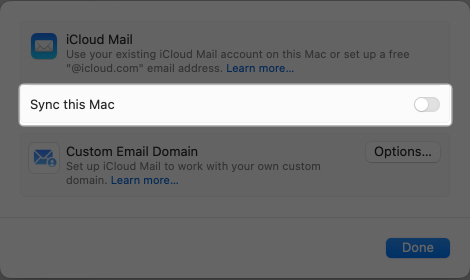
- Now, enter the Name you want to use for your iCloud email → Click Continue.
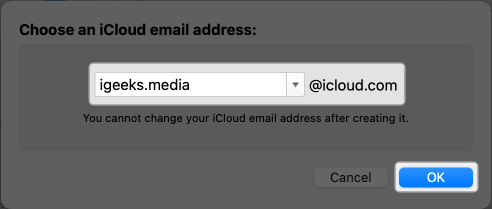
- Click on Create in the confirmation prompt.

How to create iCloud email on Windows or Android device
If you don’t own an Apple device but still want to use an iCloud email account using a web browser. All you need beforehand is an active Apple ID.
Become an iGeeksBlog Premium member and access our content ad-free with additional perks.
- Go to iCloud.com/mail using your preferred web browser → Sign in using your Apple ID credentials.
- Here, tap the blue Create Email Address button.
- Now, enter the Name you want to use or choose one from the available suggestions and hit Continue.
- Now, tap Confirm to confirm your decision.
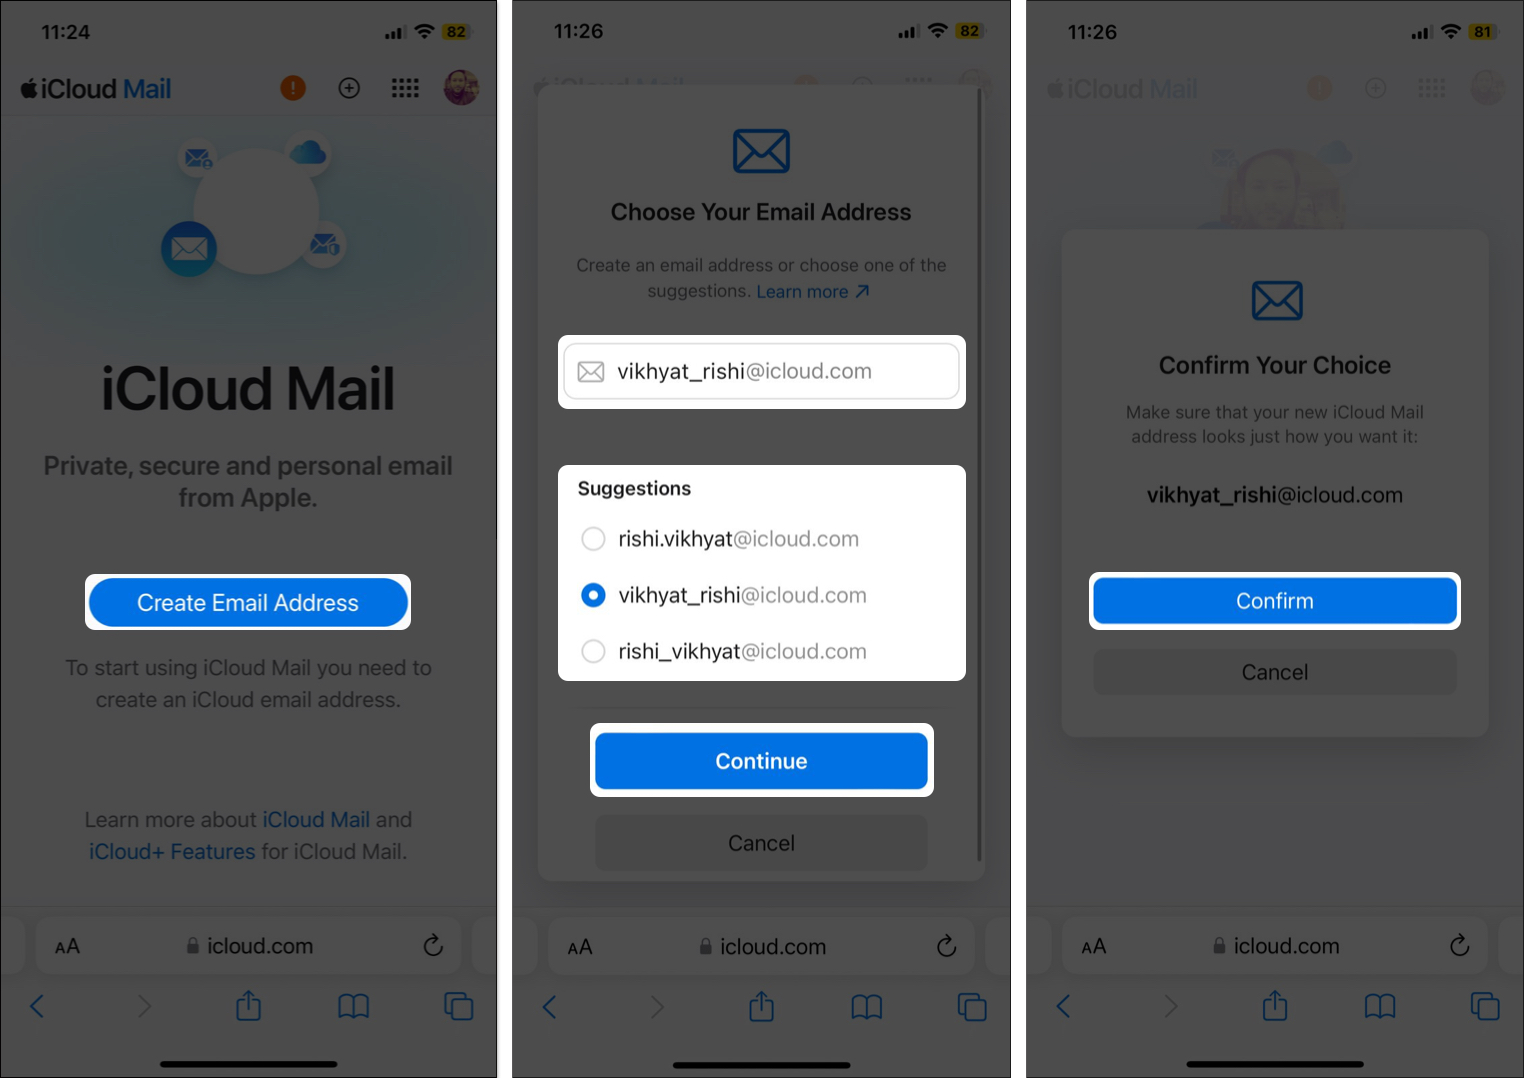
That’s it. You have successfully created an iCloud email account via the web browser and can now add the account to Android and Windows.
What are the benefits of iCloud email?
Setting up and using an iCloud email is different from using regular email clients. It is your gateway to the seamless Apple ecosystem’s interconnected world, offering you convenience, robust security, and enhanced productivity.
- Seamless integration across devices: Like every other Apple ecosystem service, iCloud email ensures seamless synchronization across Apple devices. Any email sent or received on one device will immediately reflect on others.
- Storage and security: The iCloud service offers free 5GB storage per user with upgrade options to free you from the shackles of email clutter. Advanced security features like SSL and two-factor authentication safeguard your emails and private information.
- Effortless sorting and productivity: iCloud email offers a user-friendly interface that allows you to categorize, search, or archive your emails effortlessly.
- Automatic Backup: An iCloud email account not only keeps your emails easily accessible but also automatically backs them up to ensure their safety. So you don’t have to worry about data loss and associated headaches if a device malfunctions or is lost.
I could iCloud!
And that’s it; now you know how easy it is to create iCloud email on iPhone, iPad, and Mac. You can now use this newly created email address for various Apple services and enjoy a seamless integration and unified experience across all your Apple devices.
Are you still puzzled by a few doubts? You can comment below, and I will be happy to respond.
FAQs
Go to Settings > Apple ID > iCloud > iCloud Mail > Custom Email Domain, and follow the on-screen instructions.
Unfortunately, creating an Apple ID with an existing iCloud email address is not possible.
Also read:
- Best iCloud tips and tricks
- How to back up iPhone and iPad to iCloud, Mac or Windows PC
- How to free up iCloud Storage on iPhone or iPad
