Do you often struggle to coordinate schedules with friends, family, or colleagues using the native iPhone Calendar app? It’s a familiar dilemma for many of us. But there’s a solution at your fingertips – the Calendar app’s ability to create public calendars with shareable URLs. This helps to effortlessly share important dates, pictures, videos, meetings, outings, or romantic dates with just a few taps. In this blog, I’ll show you how to create a Public Calendar on iPhone, making it easier than ever to keep everyone on the same page.
- What is a public calendar on iPhone?
- How to make a calendar public on iPhone and iPad
- How to share a public calendar on iPhone
What is a public calendar on iPhone?
By default, any calendar you create on the iPhone Calendar app is private by default – this is not accessible to anyone other than yourself.
But as the name suggests, a public calendar is accessible by others. You can make such a calendar so others can view it in a read-only mode. Further, sharing a public calendar is simple. You guessed right; you only need to share a generated iCloud link with whoever you choose.
The whole process is a helpful iPhone Calendar trick. Let us go through it in detail.
How to make a public calendar on iPhone and iPad
You can only convert an existing calendar into a public one. Thus, to make a calendar public on the iPhone, create a new calendar, or pick one that you already have. Then, convert it into a public calendar.
Note: Only iCloud Calendars can be made public.
How to create a new iCloud calendar on iPhone and iPad
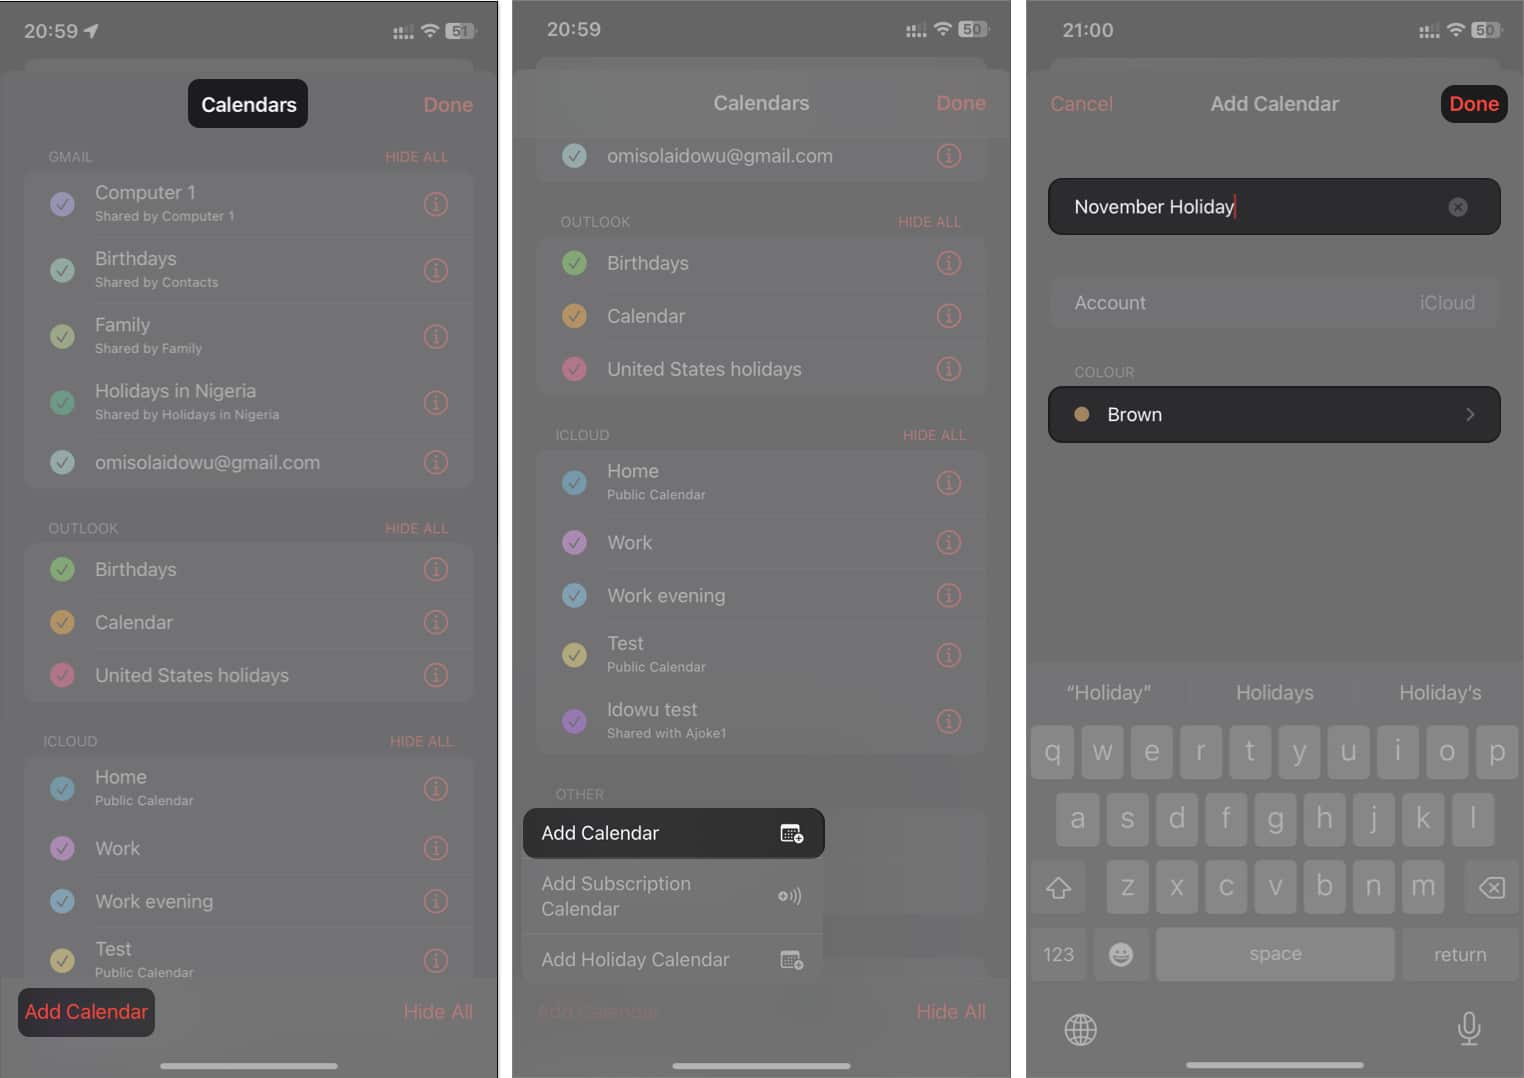
- Open the Calendar app on your iPhone → Select the Calendars tab at the bottom.
On iPad, you’ll have to select the Calendar icon at the top left. - Tap Add Calendar at the bottom-left → Select Add Calendar.
- Type a calendar name in the Calendar Name field and select a color of your choice.
- Then tap Done at the top.
Now, to make this or any other existing iCloud Calendar public on the iPhone:
Become an iGeeksBlog Premium member and access our content ad-free with additional perks.
How to make a calendar public on iPhone and iPad
- Open the Calendar app on your iPhone → Select the Calendars tab at the bottom.
On iPad, you’ll have to select the Calendar icon at the top left. - You will see a list of all your Calendars.
- In the iCloud section, tap the info icon (i) to the right of the Calendar you want to make public.
- Toggle on Public Calendar.
- Finally, tap Done at the top-right.
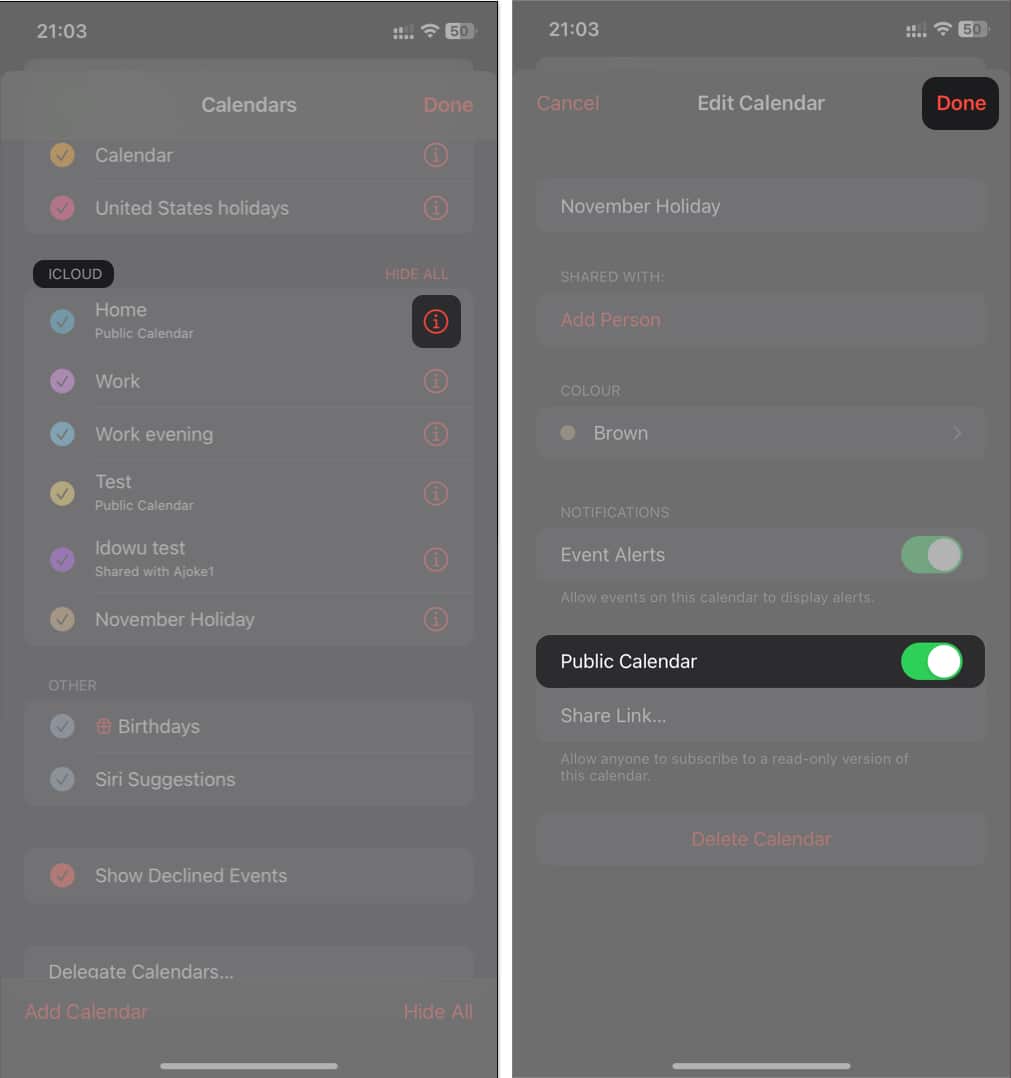
You have successfully made the chosen calendar public and can now share its iCloud link with others.
It is straightforward to share a public calendar:
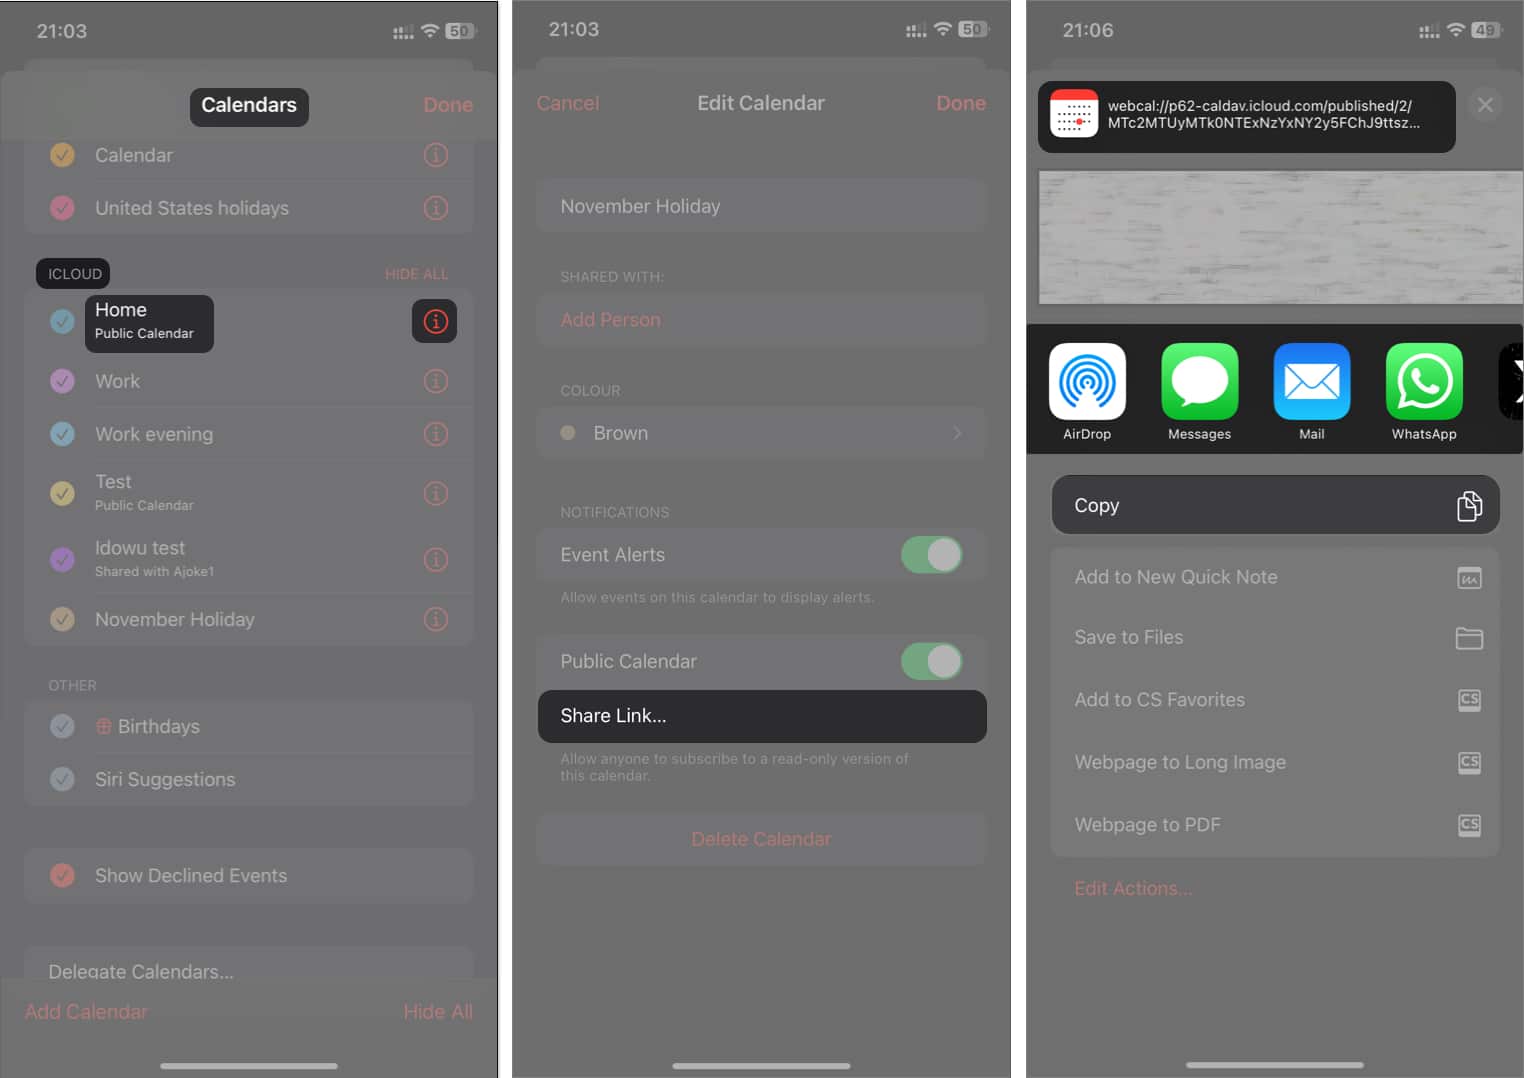
- Open the Calendar app on your iPhone → Enter the Calendars tab.
- You will see a list of calendars in the iCloud section. Each public calendar has Public Calendar written under it.
- Tap the red info icon (i) to the right of the public Calendar you want to share.
- Pick Share Link.
- From the Share Sheet, you can Copy the link and send the copied link to a recipient or share the link directly via Messages, AirDrop, or any other media.
Simple, isn’t it?
Conclusion
Creating and sharing a public calendar on the iPhone is as simple as described. Now, you can share your schedules and routines with friends, colleagues, or family. However, be careful not to publicize sensitive calendars to avoid poking from scammers and threat actors. Why are you making your Calendar public? Let us know in the comments section below.
Read more:

