How to digitally sign a document from your iPhone or Mac? Though not a momentous question, it does crop up occasionally for digital agreements, urgent receipts, self-attestation, etc. Well, the good news is that you can create a signature and sign documents on your iPhone, iPad, and Mac in multiple ways.
I have covered each of these in detail. So, choose the one that fits your bill. Let’s get started!
- How to sign a document on iPhone and iPad
- How to sign a document on Mac
- How to create a transparent signature on Mac
- How to delete saved signature from iPhone, iPad, and Mac
How to sign a document on iPhone and iPad
All thanks to the magic of the Markup tool, you can easily create a handwritten signature and use it to sign PDFs and photos from iPhone and iPad.
Depending upon your file’s location or type and ease, choose a suitable method from the following.
I. Sign a PDF on iPhone using the Files app
- Open the Files app and select the PDF document.
- Tap the Markup icon.
- Select the + icon and tap Signature.
- Sign using a finger or a compatible stylus.
- Tap Clear to start over and Done once you are satisfied.
The signature will show up in the document.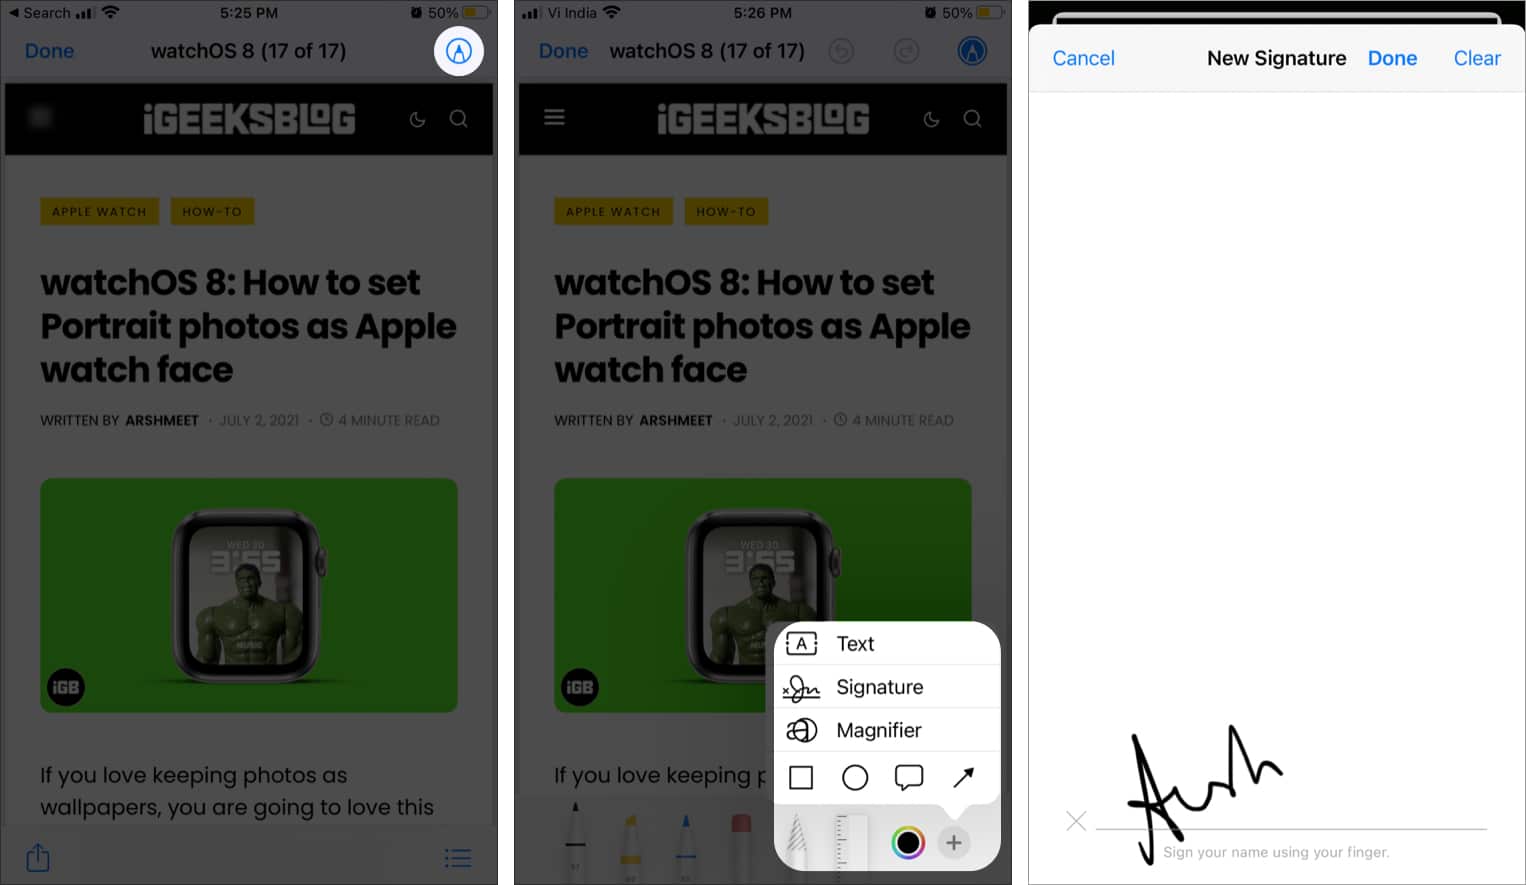
- Resize if needed, and move it to the desired location.
- Long-press the signature to Cut, Copy, Delete or Duplicate the signature.
- Tap Done to save.
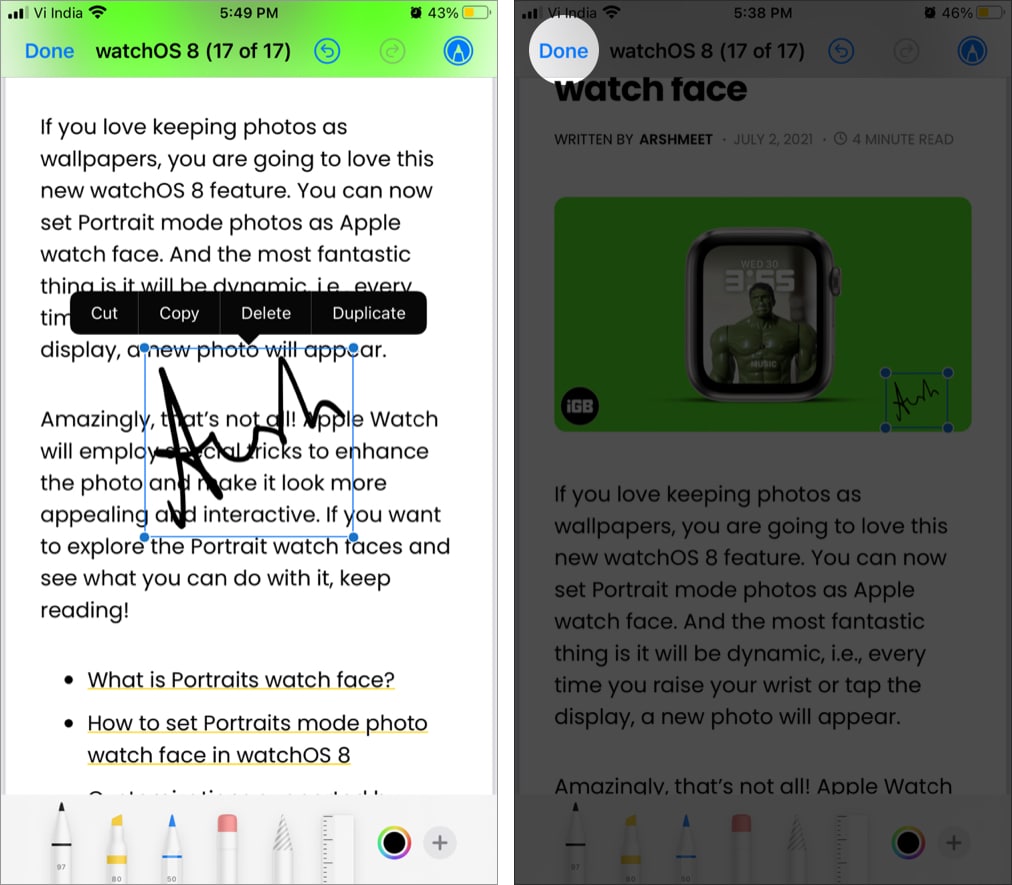
Note: Once saved, you won’t be able to revert changes. So, if you are unsure, duplicate the file before signing.
To add more signatures:
Go to the Files app → PDF → Markup icon → + icon → Signature → Add or Remove Signature → + icon → sign → tap Done.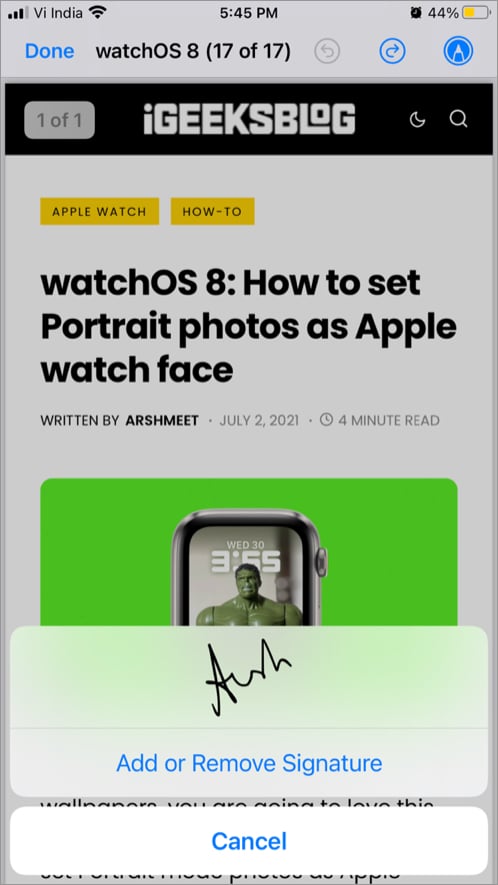
II. Sign a scanned document on iPhone using the Notes app
Unfortunately, you can’t insert a signature into a plain note. The feature is only available if you scan a document via the Notes app or add a photo or PDF into notes.
- Tap and open the scanned document/PDF/Photo in the Notes app.
- Tap the Share icon at the top right.
- Select the Markup option from the share sheet.
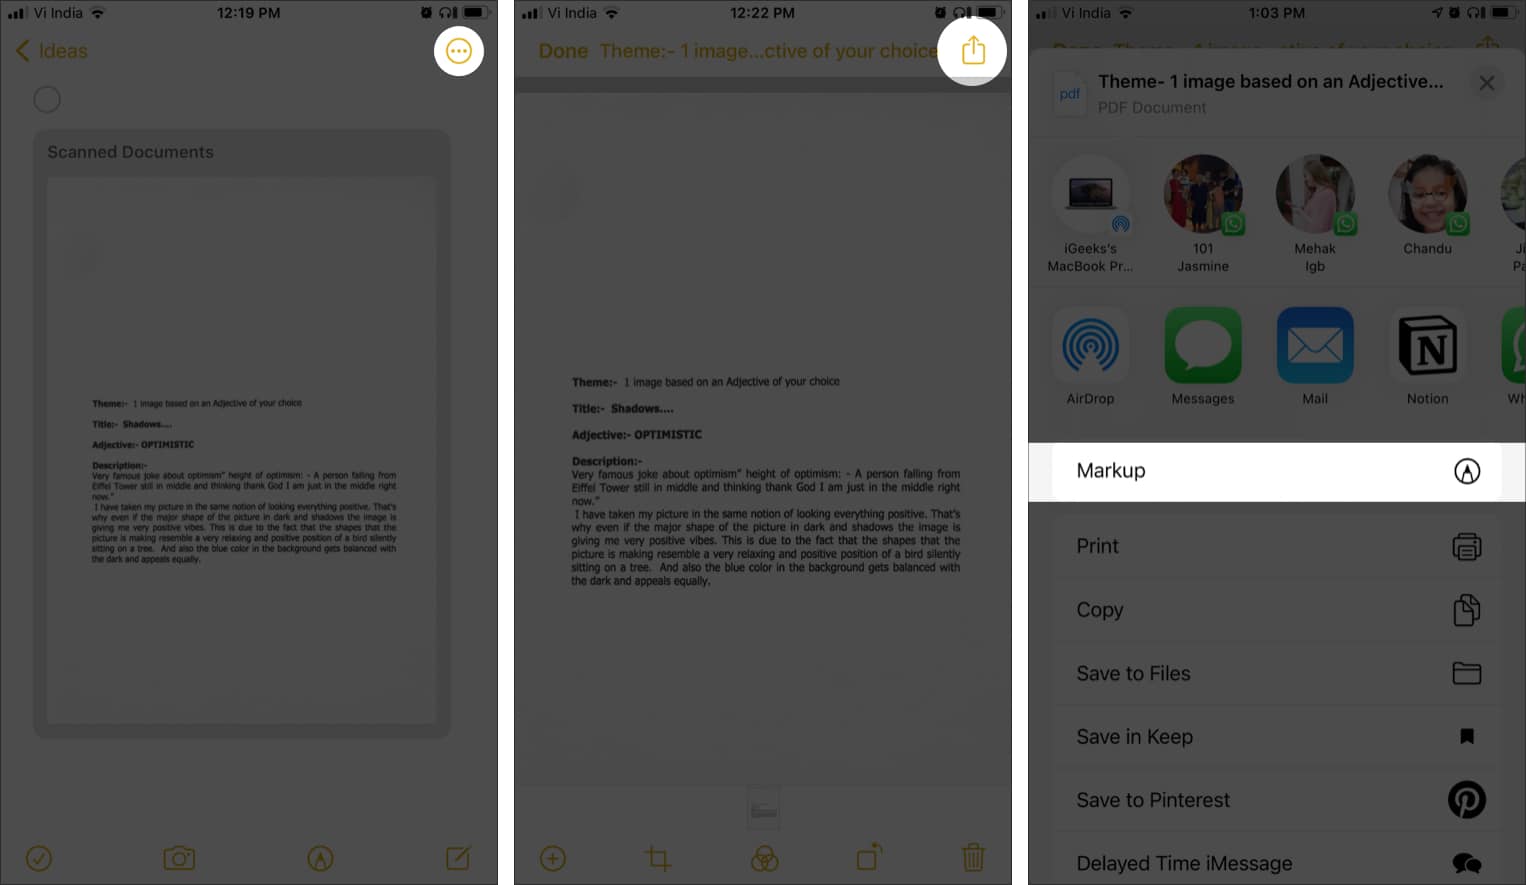
- Hit the +icon at the bottom right and select signature.
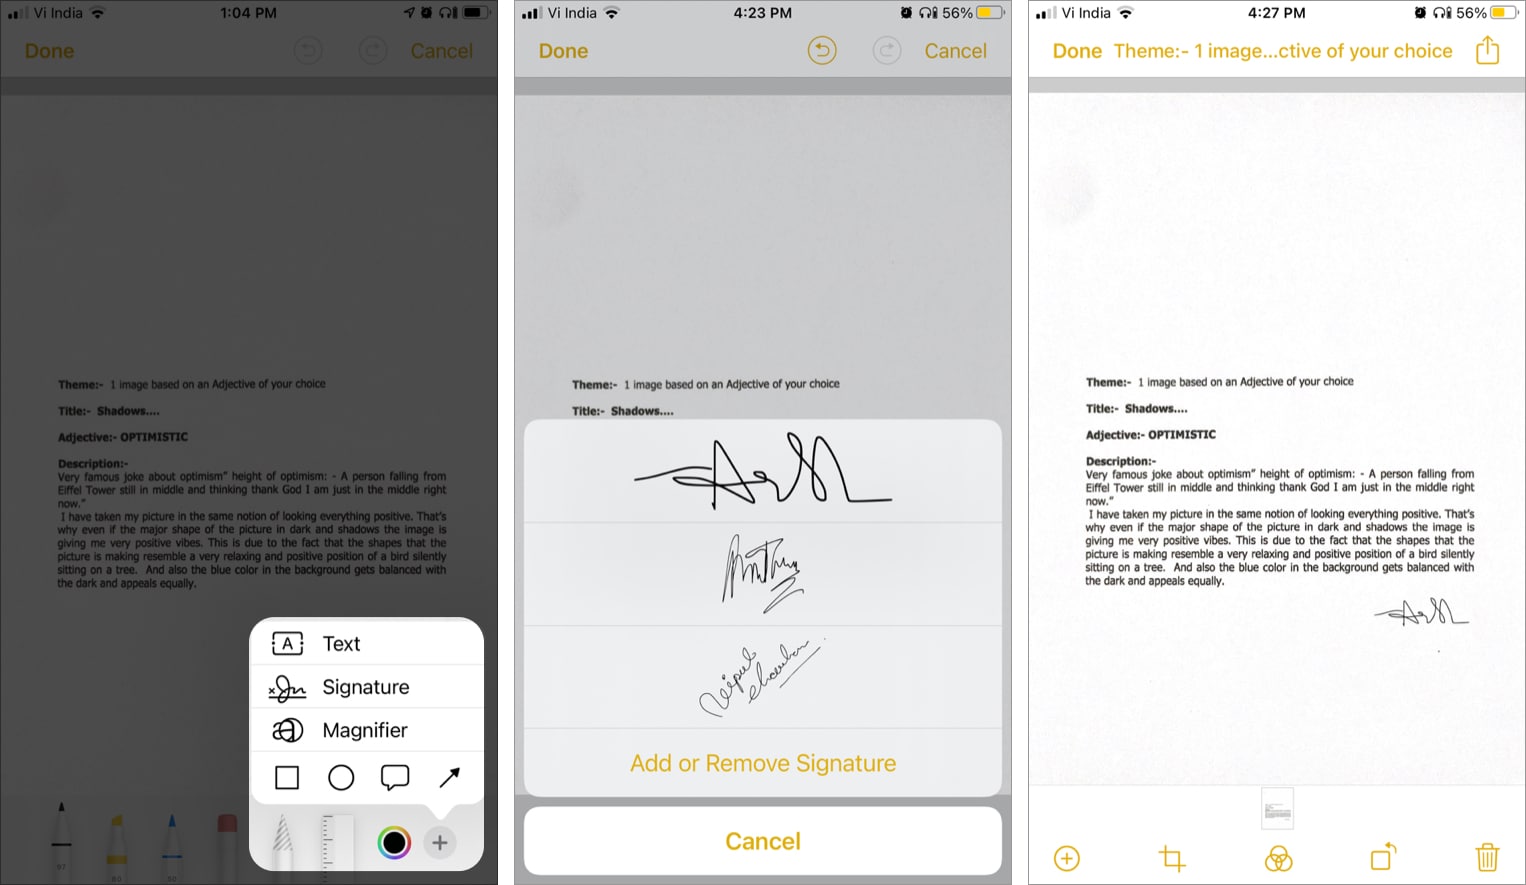
Now, create a signature or select from saved signatures. Tap Done to save the changes.
III. Sign a document with Photos on iPhone
Sometimes you may have to self attest an ID proof and share it across. Or, instead of a PDF, you may get a receipt’s photo for your signature. Alternatively, you can choose to screenshot the document and add the signature using the Photos app. This is the easiest way to sign your documents on iPhone.
- Launch the Photos app and open the photo or document you want to sign.
- Tap Edit at the top right.
- Here, select the three-dot icon at the top right.

- Tap Markup → + icon → Signature.
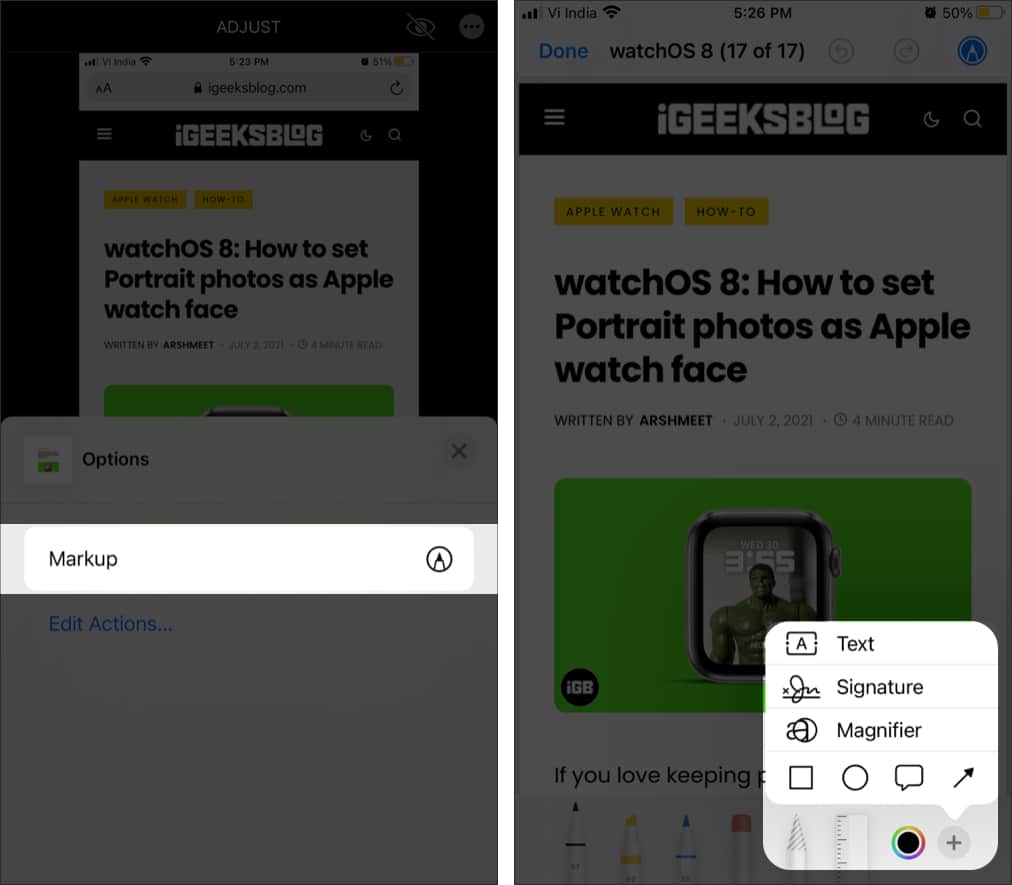
As shown in previous sections, select a signature → edit it → tap Done → hit Done again to confirm changes.
Note: All thanks to the Revert feature, this is the only method where you can undo and remove the signature.
IV. Sign and send documents through Apple’s Mail app
Received a file in your mail that needs a digital signature? Well, you can manage that from Apple’s native Mail app itself.
Just tap the file to open/preview it → select the Markup tool → repeat the drill explained in the previous sections.
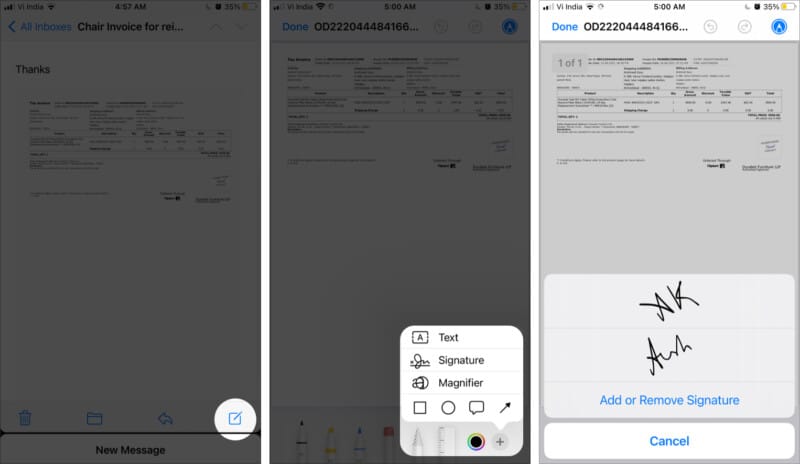
Note: I also tested the Gmail and Spark app for the feature, but it wasn’t available for them.
How to sign a document on Mac
Again the Markup tool comes to the rescue. However, you can’t touch the screen of your Mac, so how will you sign your name or initials on the dotted line?
Remarkably, Apple has incorporated three smart ways in the Preview app to help you do so. Let’s check them out.
Add a signature to a PDF on Mac Preview
- Open the document with Preview.
- Go to the page where you need to sign.
- Click the Markup icon at the top right.
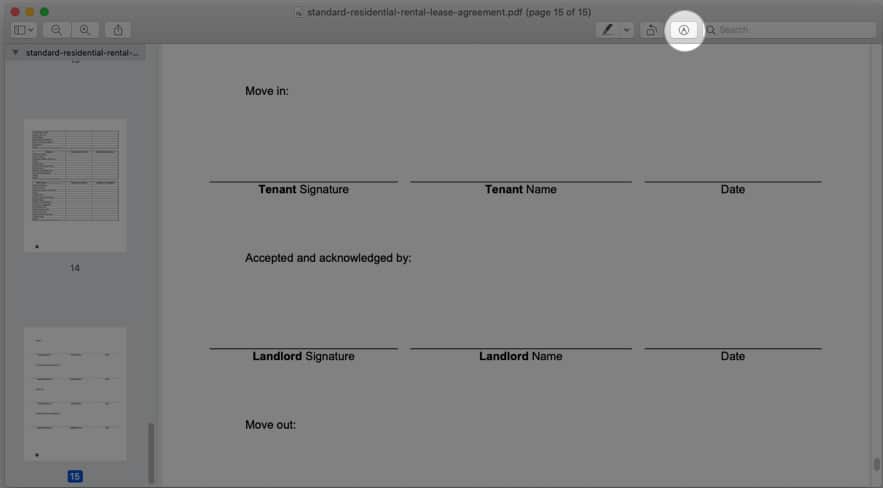
- Next, hit the Signature icon.
- Select the signature from the list or click Create Signature.
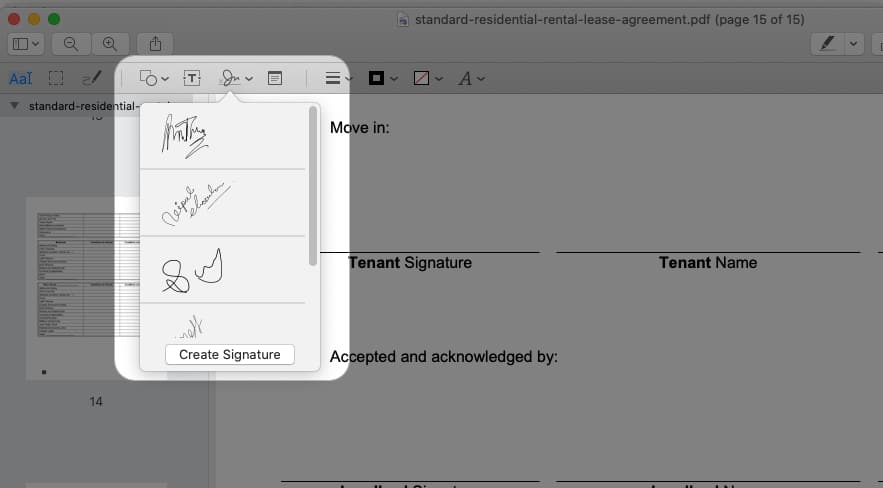
You’ll have three options here; let’s understand each in detail. 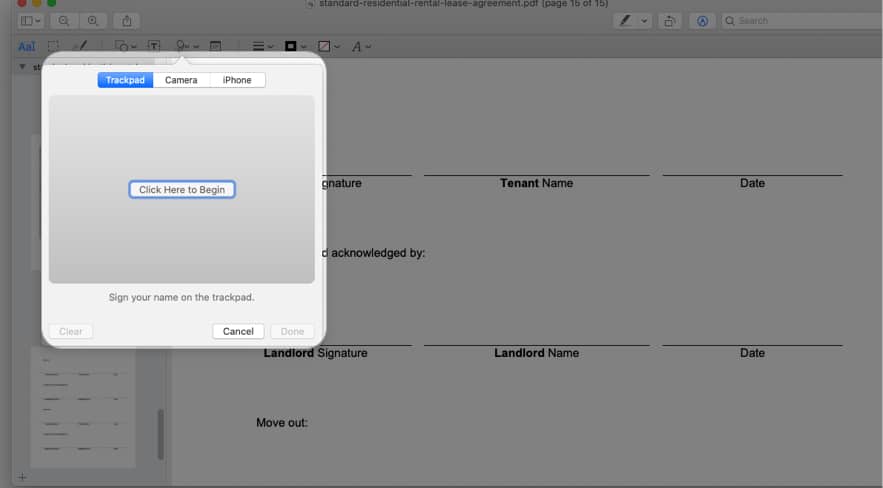
Become an iGeeksBlog Premium member and access our content ad-free with additional perks.
I. Use Trackpad to create a signature
- Ensure the Trackpad tab is selected, and select Click Here to Begin.
- Now, slide your fingers over the Trackpad to create the signature and press any key to stop.
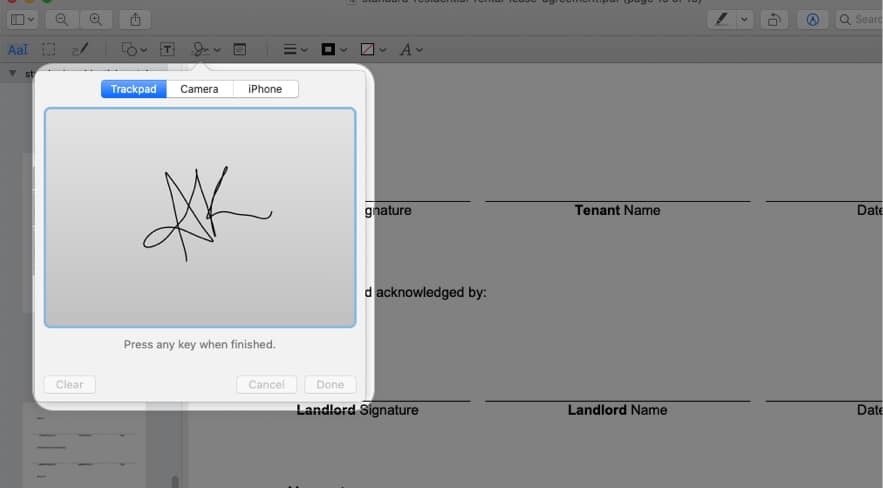
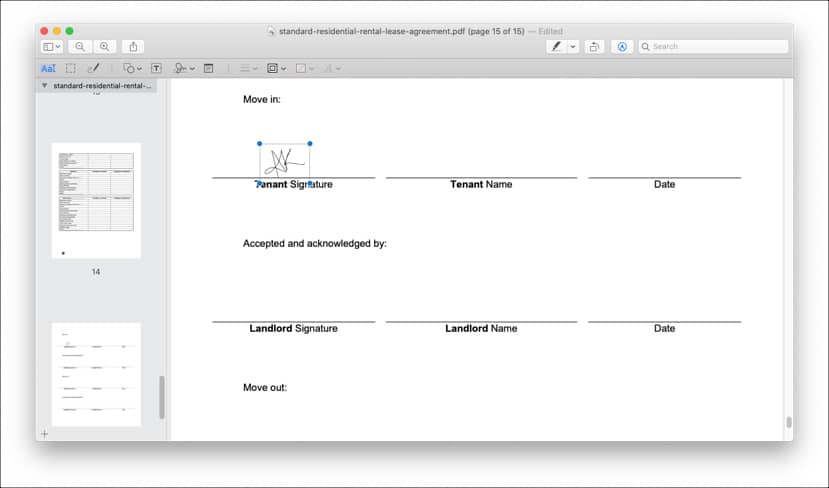
- Click Clear to start over again or Done to save the signature.
II. Create a signature using Mac’s Camera
- Move to the Camera tab.
- Sign on a white paper and show it to the camera.
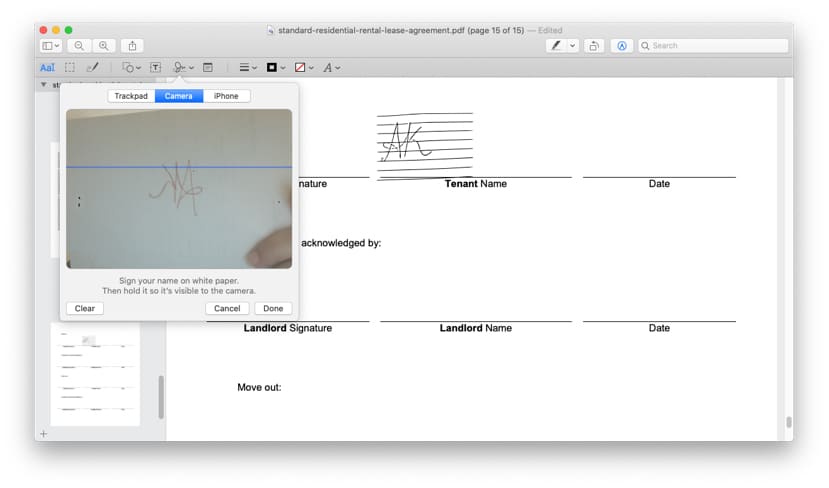
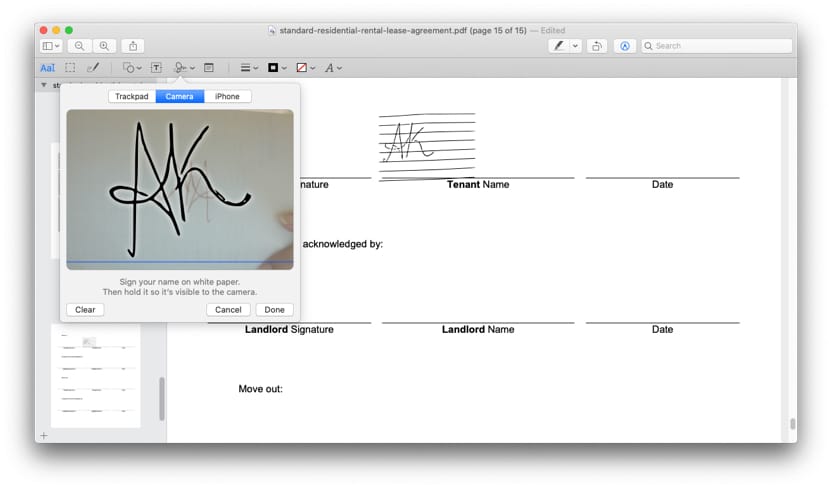
- Mac will read and show a mirror image of the signature, click Done to save it.
III. Use iPhone to create a signature on a Mac
- Open the iPhone Tab.
- The paired iPhone will instantly have a similar screen.
Rotate to landscape orientation for better access. - Use your finger or stylus to sign; it will instantly reflect on Mac’s screen.
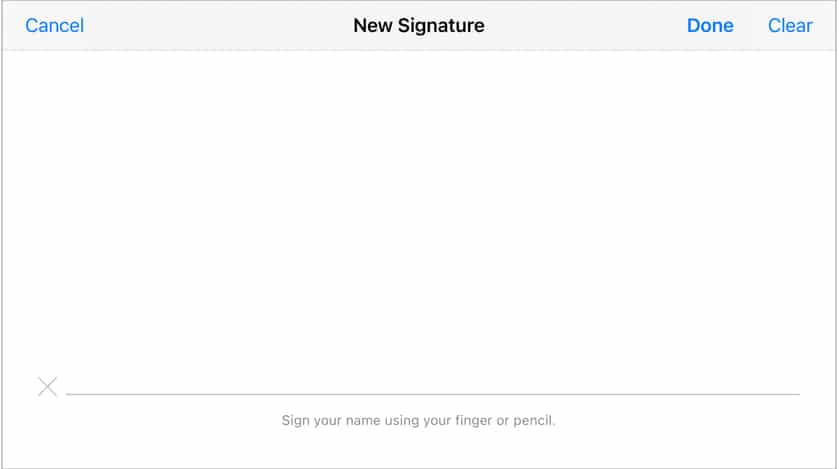
- Tap Done on iPhone or Mac to save the signature.
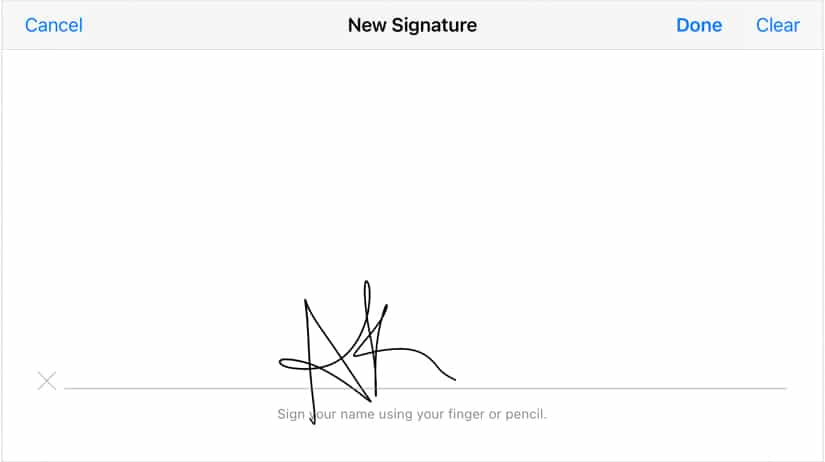
Once you have created and inserted the signature into the file, resize and move it to the desired location → press command + S to save the changes.
Sign documents in the mail on Mac
You can directly sign PDFs and photos attached in a mail. The good thing is that you are not restricted to the native Mail app. Almost all third-party mail apps support the feature.
- Open the mail with the attachment you want to sign.
- Double-click the attachment; it will open in Preview.
- Now, click the Markup icon → Signature → Add Sign.
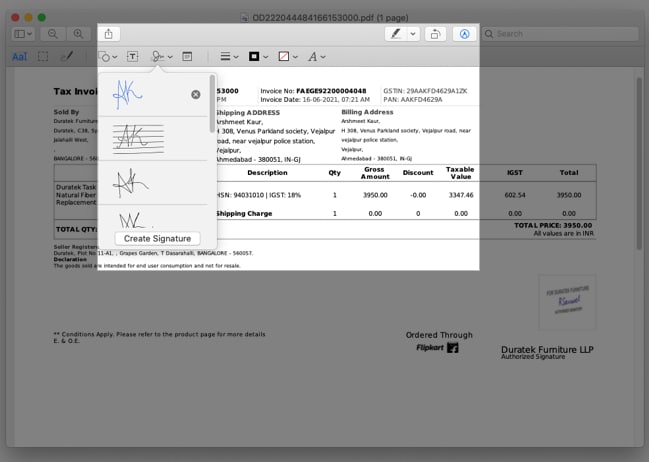
- Save the copy on your Mac and reattach to share it.
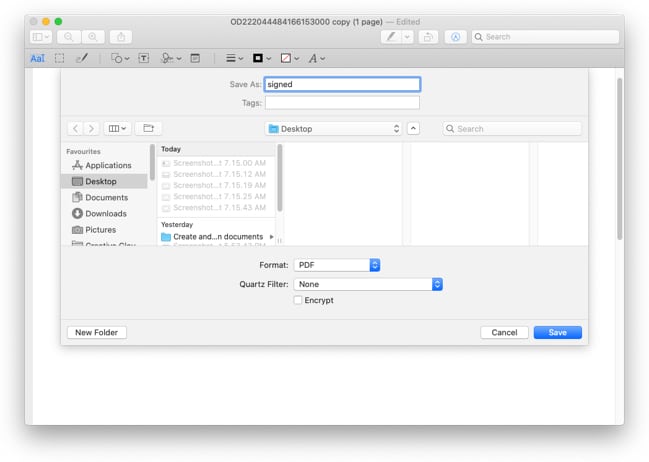
How to create a transparent signature on Mac
Why would I need a copy of my signature without background? Because you can’t sign word documents or files of other formats with the Markup.
Also, you may want to sign your digital artwork, add a personalized signature to mail, or something. This trick can help you do all that and more.
- Take a random screenshot of your screen.
- Open the screenshot in Preview and click the Markup tool.
- Click the Instant Alpha tool (the wand-like icon).

- Drag your cursor across the photo until it turns completely pink.
- Now, press Delete on your keyboard twice without releasing the cursor. (38)
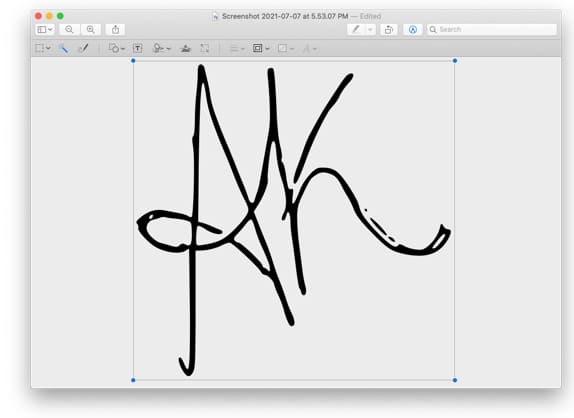
- Insert your signature in the empty frame and expand it as much as possible.
- Finally, go to File from the menu bar and click Export.
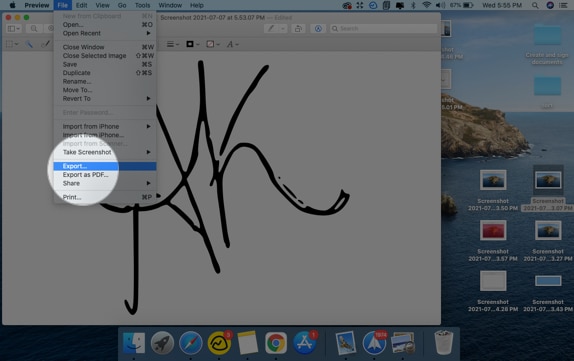
Save the image as PNG, TIFF, or JPEG 2000 (formats that support an alpha channel) and ensure that the setting is enabled to preserve the transparency of the background. (40,40a)
Once done, you are free to use this image as you will! Here’s an example.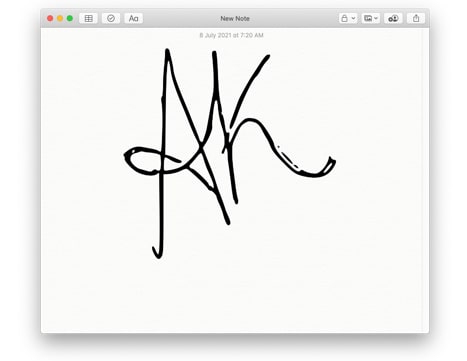
How to delete saved signature from iPhone, iPad, and Mac
Don’t want to retain the signature for security reasons, or just had too much fun signing, and now you require a clean-up? Whatever the reason, here’s how you can do it.
From iPhone and iPad
- Open any PDF file or photo and invoke the Markup tool.
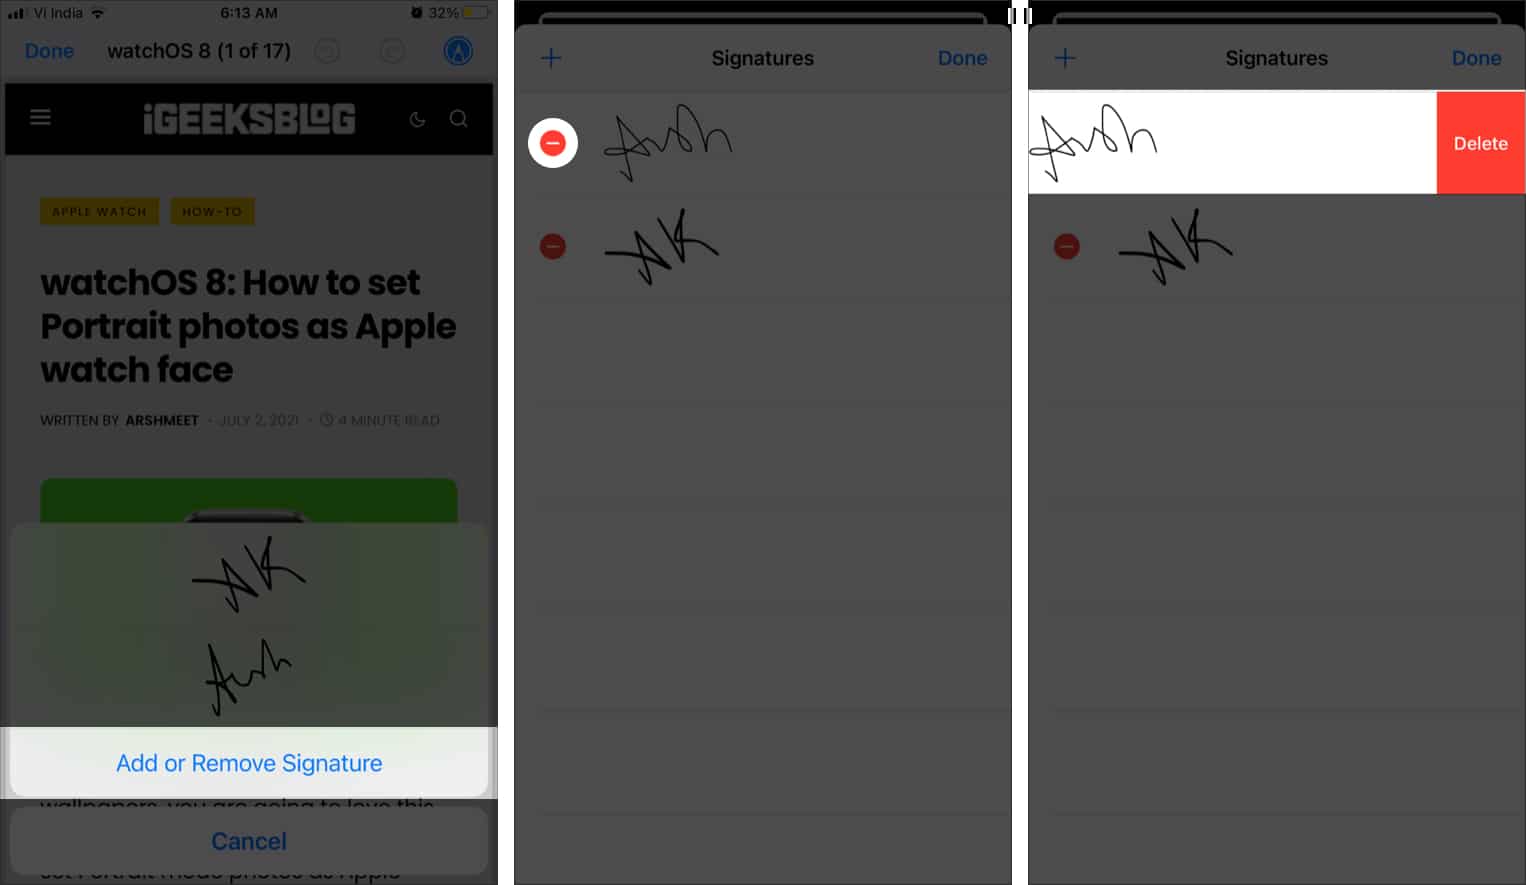
- Tap the + icon → Signature and select Add or Remove Signature.
- Here, tap the – icon → select Delete.
- Tap Done to exit.
From Mac
- Open a document or photo with Preview and click the Markup icon.
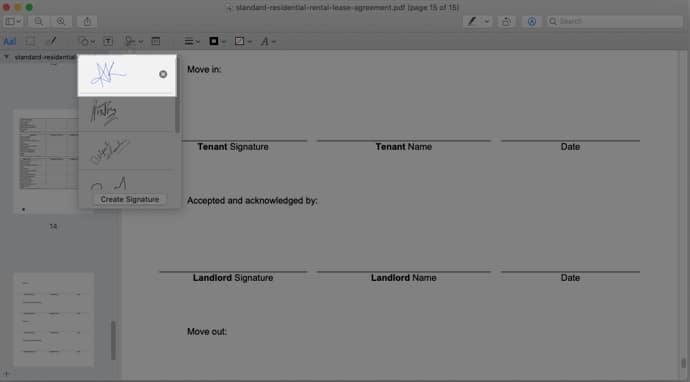
- Click the Signature icon and simply take the cursor to the signature.
- Select the X icon to delete it.
Huff! Who knew we have so many options of creating an electronic signature and signing documents using your iPhone, iPad, and Mac. All the love to Apple developers for incorporating such a handy gem into the Markup tool.
I hope the article was helpful to you. Feel free to shoot out any related queries or questions in the comment section below. I will be happy to help.
Check out the below for more hidden hacks:

