Have a significant office or client meeting, and Zoom is not working on your Mac? Well, besides frustration, this can lead to potential monetary loss.

Thankfully the solutions here will most certainly fix the problems you face using the Zoom app on your Mac. Let us start with the basics and move our way up to address this issue.
- Make sure you have the Zoom app
- Check if Mac is connected to the internet
- Check Zoom’s server status
- Force Quit the Zoom app
- Restart your Mac
- Give Zoom the required permissions
- Quit other apps using Mac’s Camera and Microphone
- Close other apps consuming significant resources
- Uninstall and reinstall Zoom
- Turn off Firewall
1. Make sure you have the Zoom app
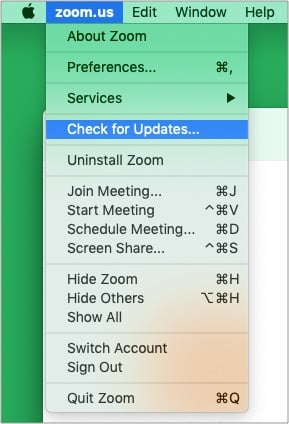
You can join a Zoom meeting via a browser. There are Chrome and Firefox extensions as well, but the experience and features are limited. Sometimes, it might even fail to work correctly. Thus, for the best experience, please consider downloading the Zoom app. If you already have the app, launch it and click zoom.us from the top Menu Bar. Next, click Check for Updates and install if an update is available.
2. Check if Mac is connected to the internet
Before we go further, it is essential to ensure that your Mac has an active and stable internet connection. For this, open a browser and try visiting a page. If the internet does not work, head over to this guide to fix Wi-Fi issues on Mac.
Secondly, if you are using a VPN on your Mac, please consider turning it off. At times, Zoom might not work with some VPN services.
Tip: The faster the internet, the better the Zoom experience. If your internet is slow, or you are downloading or uploading something or streaming a movie on another device connected to the same Wi-Fi, please consider stopping these during the Zoom call.
3. Check Zoom’s server status
Though rare, it is possible that everything on your end is fine, and the problem lies at Zoom’s end. Thus, it is vital to ensure that things are working on Zoom’s end as well. For this, head over to Zoom’s status page and make sure everything is operational. If not, you might have to wait until things are fixed.
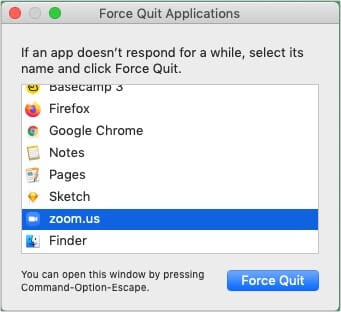
4. Force Quit the Zoom app
- Click the Apple logo at the top left.
- Choose Force Quit.
- Select zoom.us and click Force Quit.
- After a few seconds, open the Zoom app again.
5. Restart your Mac
- Click the Apple logo at the top left and choose Restart.
- Once the Mac reboots, try using Zoom. It will most likely work.
6. Give Zoom the required permissions
Zoom needs a microphone, camera, and a few other permissions to work correctly and offer the full video conferencing experience. For this, it is crucial to ensure that the app has the right permissions.
Become an iGeeksBlog Premium member and access our content ad-free with additional perks.
- Click the Apple logo from the top left and select System Preferences.
- Click Security & Privacy. Make sure you are in the Privacy tab.
- Camera: Click Camera from the left sidebar and make sure zoom.us.app is checked. If not, click the lock at the bottom left, authenticate using Mac’s password, and check the Zoom box.
- Microphone: Make sure Zoom is allowed to access Mac’s microphone.
- If you are on macOS Catalina or macOS Big Sur, click Files and Folders and check the box for Zoom. This will allow sharing and saving files from the chat and record calls locally to your Mac.
- Next, click Screen Recording and check Zoom. This lets you share your Mac’s screen during Zoom calls.
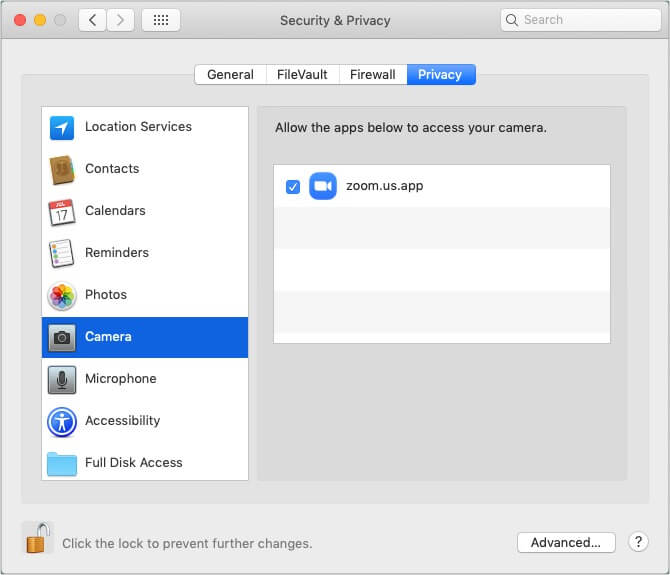
After giving the necessary permission, quit the Zoom app and reopen it. Everything should work correctly now.
7. Quit other apps using Mac’s Camera and Microphone
Are you running other apps in the background (like Skype, Discord, FaceTime, etc.) using Mac’s camera, microphone, or recording the screen? If yes, please quit those apps. Zoom may not be able to access the camera or microphone if another app is using it.
8. Close other apps consuming significant resources
Press command + space bar to bring Spotlight Search. Now type Activity Monitor and open this app.
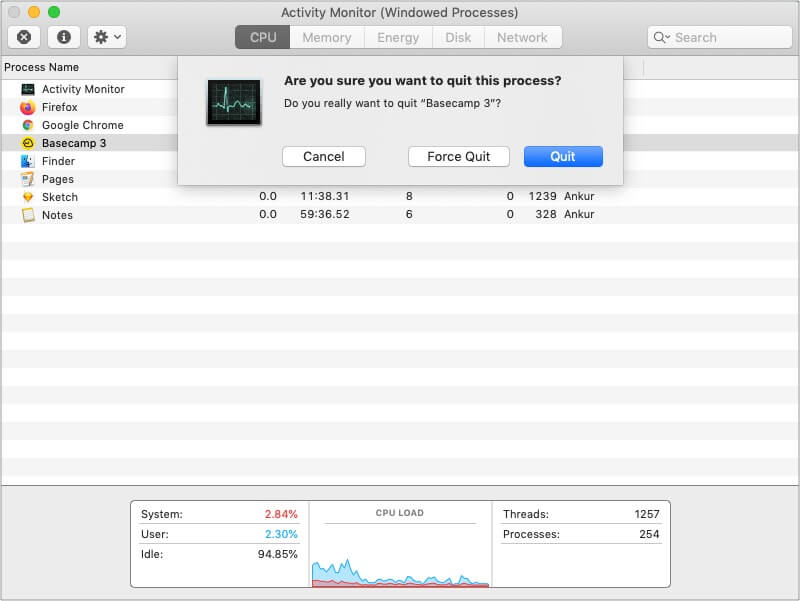
From here, if you find apps hogging CPU power the most/unnecessarily, consider closing them. For this, click the app/process name and click the x at the top left. Finally, click Quit.
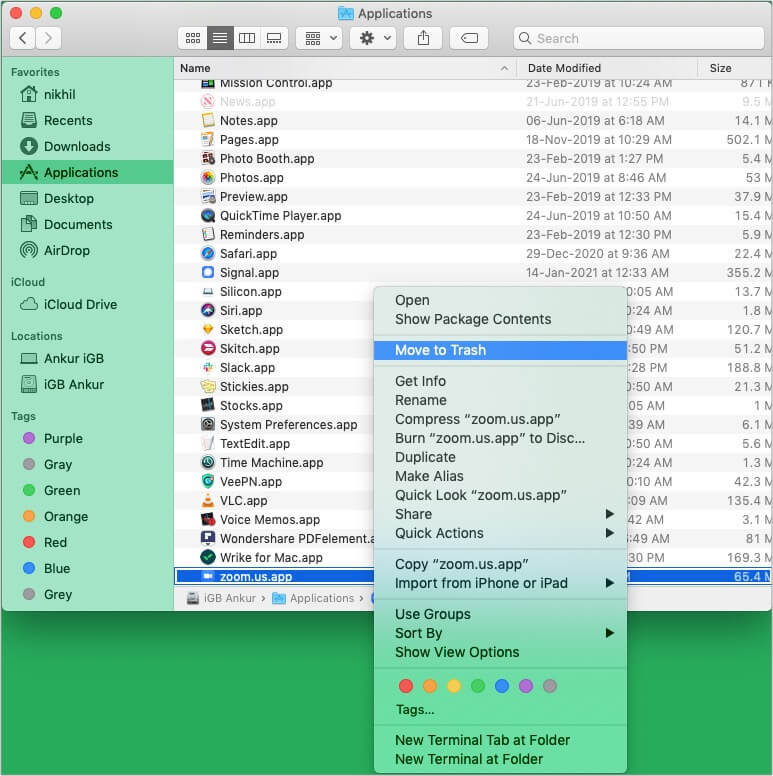
9. Uninstall and reinstall Zoom
- Force Quit Zoom.
- Open Finder → Applications → and right-click zoom.us.app
- Click Move to Trash.
- Empty the Trash and restart your Mac.
- Finally, download and install Zoom again. Give it the necessary permissions when you make the first Zoom call.
10. Turn off Firewall
In some instances, turning off Firewall may help with the proper working of Zoom. For this, open System Preferences and click Security & Privacy. Click Firewall. Next, click Turn Off Firewall. Once this is done, restart your Mac and try using Zoom. It should work without any issues.
Zoomin’ comfortably again on Mac?
I believe the above steps helped you get Zoom working on your Mac again. In the rare case it did not, please consider reaching out to Zoom Support.
Also, if you have trouble getting Zoom to work on your iPhone or iPad, we have some tested fixes for that as well.
Finally, it would be perfect for taking a few minutes and learning about Zoom keyboard shortcuts for Mac. This will enhance your experience and even save time!
Check out next:

Great tips! I’ve been struggling with Zoom crashes on my Mac for weeks. I tried a couple of the solutions mentioned, and they really helped. Thanks for sharing these fixes!