An SD card is a lifesaver for extending your device’s storage capacity. But it needs formatting before you start using it on your device. If you are having trouble formatting your SD card on your MacBook, don’t worry! You have landed at the right place. This article explains every step you need to perform to get the job done.
Before we jump to the steps, let’s understand why you should format your SD card.
Why should I format my SD card?
Most of the leading brands these days give pre-formatted SD cards, but to minimize the risk of data corruption in the future, it is always a good idea to format them before using them. Here are a few other reasons why you should consider formatting your microSD card or SD card.
- Ensure that your SD card is ready for your device.
- Formatting cards before changing the device is a good practice to avoid any bad memory spots.
- Merely deleting the content doesn’t clear your card entirely; you have to format your SD card even if it is for clearing its memory.
Whatever may be your reason, it is an excellent practice to format the SD card for a healthy memory. Here are a few quick ways to do it.
Note: If you are using an iPad instead of a MacBook, you will need a lightning to SD camera card reader to access your SD Card using your iPad.
How to format SD or MicroSD card on your Mac
Using Disk Utility app on Mac
- Use a connector to access your SD card using a card reader.
- Open Disk Utility app on Mac.
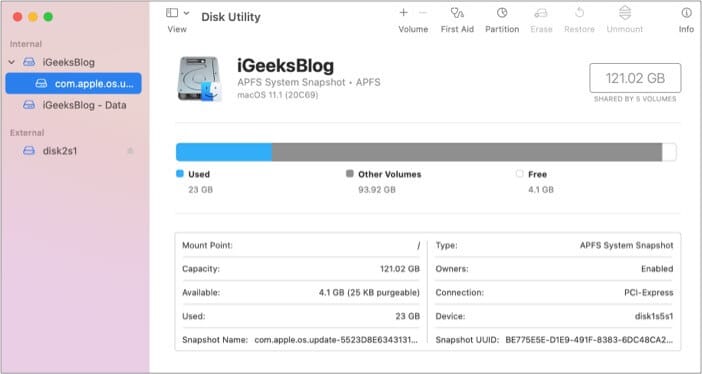
- Look for your SD card and click it.
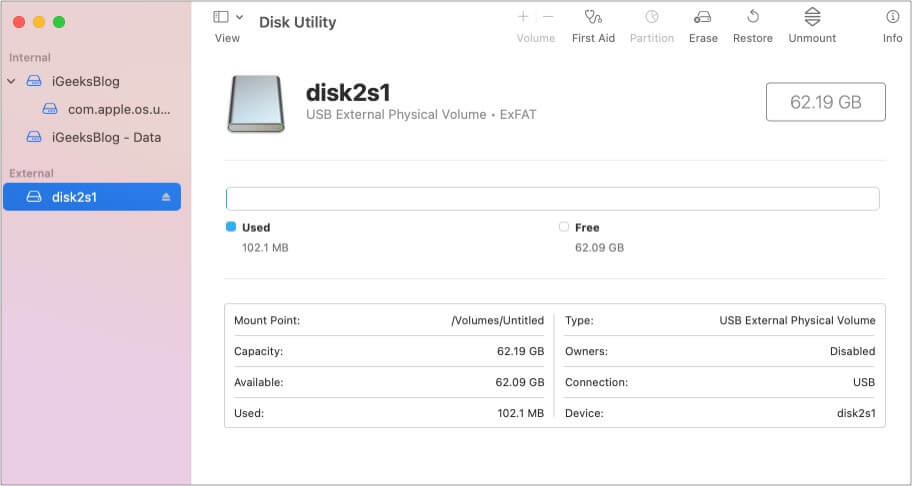
- Click Erase. You can enter the SD card name if you want.
- Choose filesystem format. If it is 64GB or larger, pick exFAT; else opt for FAT32.
- Erase your SD card.
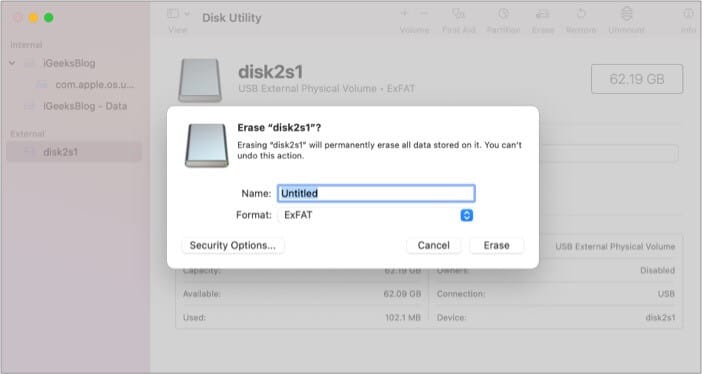
That’s it! Your SD card is formatted and good to be reused.
With SD Card Formatter software
SD Card Formatter is a free app by SD Association. The software takes care of the technical work so that you don’t succumb to the technicalities. The best thing about the software is that it supports almost all macOS (macOS X 10.7 Lion or later).
Become an iGeeksBlog Premium member and access our content ad-free with additional perks.
Download and install the software → launch the software and follow the on-screen instructions. Make sure your SD card is connected to the Mac to format it.
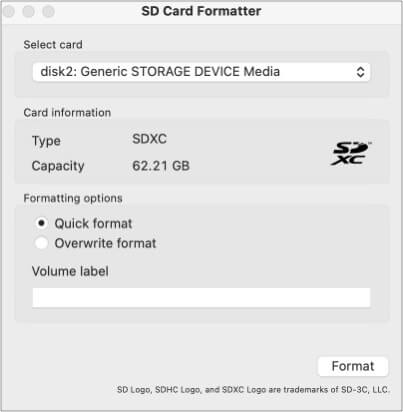
The software is straightforward and reduces the risk of formatting an unknown drive or card since it automatically detects your SD card. It also picks up the appropriate file system (exFAT or FAT32) based on the SD card’s size.
Using Mac Command Line
- Type cmd + space to launch spotlight. Type Terminal.
- Connect your card reader to your Mac and insert your SD card.
- To see the list of all the available storage, type diskutil list. You will now see all the storage in a list format. Select your SD card from the list.
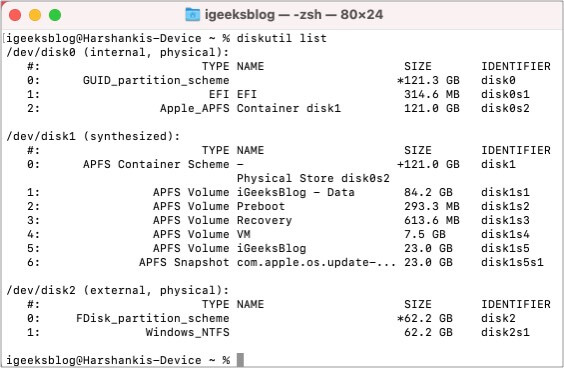
- Type the following command: sudo diskutil eraseDisk FAT 32 SDCARD MBRFormat /dev/disk2
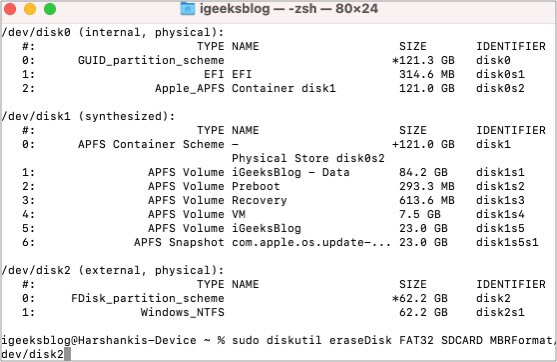
This command will format your SD card. To confirm your action, the system may ask for your password. Enter it, and you are good to go!
If you have tried all these steps and still cannot format your SD card, keep reading.
Why I cannot format my SD card?
Despite performing all the methods with perfection, sometimes your Mac still cannot format your SD card. This may be due to the following reasons;
- Virus attack.
- Unsafe ejaculation.
- A corrupted SD card.
- The SD card is protected by some rights.
You can manage the first two issues by being a little more cautious, but if you are stuck with a corrupted SD card or a protected SD card, you cannot do much about it.
I hope this guide helped. Let me know in the comment section below if you run into any issues.
You may also like to read these posts:
