Things you need to know:

- To create a hard disk partition on Mac, open Disk Utility → select the Volume → click Partition → + → Add Partition → name the partition → Apply → Done.
- To switch a partition, press and hold the Option button while your Mac starts up → select the partition you want to switch.
Whether you are a Mac user or Windows, having more than one hard disk partition is always recommended. That’s because if you ever end up messing the macOS, you can have your important files saved on the second partition. You can quickly restore the macOS without losing any data. It hardly takes a few minutes to create a hard drive partition on Mac.
There is a built-in application on Mac called “Disk Utility,” but there are also some third-party partition manager apps that make the task a lot easier. Besides that, if you have Time Machine backup enabled, you have to keep it safe. You can attach an external HDD and create an exclusive partition for Time Machine backups. Even if you end up a corrupted Mac, you can restore it as new and then use your Time Machine backup to get things back.
Anyways, if you are new to this partitioning thing, follow this tutorial to partition a hard drive on mac.
- Why should you partition a Mac hard drive?
- How to create a hard disk partition in macOS
- How to switch between partitions
- How to delete Mac Partition
- How to Erase the content in a Mac partition
- How to create a new volume on Mac
Why should you partition a Mac hard drive?
There are many reasons why you should partition your Mac hard drive. The primary among them is the ability to run a stable version of macOS and a macOS beta version or even Windows on the same Mac.
You can also create a backup of the data on the other partition and thus, prevent worrying about losing the data. Now that we know the use cases for creating the partitions, it’s time to learn how to do it.
How to Create a hard disk partition in macOS
Before you begin the process, it is best to take a backup of your Mac if things don’t go well, leading to data loss. Now since that’s sorted, let’s look at the steps:
- Open Disk Utility.
Either open from Spotlight or Launchpad. - Select the volume in which you want to create a partition from the sidebar.
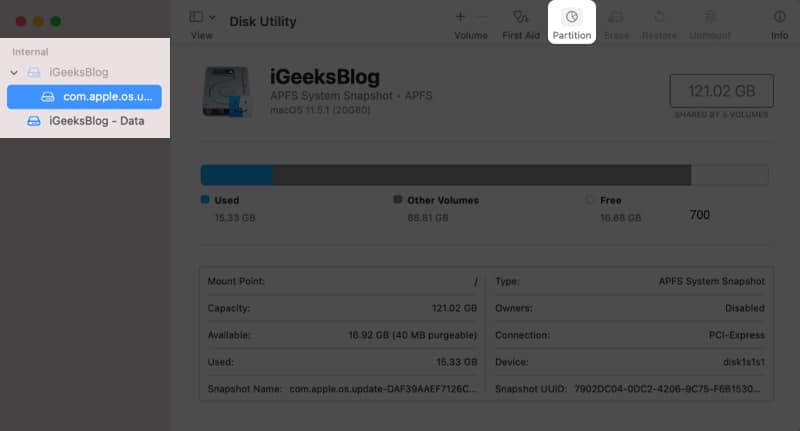
- Now, click the partition button from the toolbar on the top.
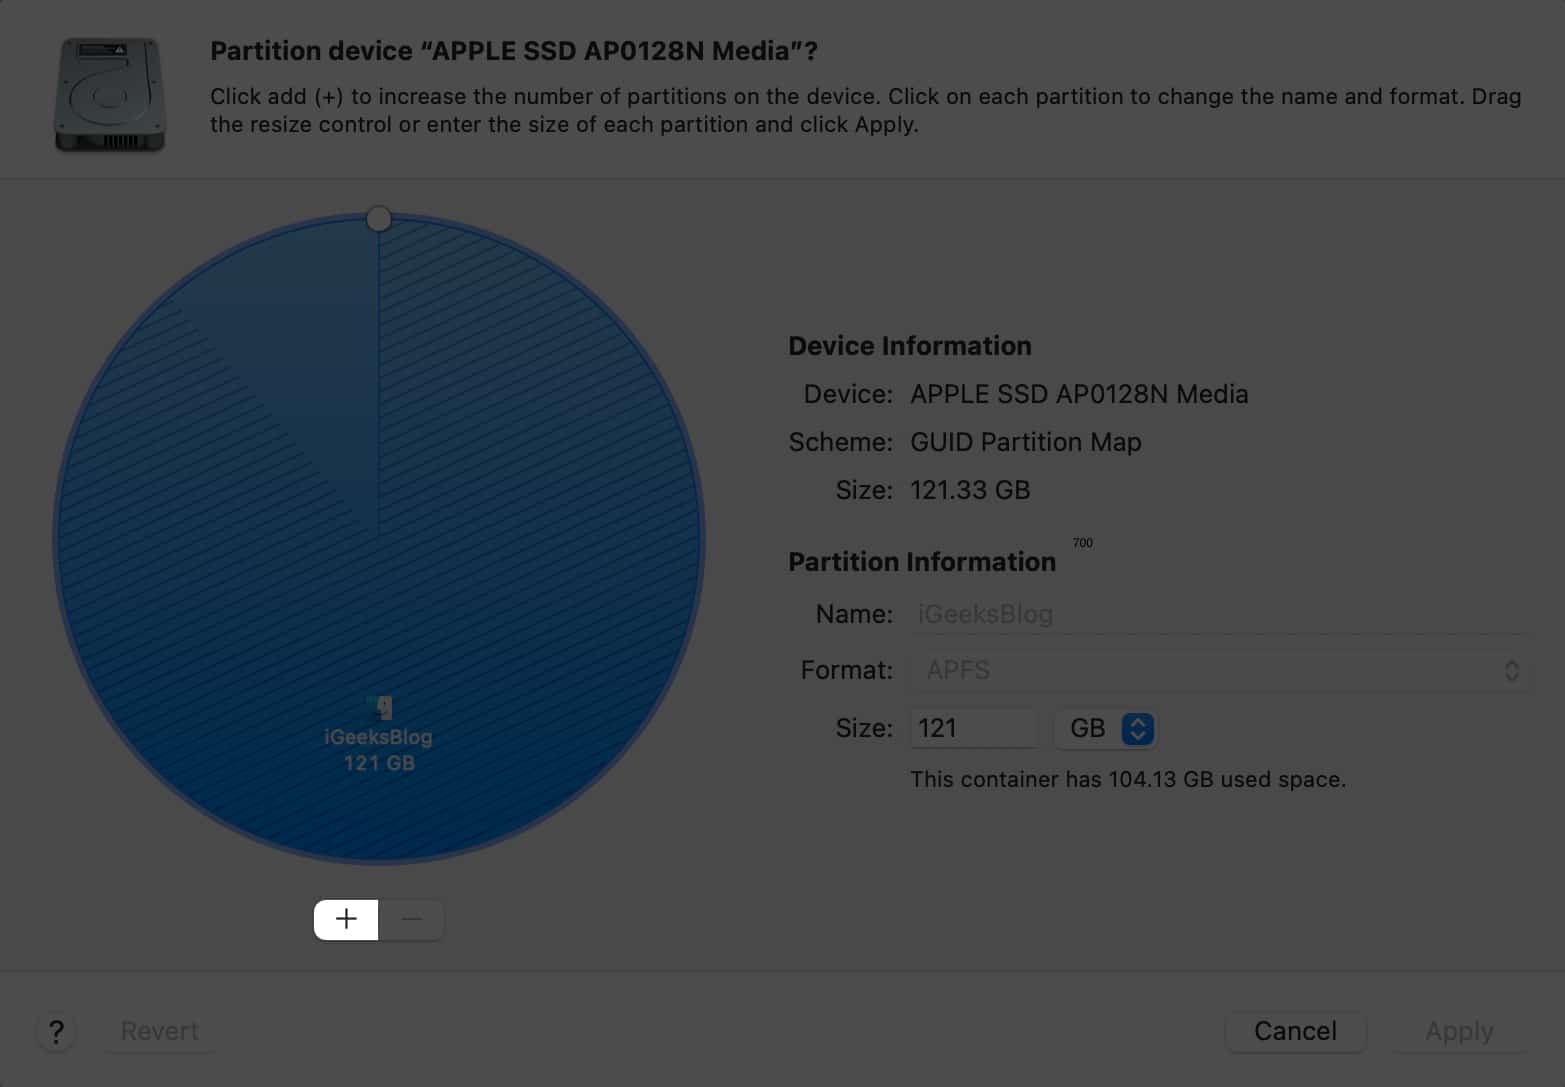
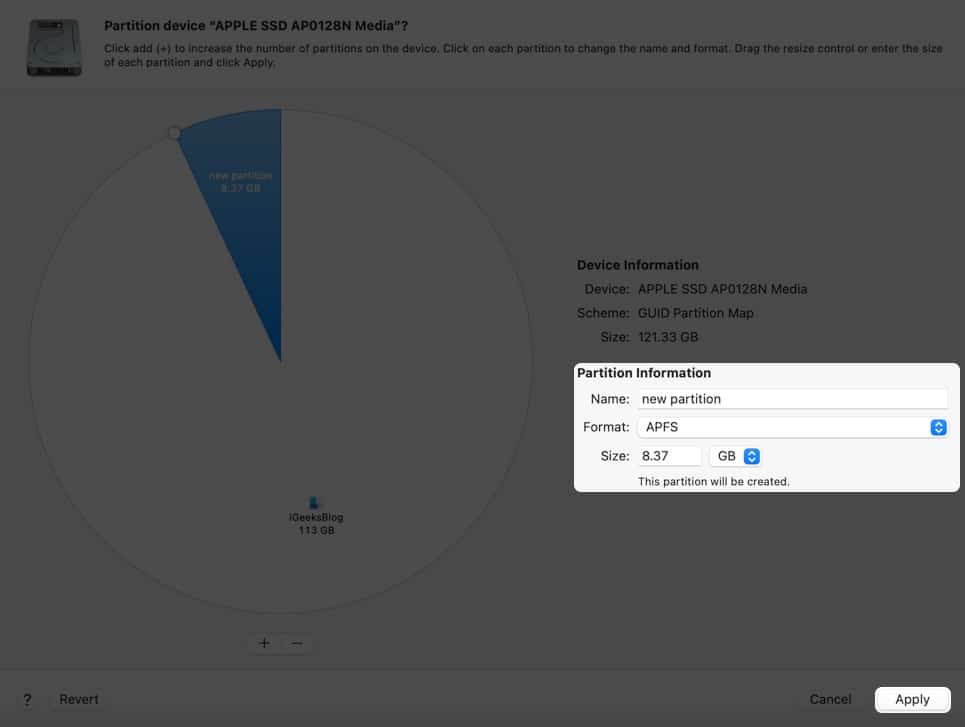
- Click the plus button (+) at the bottom of the pie chart.
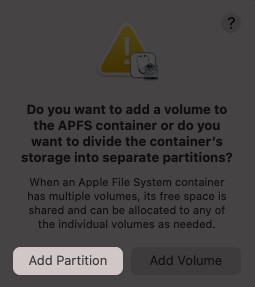
- Then, select Add partition on the pop-up.
- Next, you can customize the size of the new drive.
The unshaded part of the chart shows the free space available. - Add details such as name and format.
- Once done, click Apply.
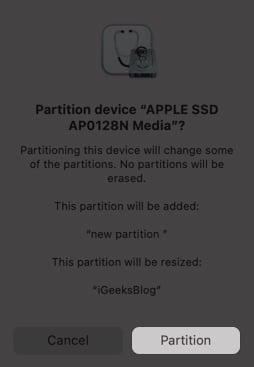
- Click Partition to confirm.
- Wait until the process is completed and click Done.
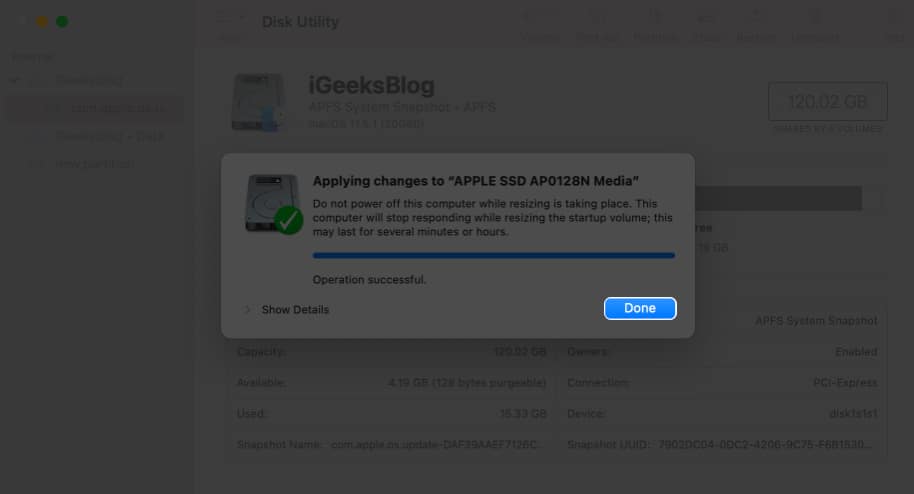
Sometimes if it takes a long time, macOS may give the option to continue installation or to wait until it’s completed.
How to switch between partitions
- Click the Apple logo → System Preferences.
- Select Startup Disk.
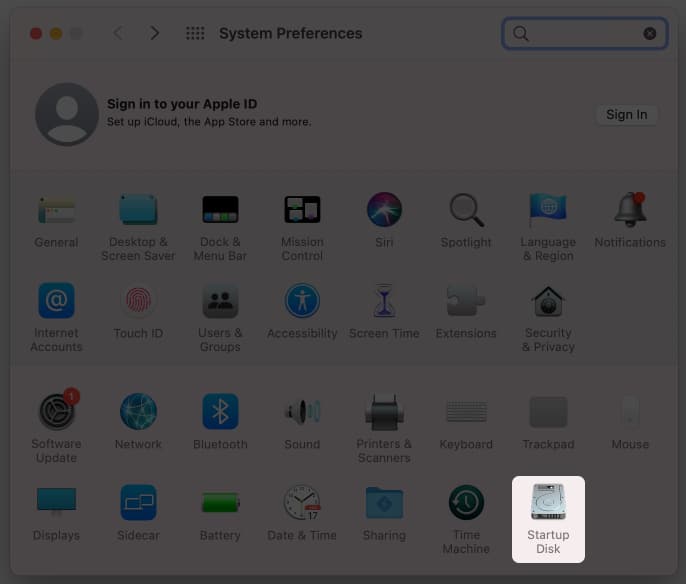
- Click the lock button and enter your TouchID or password.
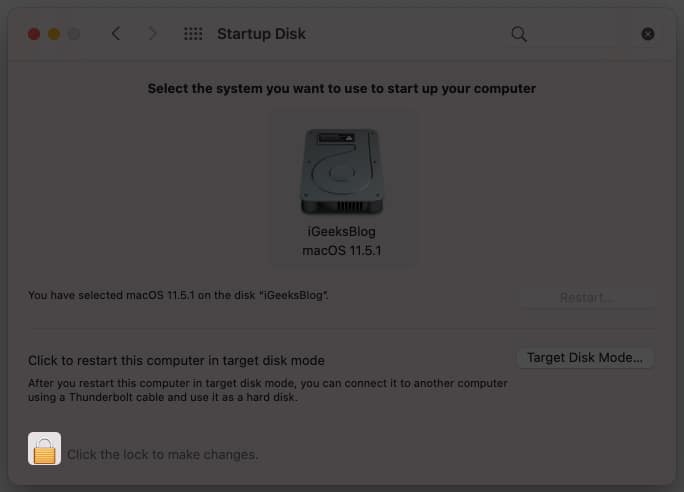
- Now, select the particular partition you want to boot.
- Restart your system.
Your Mac will open to the new disk that was selected. Other than that, you can also select the disk when your Mac is booting up. Simply press and hold the Option key and select the partition from the Startup Manager screen.
How to Delete Mac partition
As one can guess, when you create a partition, it divides the storage inside your Mac, reducing the storage for a particular partition. Chances are that you might have accidentally allocated extra memory to a partition, which will also affect your Mac. To resolve this, delete that partition. Here’s how:
Become an iGeeksBlog Premium member and access our content ad-free with additional perks.
- Open Disk Utility.
Either open from Spotlight or Launchpad. - Select the volume from which you want to create the partition from the sidebar.
You can click View → select Show All Devices if you don’t see the partition to delete. - Now, click the partition button from the toolbar at the top.
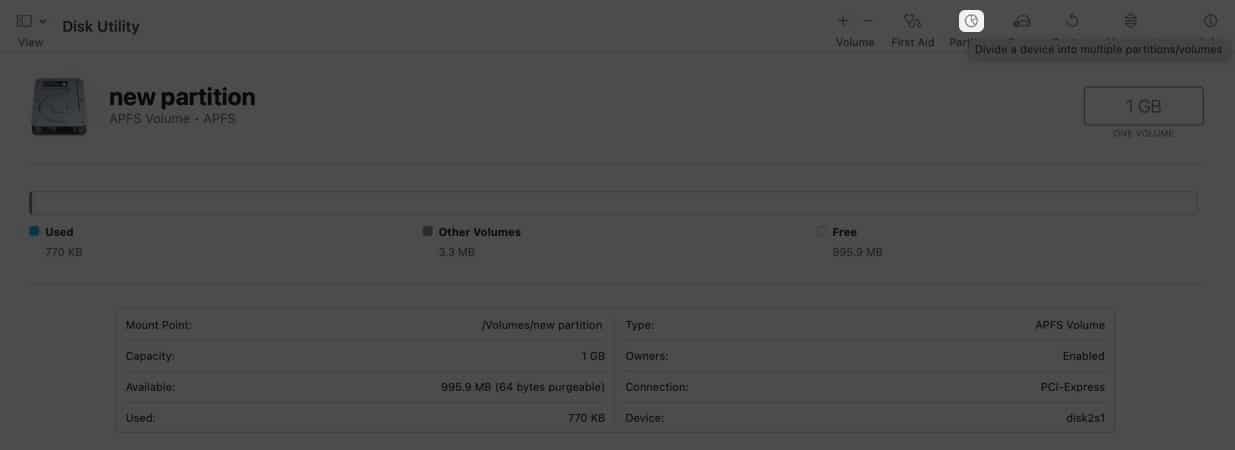
- Select the partition you want to delete from the pie chart.
- Click the delete button (-).
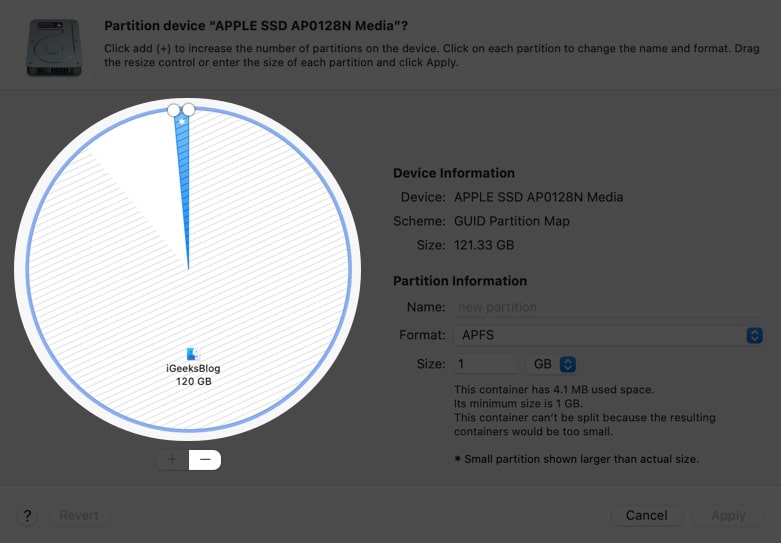
If the delete button appears dim, you can’t delete that partition. - Next, click Apply.
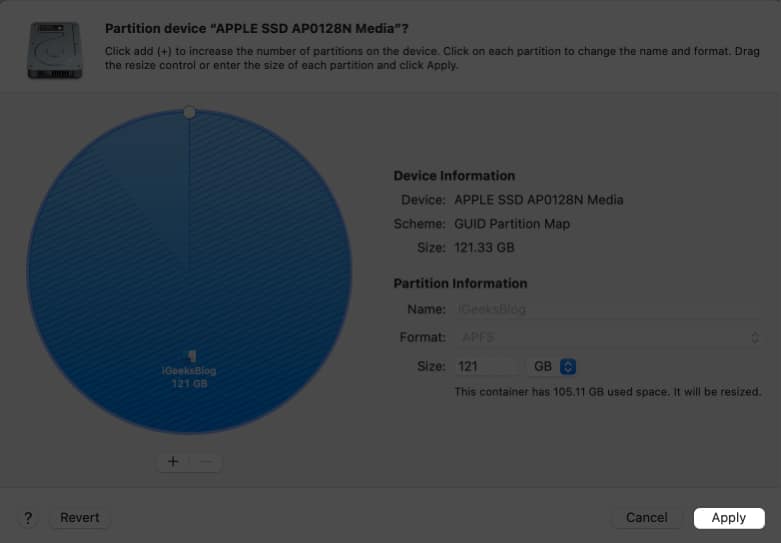
- Click Partition to confirm again.
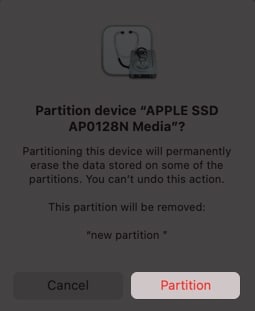
- Wait until the operation finishes, and click Done.

As you can guess, deleting the partition will also erase all the data stored in it. So, be sure to take a backup.
How to Erase the content in a Mac partition
If you don’t want to delete a partition but only want to erase the contents in it, you have to:
- Open Disk Utility.
Either open from Spotlight or Launchpad. - Choose View → select Show All Devices.
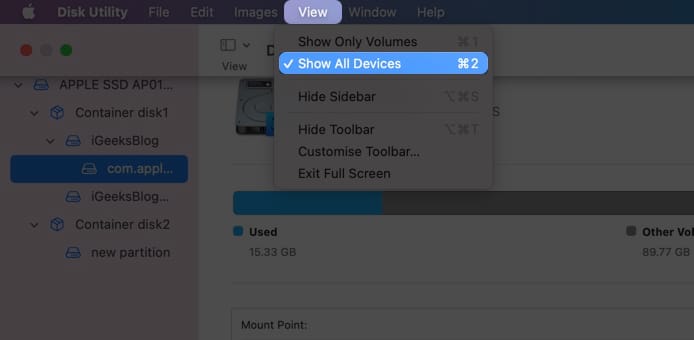
- Now, select the partition you want to erase.
- Click Erase from the toolbar on top.

- Name the partition → select the format → click Erase.
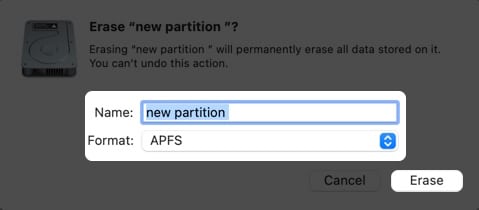
- Wait until the formatting is finished, and then click Done.
How to Create a new volume on Mac
Since you are dividing the disk storage into individual sections, it can’t be dynamically changed later. Hence it is best to create APFS volumes instead of dividing your Mac storage for creating partitions. And yes, you can even install another macOS version on an APFS volume.
Even if you create multiple APFS storages, the space will be allocated dynamically between them, thus making sure you won’t lose any space. Now that we have seen the benefits of creating an APFS storage, let’s look at the steps for it:
- Open Disk Utility → select the volume from the sidebar.
- Click the Plus button (+) from the toolbar on top.
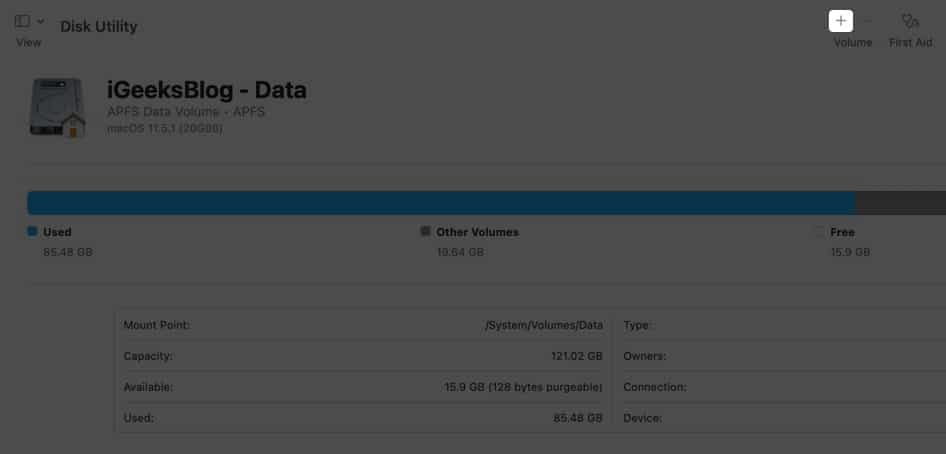
- Enter the name for the new APFS volume.
- Choose an APFS format according to your needs.
- Optional: Select Size options and choose any of the below:
- Reserve Size: Make sure the storage of the volume won’t be allocated for other volumes.
- Quota Size: This will limit how much storage can be allocated to the volume.
- Now, click Add.
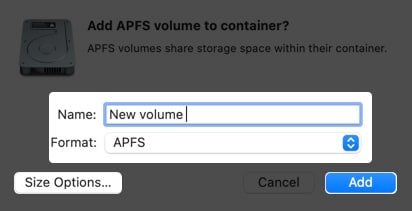
- Wait until the process is finished, and click Done.
That’s it!
If you love to play around with macOS Beta versions or experiment on macOS, it is always best to carry it out on partitioned storage, especially if it is your primary device. I hope that this guide helped you understand how you can partition your macOS hard drive, and if you have any doubts, let me know.
FAQs
In Partition, you directly divide the storage, and the memory won’t be allocated according to the other partition’s use. Whereas in Volume, they act like separate partitions without dividing the storage. The memory will also be allocated accordingly.
While the partition format differs according to your needs, usually APFS or Mac OS Extended (Journaled) are the best partition format.
APFS is the default partition scheme for macOS. There are many other partition schemes to choose from according to your needs.
Here are some more reads on Mac:

