For a long time, iPhone users worldwide have anticipated a native call-recording functionality. Although late, Apple has finally listened to the users’ demands and added the native call recording and transcription feature with iOS 18.1.
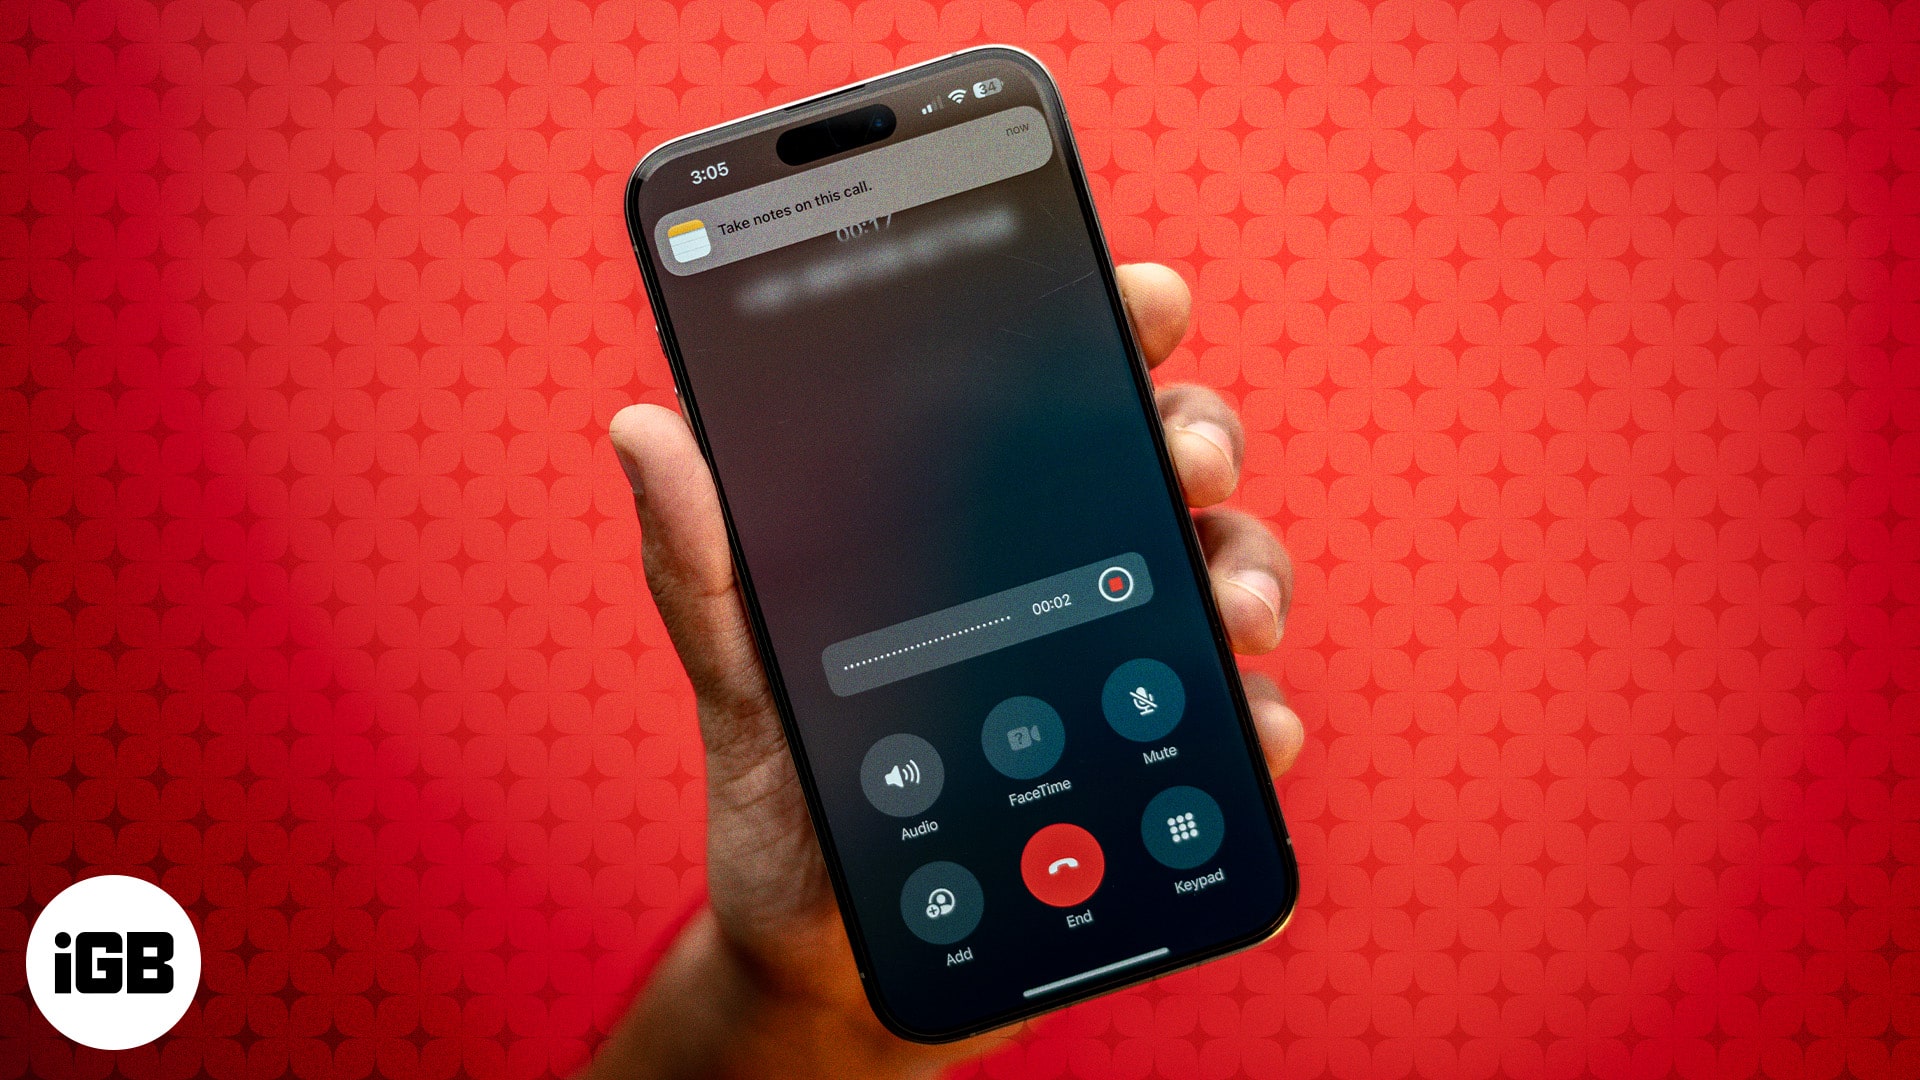
In this guide, I’ll show you how to record a phone call on an iPhone running iOS 18.1 and view the transcript in the Notes app.
How to record a phone call in iOS 18.1
The new call recording feature is a part of Apple Intelligence (Apple’s take on artificial intelligence). It lets you natively record and transcribe phone calls on your iPhone. Here are the steps to how to do it:
- Open the Phone app on your iPhone and make a call.
- Once the call connects, tap the little Record button in the top-left corner of the screen to start recording the call.
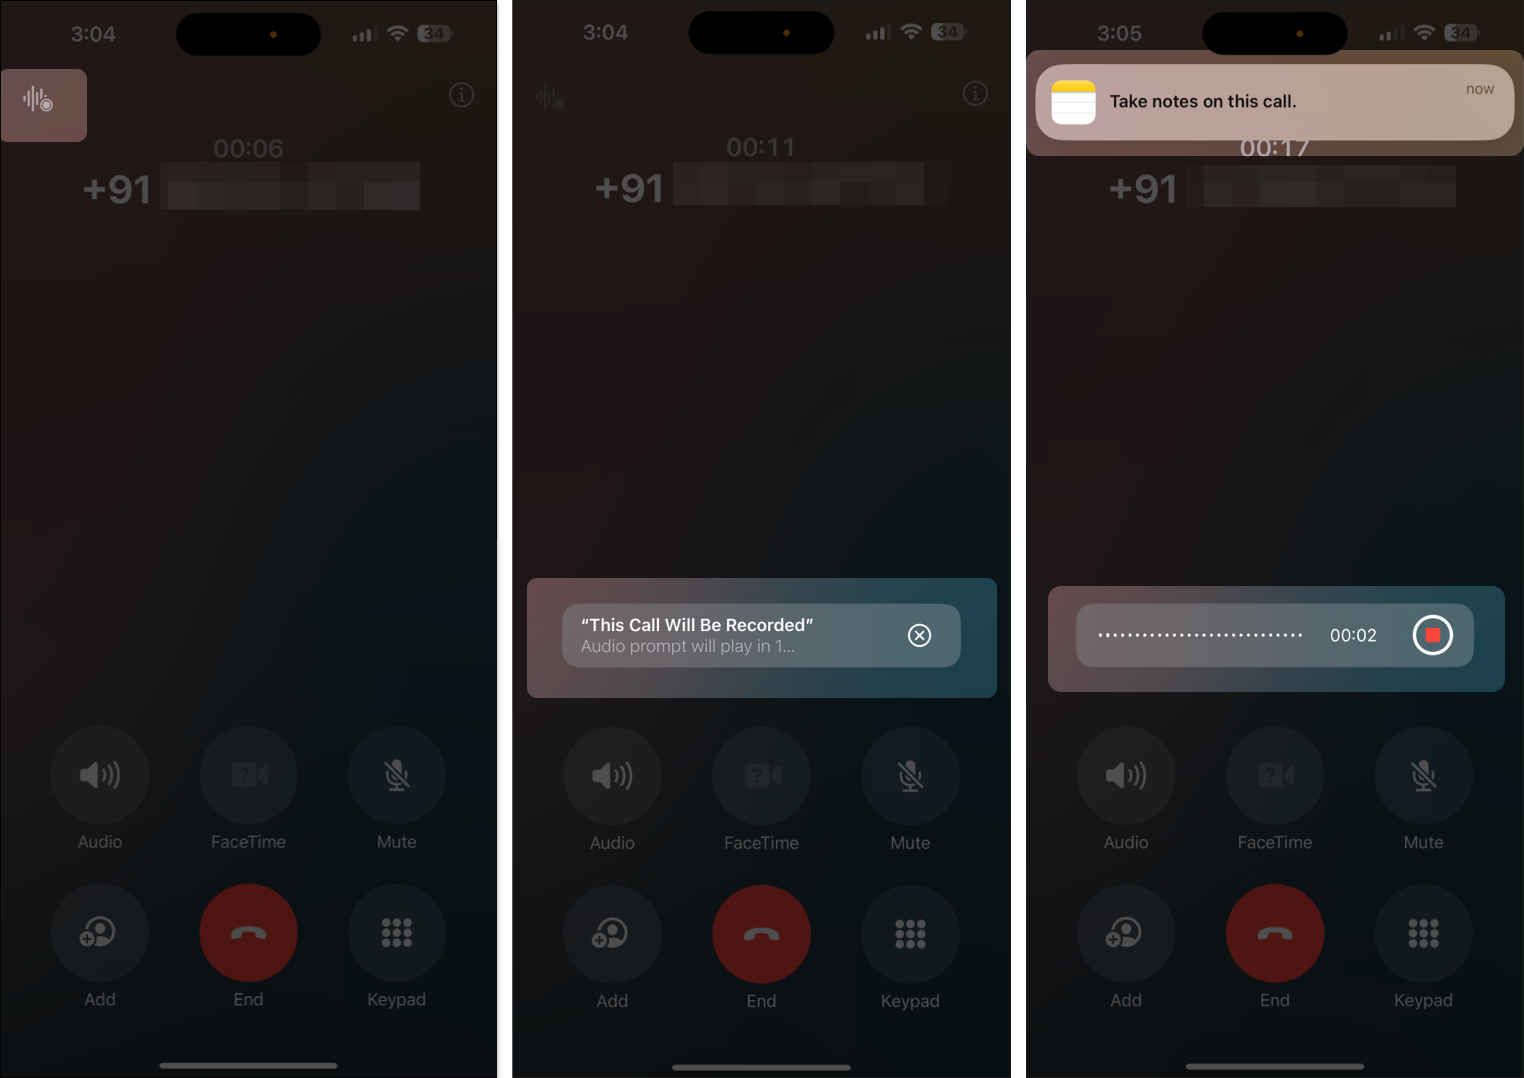
You’ll now hear the “This Call Will Be Recorded” message being played for both parties on the call. This is to protect the recipient’s privacy so they can decide whether they are okay with their conversation being recorded.
As the call progresses, the audio is recorded and saved in the Notes app simultaneously. You can even add notes to the audio being recorded while the call progresses.
Listen and transcript phone calls in the Notes app
Similar to how the Math Notes feature in iOS 18 saves your calculations in the iOS Notes app, the call recording feature also automatically saves all your recorded calls in the Notes app. That way, you can re-listen a recording, view its complete transcript, or get a summary without having to listen to the complete recording.
Here’s what you need to do:
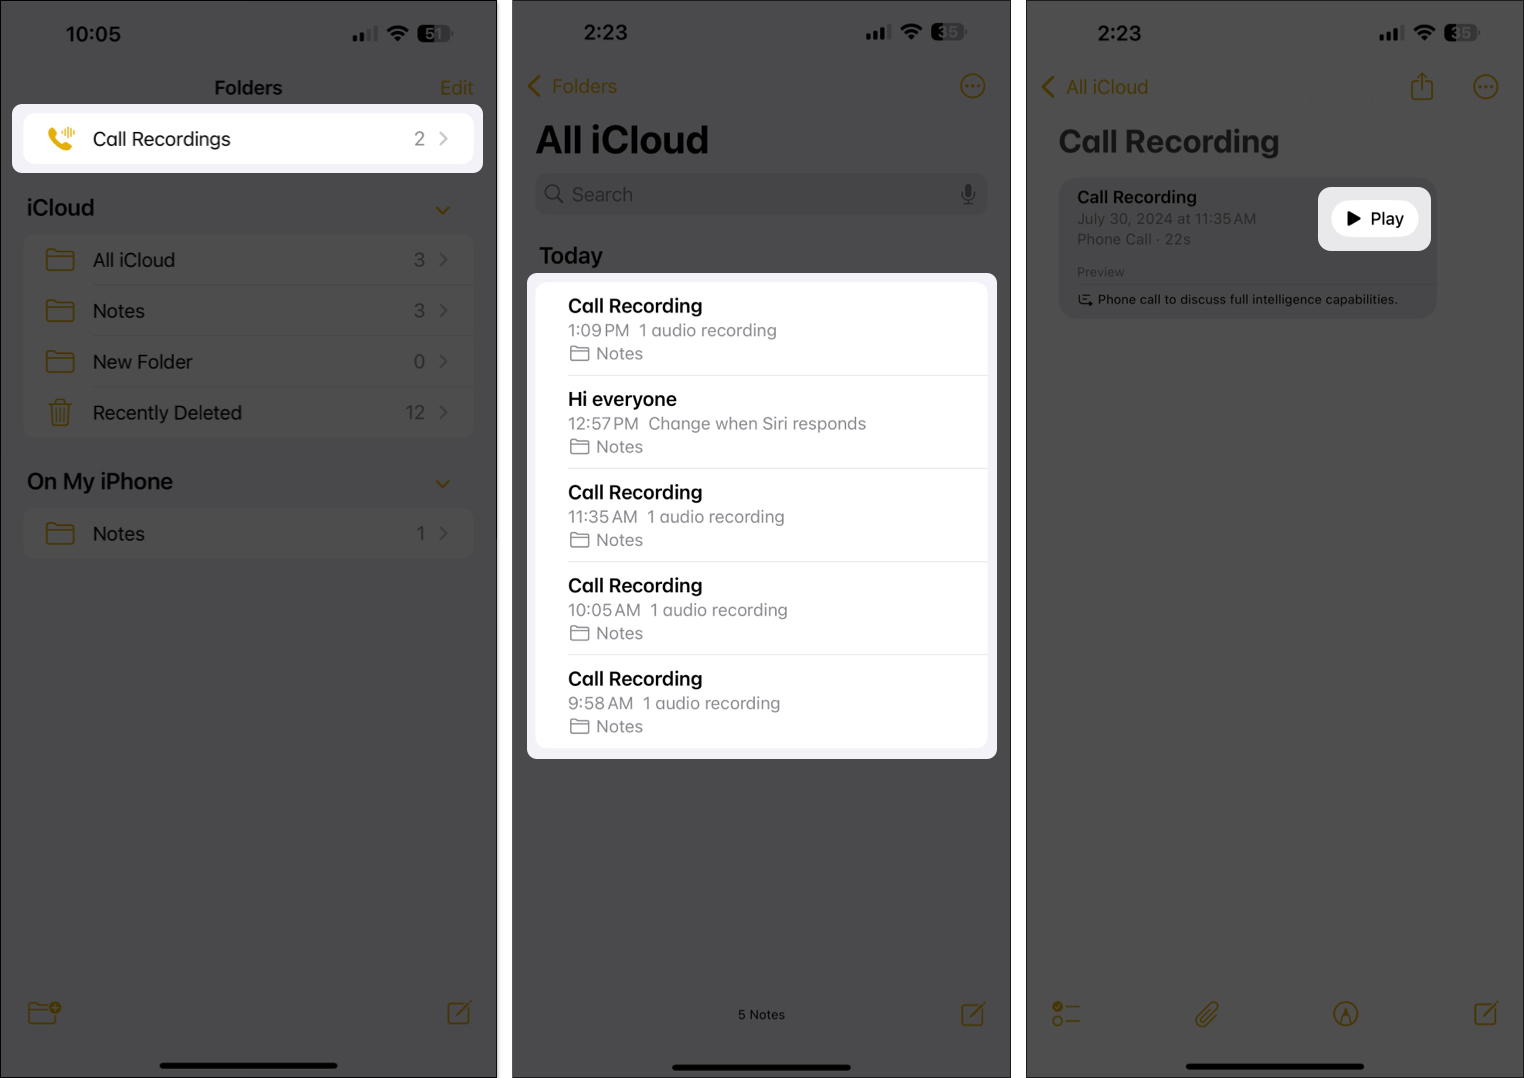
- Open the Notes app.
- Tap on the Call Recordings folder at the top.
- Here, select the call recording you want to listen to and tap the Play button.
- If you want to view the transcription of the recorded call, tap on the call recording, and you’ll see the entire transcript.
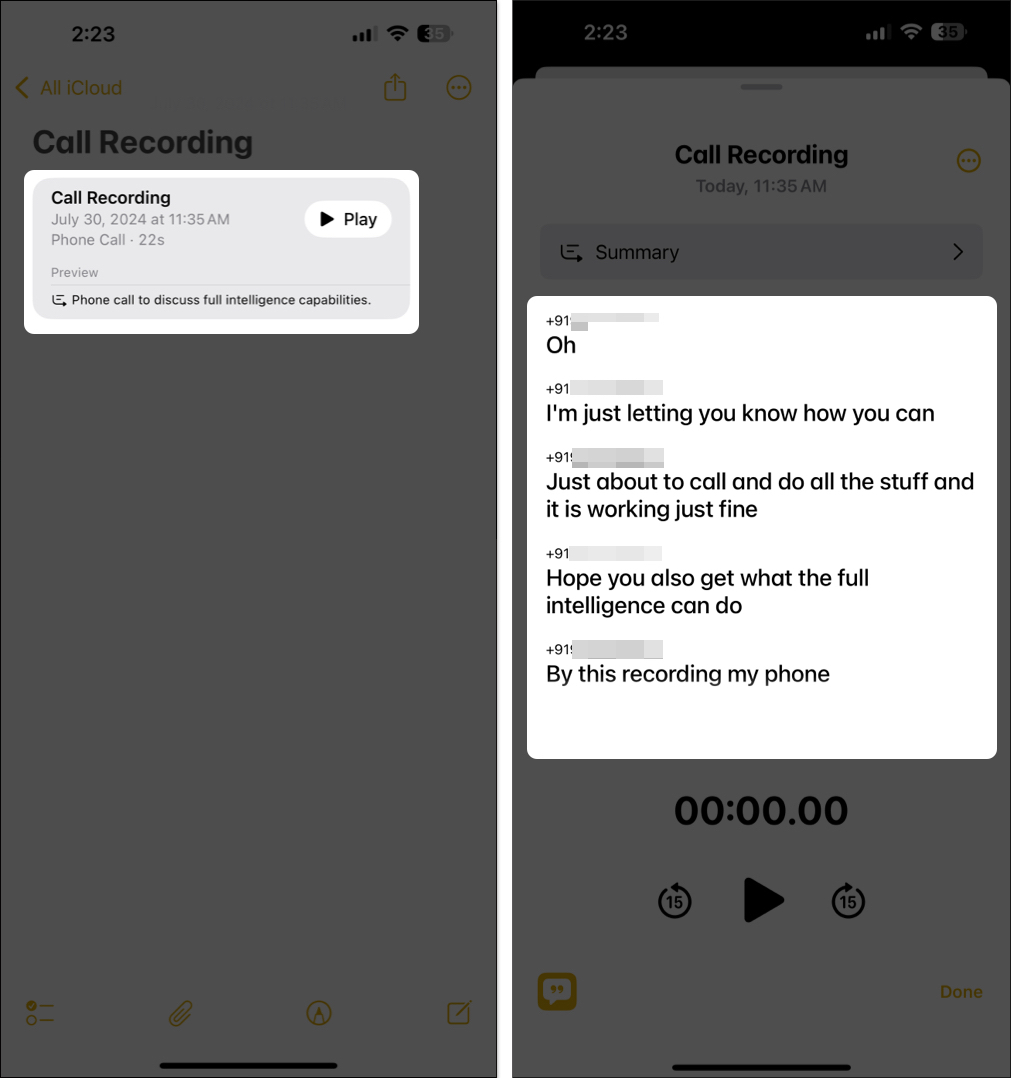
- If you don’t want to read the whole transcription, you can opt for the summary instead. Just tap on Summary, and you’ll see a short summary of your recorded conversation on your screen.
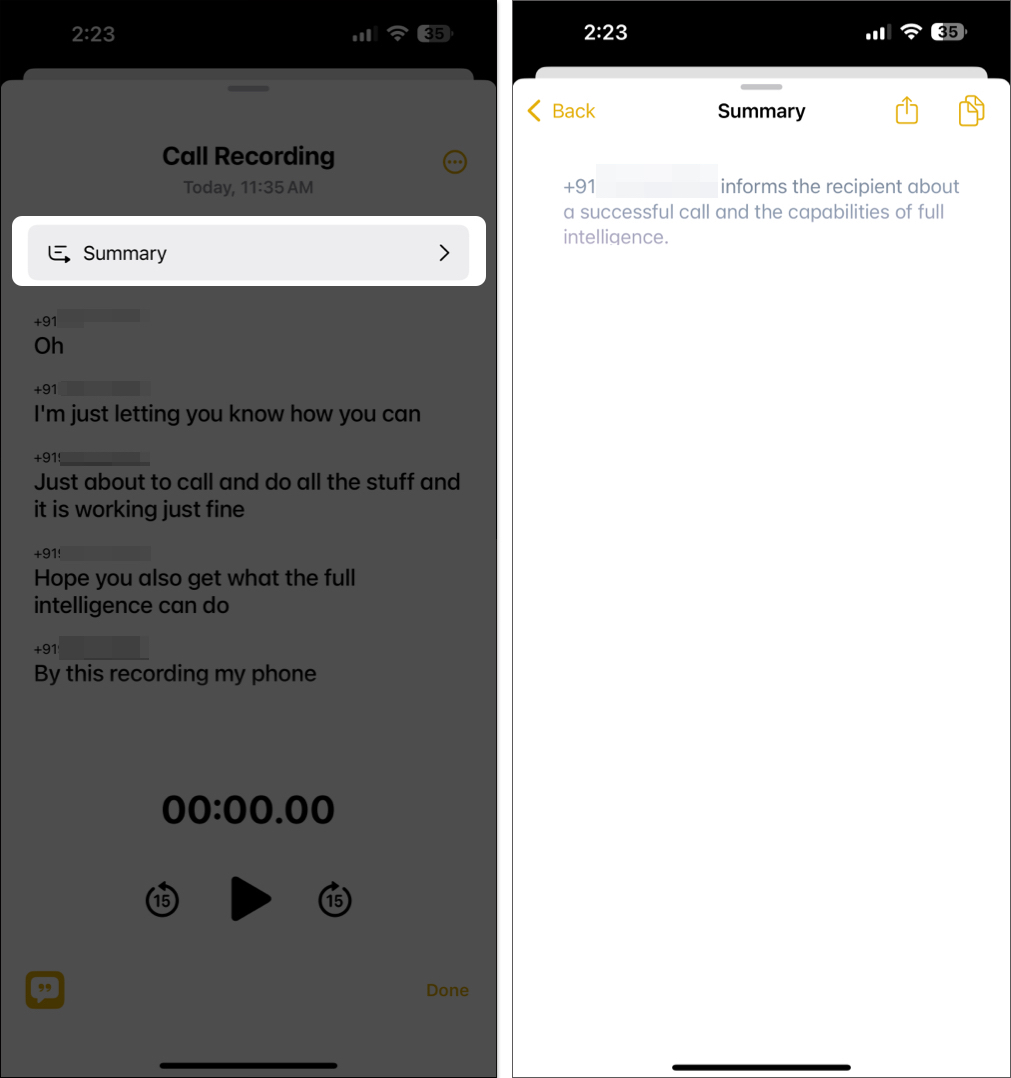
While the call recordings aren’t going anywhere from the Notes app, you can share the audio file directly to other apps or save it to the Files if you want to transfer it to your PC or a portable drive.
Become an iGeeksBlog Premium member and access our content ad-free with additional perks.
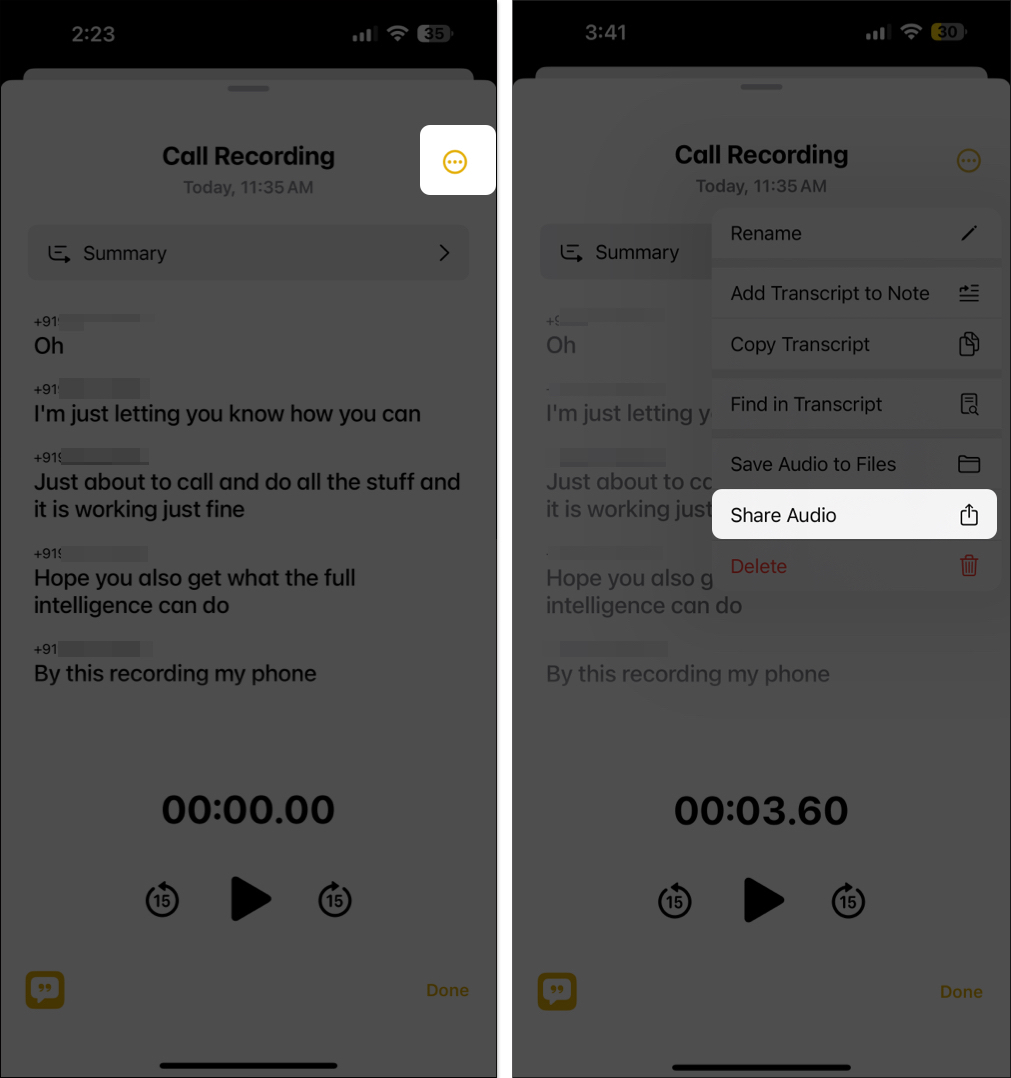
- With the call recording open, tap the three-dot button in the top-right corner of the app.
- Select Share Audio from the menu, then select the app on the Share Sheet using which you want to share the recorded file.
- Alternatively, tap on Save Audio to Files and follow the on-screen instructions to save the recorded audio to the Files app.
Video: iOS 18.1 Call Recording Feature: How to RECORD Phone Calls
Signing off…
The introduction of the call recording feature is a welcome step that every iPhone user will surely cherish. It’s also good that Apple kept the focus on user privacy and added the warning dialogue before the recording starts.
What do you think about the new native call recording feature in iOS 18.1? Do share your thoughts in the comments.
Read more on iOS 18:
