We may all have deleted files without intention. If you have deleted any critical documents by accident, you should look through the trash to see if there is any chance to recover trash on Mac. However, you shouldn’t be concerned since we will provide multiple solutions to recover deleted files from emptied trash on Mac and restore access to your data.
Can I recover deleted files from trash on Mac?
When it comes to deleting files, the topic is often broken down into three distinct categories: erasing information permanently, clearing out the recycling bin or Trash, and deleting files inadvertently. You may recover lost data on a Mac without the need for any additional software if you make use of certain Mac tools discussed in the next section.
Additionally, you might need a data recovery application such as Tenorshare 4DDiG to retrieve anything that has been deleted from the trash on your Mac. With the help of this excellent data recovery application, you may recover deleted Trash on macOS Ventura, files that were deleted permanently, and even files that were wiped from trash.
Recover accidentally emptied trash in macOS Ventura
Here are some of the easiest and most convenient ways to recover deleted files from the emptied trash on macOS Ventura.
1. Use Time Machine
If you routinely back up your Mac, you may be able to utilize the backup media to retrieve items from the Trash bin after you have deleted them. The fact that you have a backup that includes the lost information is essential in this situation.
This backup and recovery program, known as Time Machine, is already pre-installed on your Mac. When recovering the trash from a Time Machine backup, use the technique.
- Establish a connection between your Mac and the Time Machine backup media.
- Launch the Finder application and go to the Trash folder. (It is also important that you verify the folders that had the files before you moved them to the Trash.)
- Launch Time Machine and go through its archives for the things you erased.
- Choose the things that need to be recovered, and then click Restore.

2. Use iCloud backup to recover emptied trash
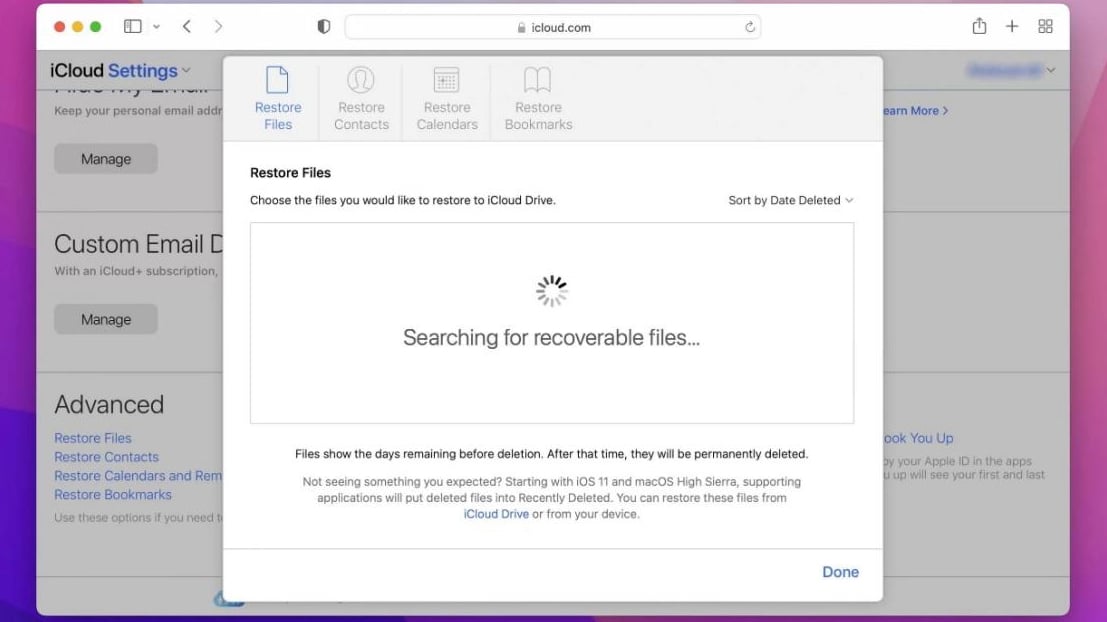
- Visit iCloud.com and sign in there.
- To open the iCloud Settings web app, you will need to click the gear icon.
- Scroll down until you reach the bottom, then click the Restore Files button.
- Select the files that were deleted lately that you wish to recover, and then click the Restore button.
Even after you delete a file, it will remain on the hard drive until another file is stored in the same place. But you can retrieve deleted trash easily with solid data recovery software designed for Mac. Here, we’ll be using Tenorshare 4DDiG Mac data recovery.
- After the installation is complete, launch 4DDiG-Mac and choose a place, such as your local disks, to begin the data recovery process on your Mac.
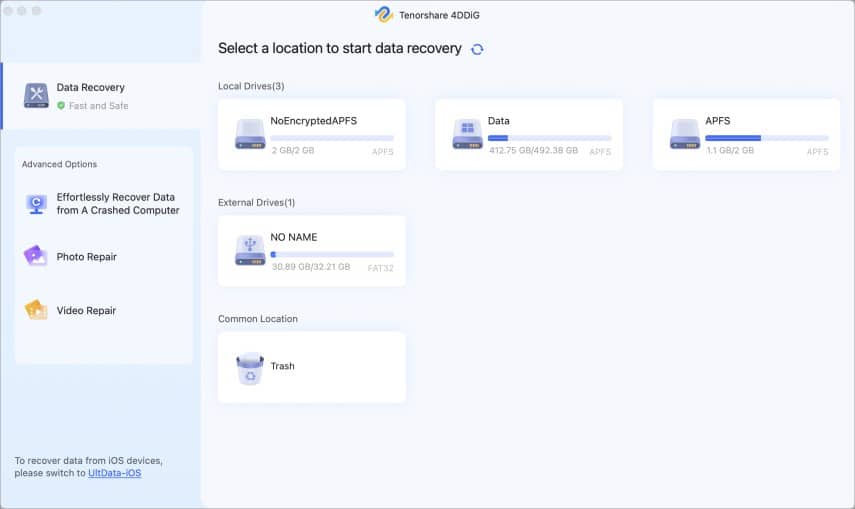
- When you move the mouse pointer over the spot you want to scan, a little icon with the word “Scan” will display in the corner to the right. Simply start the search for your missing files by clicking the Scan button.
- The process of checking for deleted files takes some time. After the result of the scan has been obtained, you will be able to choose individual file types and get a preview of further data.
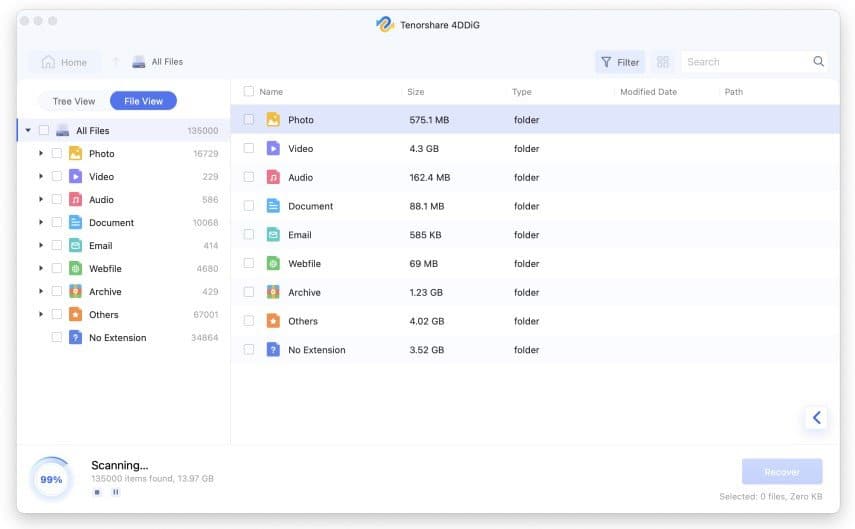
- Click the Recover button, and then choose a place to save the recovered data. It is not advised that you save the recovered data to the partition on which you had previously lost them.
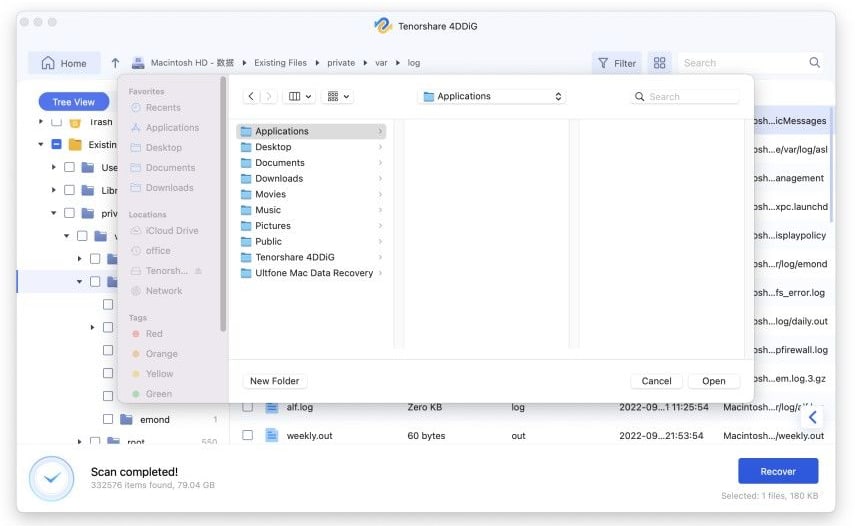
To learn how to retrieve deleted data from the trash after emptying it, download Tenorshare 4DDiG Mac Data Recovery and watch the accompanying video that explains how to recover emptied trash on Mac.
Become an iGeeksBlog Premium member and access our content ad-free with additional perks.
4. Get deleted files back from emptied trash using Terminal
- Launch Spotlight on your Mac → Search and launch Terminal.
- Enter cd .Trash and hit the return key.
- Next, type ls -al ~/.Trash and hit the return key.
- If you find your desired file, then type mv xxx../ and move it to your desired location.
Here, xxx stands for the deleted file’s name.
Yes, you can get those files back with macOS data recovery software.
Launch Finder → From the Finder’s Go menu, choose Go to Folder → Type .Trashes as the path and hit the enter key. Now, you will be able to view the deleted files on the external drive of your Mac.
Conclusion
You must act promptly if you discover that data on your Mac has been accidentally deleted by going to the Trash folder and recovering emptied trash. We hope the solutions provided here have addressed your concerns. If you have further queries, do let us know in the comments.
4DDiG Christmas & New Year sales (Dec 9, 2022-Jan 4, 2023)

100% Win A Gift
Each user can get 4 chances to 100% win a prize by picking a sock at random. To participate, you can:
- Submit your email to get 1 chance. After submitting, you can pick a sock at random.
- Share this page on Facebook or Twitter, and you will get 2 extra chances to win the prize.
- By subscribing to our YouTube channel, you can also get a chance to win a prize.
Up to 70% off on the best Single Deals
Only on Christmas & New Year Sales can you get a license for Tenorshare 4DDiG devices that is valid for one year or one month:
- After the discount of 60%, 4DDiG Data Recovery is available for just $39.98 per year and $27.98 per month.
- After the saving of 70%, 4DDiG Duplicate Deleter is available for just $23.97 per year and $14.97 per month.
- After the discount of 60%, 4DDiG File Repair is available for just $36.76 per year and $17.97 per month.
XMAS Coupon Code – 40% OFF
You will receive a 40%off discount valid from December 12, 2022, to January 4, 2023. This discount code is valid for all products on the 4DDiG website.
If you want to know more, please visit our events page. ( Sorry, this event was expired! )
