Captured a picture on your iPhone where the background looks distracting and wondering how to remove it while keeping the subject intact? Worry not! Your iPhone has built-in tools in its native apps to help delete backgrounds from photos for free.

Keep reading, and I’ll show you three ways to remove the background from pictures directly on your iPhone and iPad.
Why do you need to remove the background from an image?
Removing the background from a picture can be useful for several reasons:
- Focus on the subject: Whether it’s a portrait or a product photo, removing the background eliminates distractions and helps emphasize the main subject.
- Create professional content: Background-free images look clean and are widely used in official documents. In the case of products, removing background lets you showcase them in a neat way in business presentations and online stores.
- Make memes and graphics: If you enjoy making fun memes or personalized graphics, removing the background helps blend your subject into different designs.
- Enhance creativity: A transparent background opens endless possibilities for placing the image on new backgrounds or combining it with other elements for creative projects.
- Error correction: Sometimes, unwanted elements in the background can spoil an otherwise great shot. Removing these distractions can make a photo usable.
How to remove the background from a picture using the Photos app
Your iPhone’s Photos app comes with a built-in tool that lets you lift the subject and remove the background from images easily. Here’s how to do it:
- Open the Photos app on your iPhone.
- Select the picture you want to edit.
- Tap and hold on to the subject of the image (the person, object, or anything you want to keep), and you’ll see a glowing outline around the subject after a few seconds.
- Once the subject is selected, a small pop-up will appear with three options. Select Copy to save the background-free image to your clipboard.
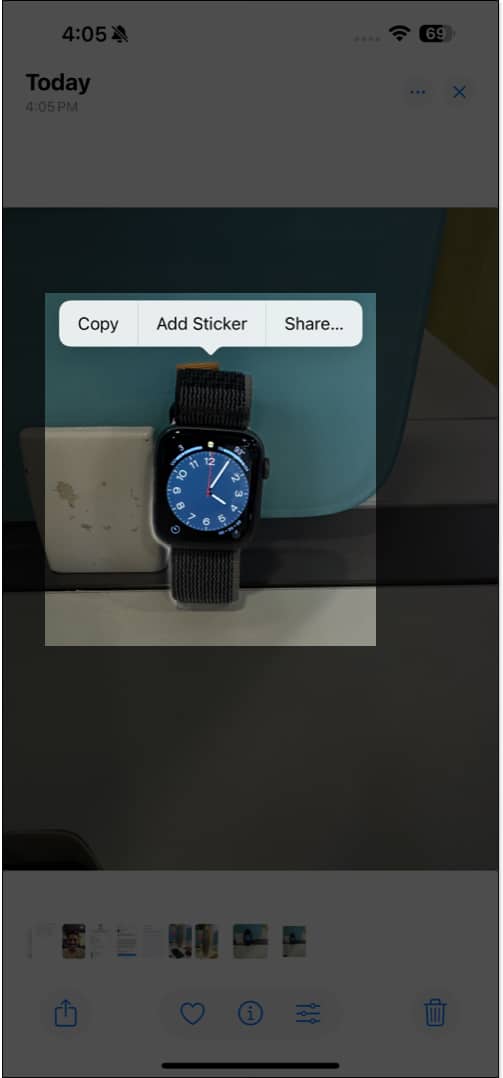
- Now, you can paste the copied subject in apps like Notes, Messages, etc.

- If you select Share, you can directly send the image to anyone or tap on Save Image from the Share Sheet to save the cutout in PNG format in your Photos app library.
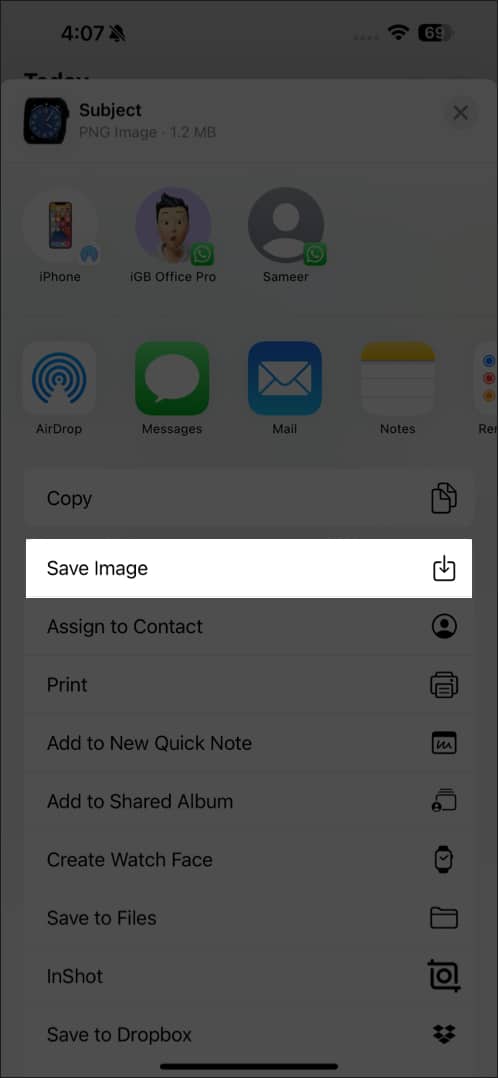
- You may choose Add Sticker to create a Live Sticker from your image.

I use this method whenever I need to remove background from an individual picture on my iPhone. It is quick and easy and doesn’t require downloading third-party apps.
Become an iGeeksBlog Premium member and access our content ad-free with additional perks.
But what if you need to erase the background from several photos on your iPhone? Following the above method would be tedious, so I have found another solution.
Remove background from multiple images using the Files app
The Files app on your iPhone also allows you to remove backgrounds from multiple images simultaneously. Here’s how:
- Open the Files app on your iPhone.
- Navigate to the folder to find the images whose backgrounds you want to remove. If you can’t locate them, save your pictures from the Photos app to the Files app first.
- Tap the three-dot icon in the top-right corner and choose Select. Then, tap on each image you want to edit.
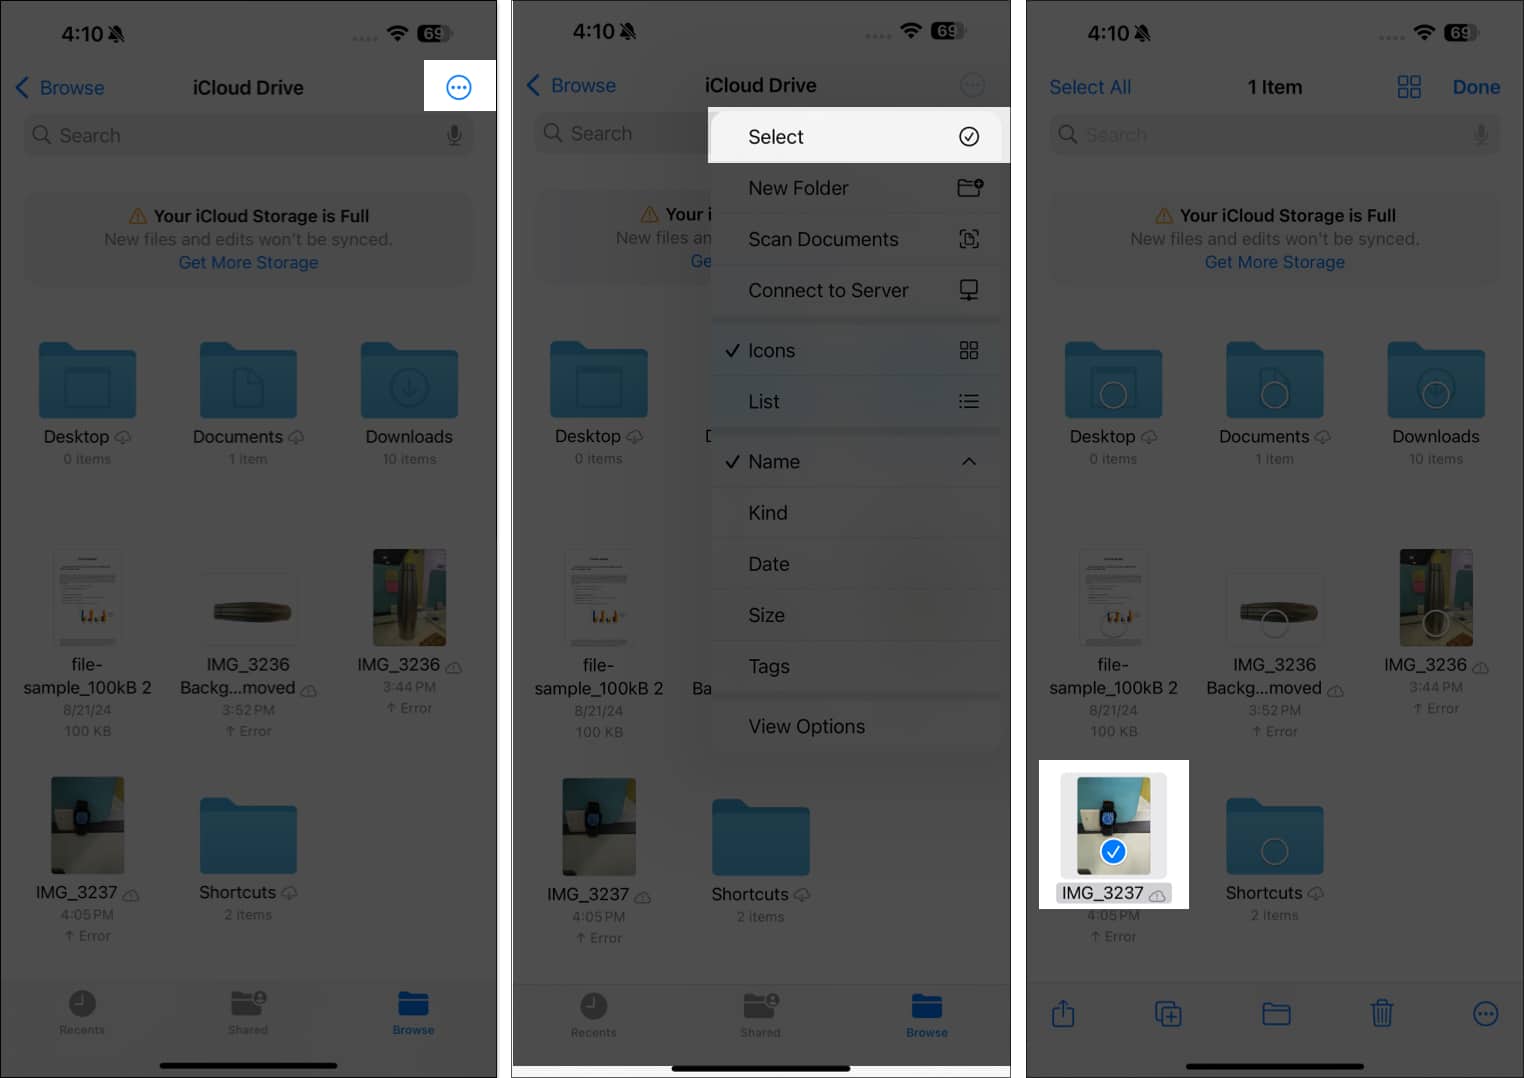
- After selecting the images, long-press on one of them. Select Quick Actions from the menu and tap on Remove Background.
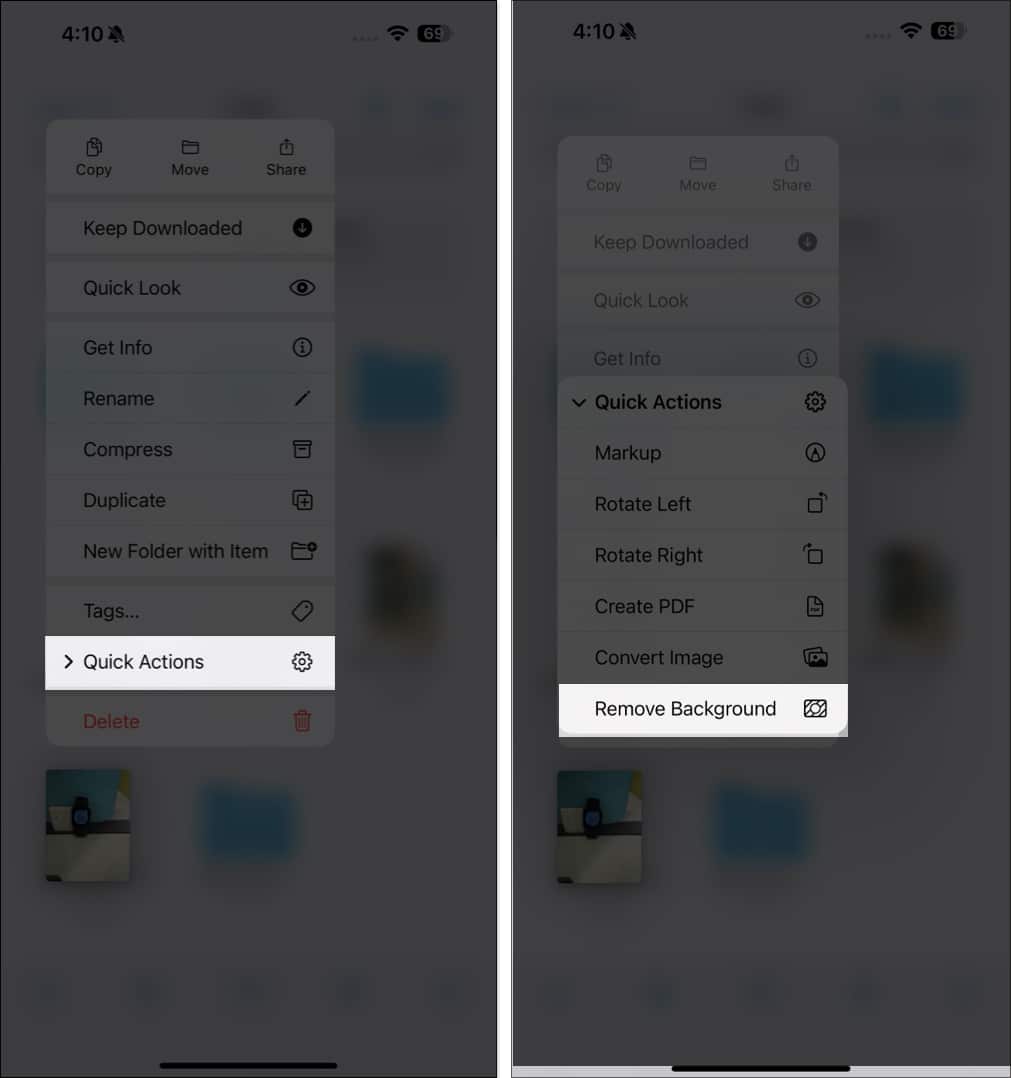
The iPhone detects the subject and instantly removes the backgrounds from all selected images. You’ll see a transparent version of each image in the same folder.
This bulk-editing feature is handy for those needing to process multiple images simultaneously. It saves much time and effort. But keep in mind that results may vary as the process is automatic, and you can’t choose the subject with this method.
Remove background from online images using Safari
Besides removing background from images stored on your iPhone, Apple also lets you remove the background from pictures you find online using Safari? This way, you can save the subject without downloading the image. Here’s how to do it:
- Ensure you have a stable internet connection.
- Open Safari and go to the webpage that contains the image you want to use.
- Long-press on the image and select Copy Subject to save it to your clipboard.
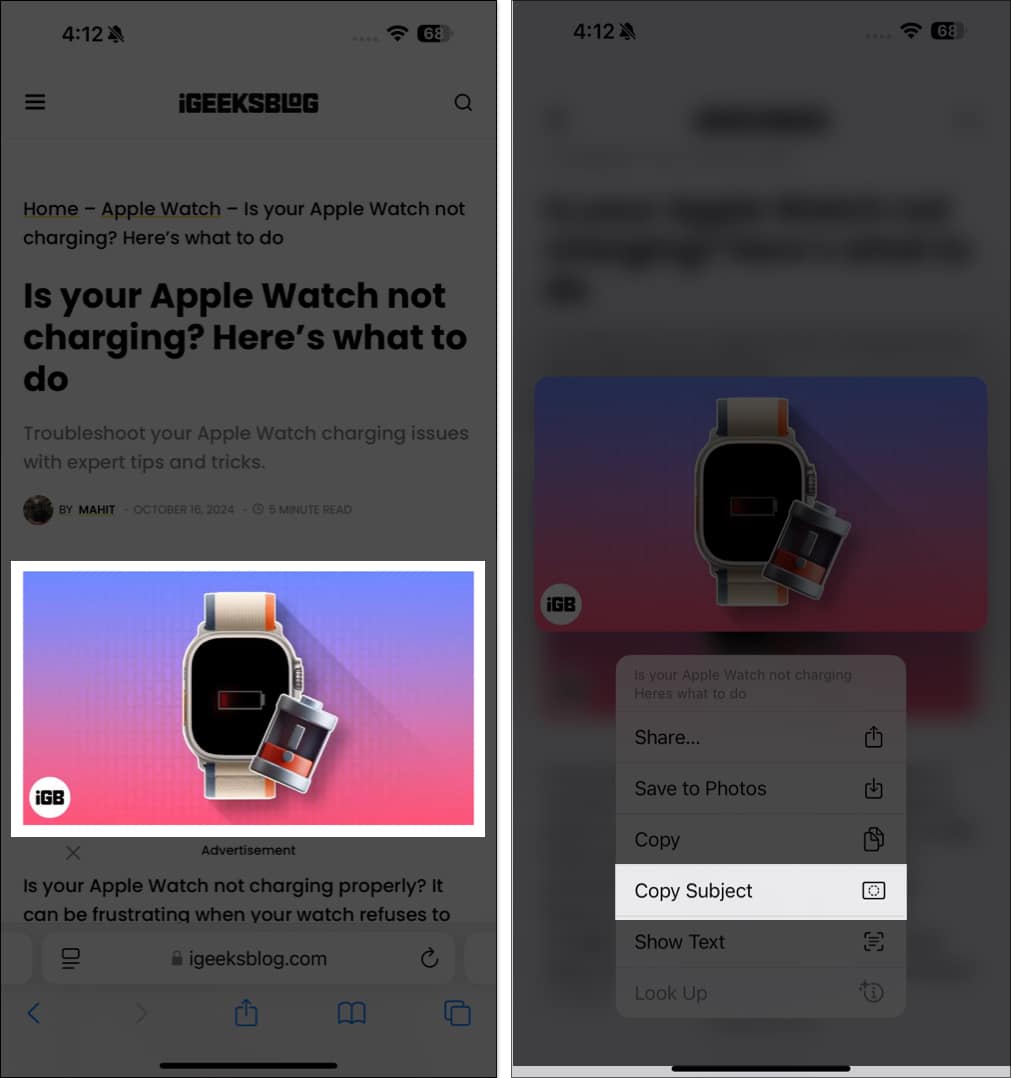
- Now, paste the image anywhere you want to save it.
All these built-in methods are convenient. However, the results are not always great. You may use third-party image background eraser apps when this happens. These apps offer advanced editing options and flexibility. Plus, the cutouts will not lose quality, which may happen with the Safari method.
Signing off…
Thanks to the built-in features, removing the background from pictures on your iPhone has become simple. The best part is that you don’t need to download any third-party apps, as everything can be done right from your iPhone for free.
So go ahead, try these methods, and let us know which method you like!
Also read:

