Summary
- To reset Notes password, go to Settings → Notes → Passwords → Reset Passwords. If you reset the Notes password, the change is only applicable to new notes created thereafter.
- If you had previously enabled Touch ID or Face ID to access a locked note, you can use biometric authentication to access it. Further, you can even go to Notes settings and Change Password for locked notes.
- If you locked old notes with only an alphanumeric password, you still need the original password to access them. You can’t reset or change it otherwise.
The Notes app allows users to lock and protect private data from prying eyes. However, it’s common for users to forget passwords for locked notes.
This blog post will take you through the steps to reset Notes password on your iPhone, iPad, and Mac so that you can set it to something you can easily remember.
Things to know before resetting password for locked notes
Resetting passwords for locked notes is super easy, but there are a few conditions you need to be aware of.
- Situation 1: If you remember the existing password for locked notes, you can just change it by going to the Settings app → Notes → Password → Change Password. The change will apply to all notes – new and existing. You can avoid resetting the Notes password in this case.
- Situation 2: If you had previously enabled access via Touch ID or Face ID for the locked note, you can still go ahead and change the password. No need for a reset.
- Situation 3: If you have forgotten the alphanumeric password for existing notes and haven’t allowed access via Face ID or Touch ID, there’s some bad news. You can’t reset the password for existing notes. In this situation, even if you reset the password, the change is only applicable to new notes you create thereafter.
Based on the above analysis, it’s fair to say that it is high time Apple figures out a way to let users change passwords for all locked notes saved on the same Apple ID.
Until Apple figures that out, here’s how you can reset the password for Notes on iPhone, iPad, and Mac.
How to reset Notes password on your iPhone and iPad
- Launch the Settings app on your iPhone or iPad.
- Scroll down to the Notes app.
- Choose Password.
If prompted and you’re signed up with multiple accounts, select the one of your preference. I choose iCloud.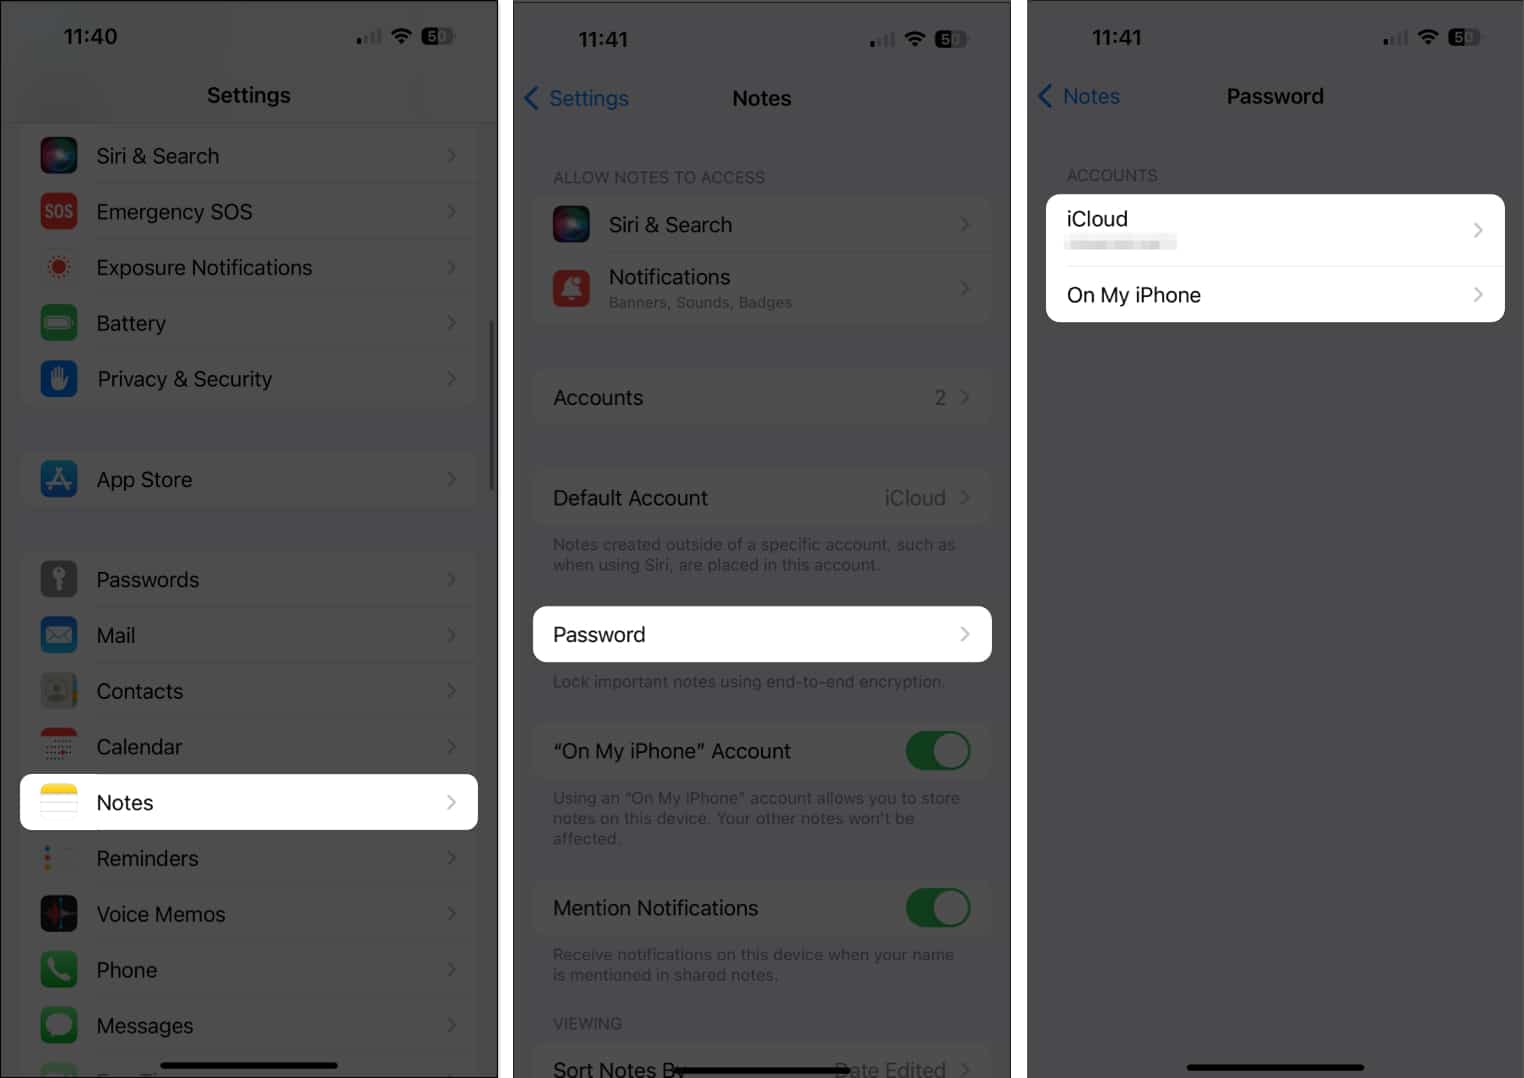
- Now, select Reset Password.
- Enter the password of your synced Apple ID → Tap OK.
Wait for a moment until the credentials are verified.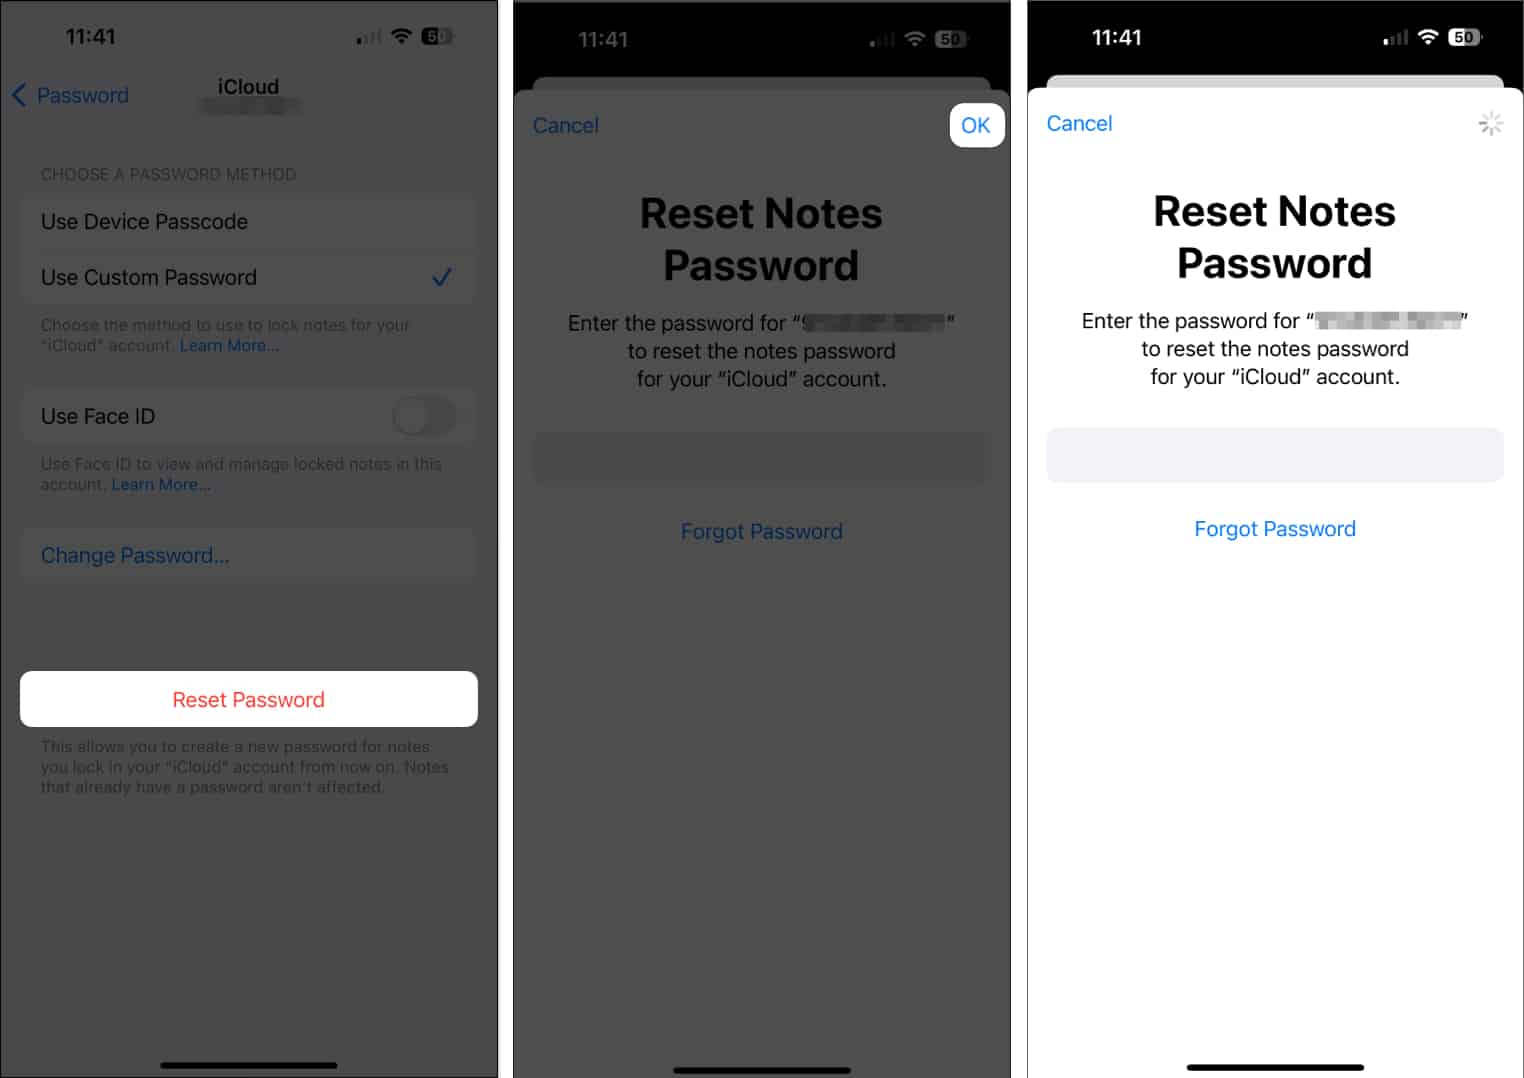
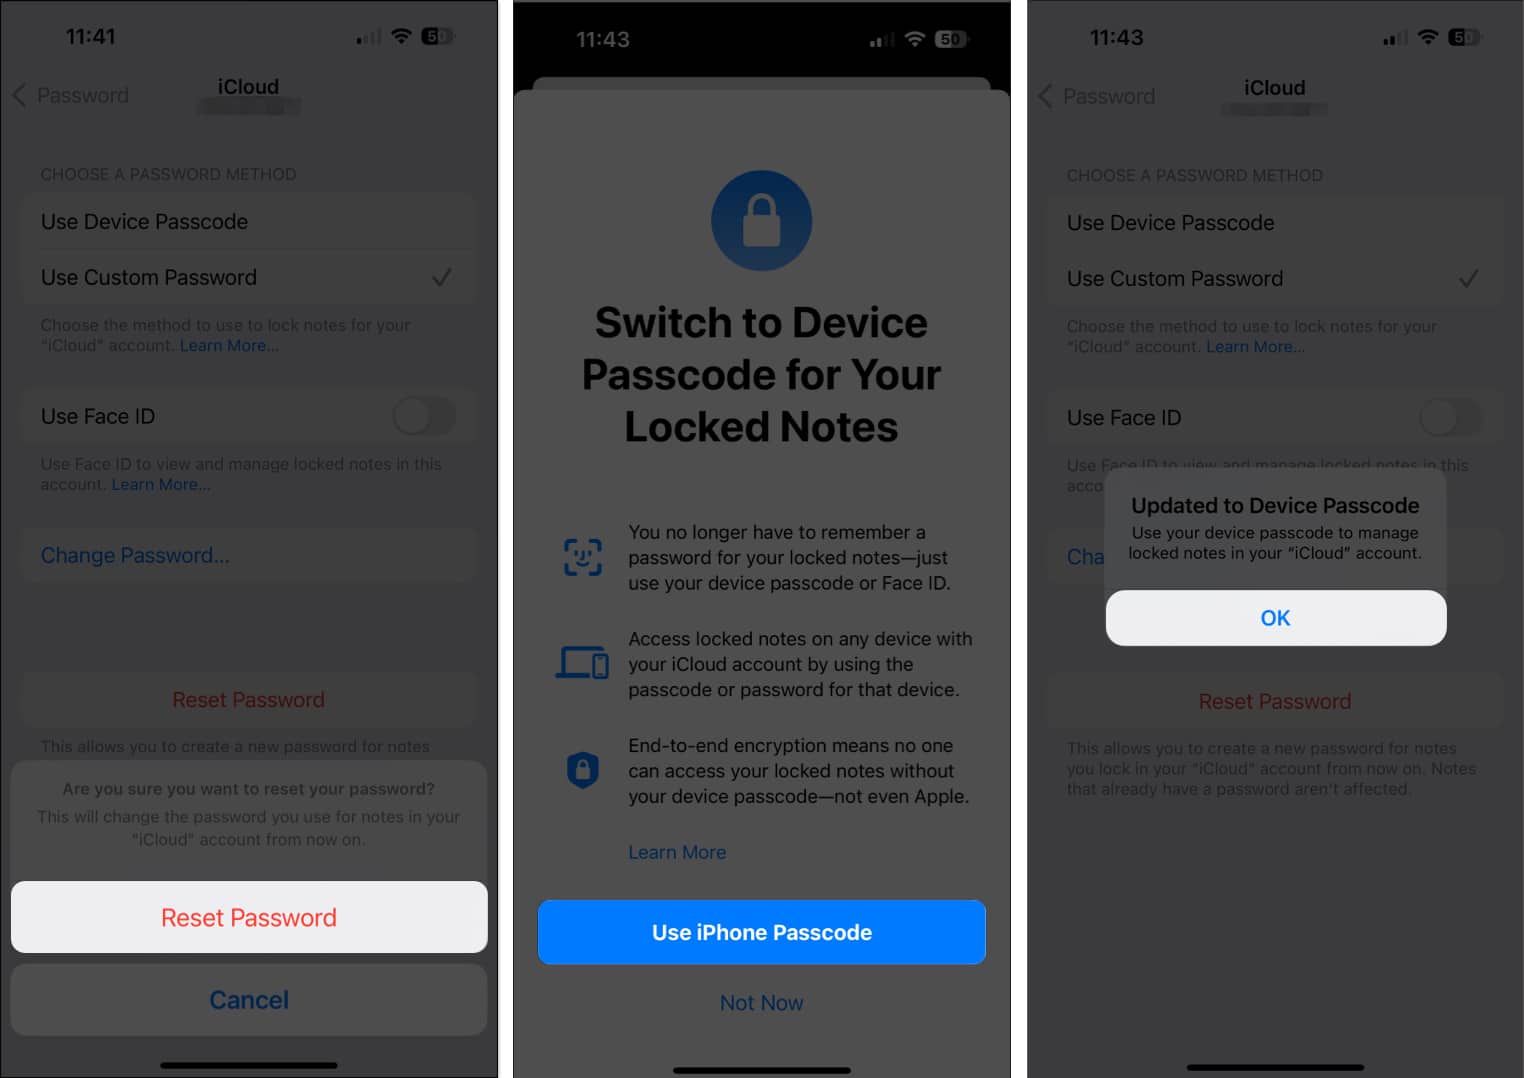
- Tap Reset Password to proceed.
- I have opted to Use iPhone Passcode as a locked note password. This lets you use the same passcode for your iPhone and locked notes.
- You can also tap Not Now and set a custom password.
- You can also tap Not Now and set a custom password.
How to reset Notes password on your Mac
- Open the Notes app on your Mac.
- Click Notes → Settings from the menu bar.
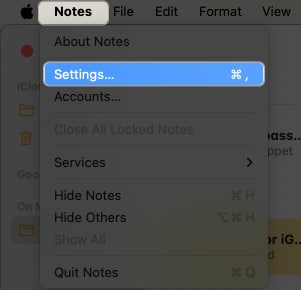
- Click Reset Password from the bottom of the menu.

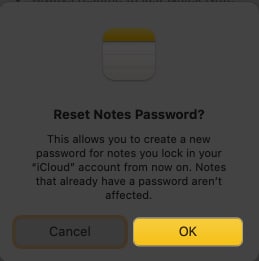
- Enter your Apple ID password → Click OK twice, one after the other, to confirm your choice.
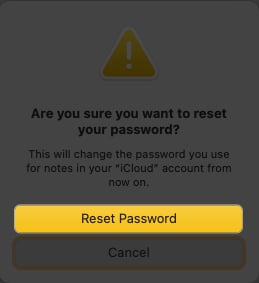
- Once verified, you can choose the Reset Password option.
- Pick any one of the Use Login Password or Not Now methods to lock notes on Mac.
- If you select Use Login Password, your Mac’s login password will be applied to lock notes.
- If you choose Not Now, you can add a custom password, verify and provide a hint, and select Set Password.
I advise adding a password hint as well. This will improve your chances of remembering the password of the locked note in the future.
Become an iGeeksBlog Premium member and access our content ad-free with additional perks.
Resetting the password of locked notes will result in the coexistence of notes with old and new passwords. This can cause confusion when it comes to locking new notes and unlocking the old ones. You may have to manage notes with old passwords and new passwords simultaneously.
In my opinion, once you reset the password for locked notes, use it to change the password as well. As changing a password requires an existing password, you will now be able to sync old and new notes with the same password.
Bonus: Copy content from existing locked notes using Touch ID or Face ID
If you have previously locked notes and chosen to keep Touch ID or Face ID as an authentication factor, you’re in luck.
In this case, you can access the note even if you forget the password.
- Simply access the locked note.
- Unlock the note via Face ID or Touch ID.
- Copy the content of the respective note.
- Paste the same in a new note.
This will allow you to get immediate access to the Lock without resetting the password. It can come in handy if you’re in a hurry and do not have time to reset the password.
But remember that this is just a workaround. So, I’d advise you to do the following to secure your notes.
- Copy content from all existing locked notes using Face/Touch ID → Paste them into new unlocked notes.
- Then, reset the password for notes by following the methods shown above.
- Now, go back to the Notes app and lock all those notes again. This will ensure your data remains private but with a new password of your choice.
Restore the forgotten!
By following the instructions outlined in this article, you can easily regain access to locked notes on your Apple device. While you’re at it, develop a habit of using a password manager so that you do not have to worry about such occurrences.
Thank you for reading. Please take a moment to leave your thoughts in the comments.
Read more:
