The feature of sending disappearing messages is available across all messaging apps like WhatsApp, Telegram, Facebook Messenger, and more. Now, Google has also introduced expiring emails on Gmail. As evident from the name, this allows you to send emails from your Gmail account that become inaccessible after a specified time interval.

This could be great if you want to shoot across a confidential email. To send expiring emails on Gmail, you need to activate Confidential mode. Let’s understand what Confidential mode is and how you can activate it to send disappearing emails.
What is Confidential mode in Gmail?
Google’s Confidential mode offers an additional privacy option while sending emails. When activated, you can set time intervals for expiring emails, unsend emails, send password-protected emails, and restrict users from forwarding, downloading, or printing emails.
With Confidential mode, Gmail has tried to offer users much more control over emails. Now, if you want to explore the new privacy mode and don’t know where to start, below is a brief guide to help you through it.
How to send expiring emails on iPhone, iPad, and Android
- Open the Gmail app on your device.
- Select the mailbox for which you want to activate the Confidential mode.
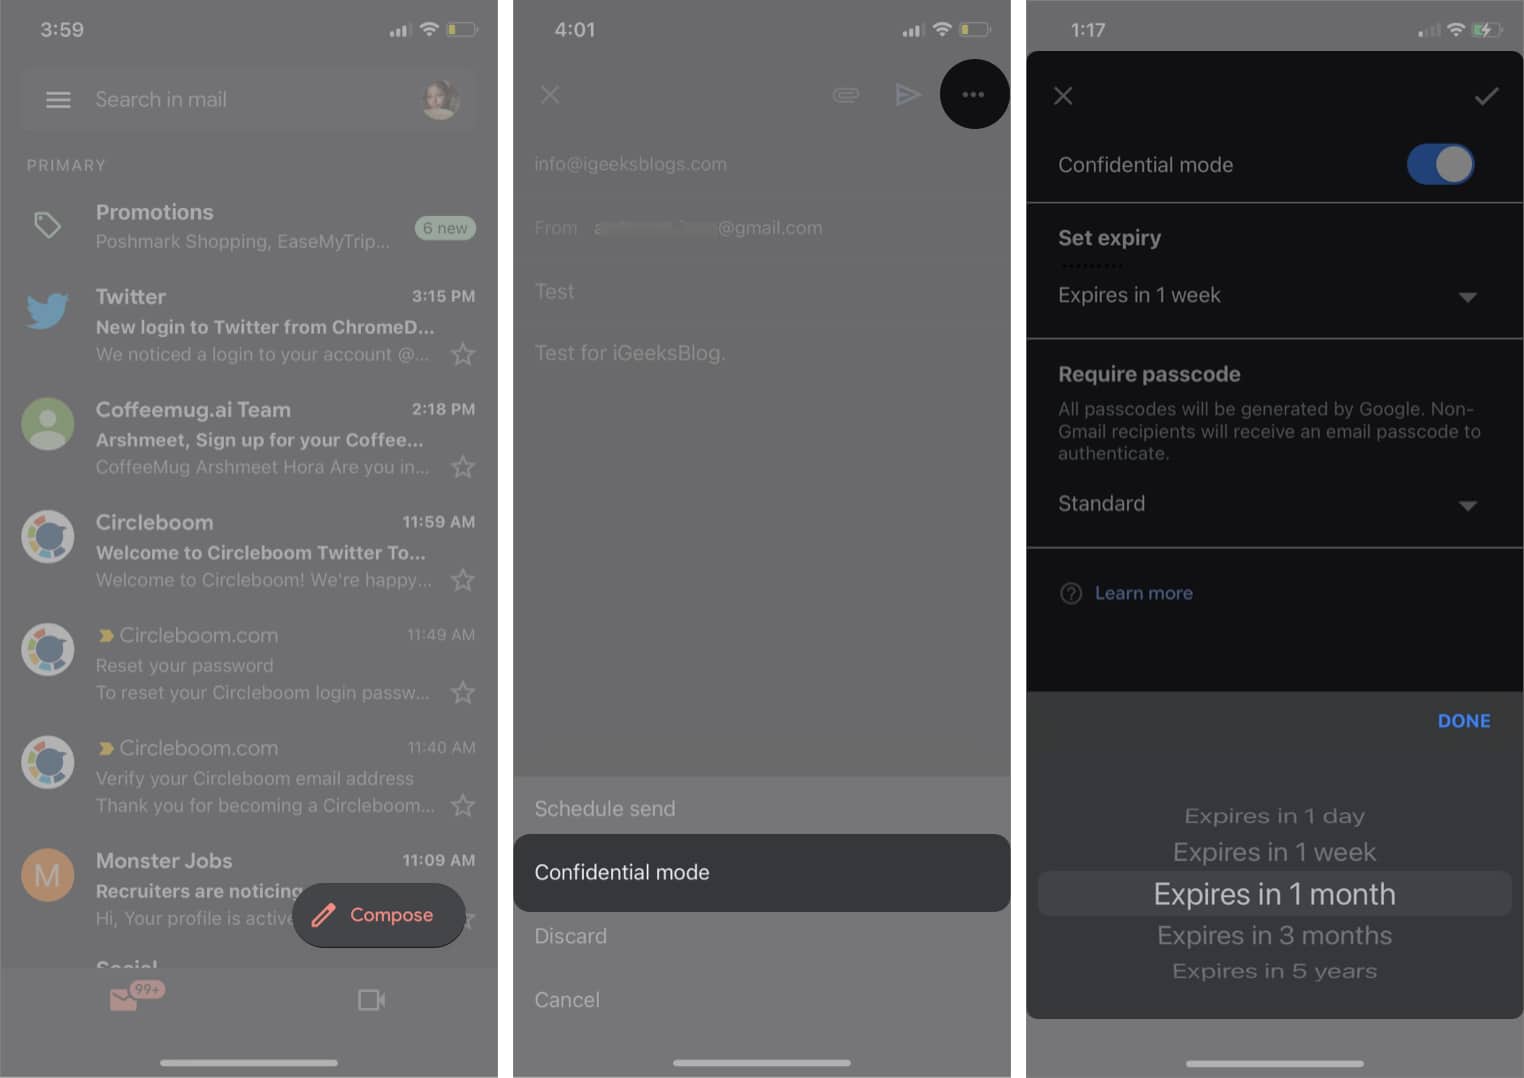
- Tap the Compose button at the bottom right.
Enter the recipient’s email address, subject, and message in the respective fields. - Next, tap the three-dot option at the top right.
- Select Confidential mode → toggle on Confidential mode.
- Tap the dropdown menu under Set expiry and select the preferred duration.
- Tap the tickmark at the top right.

- Hit send, and now the sent email will expire after the set time interval.
How to add a passcode to emails on iPhone, iPad, and Android
Gmail’s confidential mode also offers an option to apply passcode to emails for an additional layer of privacy. You can send passcode-protected emails by following the below-given steps:
- Follow steps 1 to 5 mentioned above.
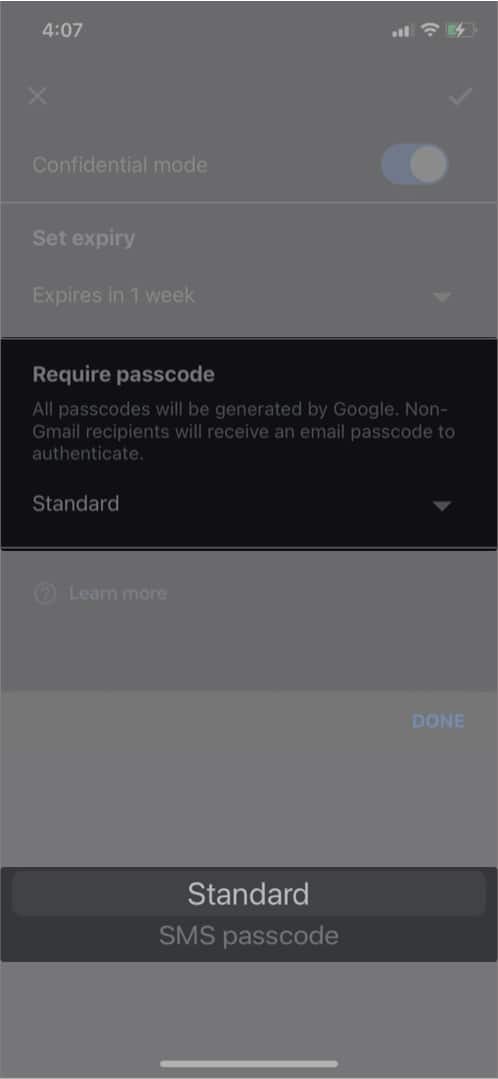
- Tap Standard under Require passcode.
- Now, choose SMS passcode to enable the option.
The recipient will receive a passcode via text message to access the email. Hence, enter the recipient’s correct mobile number.
Note: If you want the user to open the email directly without entering a passcode, you can choose Standard.
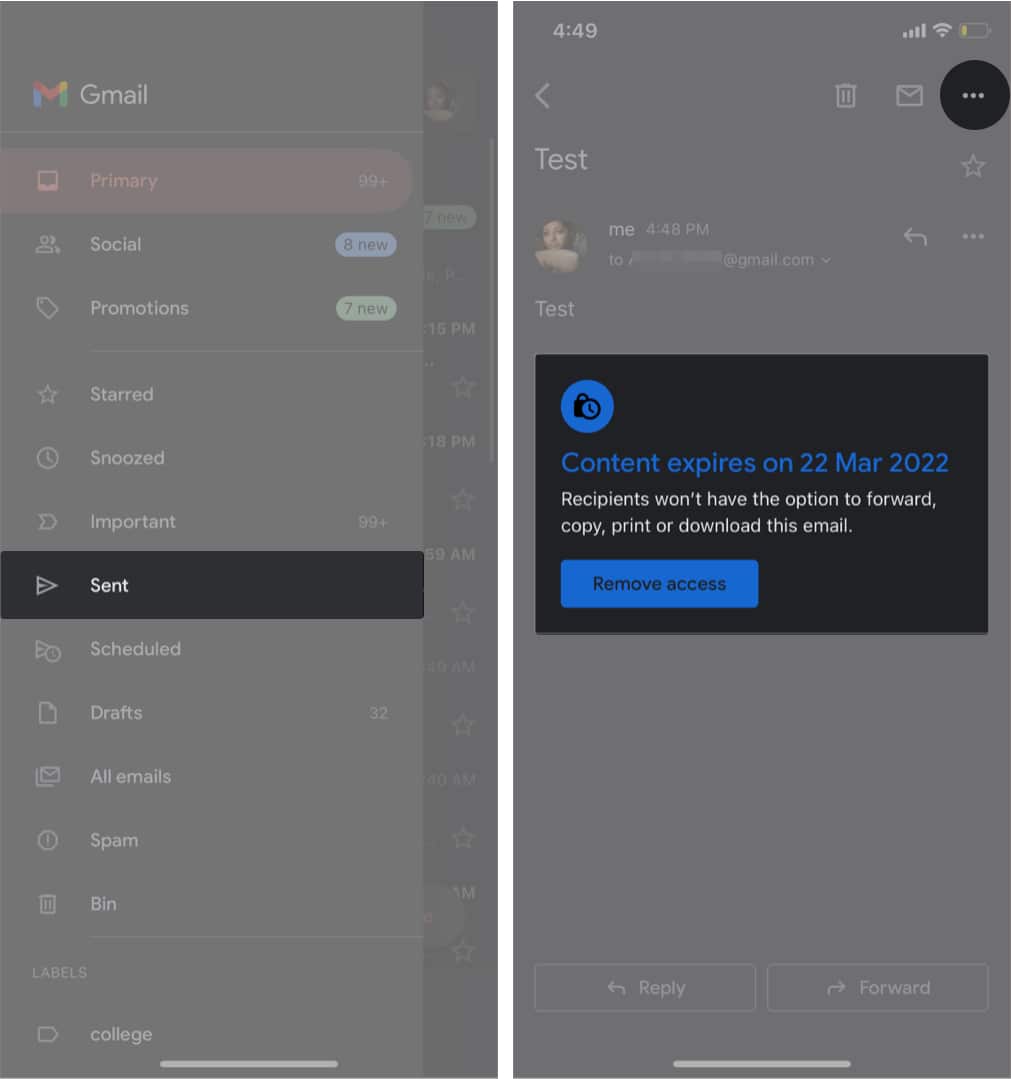
Once you have enabled the Confidential mode and chosen the required options, you will see a notification under the mail body displaying the expiry date of the email. The notification would read, “Content expires on [the selected time interval]…Recipients won’t have the option to forward, copy, print, or download this email.”
Remove access to an email before the expiry date
Google also offers the option to remove access to an email before the expiry date. If you have sent an email with a set expiry date and you want the recipient to stop accessing the email before the expiry date, here’s how you can do it:-
- Launch the Gmail app on your device and go to Sent.
- Open the email you want to stop access for, and tap Remove access below the mail body.

How to access Confidential mail and things to know
Now that we have learned about sending confidential mail on iPhone, iPad, and Android, here’s what you need to do if you are on the receiving end of an expiring email.
Become an iGeeksBlog Premium member and access our content ad-free with additional perks.
- You can read an email sent using Confidential mode until the sender has removed the access or until the expiry date.
- Additionally, you won’t be able to copy, download, print, and forward the email or its attachment for the email sent in Confidential mode.
- If the sender has enabled the SMS passcode option, you need to enter the passcode received via text message on your mobile number to access the email.
- If you are not using Gmail to access the mail sent using Confidential mode, you will receive a link. Open the link; a new page will open → tap Send passcode → enter the passcode to access the email.
If you’re getting an error while accessing an expiring email, there might be two scenarios.
1. You’re getting an ‘Email has expired’ message
If you are unable to access an email sent by using Gmail’s Confidential mode and facing the ‘Email has expired’ message, it means that the sender might have removed the access before the expiry date or the mail has been deleted from the sender’s end.
In such a case, you can contact the sender to send the email again.
2. You don’t receive the SMS passcode
If you are getting a ‘The provided number is for an unsupported country’ message after entering your mobile number to receive a passcode while accessing an expiring email, it means the feature is not supported in your region.
SMS passcode feature is only available if the receiver’s mobile number belong to these regions:
- North America
- South America
- Europe
- Australia
- Asia: India, Korea, and Japan
If you still can’t open a confidential email, you can try switching accounts. Check if you are logged into the same Google account to which the email has been sent. You can visit our guide to switch Google accounts quickly on iPhone and Android.
That’s it!
The option to send expiring emails on iPhone, iPad, and Android could come in handy when you share sensitive attachments and messages. Also, it is noteworthy that you can always schedule non-expiring emails on Apple devices but can’t do the same with expiring emails. We hope this guide helped you send expiring emails on iPhone and iPad without facing any issue. Here are some more tips if you want to use the Gmail app on iPhone like a pro.
Read more:
