With so many tasks on our plates these days, it’s hard to remember every little thing. With the Reminders app, you can set up reminders that are based on arriving or leaving a location.
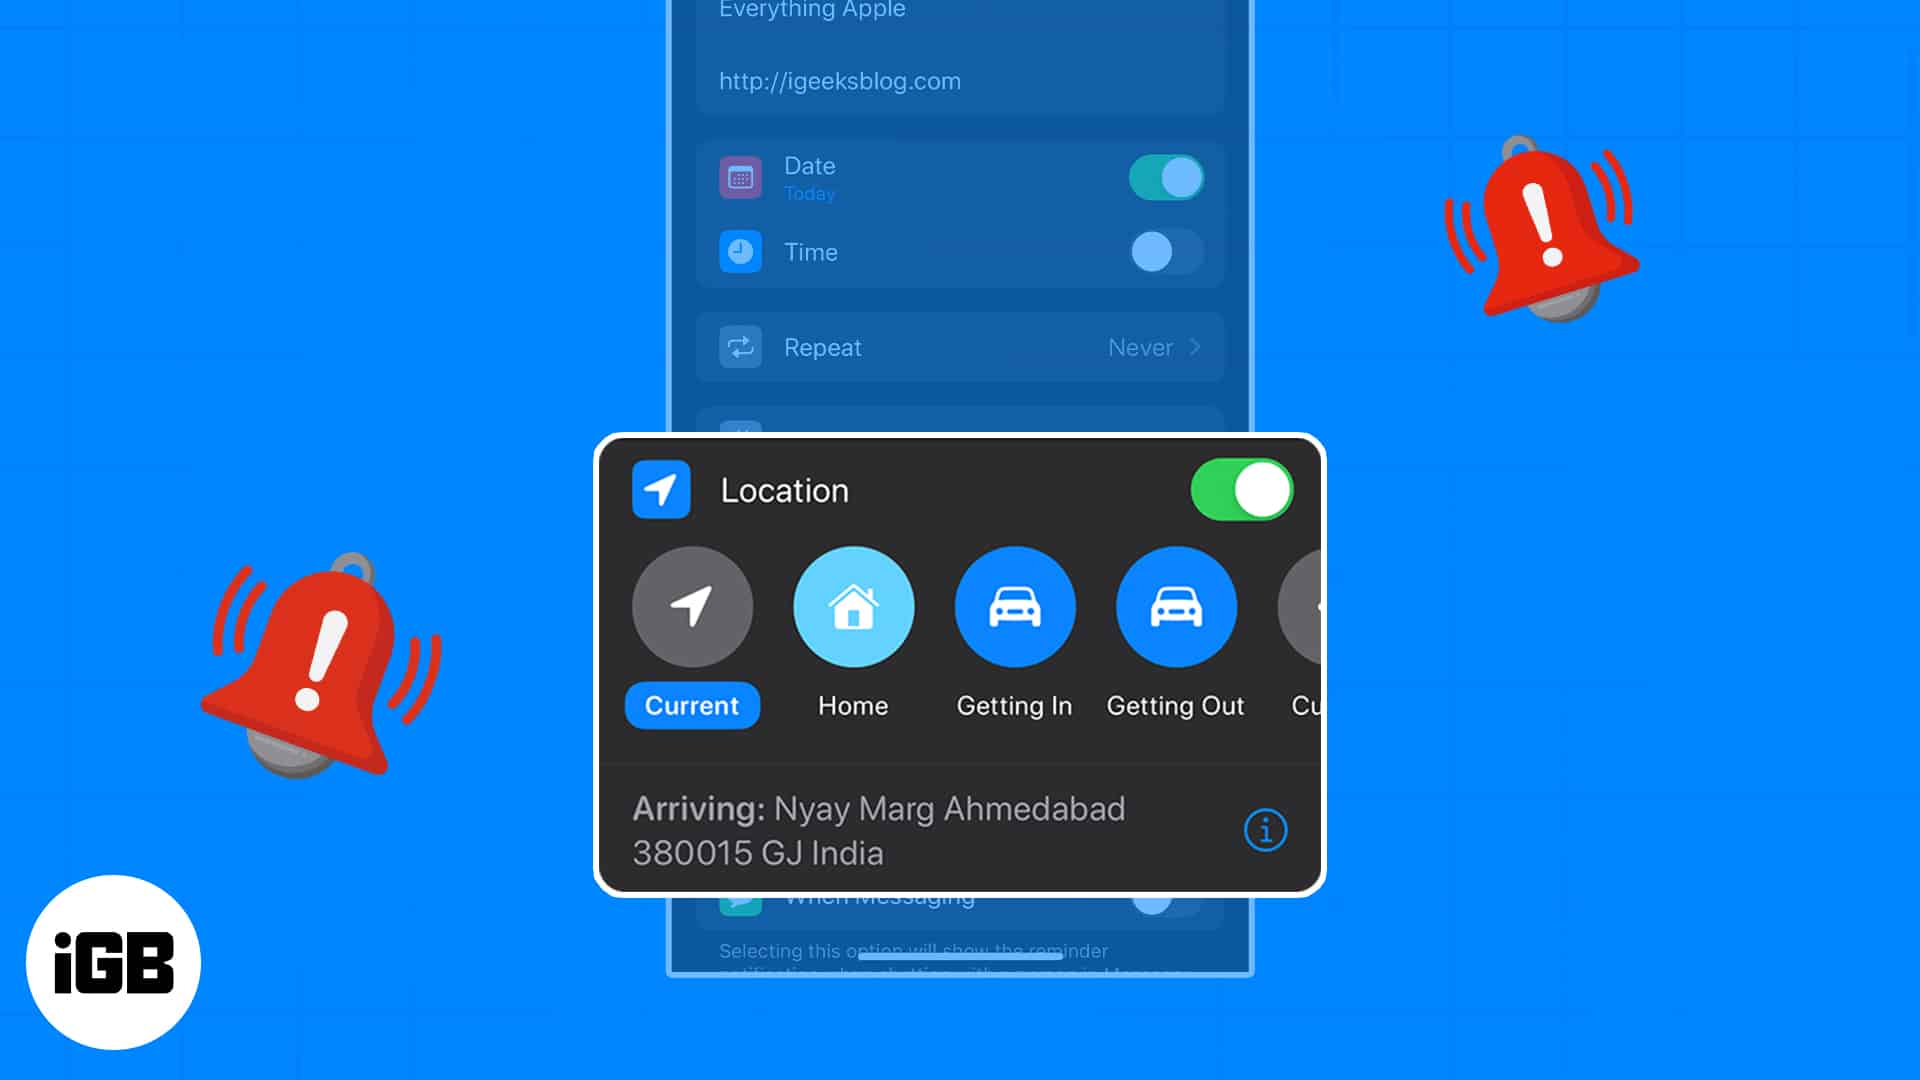
“Text me when you get home,” “Don’t forget milk when you leave work,” or “Schedule that meeting when you arrive at the office” are all things that you can easily overlook. Let’s look at how to set up a location-based reminder on iPhone, iPad, and Mac so that you don’t forget a thing.
- About location-based reminders
- Requirements to set location-based reminders on iPhone, iPad, and Mac
- How to create a location-based reminder on iPhone and iPad
- How to create location-based reminders on Mac
About location-based reminders
Setting a reminder based on location is handy for many situations on Apple’s Reminders app. You can also set up a reminder for arriving at or leaving a specific location like school, the gym, or the library or when getting in or out of your car.
Here are some common ways to use location-based reminders:
- Stop at the store when you leave work.
- Text your friend when you get home from your date.
- Call home when you arrive at your hotel.
- Put in your sun shields when you get out of the car.
- Visit your guidance counselor when you get to school.
- Reply to an email when you arrive at the office.
- Take the trash out when you get home.
Requirements to set location-based reminders on iPhone, iPad, and Mac
Let’s take a look at the requirements to set a reminder based on location on your iPhone, iPad, and Mac.
Enable Location Services on iPhone and Mac
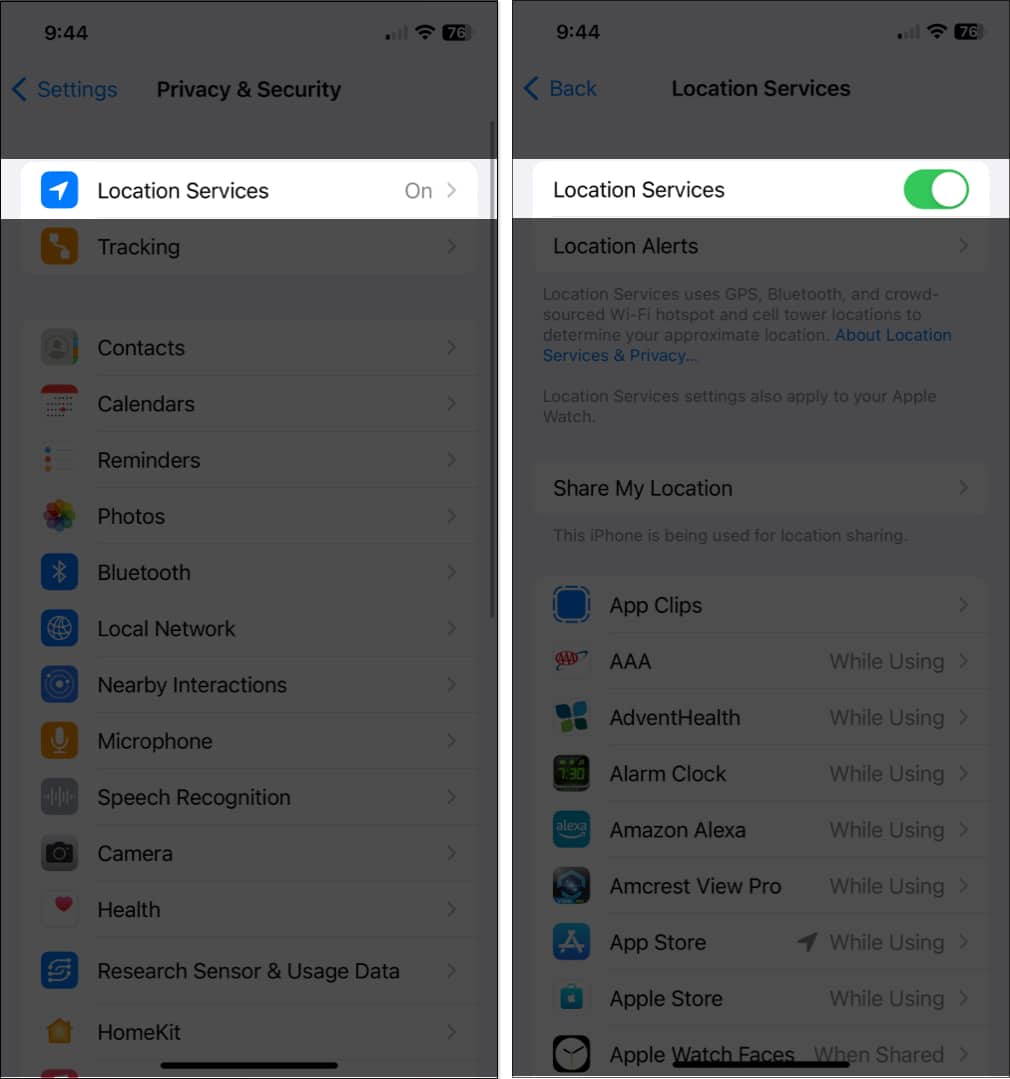
- On iPhone and iPad, open your Settings app.
- Go to Privacy & Security → Select Location Services.
- Turn on the Location Services toggle at the top.
To do the same for your Mac, go through our detailed guide on how to enable Location Services on Mac.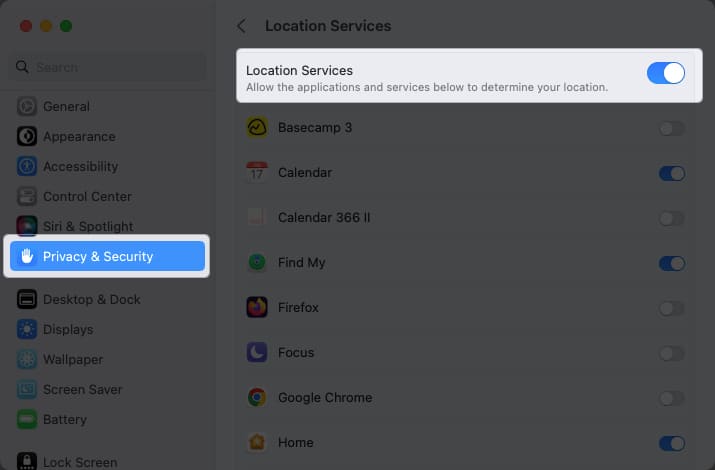
Enable Reminders syncing
If you want to set up reminders on one device and access them on another, you’ll also need to make sure you’re syncing the Reminders app. You can turn this on in your iCloud settings.
On iPhone:
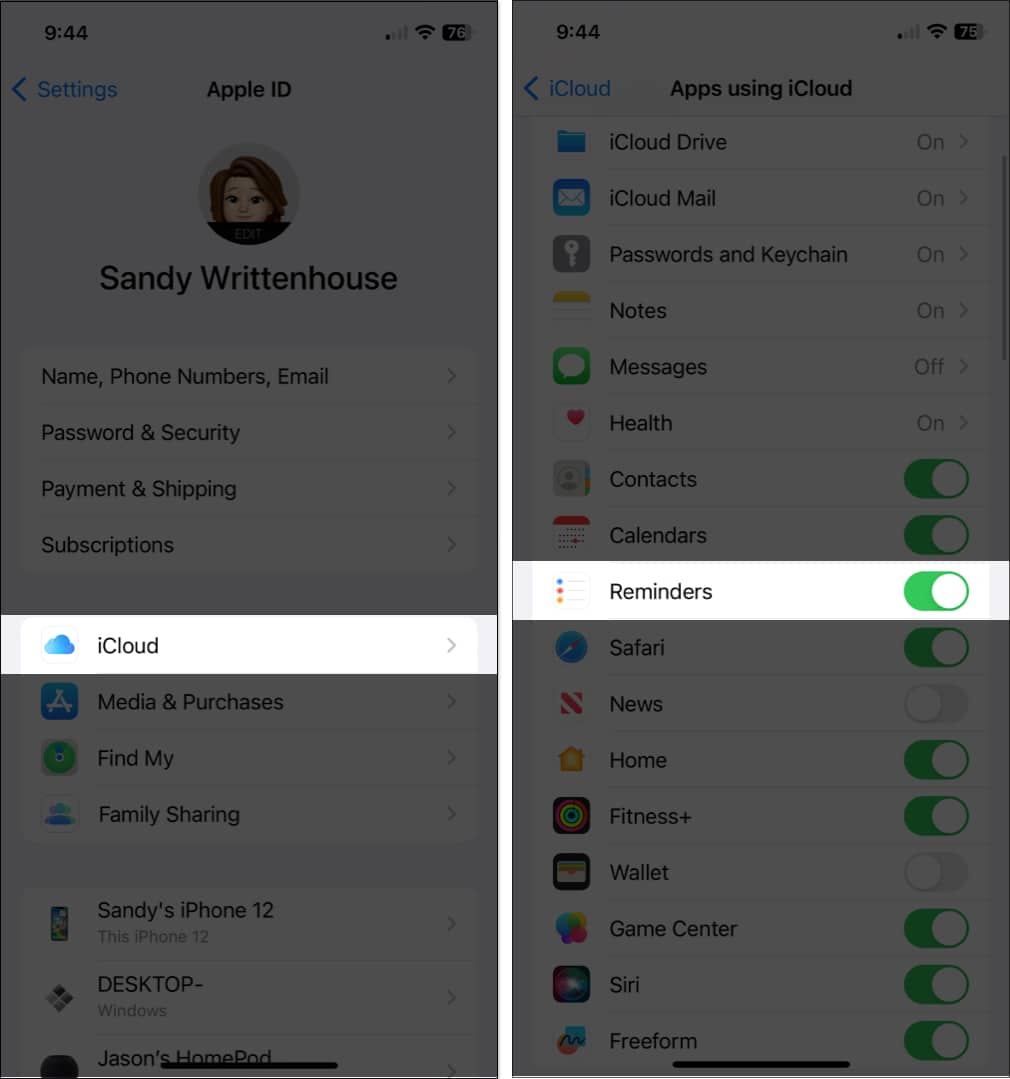
- Open the Settings app.
- Select your Apple ID → Pick iCloud.
- Turn on the Reminders toggle.
On Mac:
- Launch System Settings.
- Select your Apple ID → Pick iCloud.
- Turn on the Reminders toggle.
If you can’t see the app, click Show All.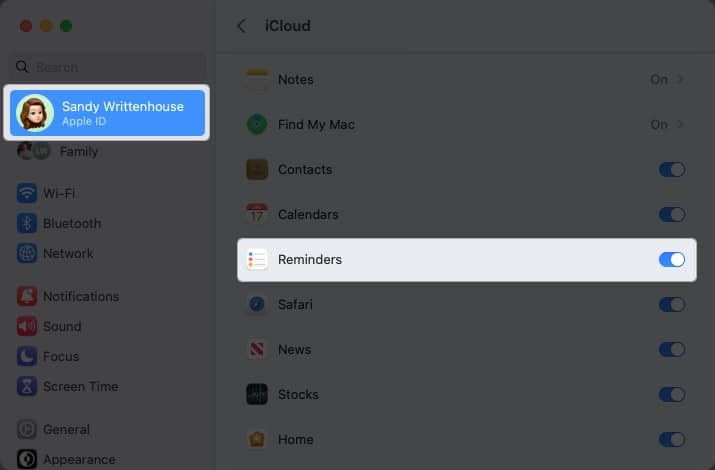
Again, this is optional but super helpful if you want to create a location-based reminder on Mac that you can access on your iPhone, for instance.
How to create a location-based reminder on iPhone and iPad
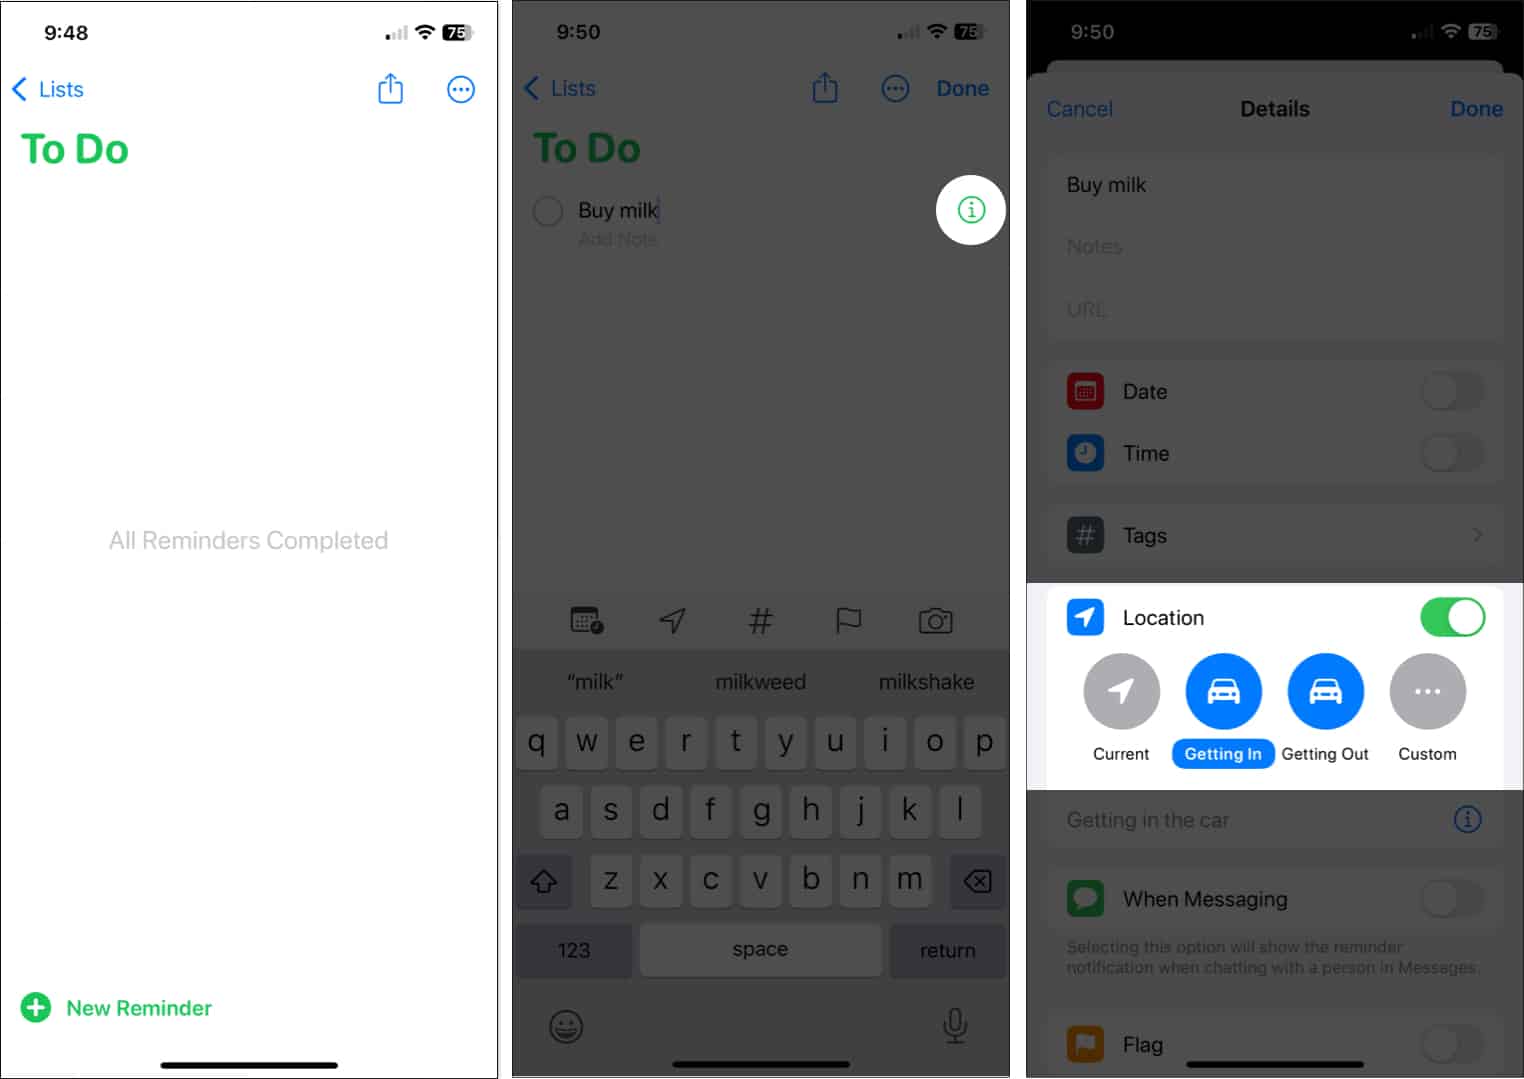
- Launch the Reminders app.
- Select New Reminder and enter the task or reminder name.
- Tap the info icon → turn on the toggle for Location.
- You’ll see a few suggestions, such as using your current location or getting in or out of your car. You can pick one of these or choose Custom to select a different location.
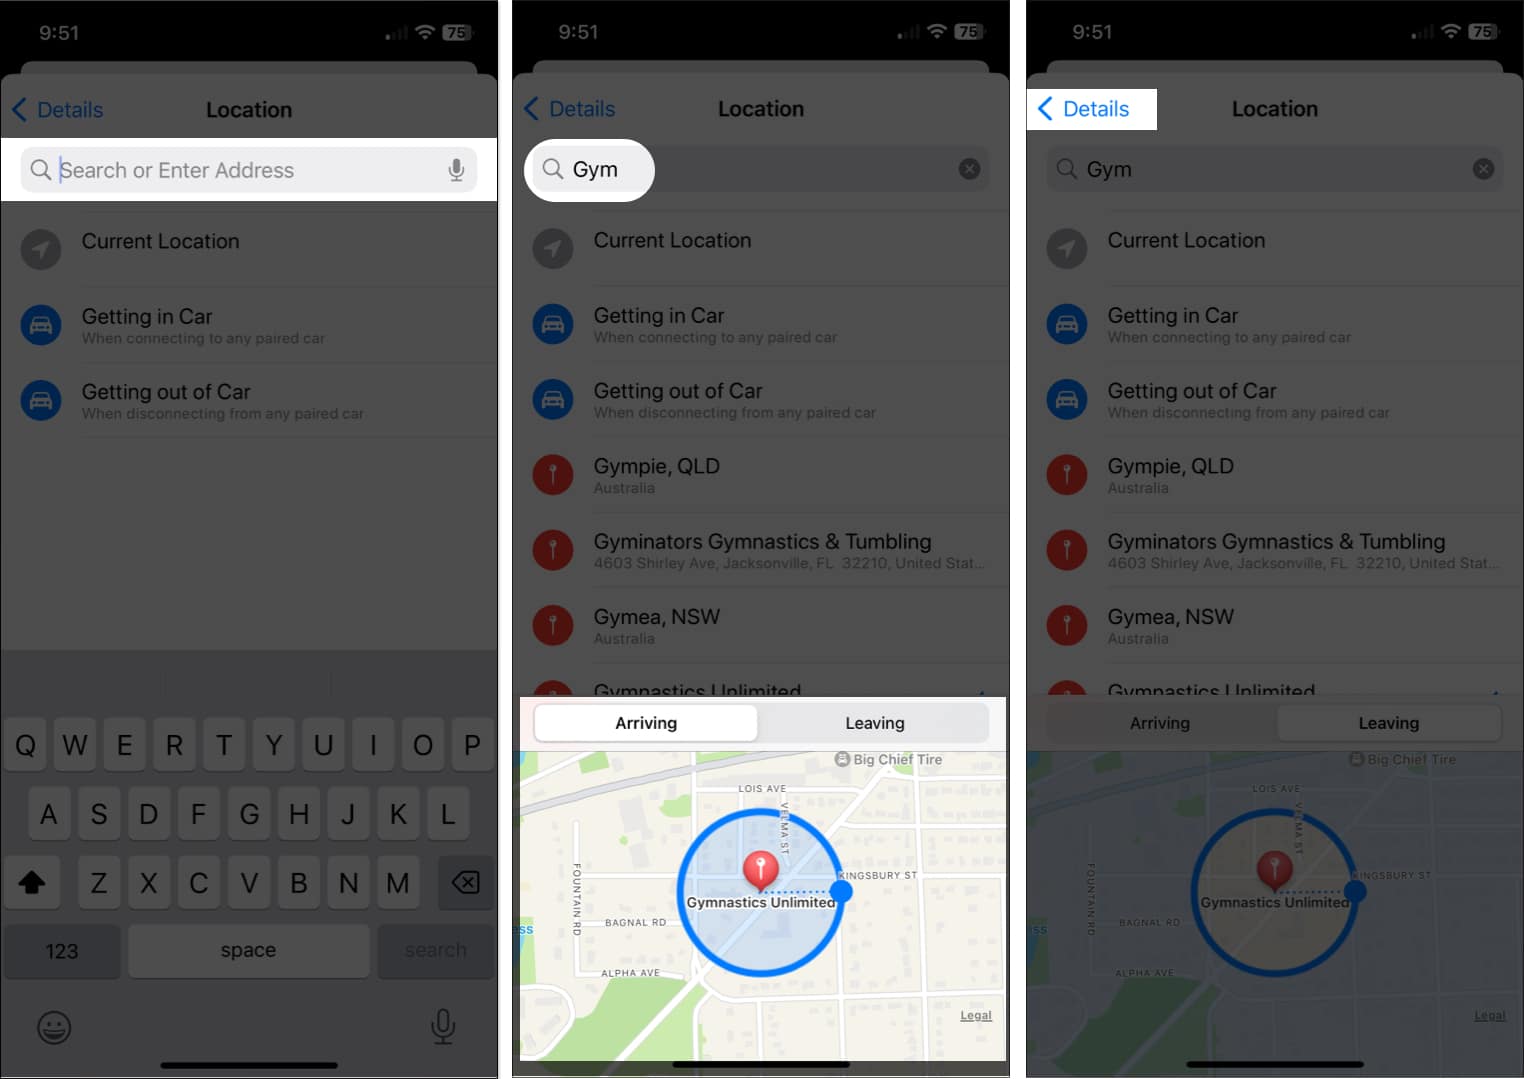
- If you use the Custom option, you’ll see those same suggestions but can also find a spot using the Search box at the top.
- Pick the location you want to use from the results. Then, select Arriving or Leaving at the bottom.
- Tap Details on the top left to return to the reminder.
- You should see the location you picked in the Location section.
- Complete the remaining details for your reminder and tap Done on the top right to save it. You’ll then see the location with the reminder in your list.
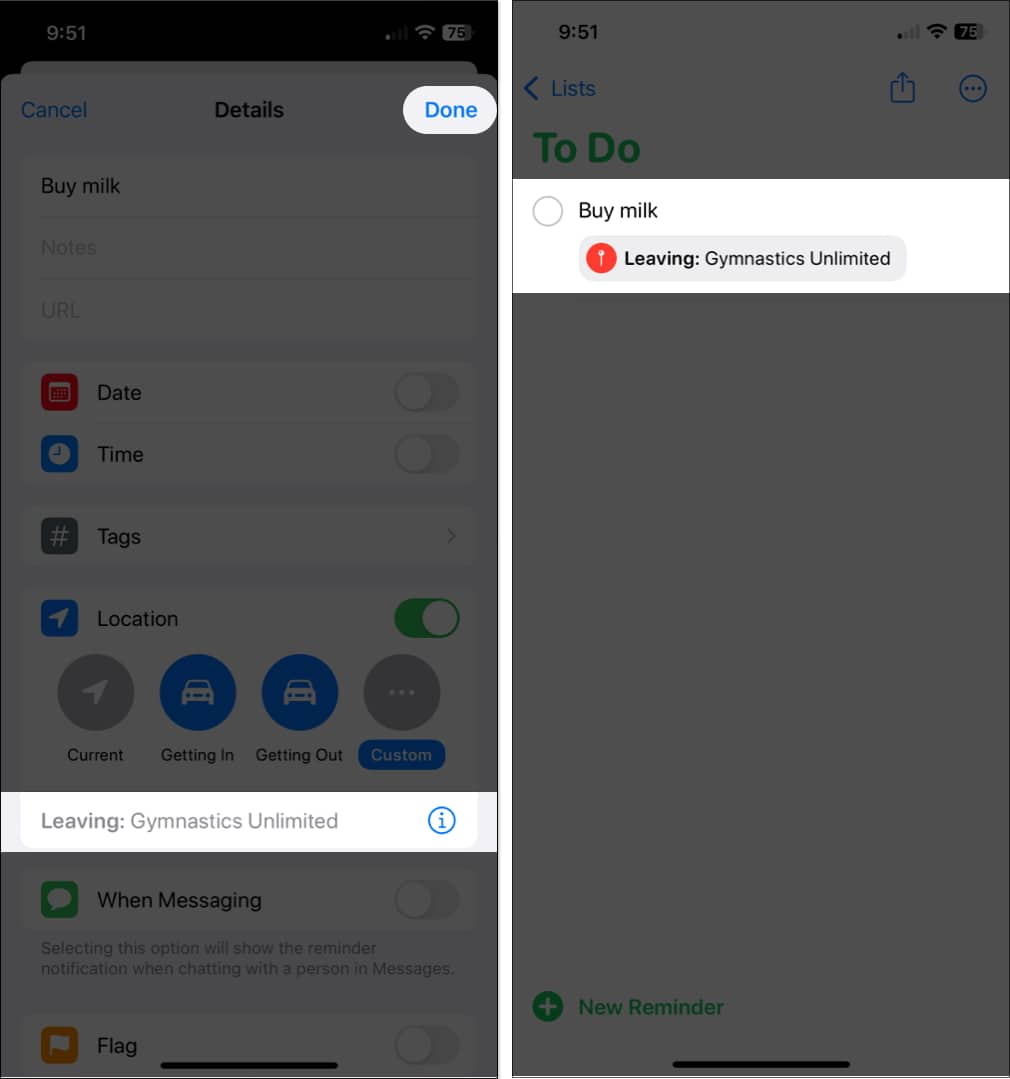
Now, when you arrive at or leave that location or get in or out of your car, you’ll see your reminder notification pop up. Do what you need to do and mark the reminder complete.
Become an iGeeksBlog Premium member and access our content ad-free with additional perks.
Tip: If you want to delete the location from the reminder later, open the reminder and turn off the Location toggle.
How to create location-based reminders on Mac
- Launch the Reminders app on your Mac.
- Click the plus sign on the top right to add a reminder and then enter its name.
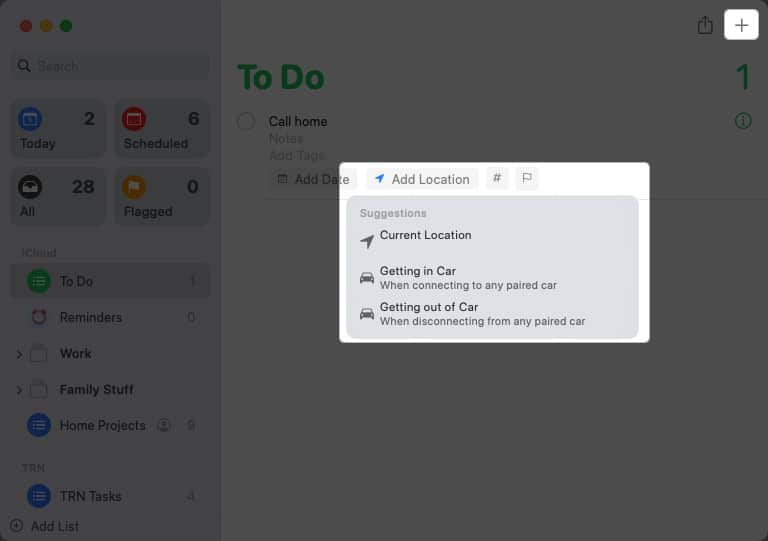
- To add a quick location, such as your current spot or getting in or out of your car, select Add Location at the bottom of the reminder.
- Alternatively, click the Info icon to the right to choose a different spot.
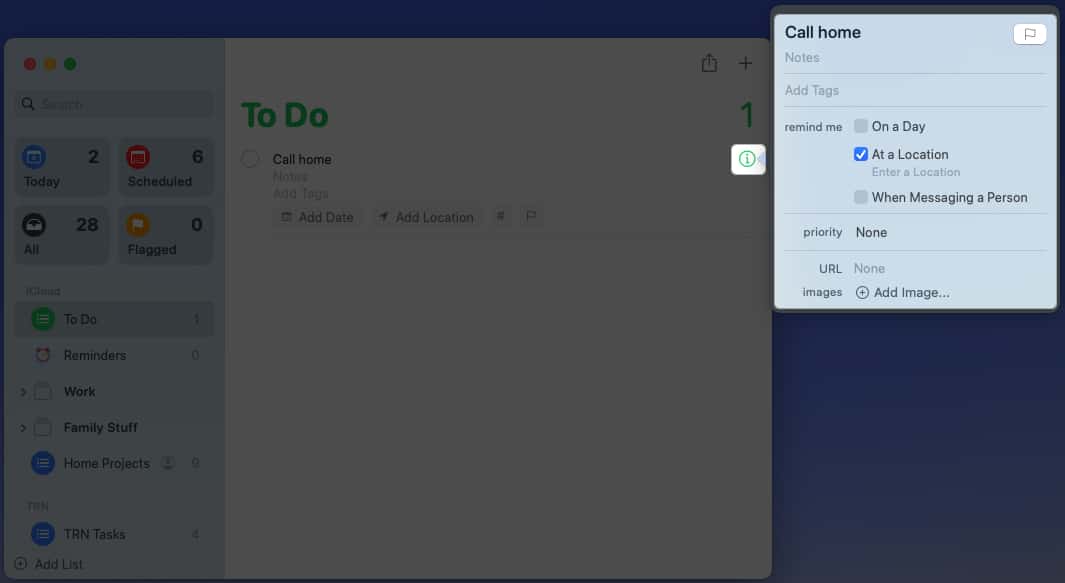
- Check the box for At a Location → Click Enter a Location directly beneath.
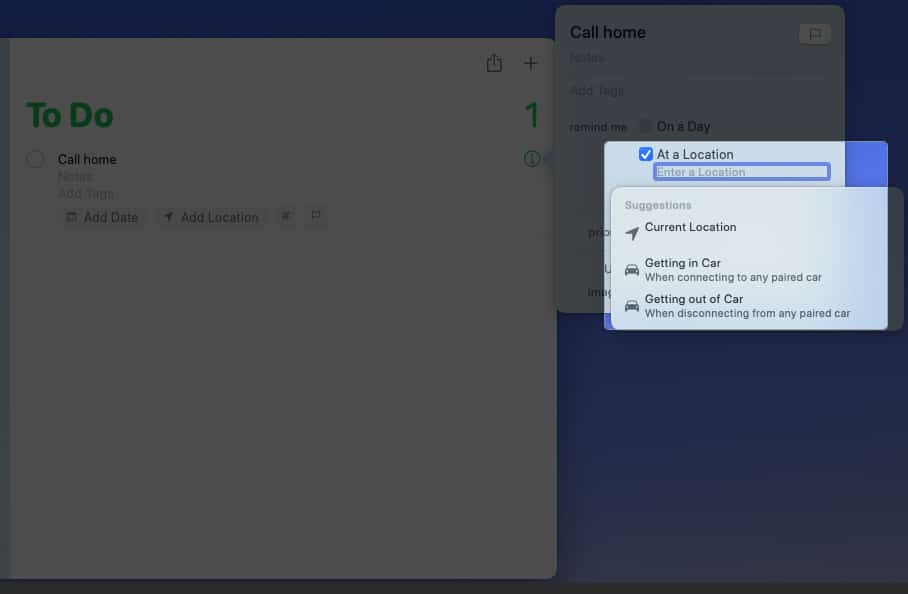
- Use the search box to find the spot and then select it from the list of results.
- Then, mark either Arriving or Leaving.
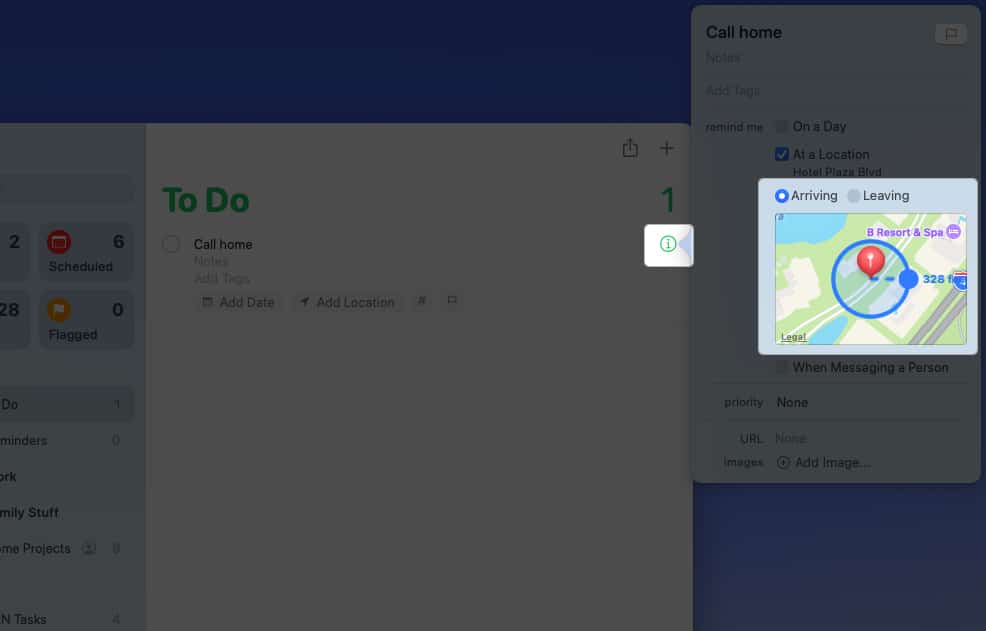
- Complete any other details as you like. Then click the Info icon to close the pop-up and save the reminder.
- You’ll then see the location at the bottom of the reminder in your list.
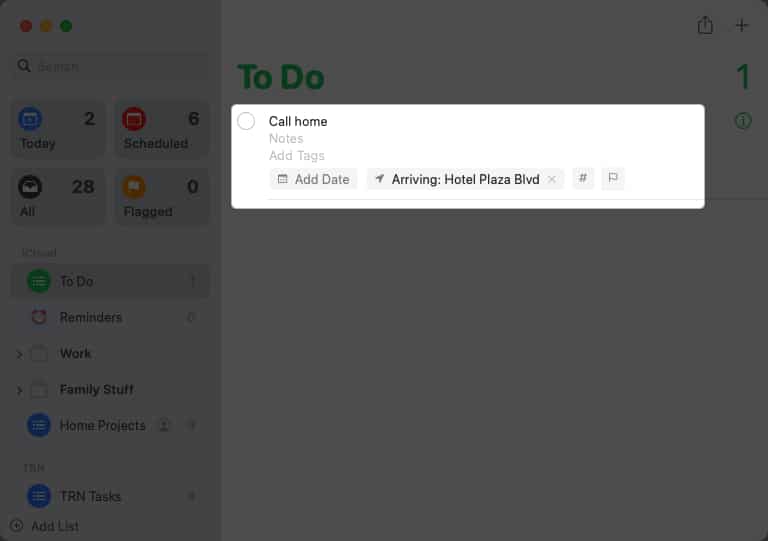
When you enter or exit your vehicle or arrive at or leave the location, you’ll see your reminder. Take care of what you need and mark it off the list.
Tip: If you want to remove the location from the reminder later, just click the X on the right of it at the bottom of the reminder.
Don’t forget this handy Reminders feature!
Location-based reminders on iPhone, iPad, and Mac are the best types of reminders when you leave or arrive somewhere. Whether you need to get something, stop somewhere, send a text, or make a phone call, these reminders will make sure you remember.
Do you think you’ll use reminders based on location? Let us know if they work for you!
Read more:
