We use the internet to find quick answers (like you did), upload images to social media, make banking transactions, and much more. All of these activities endanger privacy. Since data breaches are common, you can use a VPN to keep your data hidden from your Network Provider, Internet Service Provider, Government, etc.
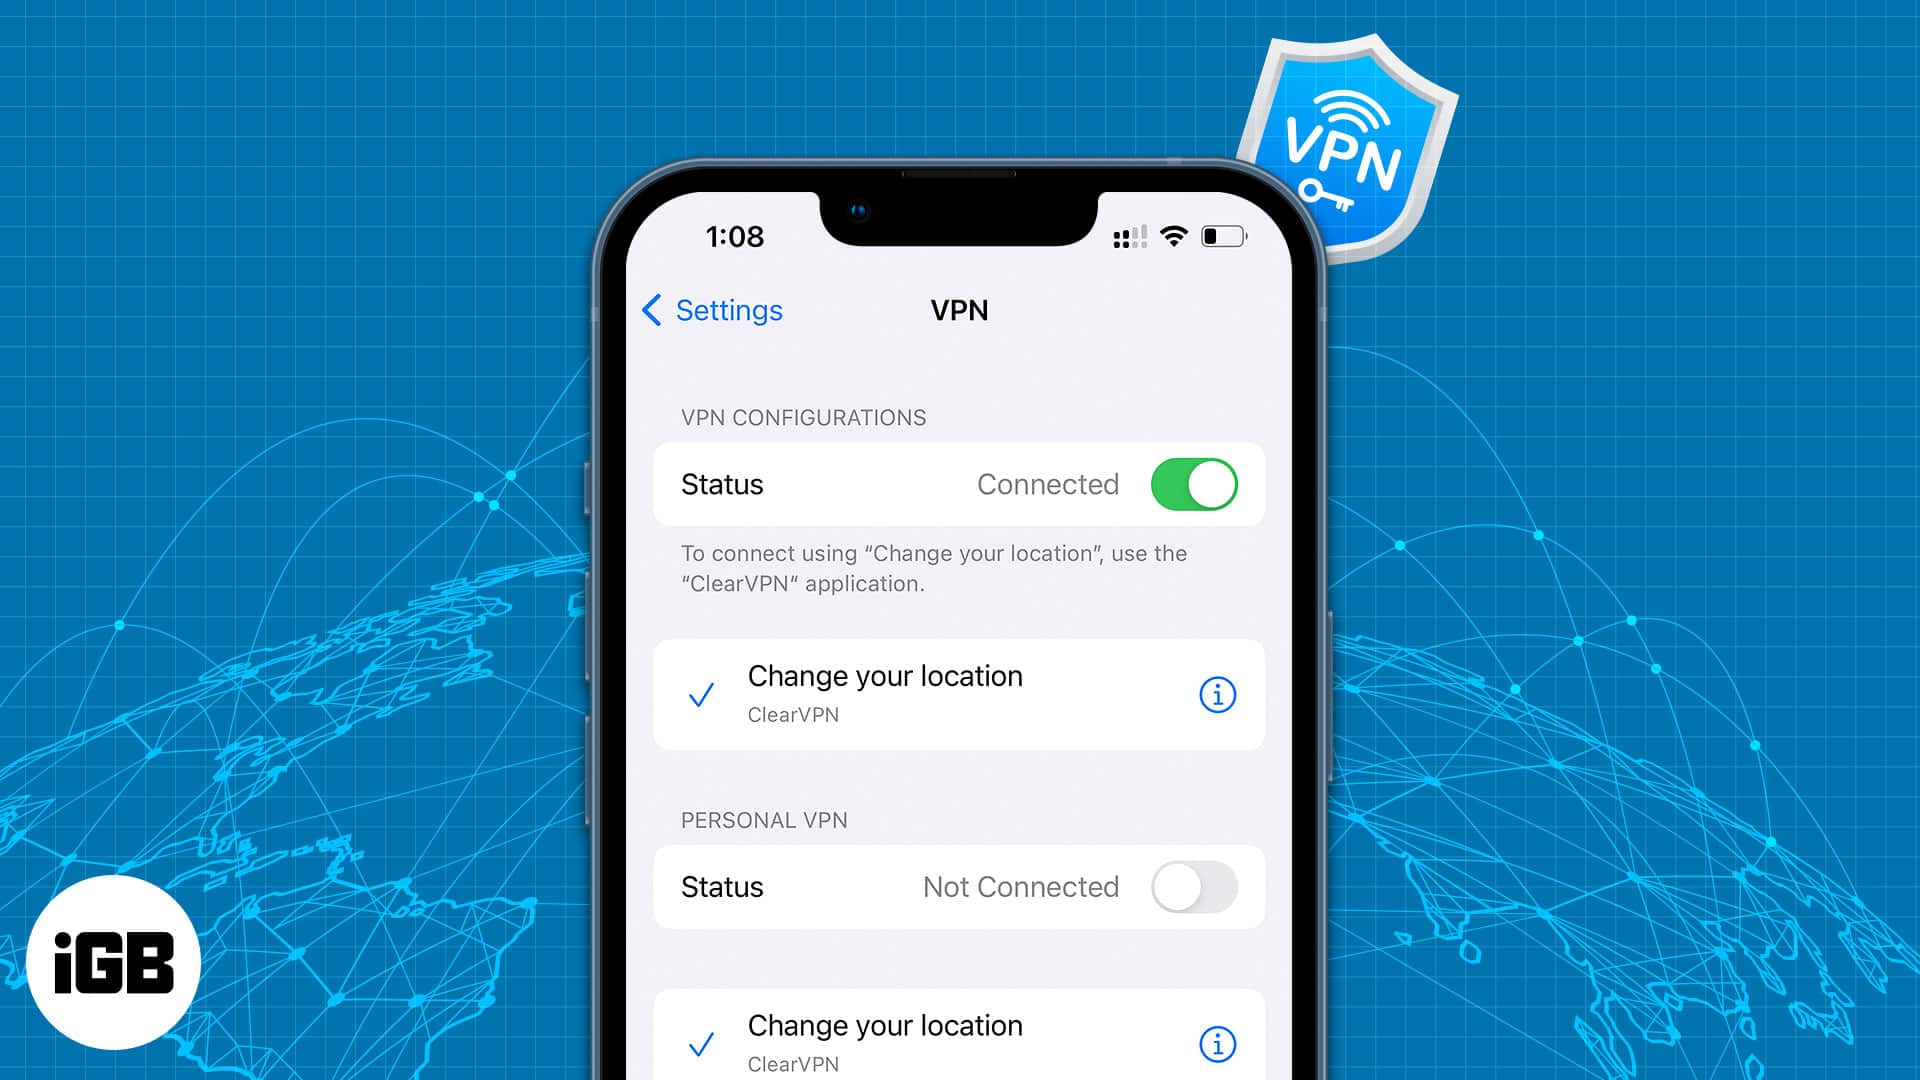
Read along to learn how to set up a VPN on an iPhone or iPad.
How to set up a VPN on an iPhone
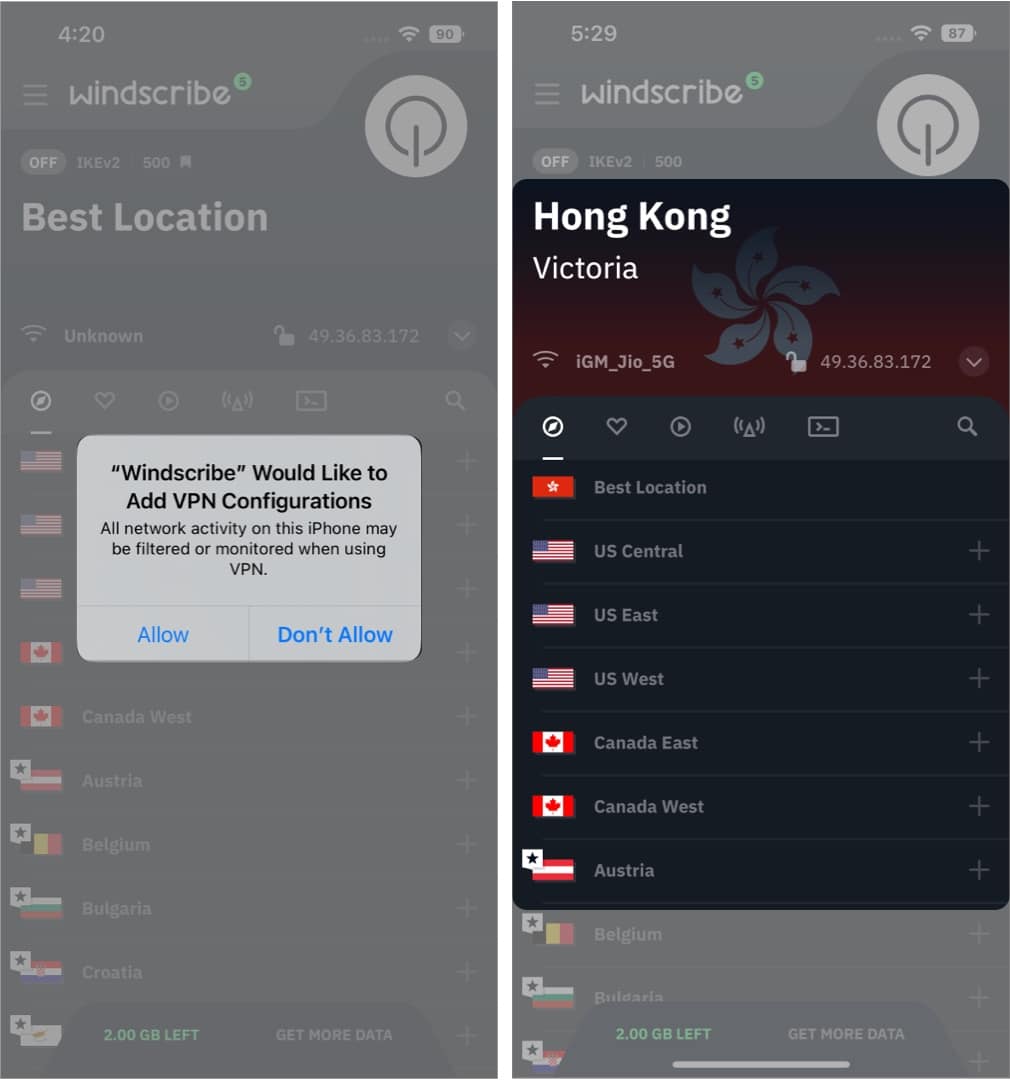
Connecting your iPhone to a VPN through an application is the easiest method. In this day and age, most VPN providers also offer their own iPhone applications. Once you’ve selected a VPN service or you decide to use a free service, follow these steps to connect to the VPN (we’ve used Windscribe as an example),
- Install your desired VPN app.
- Open the VPN app.
- Tap Allow on the dialogue box that reads “Name VPN” would like to Add VPN Configurations.
- Select the region you want to connect to or select the Best Location option.
- You are now connected to the selected region.
How to manually configure VPN on iPhone
There’s no denying that connecting to a VPN through a mobile application is the easiest method. However, some VPN providers do not offer a mobile app. Or there are several other reasons one would like to manually connect to a VPN service. Whatever your reasons are, you will need to configure these iPhone VPN settings before you proceed,
- Username
- Password
- VPN Protocol
- Remote ID
- Server Address
You can gather all these details from your VPN service provider’s web page or the System Administrator. Please ask your manager for login details if you use a company-provided VPN. Note that the username and password will likely differ from your login email ID and password.
Once you have these details, here’s how to configure and connect your iPhone to a VPN manually,
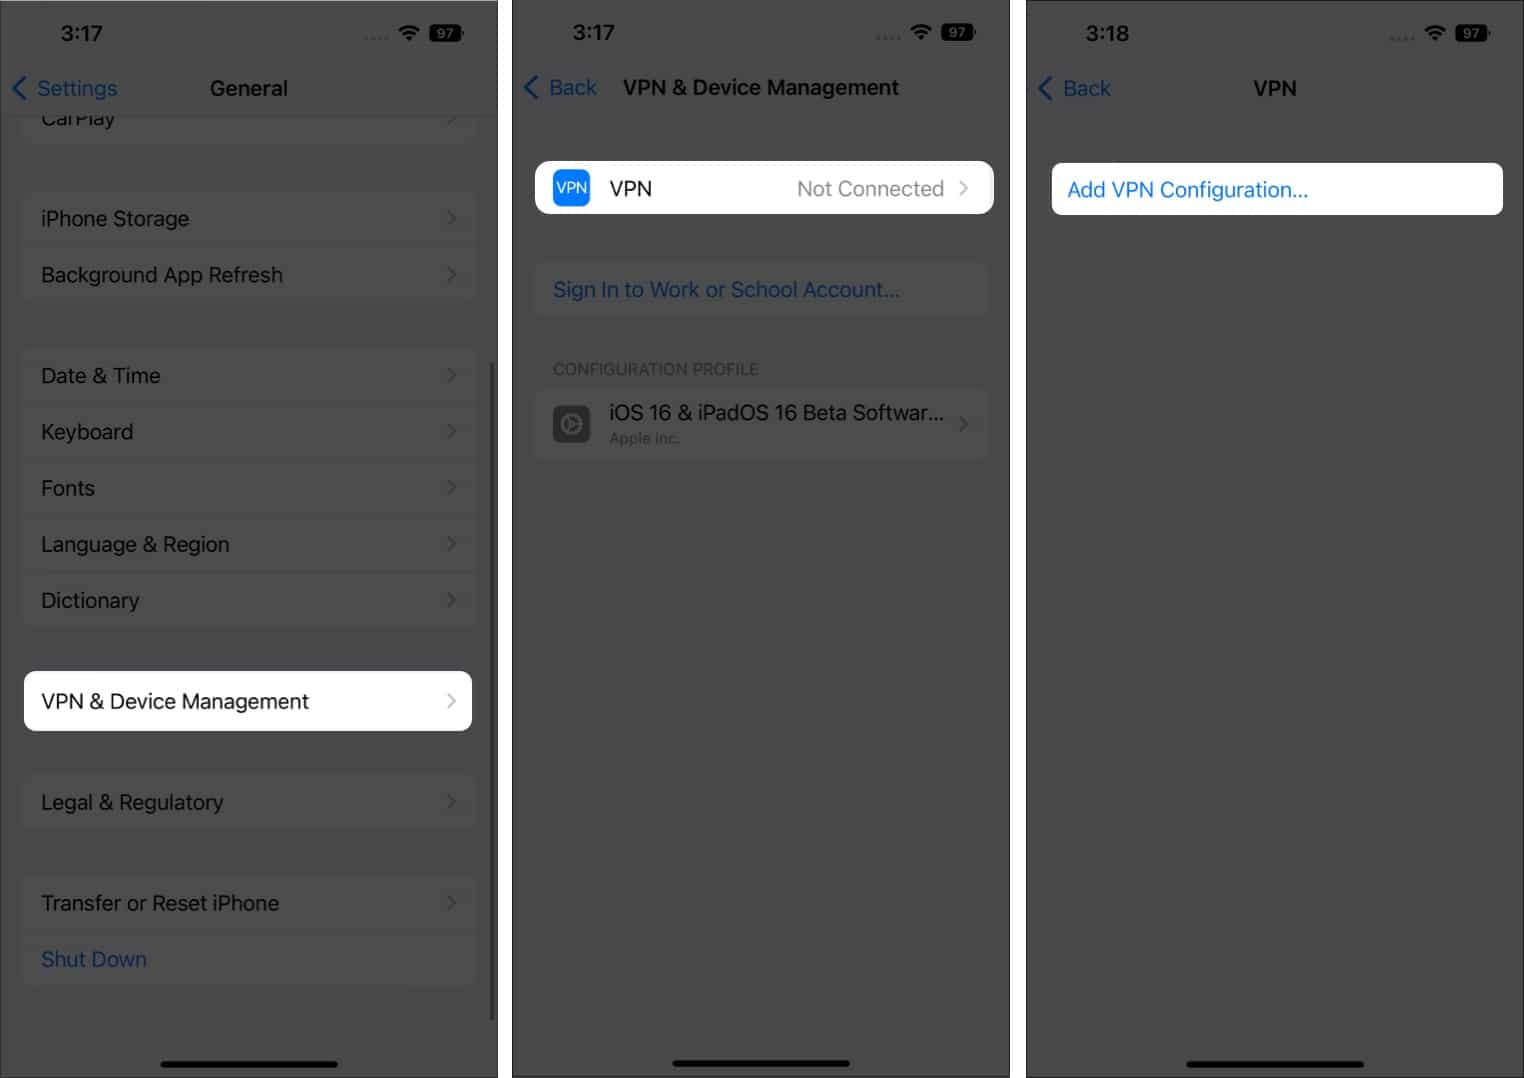
- Open Settings on iPhone/iPad.
- Tap General.
- Navigate to VPN & Device Management.
- On the next page, tap VPN.
- Select Add VPN Configuration…
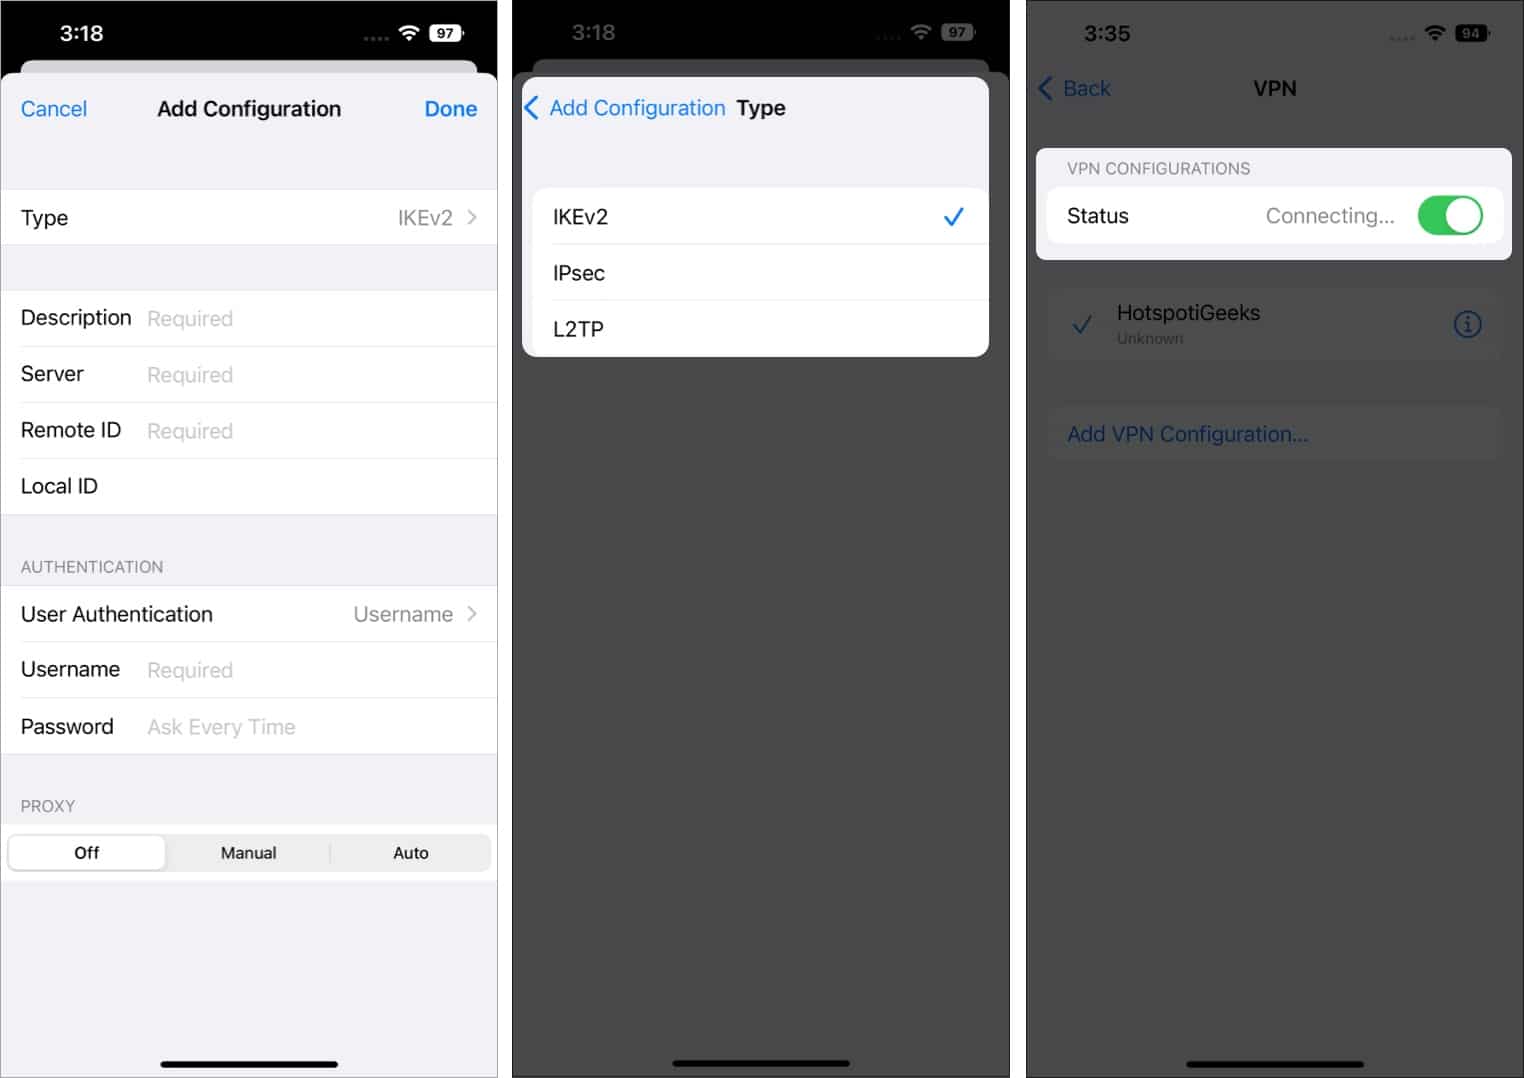
- Tap Type and Select the VPN Protocol. You can select from IKEv2, IPsec, and L2TP.
- Fill in the Description, Server, Remote ID, and Local ID.
- Now tap User Authentication and select None, Username, and Certificate.
- Depending on the choice made in the previous step, you’ll need to fill in the Username and Password, Certificate, or enable the Use Certificate toggle.
- You can set the Proxy to Off, Manual, or Auto in the next step.
- Tap Done.
- Toggle on the Status button to turn on the VPN connection.
How to turn off a VPN
iOS no longer automatically disconnects from a VPN service. You can connect to a VPN and never worry about being disconnected from the service unless there are network connectivity issues. But how do you disconnect your iPhone from a VPN service?
Become an iGeeksBlog Premium member and access our content ad-free with additional perks.
Well, since there are two ways to connect your iPhone to a VPN service, there are two ways to disconnect your iPhone from a VPN service. For those who want to disconnect their iPhone connected to a VPN app,
- Open the VPN app you are connected to.
- Tap the disconnect button.
- You have now disconnected from the VPN network.
If you’ve manually connected to a VPN network or even if you are connected through an application, this method works for both:
- Head to the Settings app → go to General.
- Scroll down and select VPN & Device Management.
- Select VPN → toggle off the VPN button.
Ensure you do not use a VPN to pirate content or indulge in any other illegal activities. We do not promote VPN use; this article is only for educational purposes. If you have any other queries, leave a comment below, and we’ll get back to you with a solution as soon as possible.
Read more:

