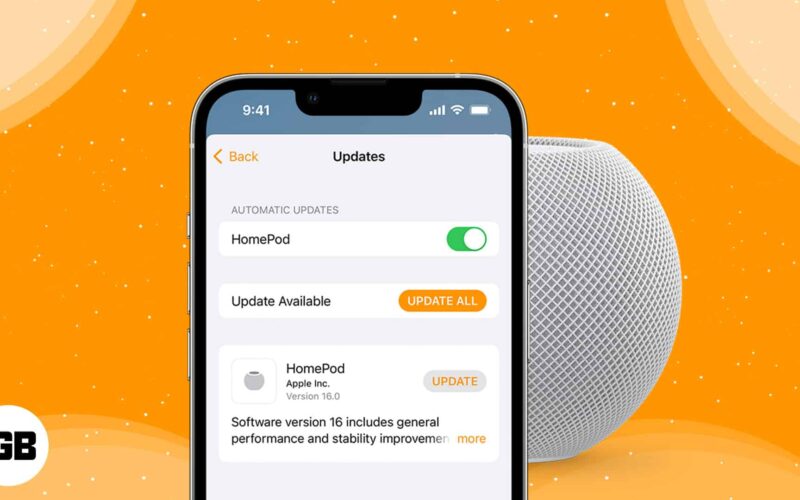
Apple’s HomePod (2nd gen), HomePod, and mini are excellent gadgets to manage your home. These are meant to work with Siri and can, among other things, play music, set alarms, and control smart home gadgets. However, it might be tricky to use at first. Here’s all you need to know about how to set up and use your new HomePod or mini.

How to set up HomePod or HomePod mini
- Apple recommends placing HomePod on a leveled surface with a six-inch gap around it.
- Plug in the device and wait for a chime to play. When you hear the sound, a white light will flicker on top of the HomePod.
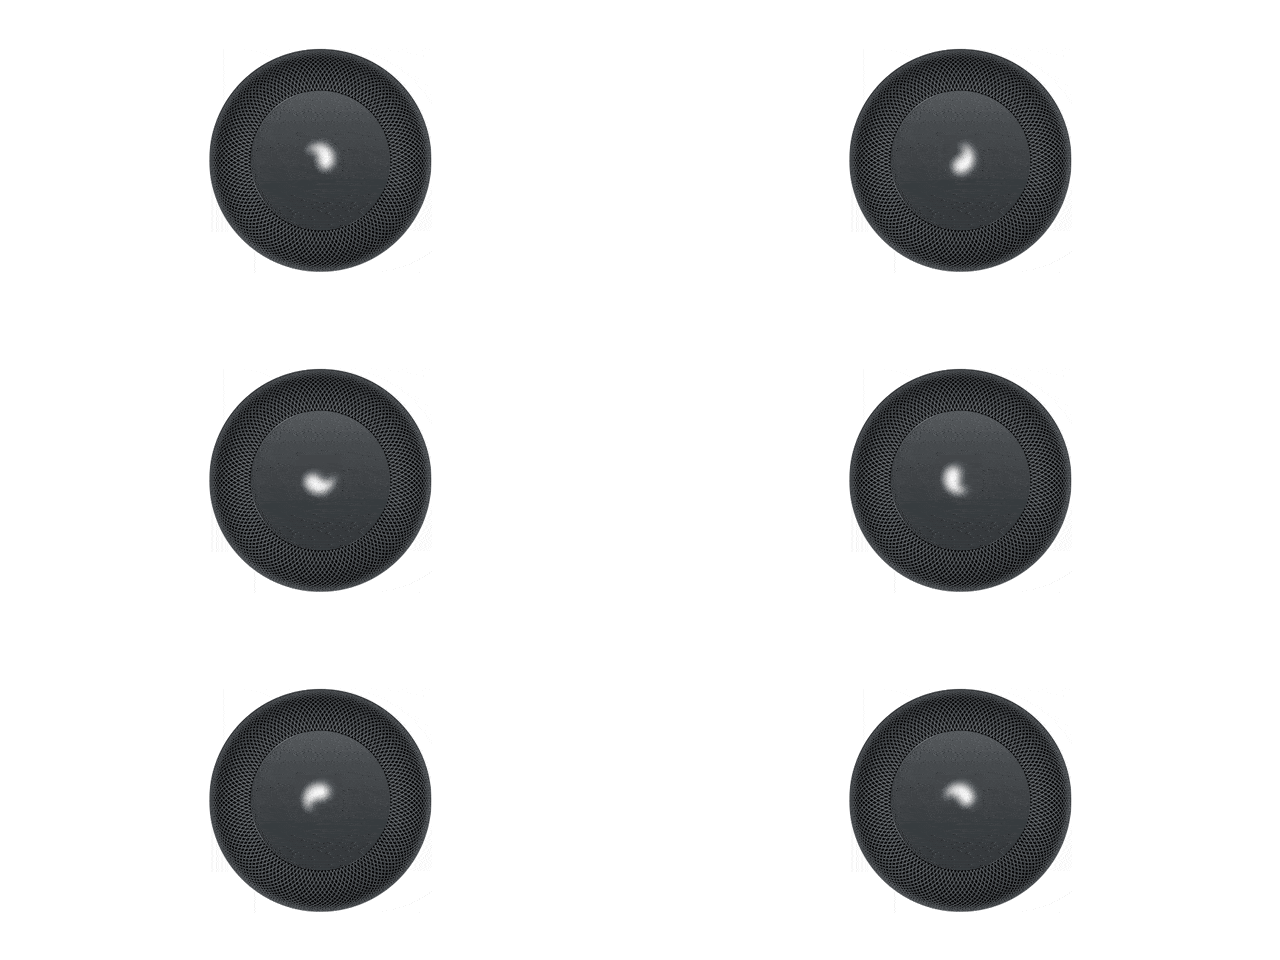
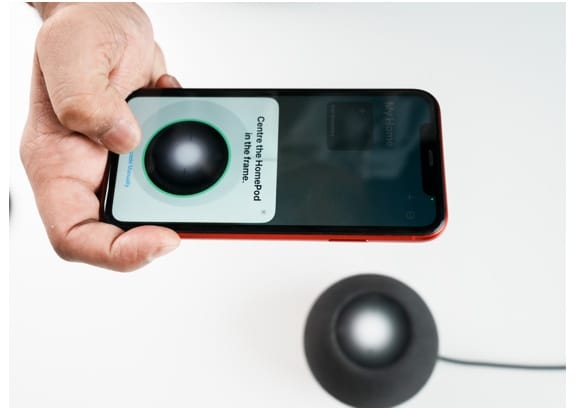
- Now, unlock your iPhone or iPad and place it near the HomePod.
Wait for the two devices to connect.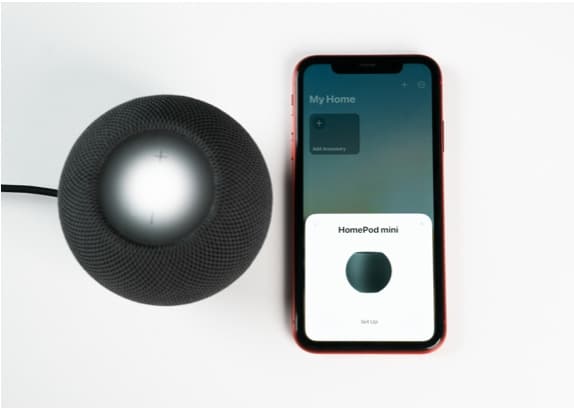
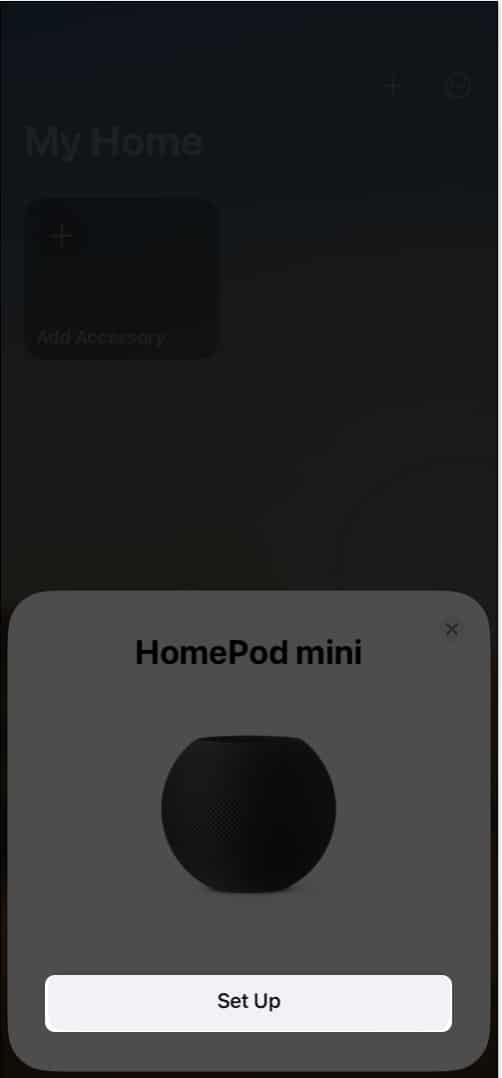
- Choose Set Up from the dialogue box that will appear on your device’s screen.
- Scan the blinking white light.
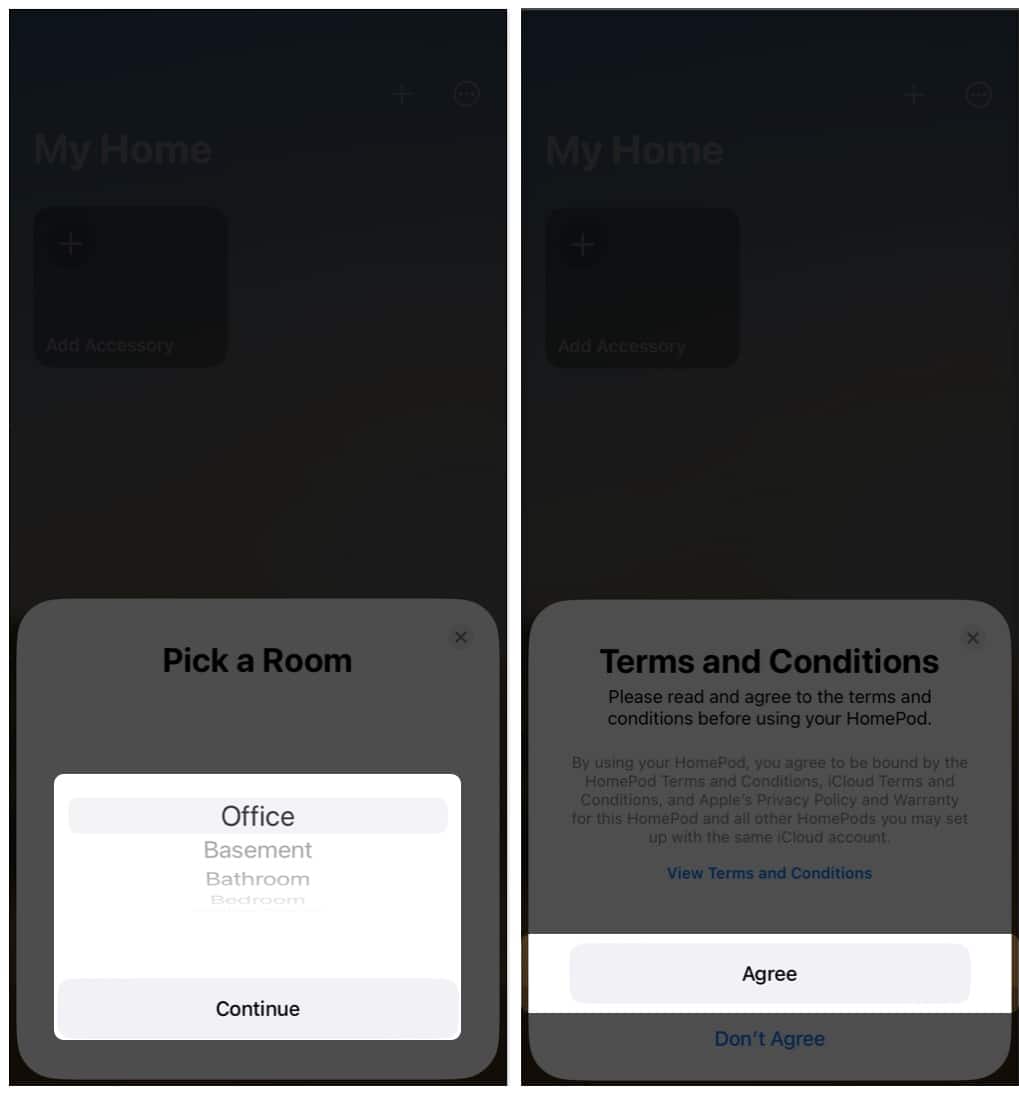
- Select your room under the Pick a Room section ➝ tap Agree.
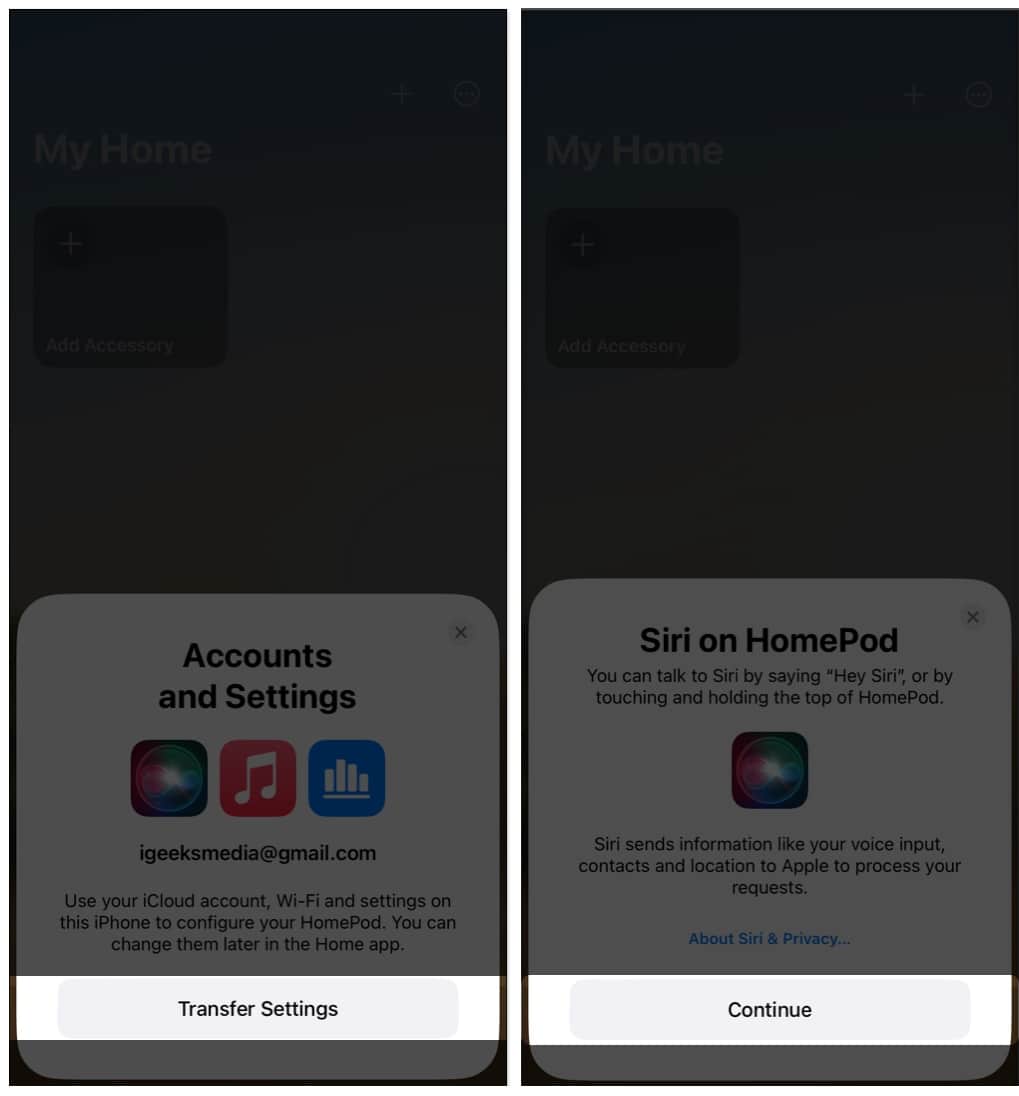
- Go to Transfer Settings → Continue.
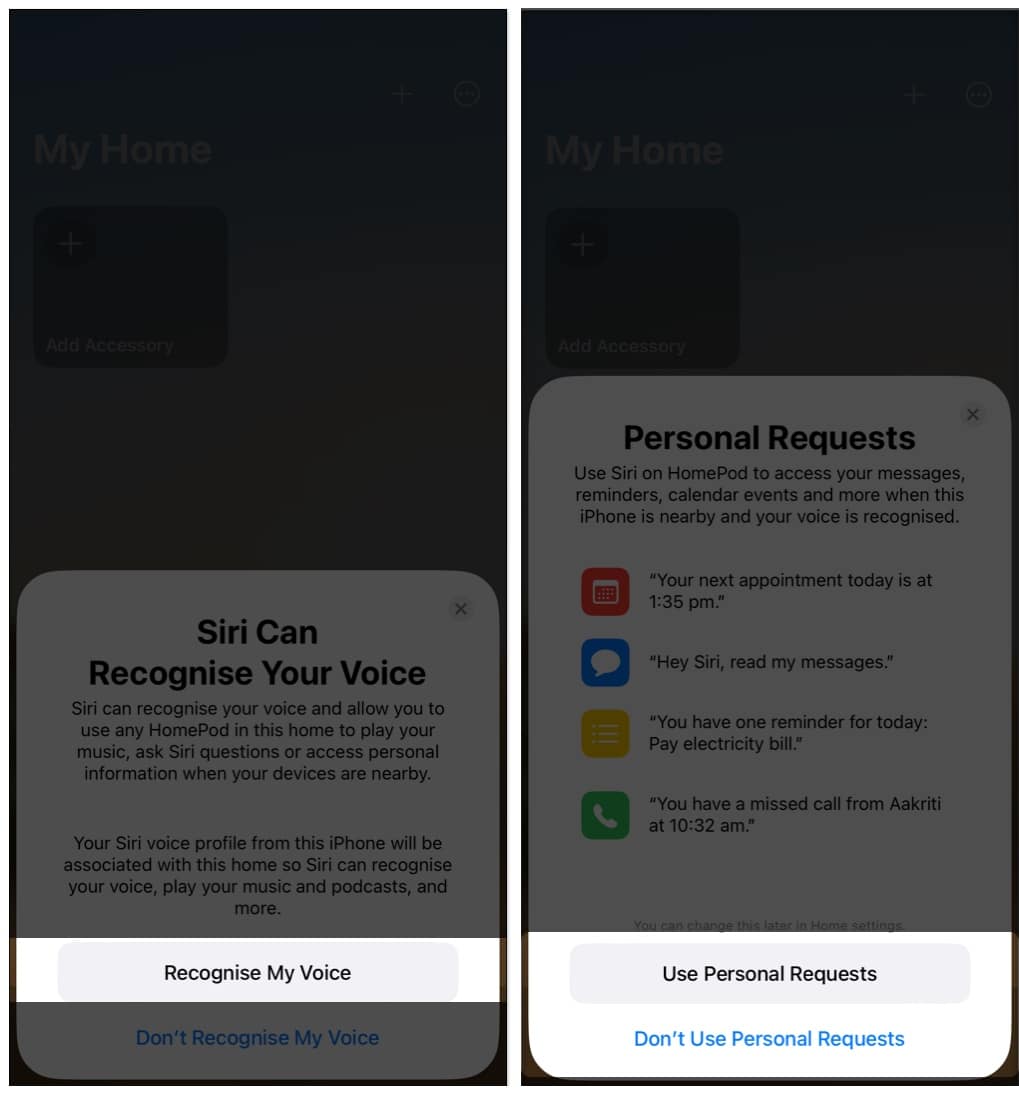
- Further, Approve or disallow Siri to recognize your voice.
- Choose from Use Personal Requests or Don’t Use Personal Requests.
- Enter your Apple ID password → select Sign In. It may take a few minutes to set up.
- Tap Done.
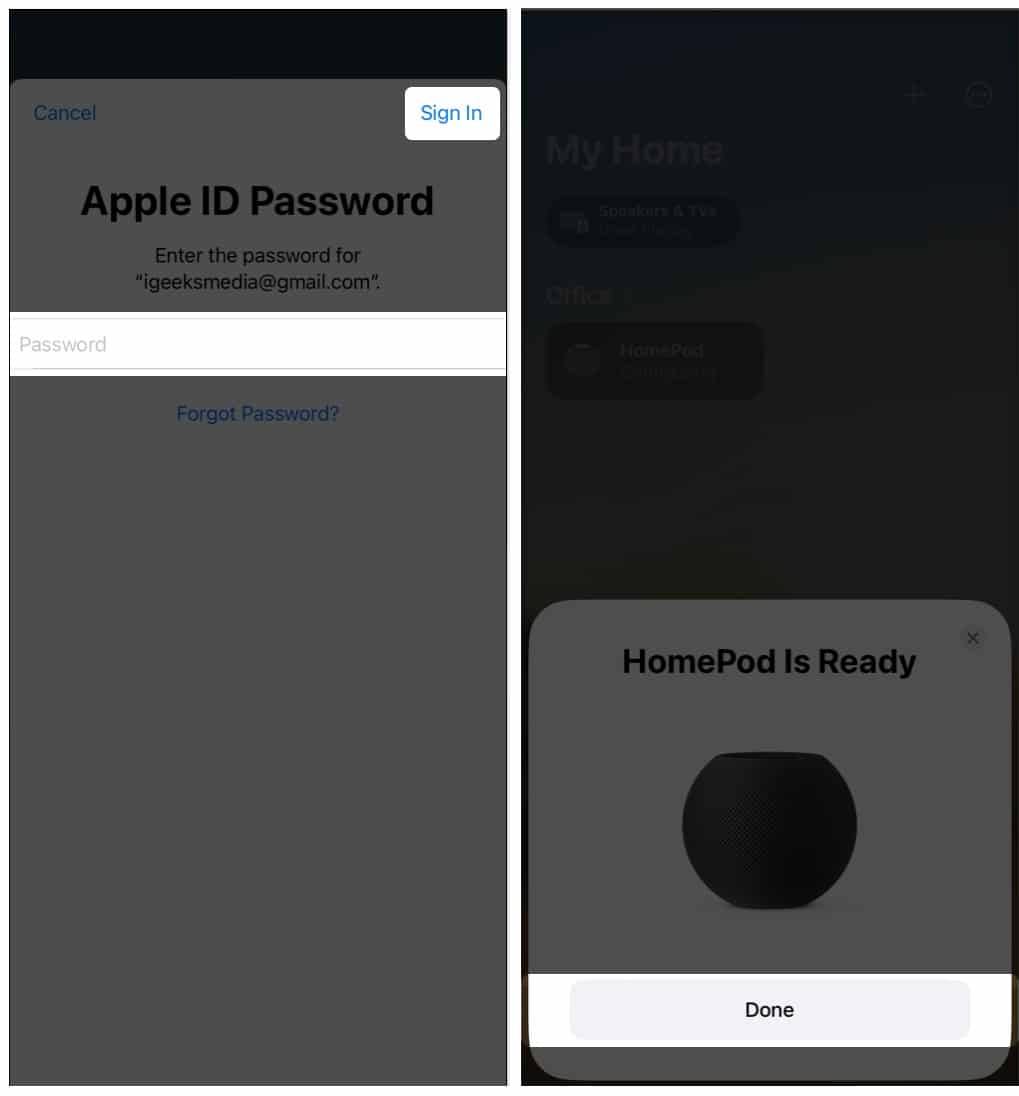
Note: Tap Enter Passcode Manually if your iPhone’s camera isn’t working, and Siri will revert back to you with a four-digit passcode which you can enter on your device.
Connect HomePod to Wi-Fi
If you use an iPhone or iPad to set up your HomePod, the network settings will be instantly transferred to the device.
However, if the settings have not aligned, you may manually connect your HomePod to a different Wi-Fi network by following the instructions below:
- Launch the Home app on your iPhone or iPad.
- Tap [HomePod name].
- Scroll down and tap Settings.
Alternatively, you can also keep scrolling. - Tap Move HomePod to [Wi-Fi network name].
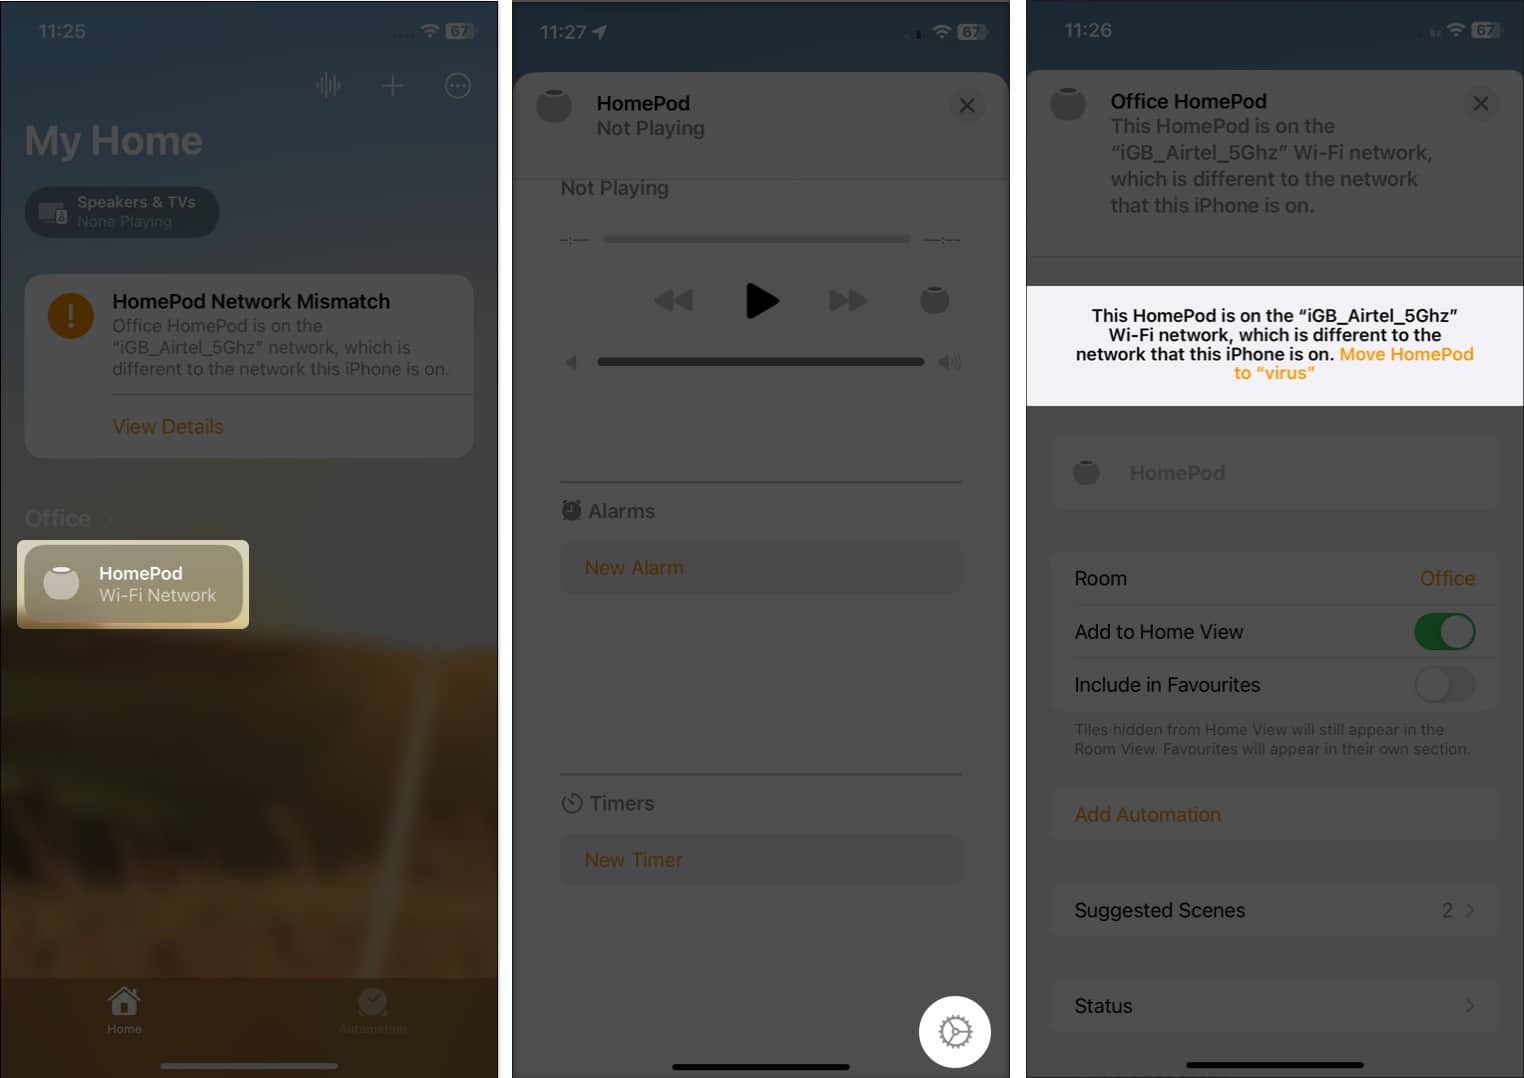
Congratulations! You’ve now shifted your HomePod to a new Wi-Fi network.
How to enable Handoff on HomePod
Handoff is an extremely handy feature offered on Apple devices. Read our article to learn how you can set up Handoff on your HomePod and HomePod mini.
Customize your HomePod or HomePod mini
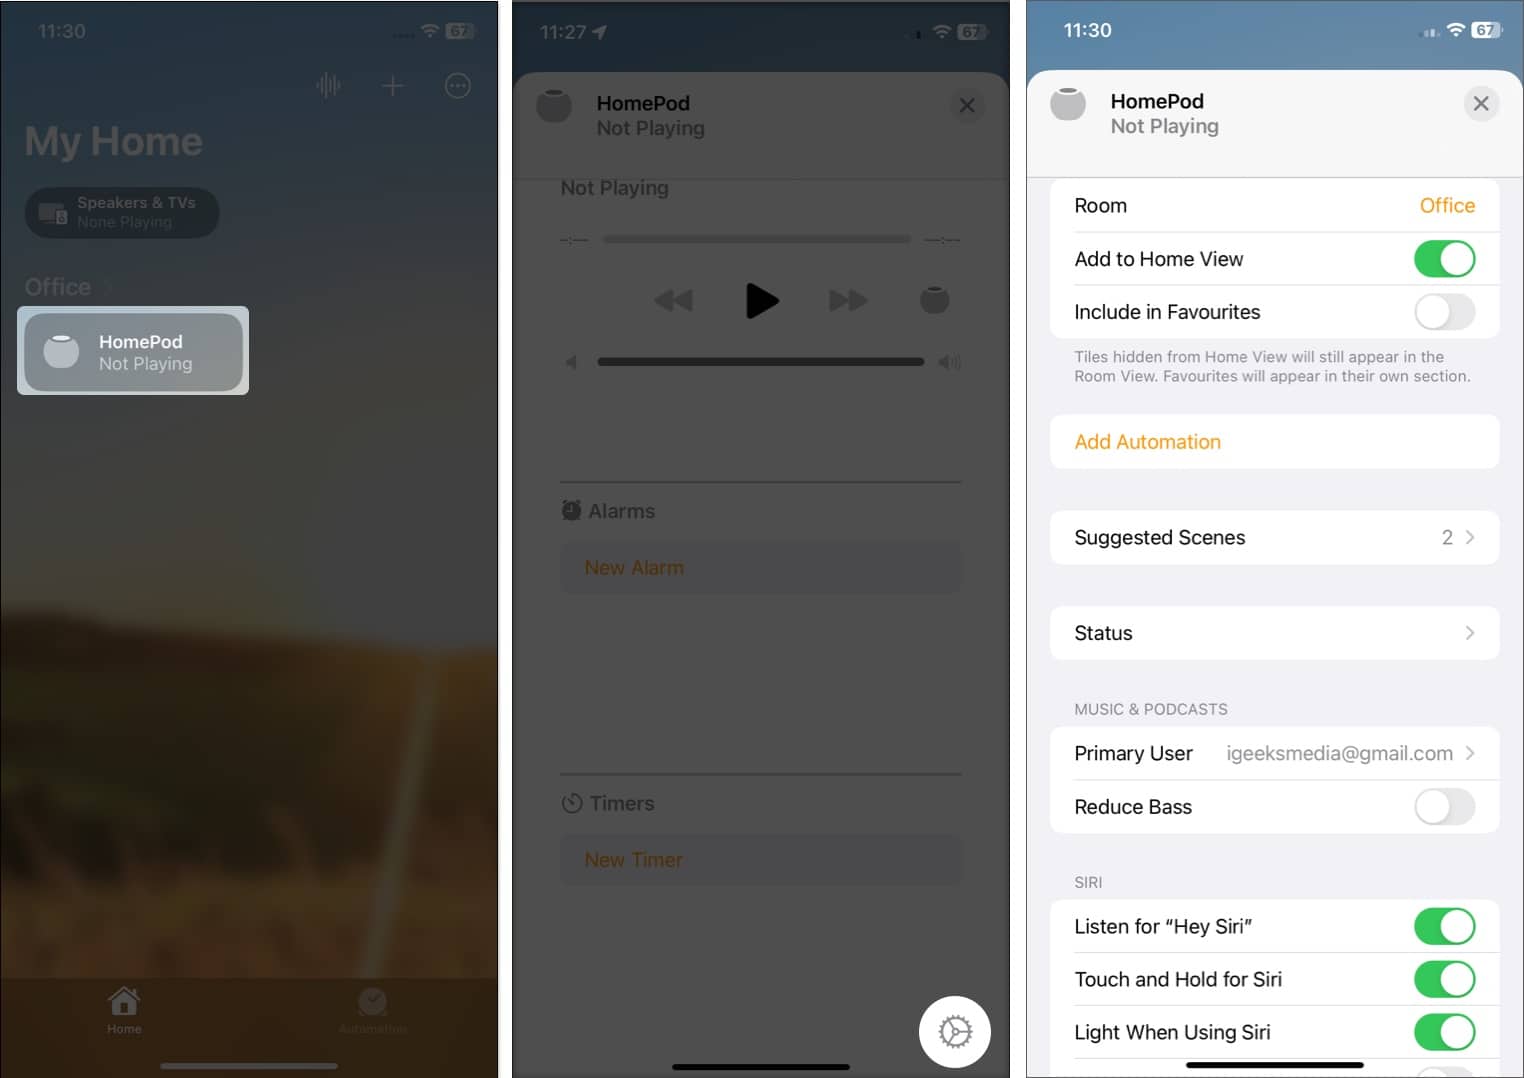
- Navigate to the Home app.
- Tap [HomePod name].
- Scroll down and tap the Settings icon.
Alternatively, you can also keep scrolling. - Now, you can edit your HomePod settings as per the requirements.
Identify status lights on HomePod
At certain intervals, different lights flash at the top of the HomePod. In order to understand what is going on with your speaker, you must identify each of them.
- White Pulsing Light: Ready to set up, or an alarm/timer is going off.
- White Spinning Light: Turning on or updating software.
- Red Spinning Light: Resetting the device.
- Multi-colored Spinning Light: Siri is activated.
- Green Pulsing Light: Transferring a phone call.
- Orange Flashing Light (only on HomePod mini): Not receiving enough power from Mac during software, or the adapter is not certified at 20W.
HomePod touch controls
- Play and pause: Tap on top of the HomePod to play music or pause an existing playing tune.
- Adjust sound: Increase or decrease the volume of the HomePod by tapping on the (+) or (-) button at the touchpad on top.
- Next Track: When using a music player app, double-tap on the top to change the next song.
(When using the Podcasts app, double-tapping would skip 30 seconds.) - Previous Track: Triple-tap on the top to head back to the previous song when on a music player app.
(When using the Podcasts app, triple-tapping would rewind the audio by 15 seconds.) - Activate Siri: Use the “Hey Siri” command to activate Siri; else, you can also tap and hold the top touchpad.
- Dismiss an alarm: Tap anywhere on the HomePod touchpad.
How to update HomePod
You can update your HomePod and HomePod mini using just a few clicks. However, make sure both of your devices are using the same Apple ID and Wi-Fi network.
Become an iGeeksBlog Premium member and access our content ad-free with additional perks.
It’s good practice to check the HomePod version before updating the software for the device. Once you’re sure that all of the prerequisites are in place, go through the steps below:
Using iPhone and iPad
- Launch the Home app.
- Tap three dots → select Home Settings.
- Scroll down and tap Software Update.
Now your iPhone or iPad will look for the updates.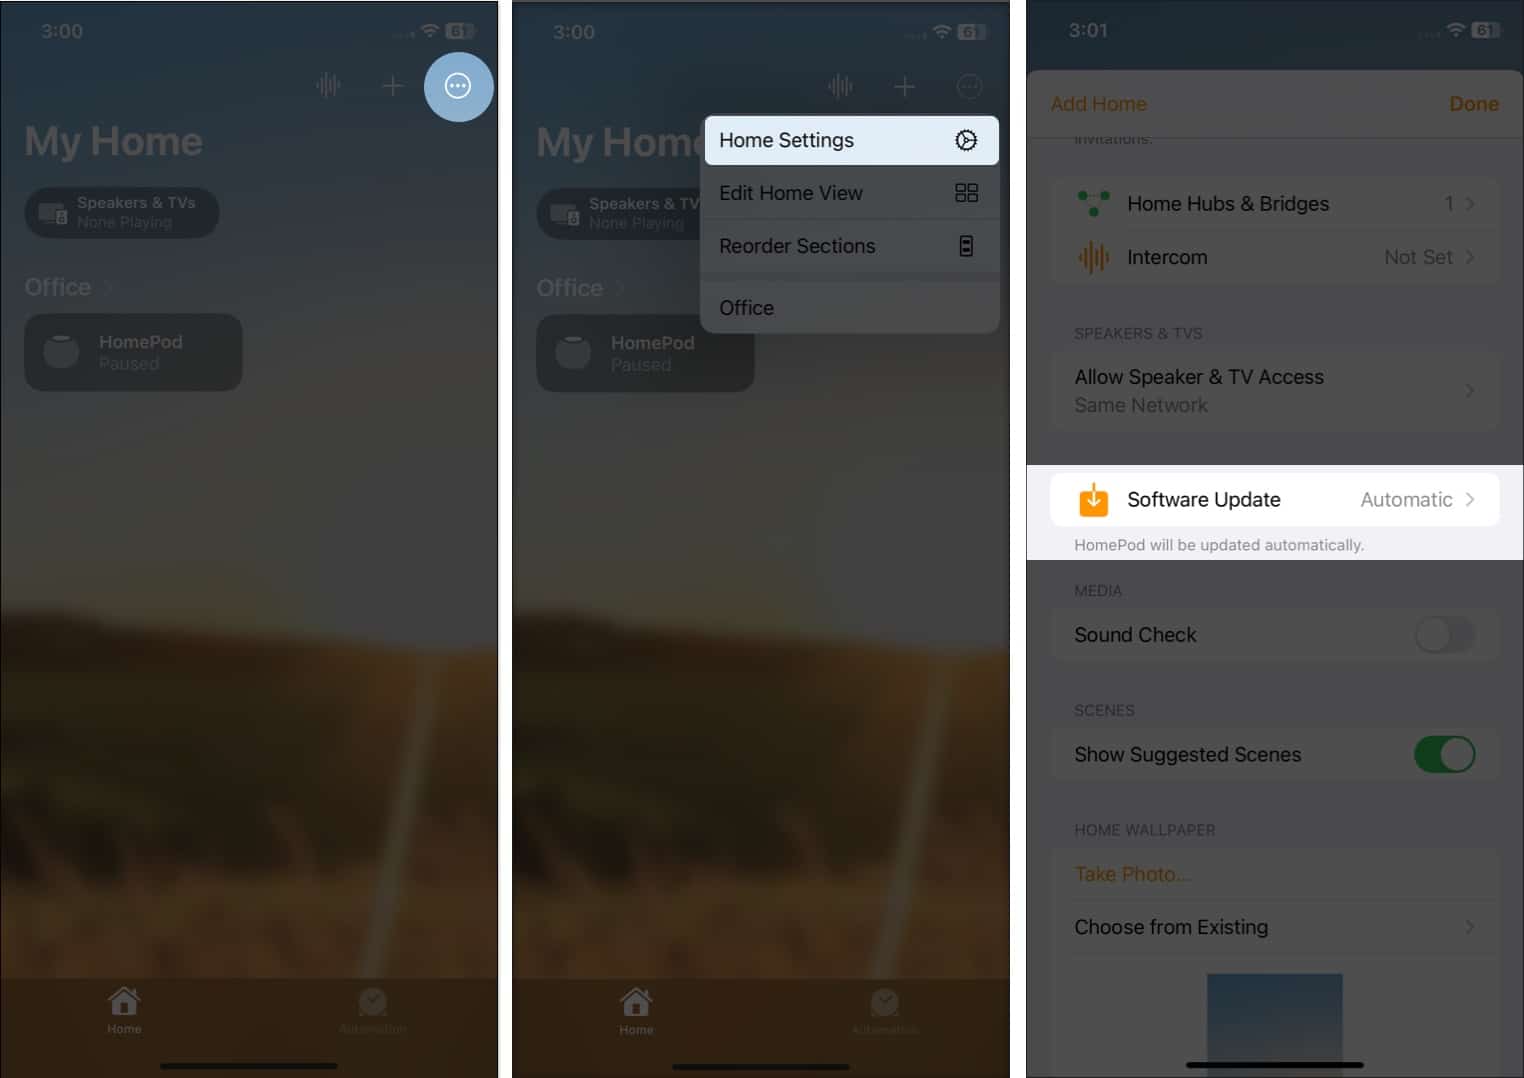
- You’ll see a dialogue box if an update is available. Tap Update to download and install it.
Alternatively, you can also launch the Home app → choose HomePod → scroll down, and select the Settings icon on the bottom right; else, you can just keep scrolling → tap Update.
Note: The update button will only appear only if an update is available.
Using Mac
You can also use the Home app on your Mac to upgrade your HomePod mini to the current version. Simply follow the procedures that correspond to your macOS version.
macOS Ventura
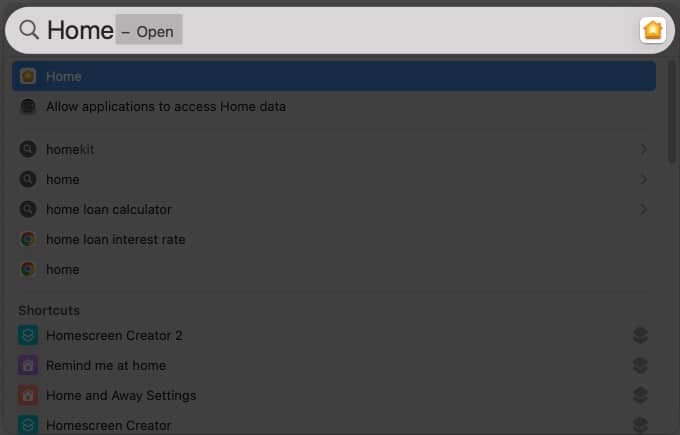
- Open Spotlight (Command + Space Bar).
- Search Home app.
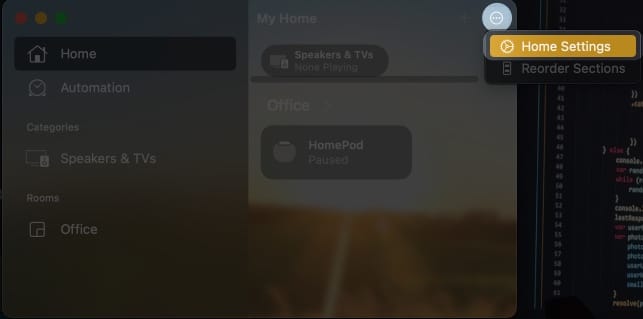
- Click the three dots icon on the top right → select Home Settings.
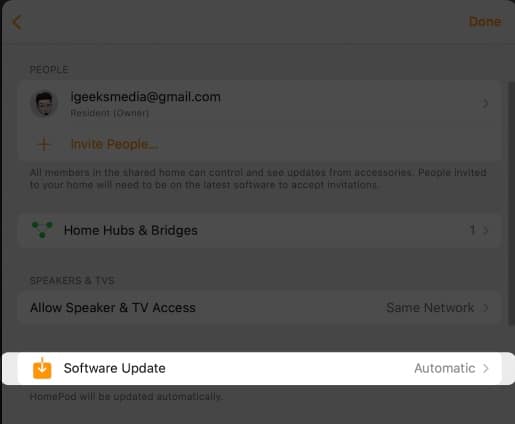
- Scroll down and select Software Update.
- Click Update next to HomePod.
macOS Monterey
- Launch the Home app.
- Click the home icon.
- Select Home Settings.
- Pick Software Update.
- Click the Update button next to HomePod.
How do I update to software on HomePod automatically?
Updating your HomePod or HomePod mini is as important as updating your iPhone, iPad, or Mac. And thankfully, the HomePod updates its software on its own if the setting is enabled.
For some reason, if you have toggled off the update option, here’s how you can turn it on:
- Go to the Home app → tap three dots → select Home Settings.
- Tap Software Update.
- Toggle on the button next to HomePod.
Apple recommends placing your HomPod on a level surface in close proximity to your Wi-Fi router.
The HomePod can function both with and without Wi-Fi. However, while using your HomePod without Wi-Fi, a majority of the functions and functionality will be lost. AirPlay music, videos, or movies from your iOS device will be the only option available.
Yes, HomePod can function in the absence of Siri. However, to do so, you must disable Siri on your iOS device. In addition, the HomePod will lose a lot of Siri-related features.
There is no need to switch off the HomePod when not in use. The reason for this is it shifts to a low-power mode that uses almost no power. As a result, disabling it is not recommended.
Wrapping up…
So that’s all about the setup, usage, and software update of your HomePod mini or HomePod. With the launch of the new HomePod (2nd gen), Apple has taken steps beyond ambient sounds and intercom functionality. What are your thoughts on Apple’s HomePod, and where do you believe it ranks among the top smart speakers? Let us know in the comments.
Read more:

