Whether you want to comfortably edit your files or share your favorite documents with your friends in the Files app, you can get it done with ease. What’s more, you’ve got the option to invite your friends as well to make changes in a shared document. Just in case, you would like to have more control over the things you share, you have the option to prevent people from making any changes to the shared doc. No longer want people to access your shared file? You can completely stop them from accessing it–whenever you want. Let’s take a closer look!

- How to Share Documents in Files App on iPhone and iPad
- How to Invite People to Make Changes to Documents
- How to Add More People to the Shared Document in Files App
- How to Remove Individual People from Accessing Shared Document
- How to Completely Stop Sharing Any Document
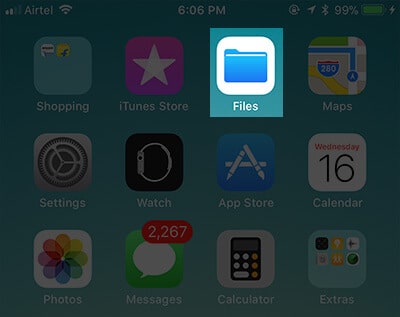
- First off, launch Files app on your iOS device.
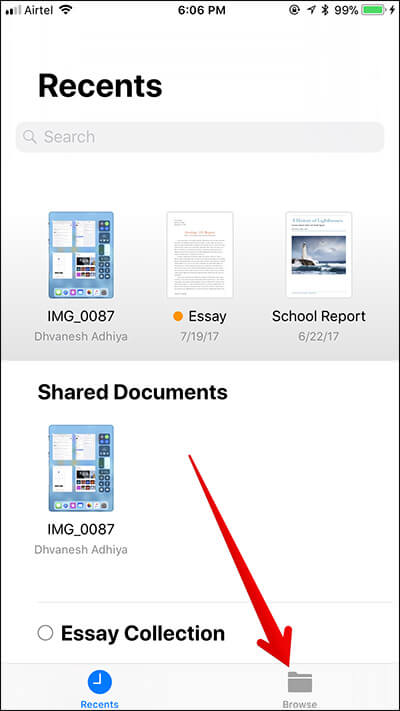
- Next, tap on the Browse tab at the bottom.
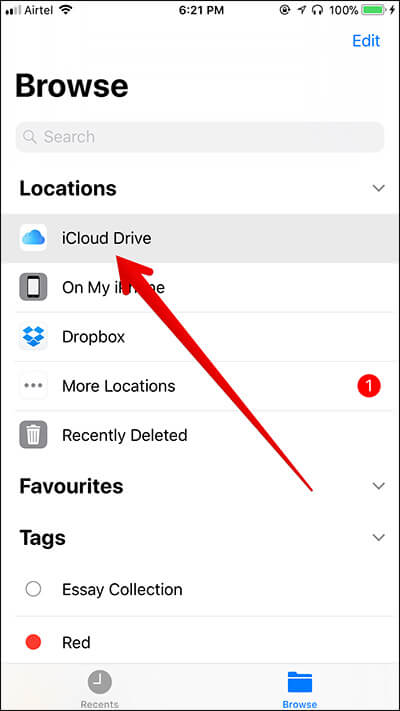
- Now under Locations, you need to select the cloud service where you have saved your file. In this test, I’m going to select iCloud Drive.
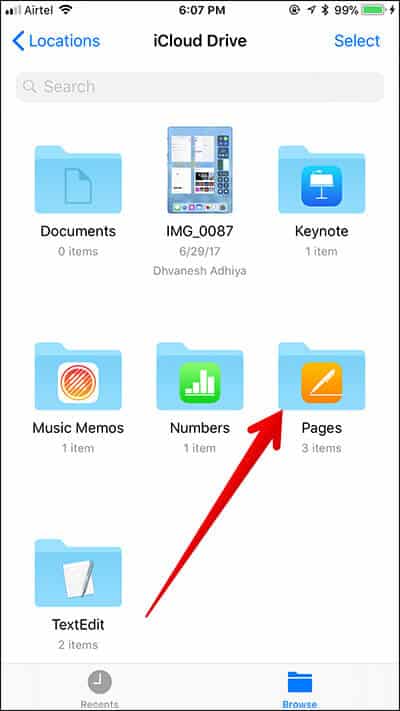
- Now, tap on the Folder.
- Next up, touch and hold the file. Then, tap on the Share button in the popup. (If you don’t see the Share button in the popup window, then tap on the arrow button at the far right. Now, the Share button will show up on the menu.)
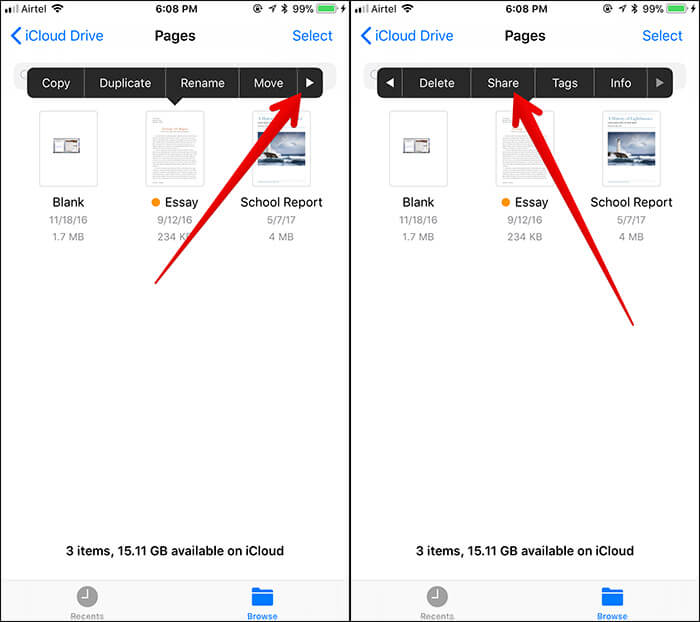 Alternately, you can tap on the document and once it opens, tap on the Share button
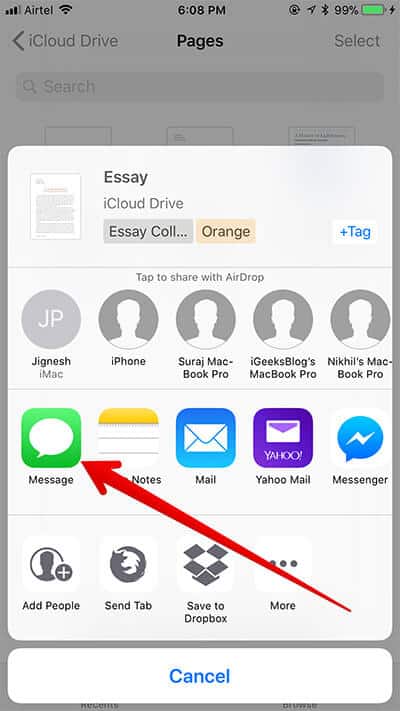
 - Now, you have to select the medium through which you wish to share the file. You can share it via email, Facebook, and other apps. I’m going to select Message.
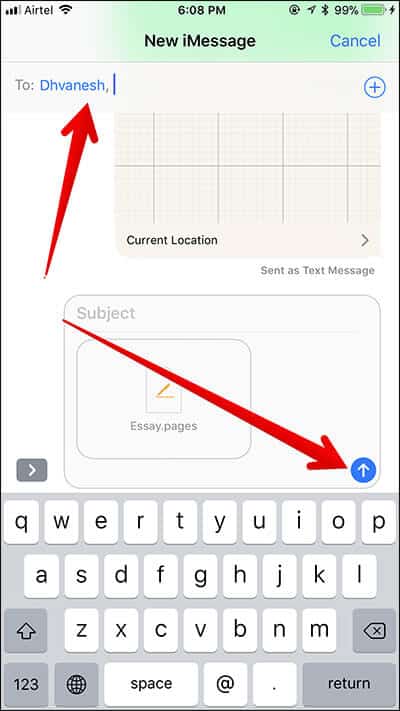
- Enter the name of the receiver and send it as usual.
How to Invite People to Make Changes to Documents
Want to collaborate with your friends in editing any document in the Files app? No problem. Send an invitation to them!
- Open Files app on your iOS device → Browse tab → tap on iCloud Drive under Location → tap on the folder → touch and hold on the document you want to share. Then, tap on the Share button in the popup window.
 Or just tap on the doc and then tap the Share button
 - Next, you need to select Add People in the share sheet.
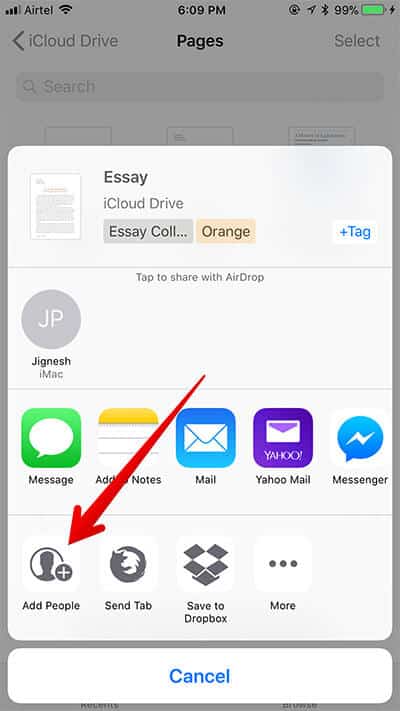
- If you want to have more control over the doc you share, tap on the Share Options at the bottom of the screen.
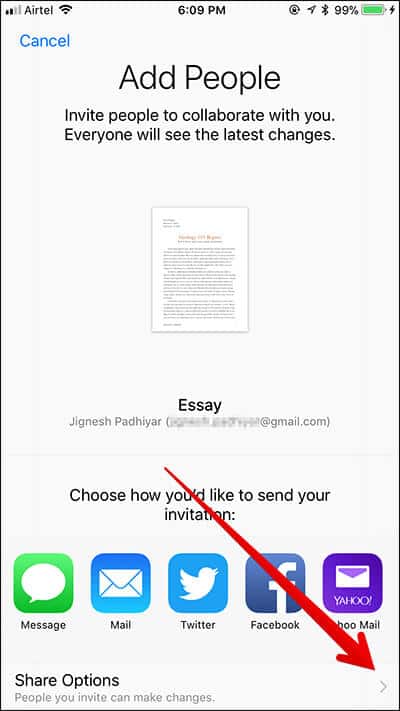
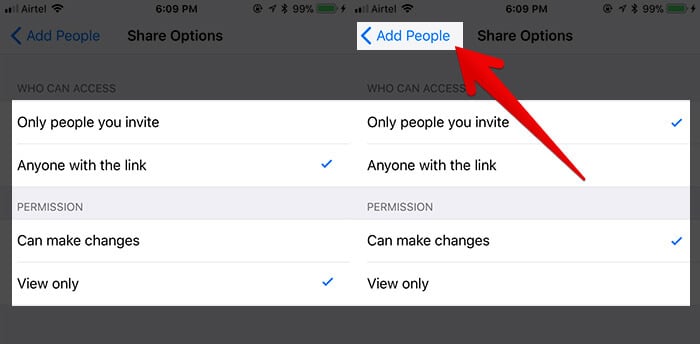
- Now, choose who can access your doc:
- Only people you invite
- Anyone with the link
Under Permission, you have two options—
- Can make changes
- View only
You can choose the appropriate option as per your need. I’m going to select Only people you invite and Can make changes.
Once you are done, tap on the back button at the top left corner to go back.
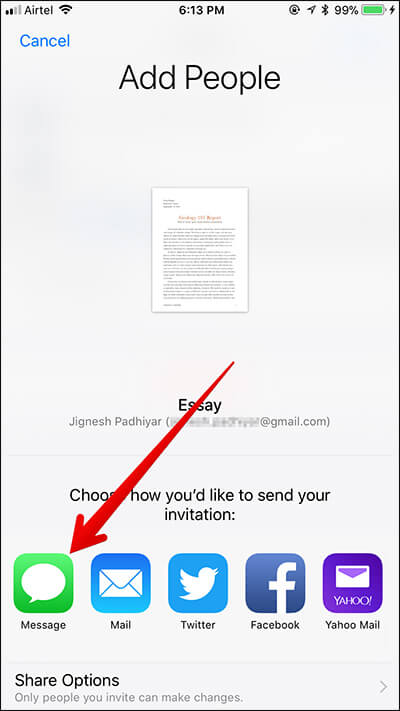
- Select the medium through which you want to send an invitation. In this test, I’m going to select Messages Tap on it → Enter the recipient name and send it as usual
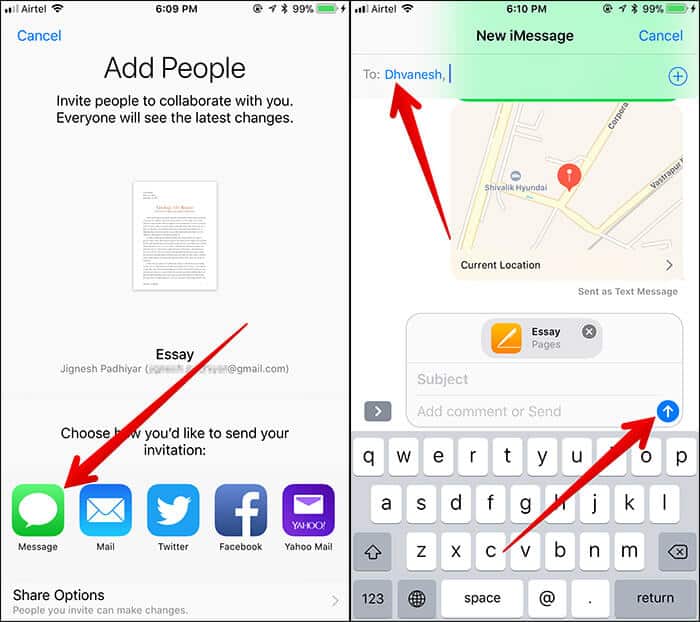
Now, your friend will receive the doc and be able to view/make changes in the doc.
- Open Files app → Browse tab → iCloud Drive → Folder → the shared document and tap on it → tap on the Share button.

- Select Show People.
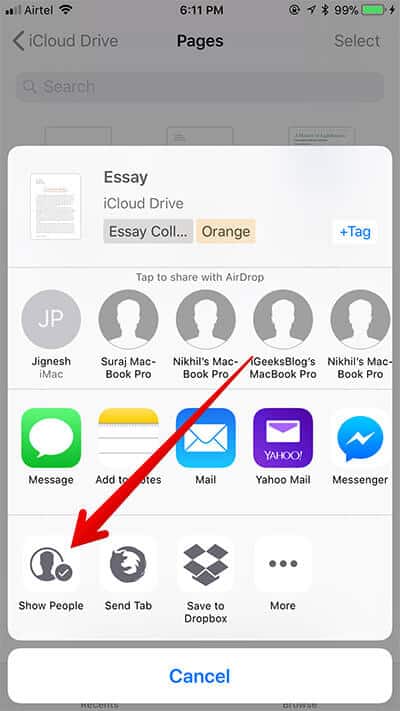
- Tap on Add People.
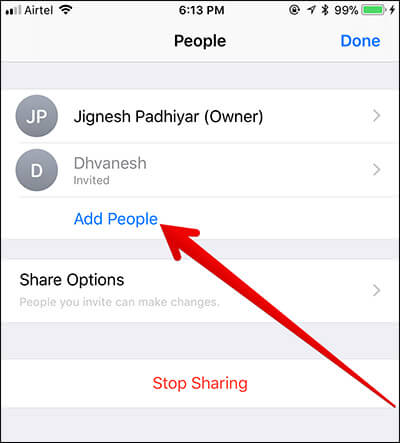
- Tap on Share Options and select the preferred option → to choose the medium through which you want to share the file and send it as usual.
- Open Files app → Browse tab → iCloud Drive → Folder → the shared document and tap on it → tap on the Share button.

- Next, you need to select Show People.

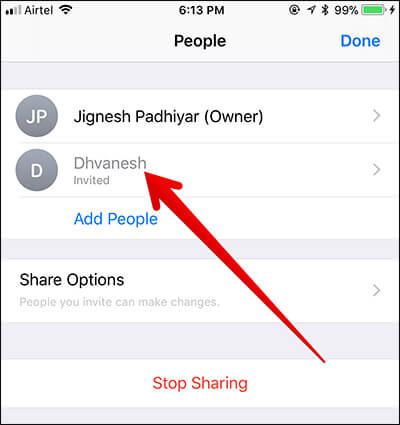
- Now, tap on the name of the person you don’t want to access this doc.
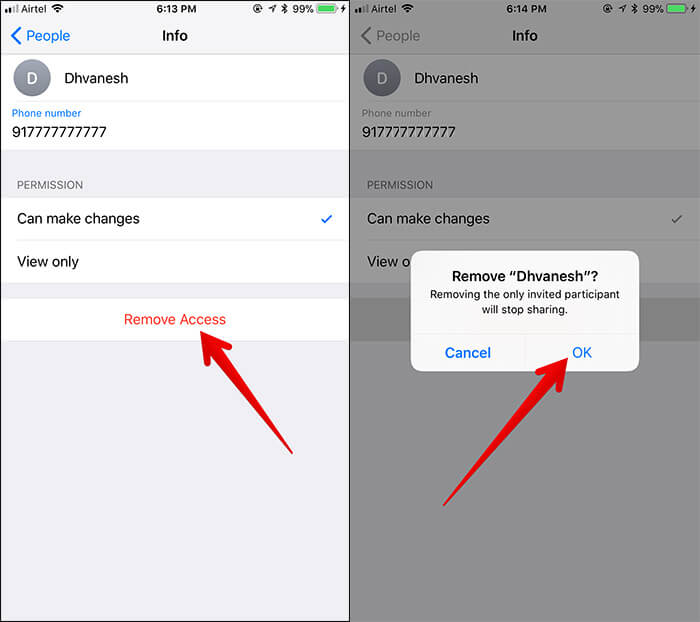
- Next up, tap on Remove Access → Tap on OK in the popup to confirm.
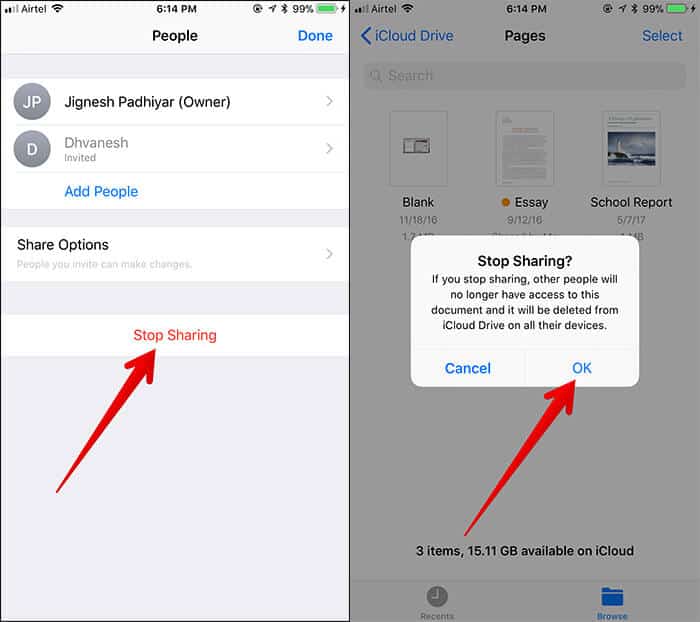
How to Completely Stop Sharing Any Document
Don’t you want to share the document with your friend anymore? You can easily prevent him/her to access the shared file.
- Launch Files app → Browse tab → iCloud Drive → Folder → the shared document and tap on it → tap on the Share button.

- Select Show People.

- Next, you need to on Stop Sharing → Tap on OK in the popup to confirm.
That’s it!
Wrapping up
The new file manager is very effective as far as functionality is concerned. I find it up to the mark in living up to the expectation. But if you aren’t quite impressed with it, check out these best file managers for the iPhone and iPad.
You might want to check out these related posts:
