All the files on your Mac are stored in various folders that are in turn stored in specific locations on the hard drive. A file path provides the precise location of a specific file in this maze of folders so that you can find it easily.

Knowing how to find the file path on your Mac can come in handy when you want to share specific file locations with others or if you’re working with command line tools. So, in this article, I’ll show you how to find the file path of any file on a Mac.
What is a file path on a Mac?
A file path is like a unique address of a file on your Mac. It helps you quickly locate a file on your system, seeing exactly which folder or subfolders it is saved in.
For example, For instance, a file named wallpaper.png located on my Desktop would have this file path: /Users/mehak/Desktop/wallpaper.png
Why would you want to find or copy a file path on a Mac?
Finding and copying a file path on a Mac can be incredibly useful in several situations, especially if you need to access or reference a file without manually going through multiple folders. Here are some common reasons why you might want to find and copy a file path:
- To share file Locations: File paths let you quickly share exact file locations with others, avoiding manually going through different folders.
- Linking files: File paths let you directly link files in design, database, or document processing apps by pasting the file path.
- Command line usage: File paths are essential for running commands in the Terminal or using scripts that require accurate file paths.
8 Ways to find the full file path on Mac
There are many ways to find and copy a file path on your Mac. In addition to these, there are also third-party tools you can use. All the methods below don’t require any third-party tools and allow you to easily find file paths on macOS.
1. From Finder Path Bar
The Finder Path Bar is the quickest and simplest way to see a file’s complete path. The whole path to your present location is displayed at the bottom of the window in Finder.
- Open the Finder app.
- Click View in the menu bar.
- Select Show Path Bar.

Alternatively, you can also press Option + Command (⌘) + P on your keyboard to show the path bar. The path bar appears at the bottom of the Finder window. To copy the file path from here, right-click on it and then select “Copy as Pathname”.

Using the Finder context menu, you can easily copy the full path of the file to your clipboard, which you can later paste anywhere according to your requirements.
- Launch Finder.
- Select and right-click the file.
- Press and hold the Option key from the keyboard.
- Select Copy [file name] as Pathname.
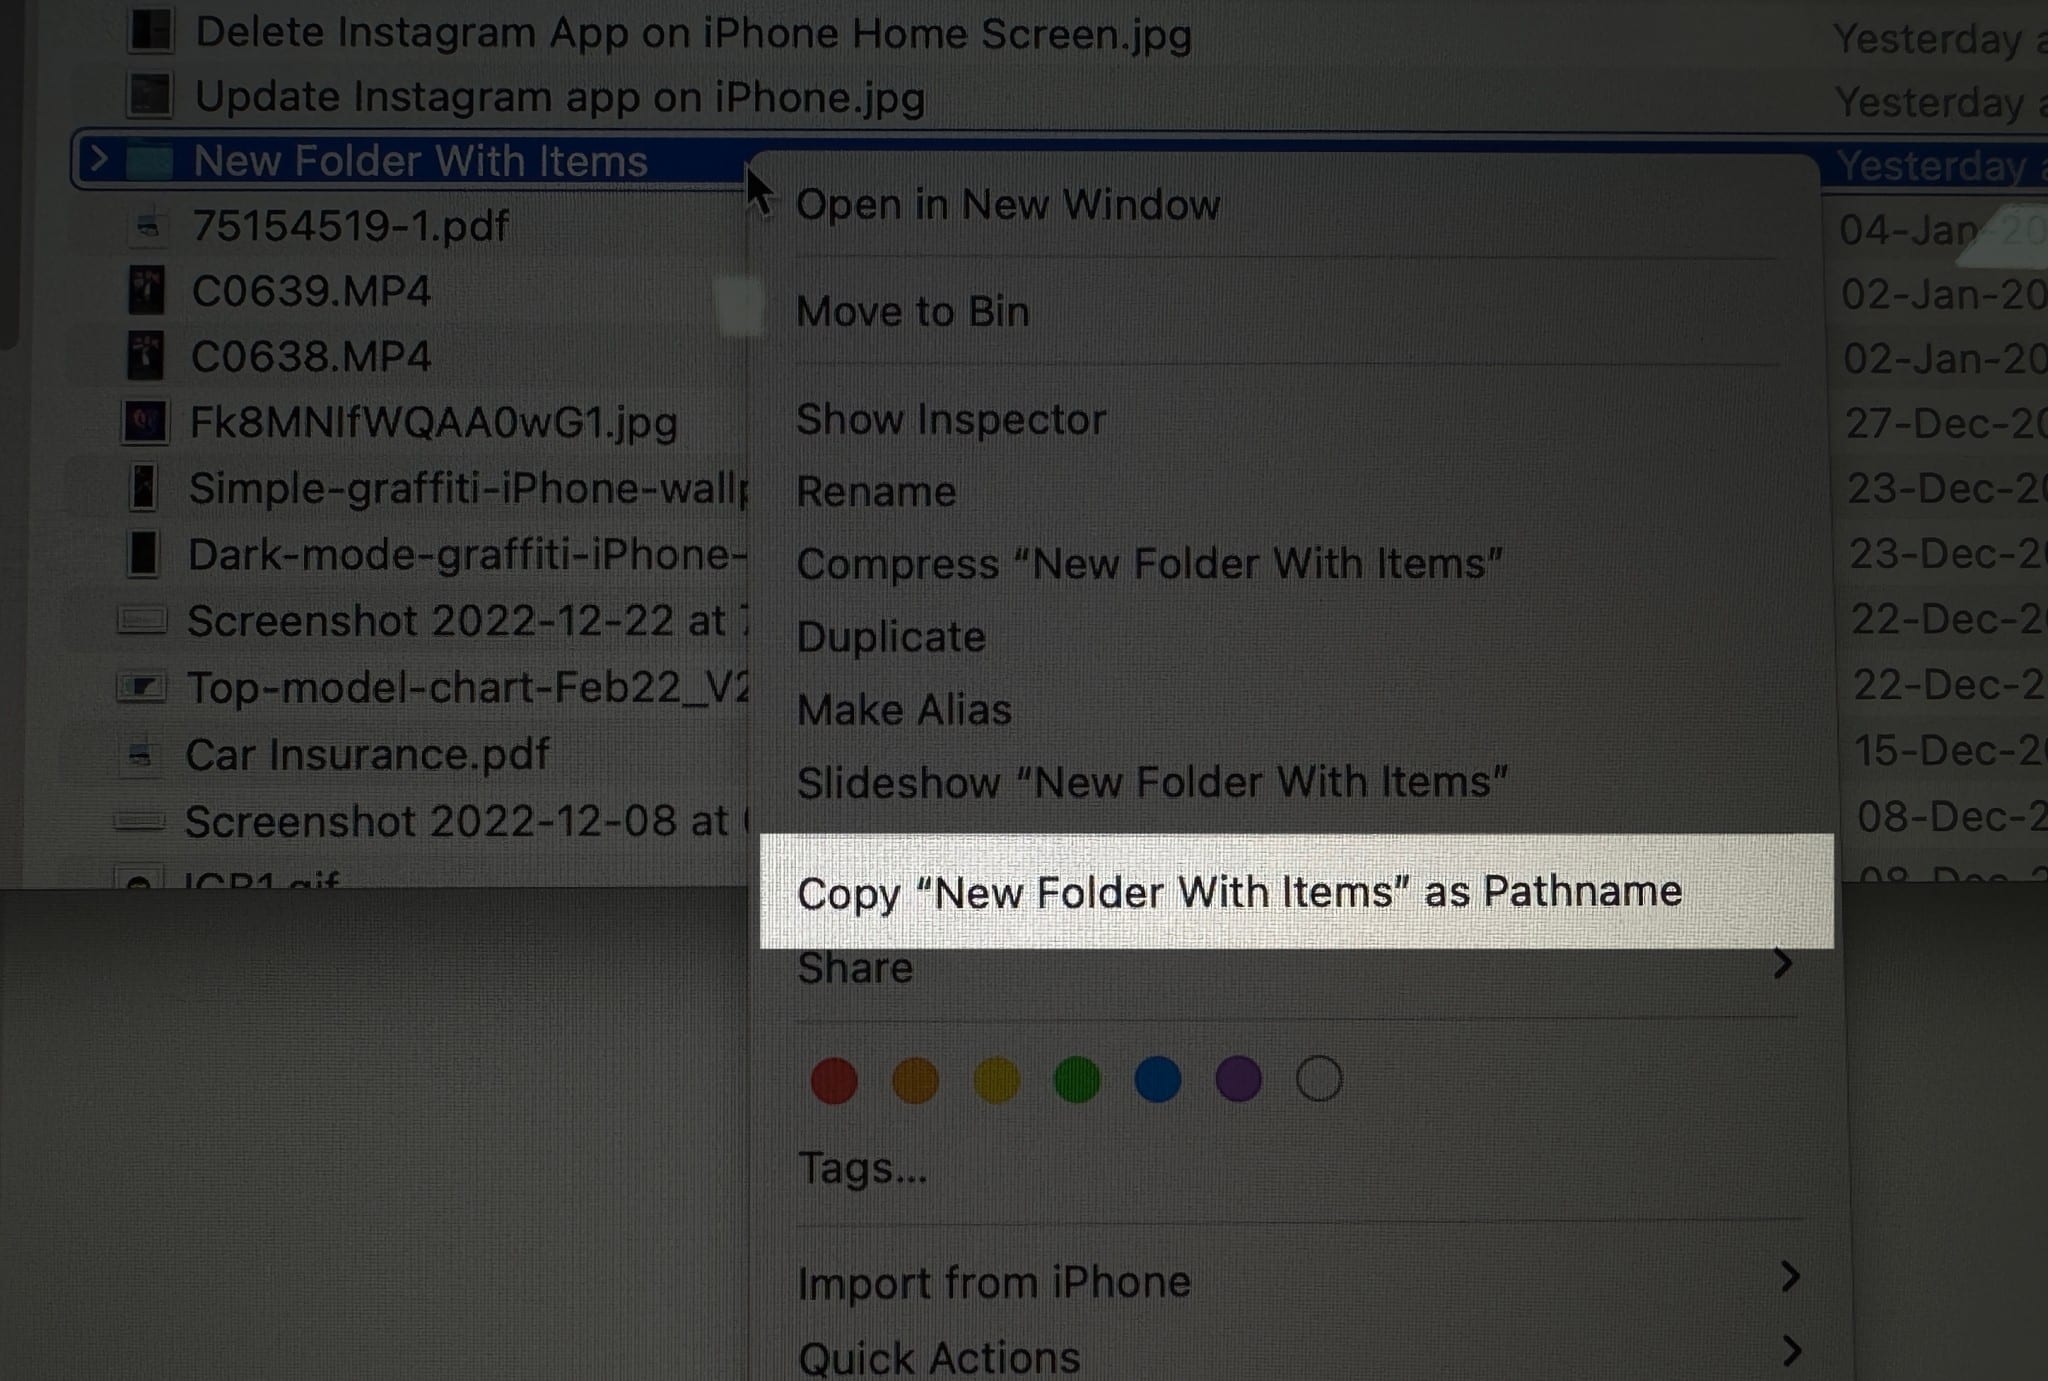
You can paste the file path anywhere you want to use it.
3. Click Get info to show the file path
In macOS, the Get Info procedure displays the file path in just two clicks. Check out the steps below:
- Go to Finder → right-click the file.
- Choose Get Info.
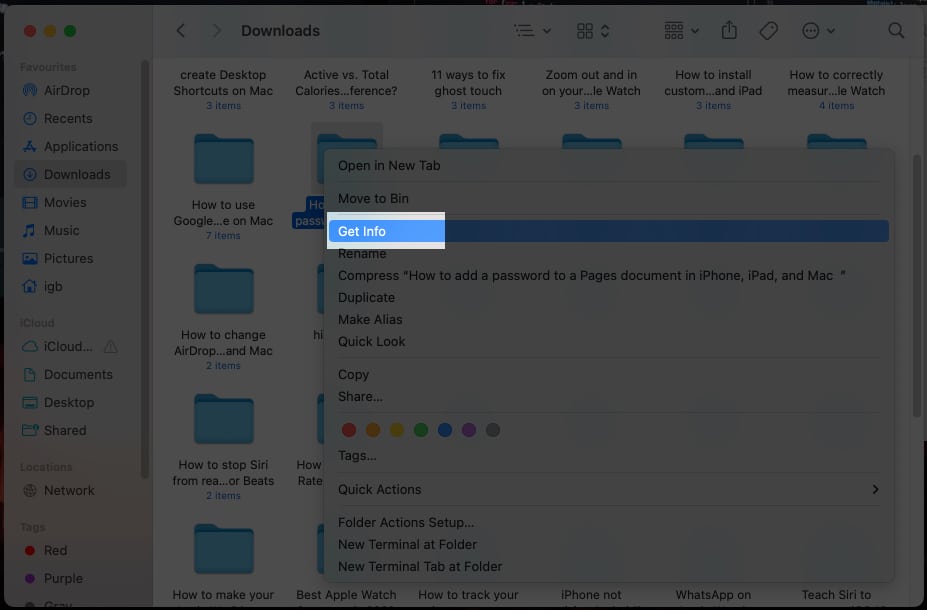
The file path is now shown in the Where section of the pop-up menu.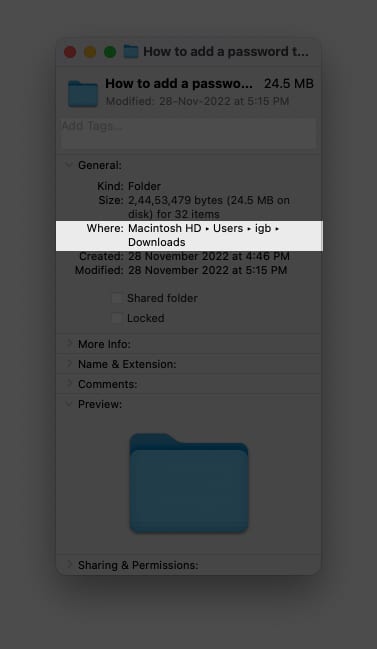
Become an iGeeksBlog Premium member and access our content ad-free with additional perks.
4. View the file path from the Finder title bar
This method can be used for files stored in a folder. You may not be allowed to copy the path while using this option, but the structure provided in the dropdown makes it simple to locate the file.
- Enter a folder stored in Finder.
- Right-click on the Finder title bar.
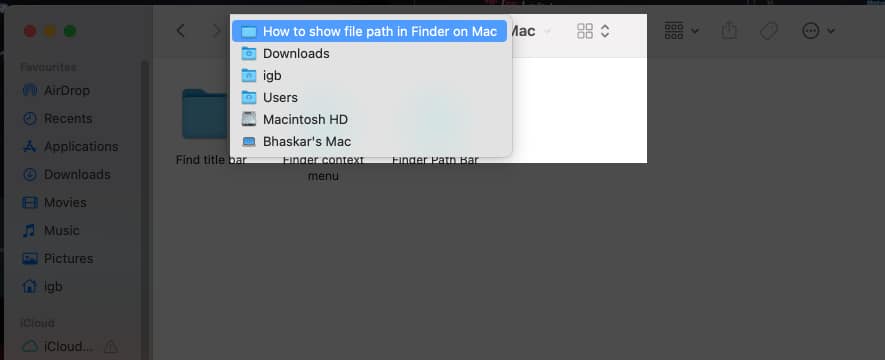
Now, you may see folders or locations in the dropdown menu; you can easily navigate to your preferred location from here.
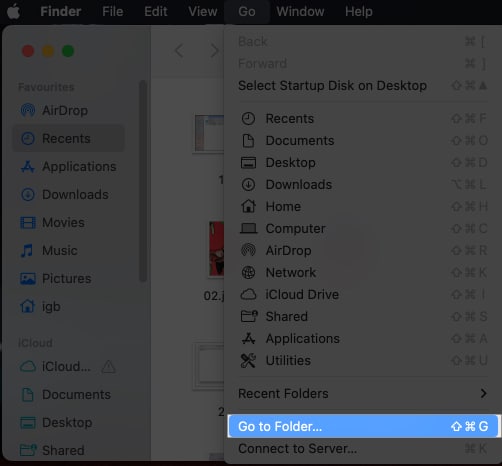
5. Copy file path using Finder’s Go to Folder
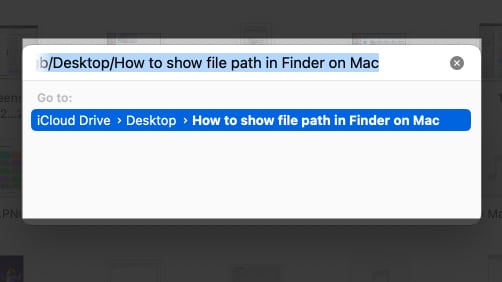
If the above methods were too nerve-wracking, you may use this simple drag-and-drop approach to see file paths: use the Finder’s Go to Folder command.
- Launch Finder.
- From the menu bar, select Go → Go to Folder.
- Drag the file to the path box to check its path.
6. Find file path using Spotlight
With only a few clicks, Spotlight allows us to search for and open anything on our Mac. By following the instructions below, we can also use it to view the file paths.
- Launch Spotlight (Command (⌘) + Space Bar).
- Search for a file name.
- Press and hold the Command (⌘) key.
7. Copy file paths with Automator
This small trick will be adored by shortcut enthusiasts! With the use of your Mac’s Automator, you can easily construct a variety of microservices that can carry out a wide range of tasks, like quickly obtaining any file’s file path. To make your own shortcut, follow these steps:
- Go to Spotlight → Automator.
- Choose Quick Action → click Choose.
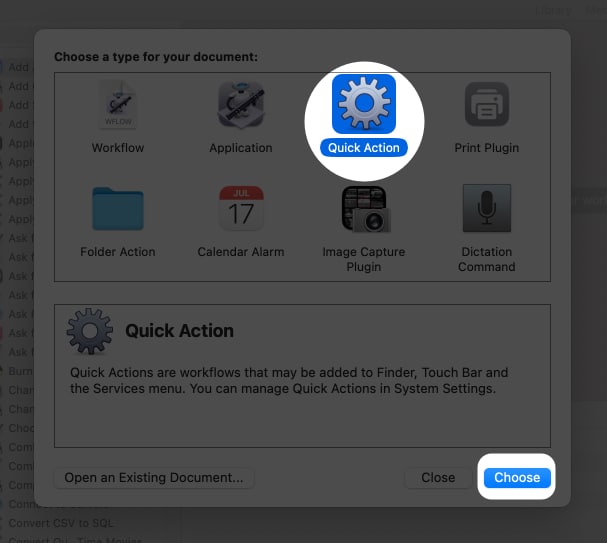
- Change Workflow receives current to files or folders and into Finder.
- Choose Utilities from the Library section in the leftmost menu.
- From the left menu, double-click (or drag) Copy to Clipboard.
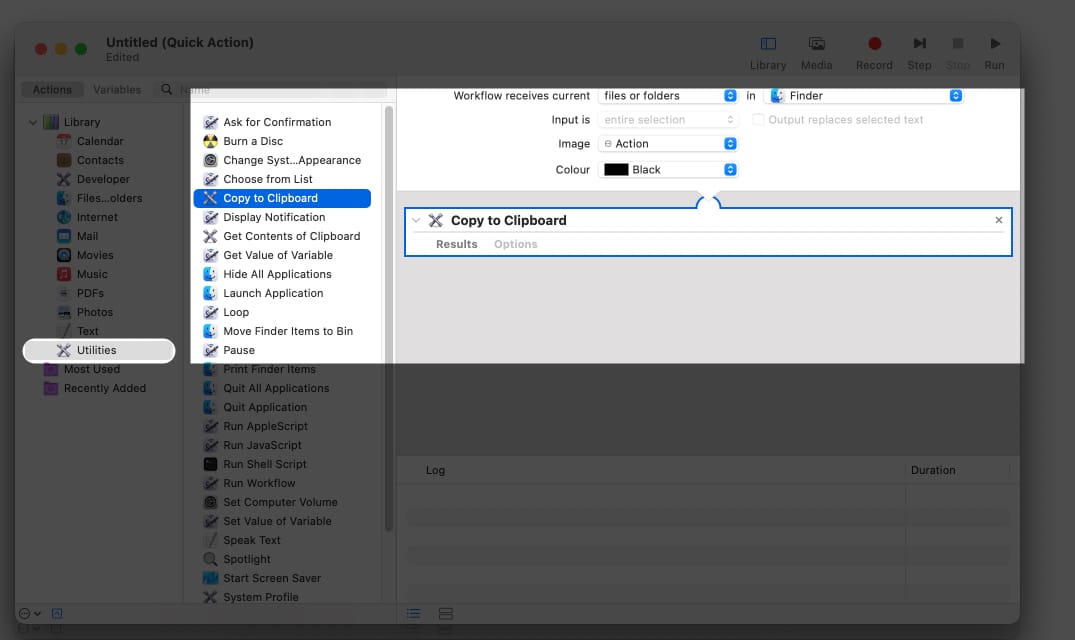
- Click File from the top menu → choose Save.
You can also press Command (⌘) + S.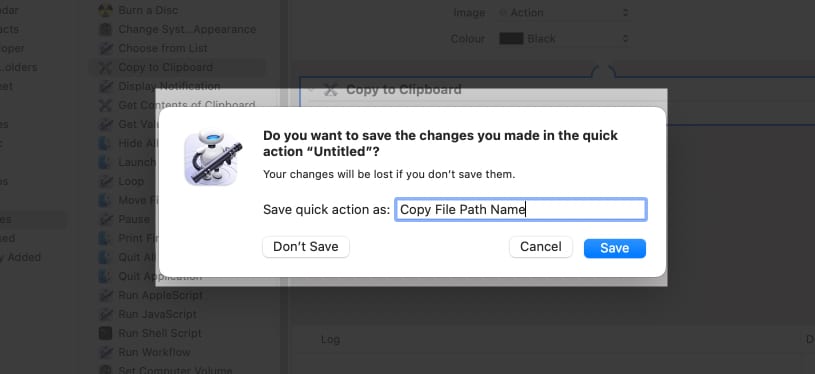
- Rename shortcut → click Save.
Once you’ve created a shortcut, you can go to file → right-click → Quick Actions → [name of shortcut]. Now that the file path has been properly copied paste it into a text editor to check the path.
8. Find the file path using Terminal
One of the most powerful tools on your Mac is the Terminal, but using the feature isn’t easy. If you’re comfortable utilizing the prompt, then check out the instructions below to use your device like a pro.
- Navigate to Launchpad.
- Open Terminal.
- Drag and drop the file into the Terminal.
You will be able to see its path.
- Right-click and copy the path.
Make your Mac easy to navigate…
There you have it. Now you know the multiple ways of finding and copying a file path on your Mac. Let me know in the comments below if you need help with anything else.
Check more:

