It’s no secret that websites track our online activity for varied reasons, such as giving targeted ads or offering a better user experience. But if privacy is your concern, then you can stop websites from tracking you on iOS. By default, Safari already limits third-party cookies on your phone, but you can also control other options, including location access.
Let me tell you more and explain how to prevent websites from tracking you in Safari on iPhone and iPad.
How to stop websites from tracking you in Safari to protect your privacy
Safari boasts a few different privacy and security settings that you can tweak to prevent websites from tracking you. Here’s what to do:
- Go to Settings → Safari.
- Scroll down to Privacy and Security.
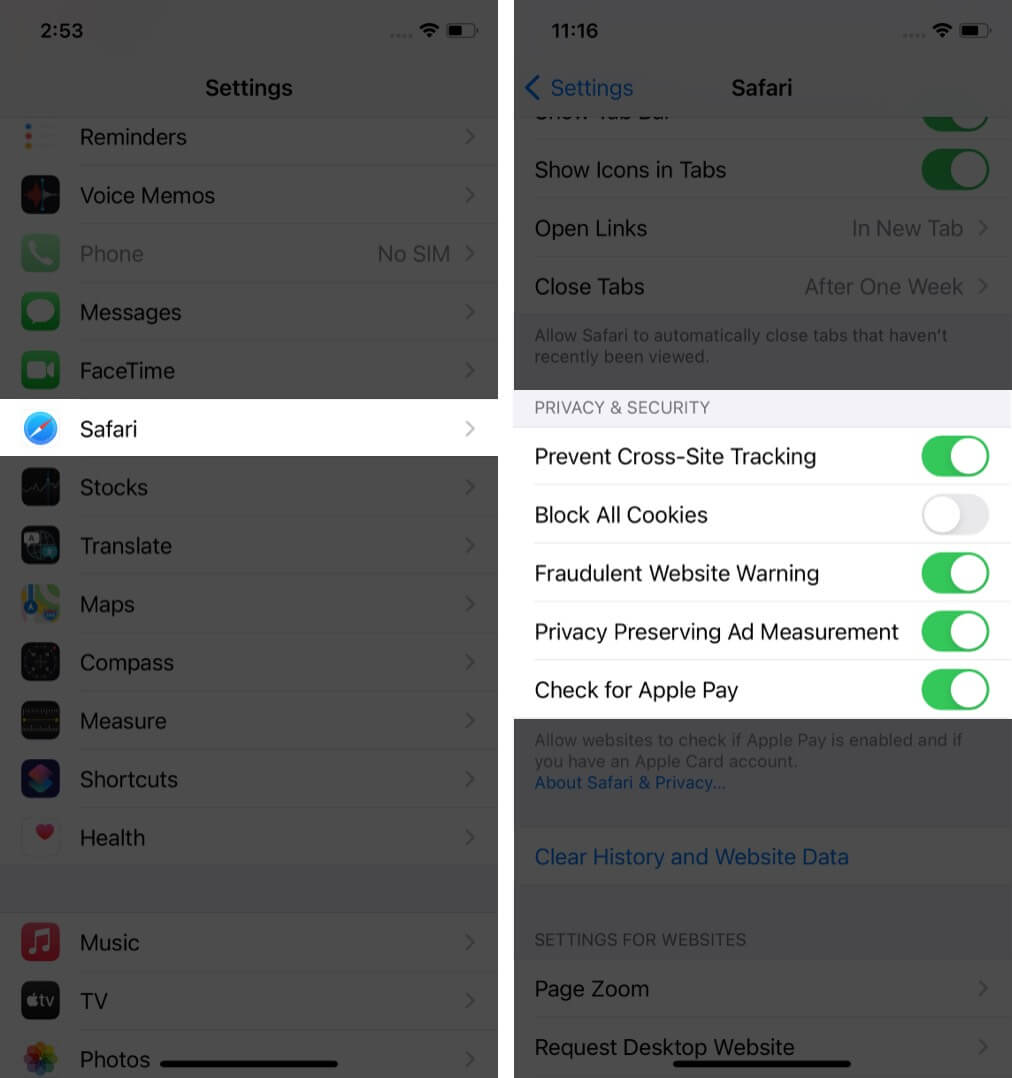
Here you will see a few different options that you can toggle on or off as you like:
- Prevent Cross-Site Tracking: This limits third-party cookies and data. It is turned on by default, but you can toggle it off to allow cross-site tracking.
- Block All Cookies: Toggle ON this option to prevent websites from adding cookies to your iPhone. To clear cookies already stored on your iPhone, tap Clear History and Website Data. Do note that some websites need to use cookies to function effectively.
- Fraudulent Website Warning: Keep this toggled on to make Safari show a warning if you’re visiting a suspected phishing or otherwise untrustworthy website.
- Check for Apple Pay: Toggle this ON if you want websites that accept Apple Pay to know that the service is enabled on your device. You can toggle it off to prevent websites from checking if you have Apple Pay.
Prevent websites from tracking your location in Safari
Have you ever been annoyed by pop-ups on websites asking to know your location? There is often a legitimate reason for this, such as wanting to give you the most relevant information based on your area. But it can also be invasive and disrupt your browsing experience. Luckily, you have the option to prevent those pesky pop-ups. Just follow the steps below.
- Go to Settings → Safari.
- Scroll down and tap Location.
- To prevent websites asking to track your location, select Deny.
Note: If you select Allow, it will let websites track your location without asking. If you select Ask, websites will show you a pop-up seeking your permission to track location.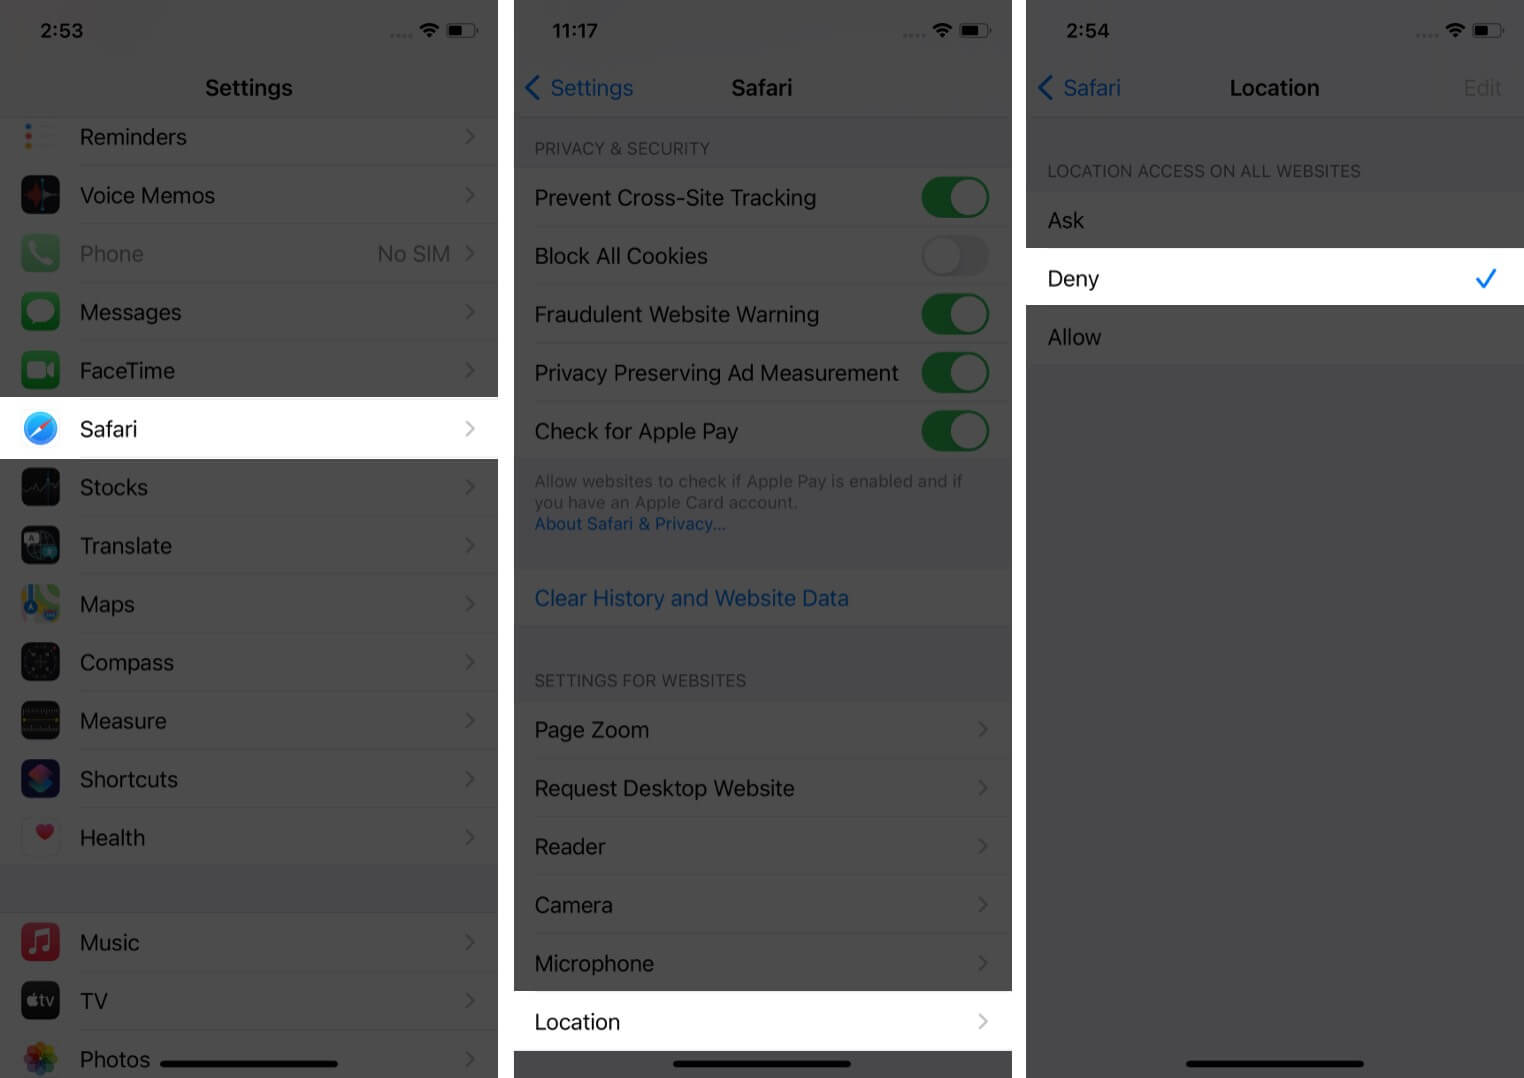
How to view the Safari privacy report on iPhone and iPad
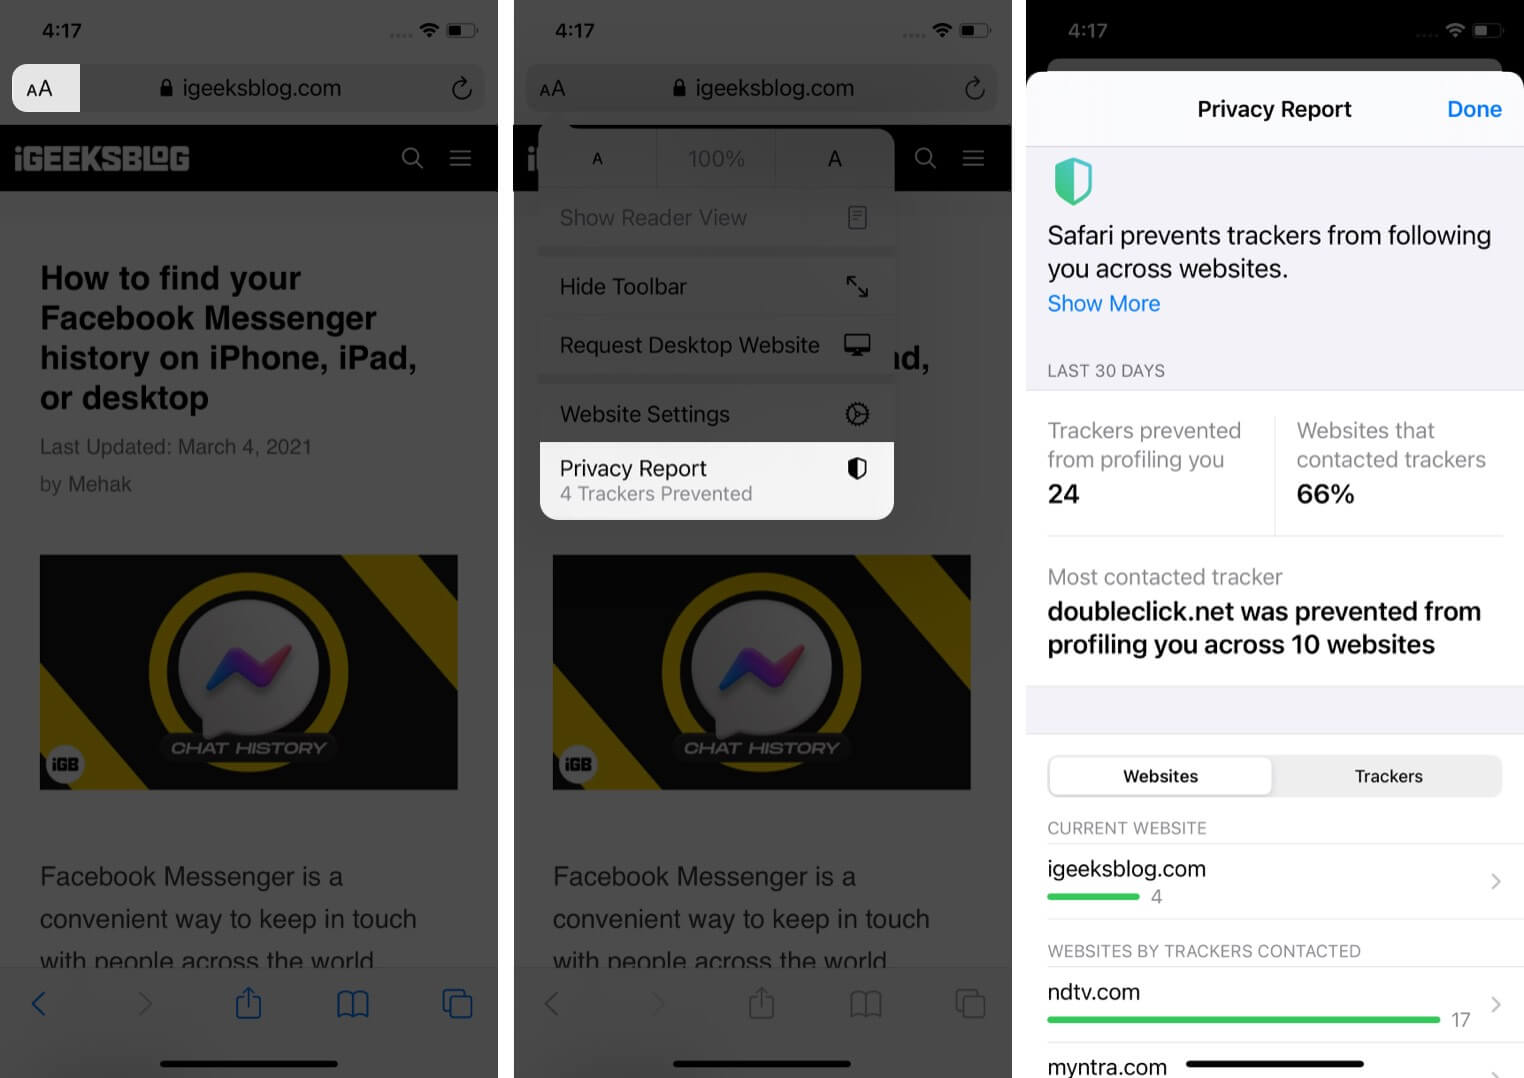
Safari has an in-built Privacy Report that shows you a summary of trackers that have been detected and stopped on the webpage you’re visiting. It also helps you stay safe from malicious websites and keep your browsing activities private from others who use the same device.
Become an iGeeksBlog Premium member and access our content ad-free with additional perks.
To view the Privacy Report → tap the AA icon on the left side of the search field → tap Privacy Report.
So that was the lowdown on how to prevent websites from tracking you or asking for your location. If you have any further questions, let me know in the comments below. You might also like to read my detailed comparison of Safari and Google Chrome to know which is better for your iPhone or iPad.
FAQs
By default, Safari limits the number of third-party trackers. To block all trackers, you have to go to Settings → Safari → Block All Cookies. However, this might affect your browsing experience as some websites require cookies and trackers to function effectively.
No, some cross-site tracking is needed for webpages to function effectively and give you a good user experience. It is only a concern when done by suspicious or invasive websites.
Safari keeps track of the websites you visit the most frequently, and these appear when you open a new tab. To disable this option, go to Settings → Safari and toggle off Frequently Visited Sites.
When you use Private mode on Safari, the browser won’t record any temporary data on the device you’re using. This means that the pages you visit or search for will not show up in the browsing history after closing the session. However, your network administrator or internet service provider might still be able to see what pages you visited.
Read more:

