Things to know about iCloud Private Relay:
- The feature is available with iCloud+ and only works with Safari.
- You can easily turn off iCloud Private Relay on iPhone, iPad, and Mac.
- If a website or network doesn’t work with Private Relay, you can exempt them from Private Relay.
- iCloud Private Relay may not work with some third-party VPNs.
iCloud Private Relay is a data protection feature provided for iCloud+ users. With this feature, you can surf the internet without worrying about any trackers and experience safe browsing. However, while it’s good to turn on this feature, some websites and online services are still not optimized for it, so users might have difficulty accessing them.
So let’s learn what the advantages and disadvantages of iCloud Private Realy are and how to turn it on or off on your iPhone, iPad, or Mac.
- Advantages and disadvantages of Private Relay
- How to enable or disable iCloud private Relay on iPhone and iPad
- How to enable or disable iCloud private relay on Mac
- How to exempt a webpage from iCloud Private Relay
- Turn off Private Relay for a specific network
- Set the specificity of your IP address location
Advantages and Disadvantages of Private Relay
If you have an iCloud+ subscription, then the Private Relay is a feature that you should definitely check out. Here’s why:
Advantages of enabling Private Relay
Increased privacy: While surfing on Safari, if turned on, all your internet traffic will be encrypted through iCloud servers, making it difficult for third parties to track your online activities. By doing this, your personal information and privacy are kept secure.
Easy to use: While the service does big things to protect your data, you are not required to do much other than enable Private Relay on your iPhone, iPad, or Mac. Once enabled, your device will automatically use the iCloud IP address when connecting to the internet, with no additional configuration required.
Compatible with multiple devices: You can use iCloud Private Relay on multiple Apple devices without any additional charges.
Disadvantages of iCloud Private Relay
Still in the beginning phase: The beginnings are always a rough path filled with difficulties, and so is the case for iCloud Private Relay.
Many websites and services are yet to adopt Private Relay: Since the feature is still in its infant stage, it comes with its issues.
Some features may obstruct because of Private Relay: Some websites cannot showcase the services and features fully when enabled. Hence you have to turn off Private Relay on your iPhone, iPad, or Mac to fully get the features.
How to enable or disable iCloud private Relay on iPhone and iPad
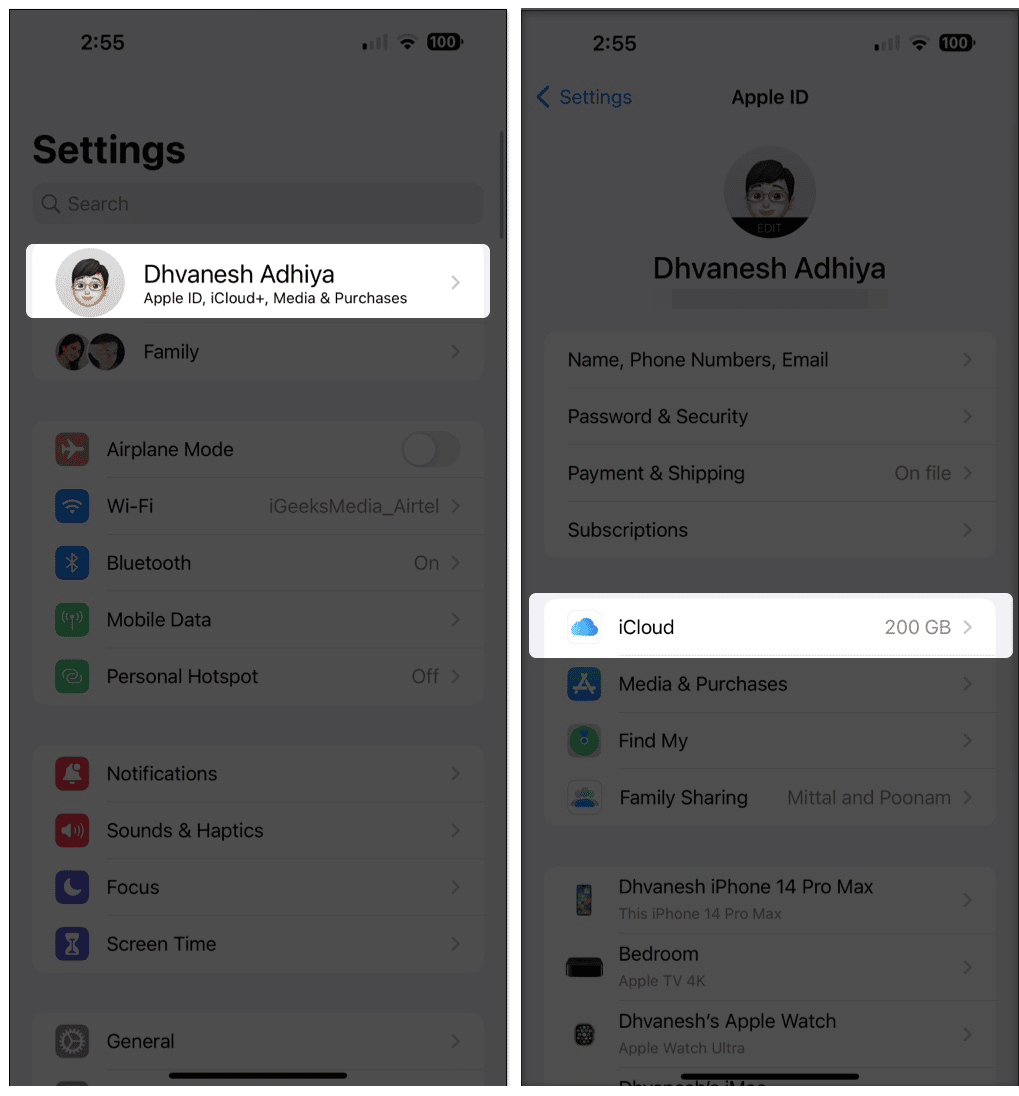
- Open the Settings app on your iPhone.
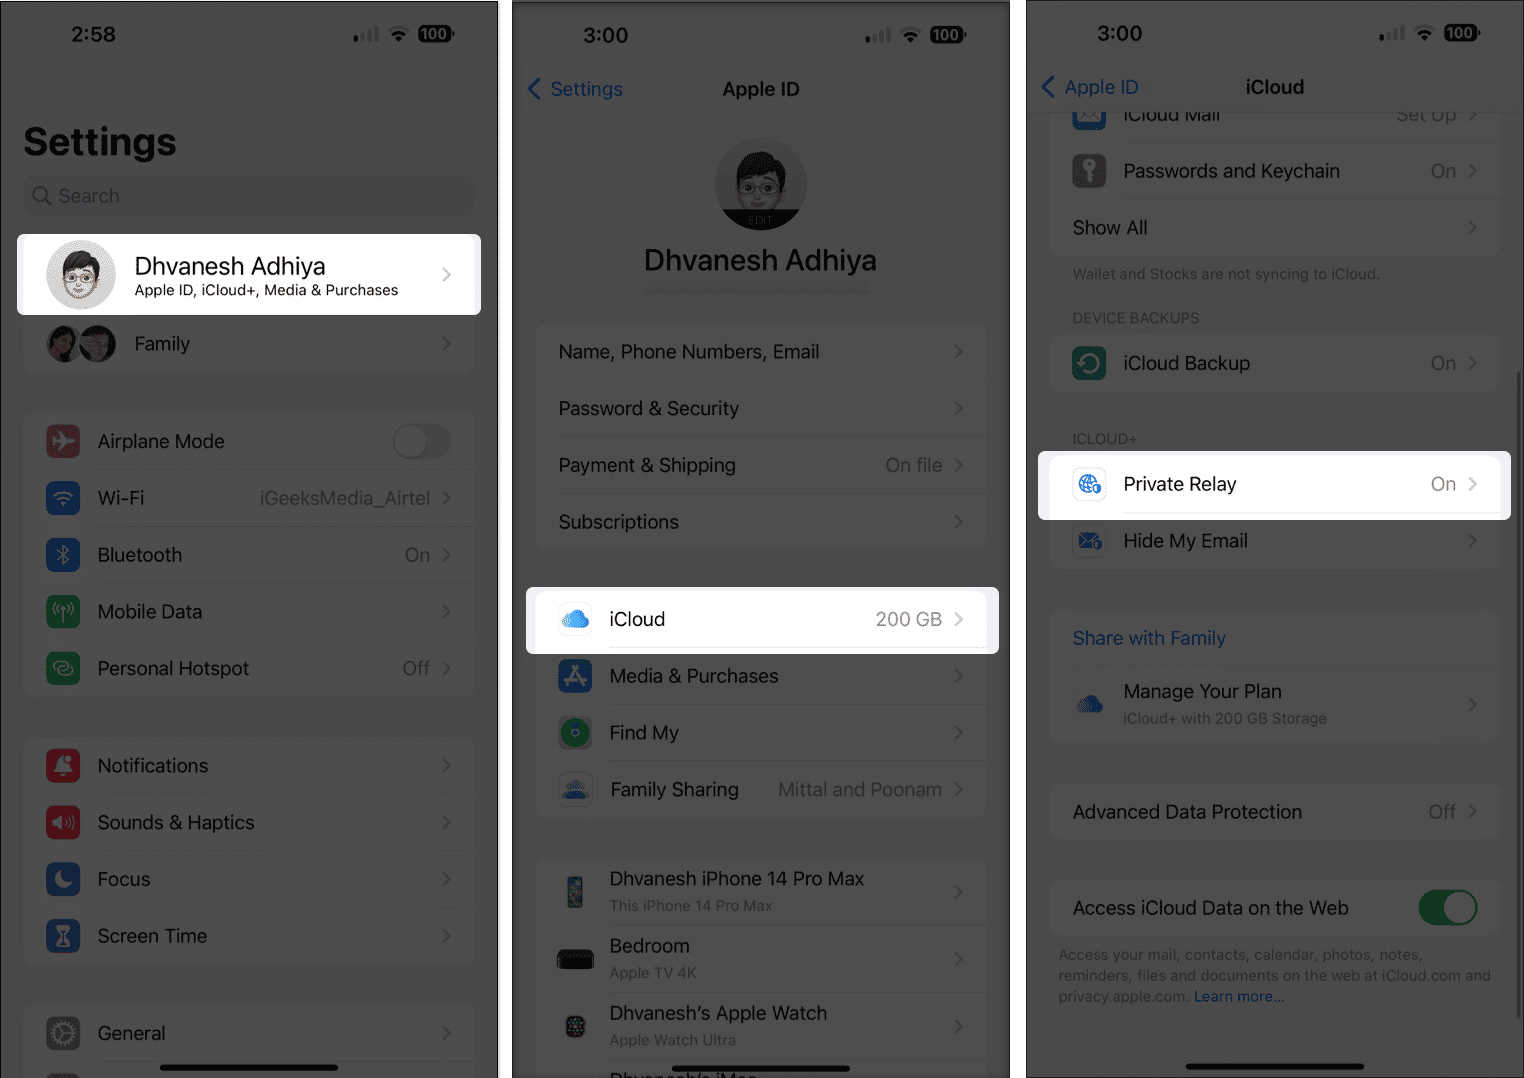
- Tap your name (Apple ID) → select iCloud.
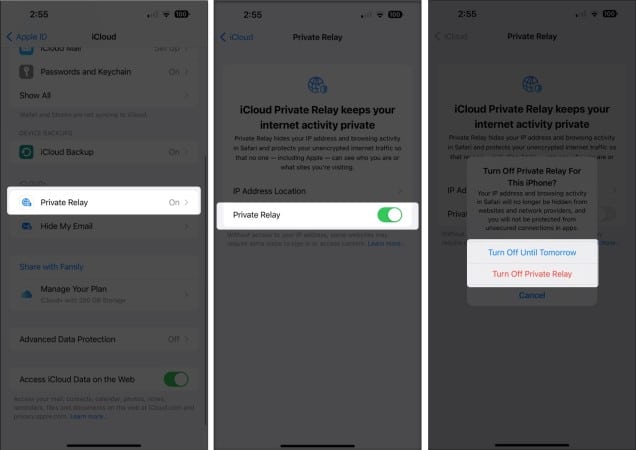
- Scroll down and tap Private Relay → toggle on or off Private Relay.
- If you Toggle it off, you can choose:
- Turn off Until Tomorrow: This will turn off the service for the next 24 hours.
- Turn off Private Relay: Permanently turn it off until you turn it on.
How to enable or disable iCloud private relay on Mac
- Click the Apple menu .
- Select System Settings.
For macOS Monterey and earlier, hit System Preferences.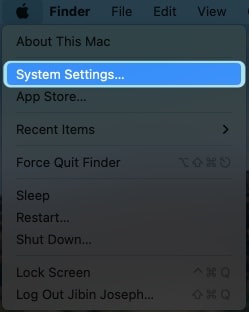
- Click your name, and select iCloud.
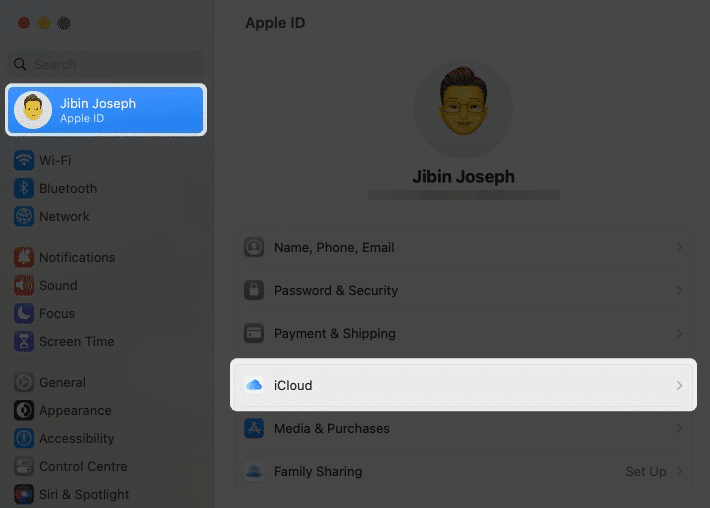
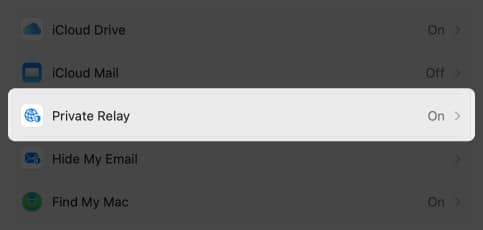
- Choose Private Relay.
- Hit, Turn On Private Relay/Off.
For macOS Monterey and earlier, enable/disable the check next to Private Relay.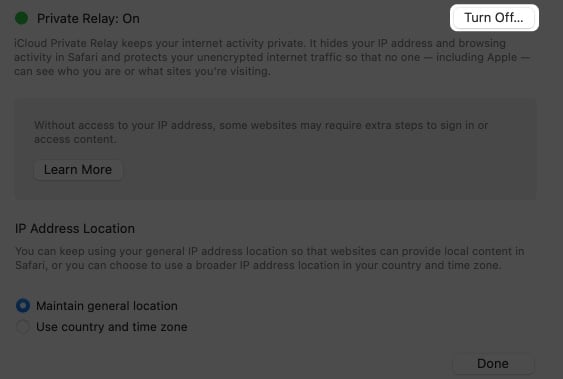
How to exempt a webpage from iCloud Private Relay
The service has been on the market for more than a year. However, many websites don’t work properly while you have enabled iCloud Private Realy. So, here’s how you can exempt them.
Note: The feature is only available from iOS 16.2, iPadOS 16.2, and macOS 13.1 Ventura
On iPhone and iPad
- Open Safari.
- Visit the webpage which you want to exempt from iCloud Private Relay.
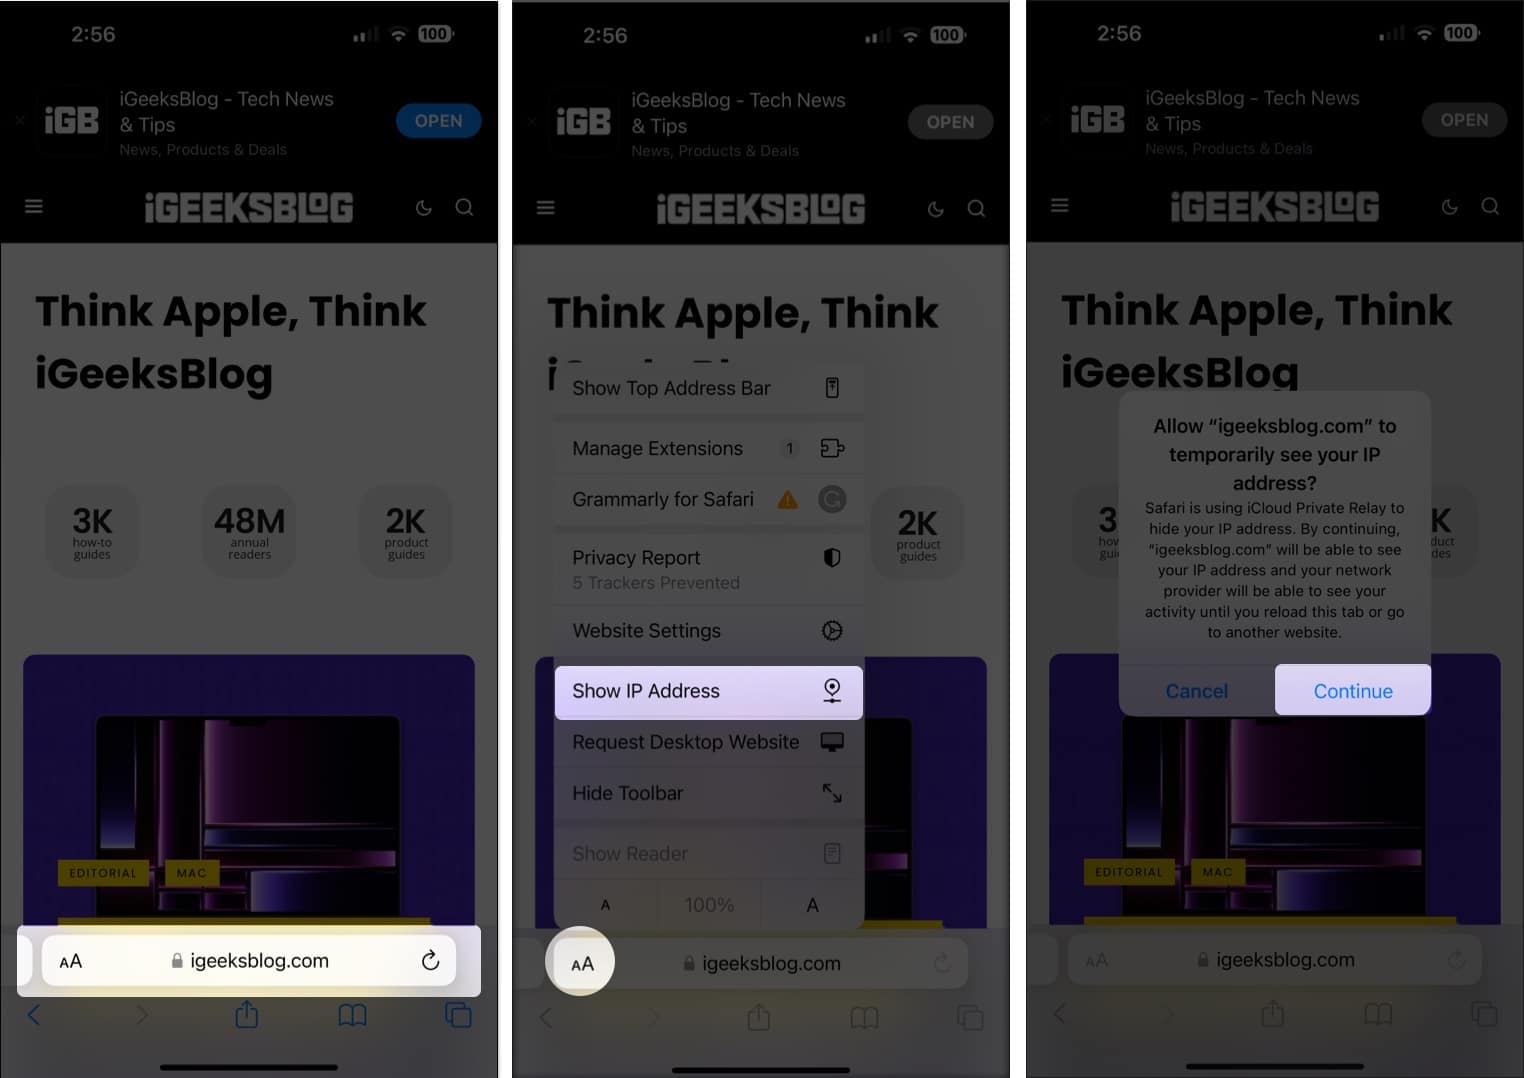
- Tap the Reading list icon (AA).
- Hit Show IP Address.
- Tap Continue.
On Mac
To make these steps work to exempt the domain from iCloud Private Relay on Mac, you must update your Mac to the latest macOS Ventura 13.1 or above. Now that it’s done let’s look at the steps:
Become an iGeeksBlog Premium member and access our content ad-free with additional perks.
- Open Safari and visit the webpage you want to exempt.
- Click View.
- Choose Reload and Show IP Address.
Turn off Private Relay for a specific network
Let’s look at what to do when you face issues with the network after enabling iCloud Private Relay.
On iPhone and iPad
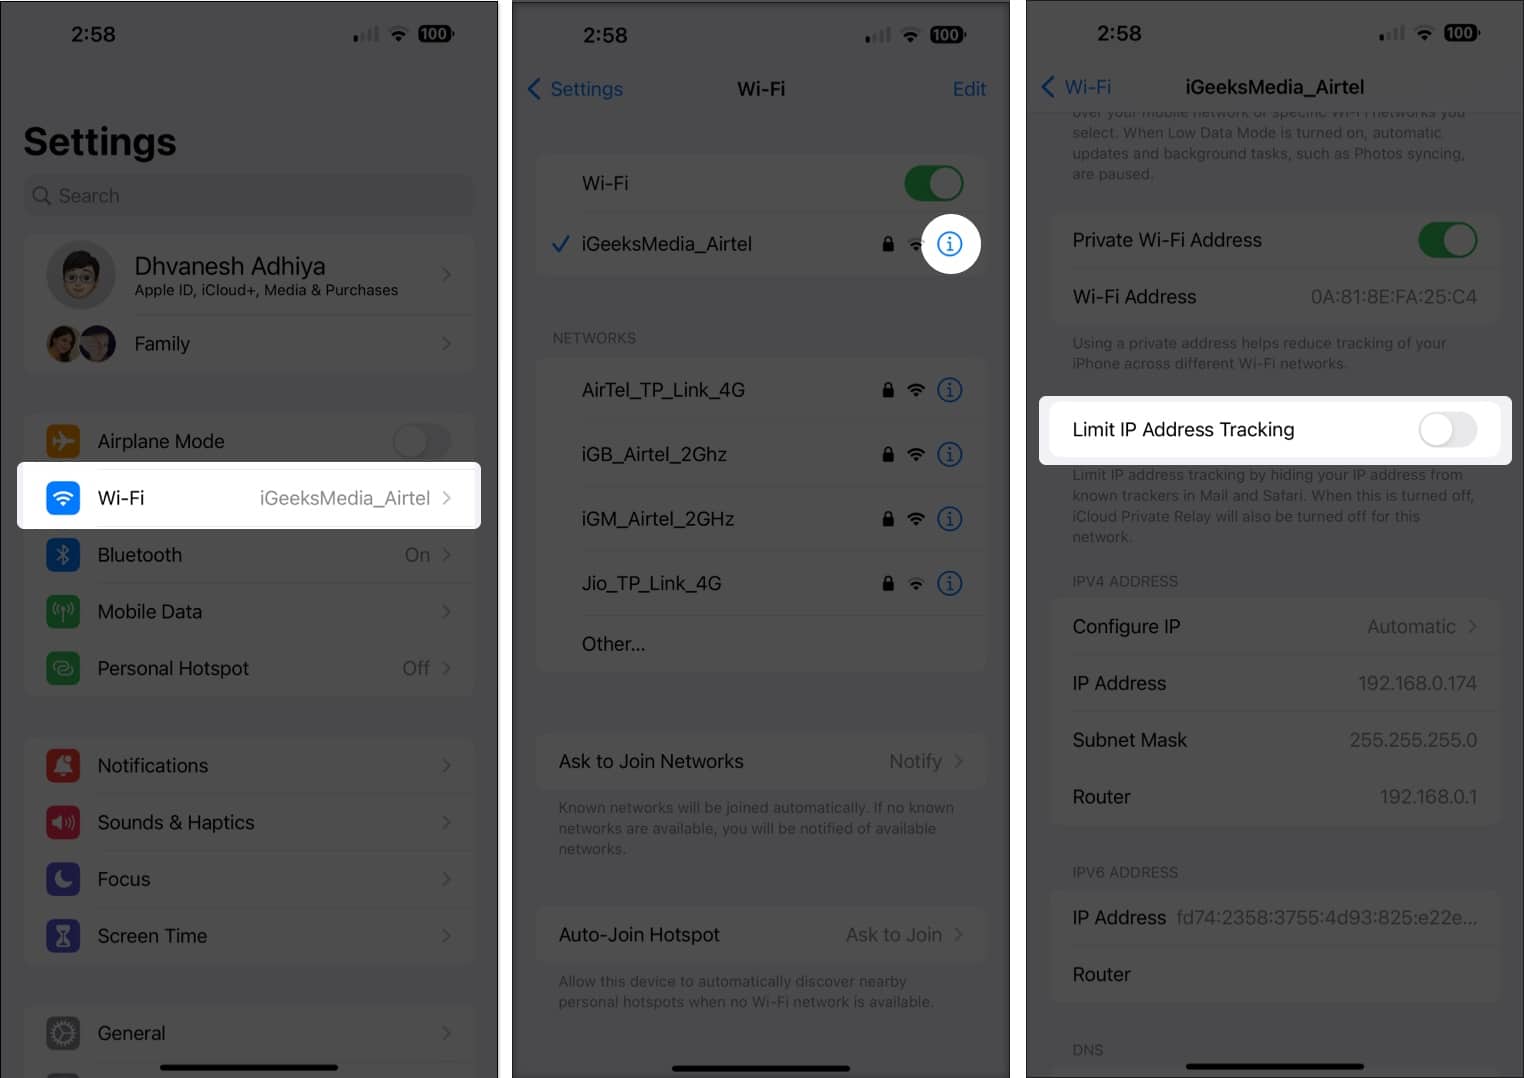
For Wi-Fi:
- Open Settings, and tap Wi-Fi.
- Tap the (i) icon next to the connected Wi-Fi network.
- Scroll down and toggle off Limit IP Address Tracking.
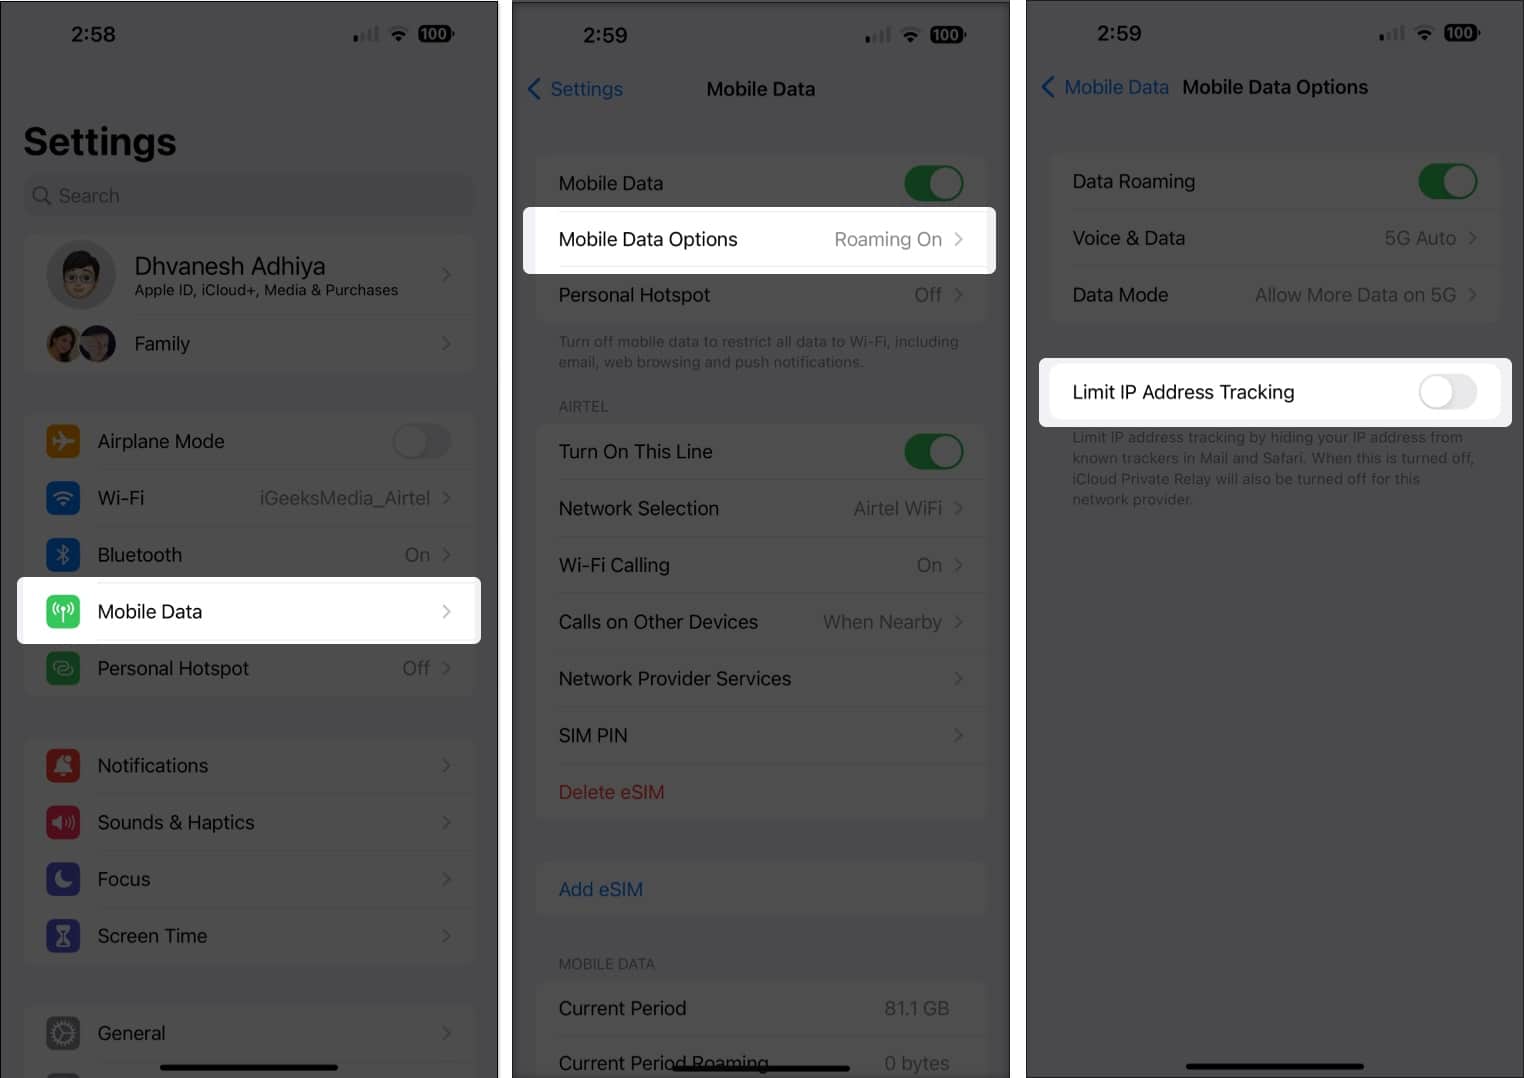
For Cellular data (Mobile data):
- Open Settings.
- Select Cellular/Mobile data.
- Tap Cellular Data Options (Mobile Data Options).
- Toggle off Limit IP Address Tracking.
On Mac
For macOS Ventura:
- Hit the Apple menu → select System Settings.
- Select Network from the sidebar.
- Now, choose the network service from the right.
- Click the Details button (three dots).
- Choose Limit IP address tracking.
For macOS Monterey:
- Go to Settings → Network and select the network from the list.
- Now, click the checkmark next to Limit IP Address Tracking.
Set the specificity of your IP address location
You can customize how Private relay should hide your IP address to access the web content.
On iPhone and iPad
- Open Settings → tap your name (Apple ID).
- Select iCloud → choose Private Relay.
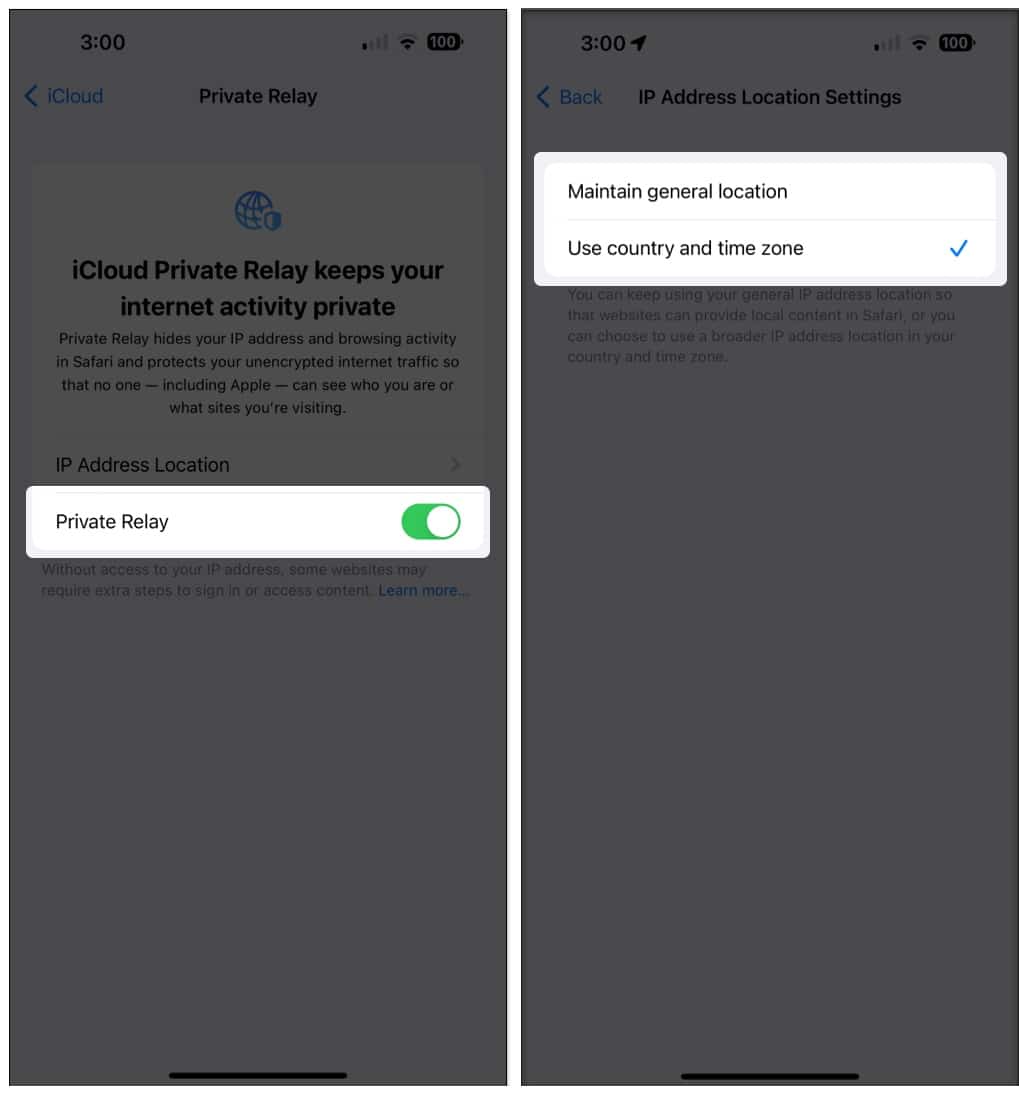
- Tap IP Address Location and choose one of these:
- Maintain general location: Let sites show you localized content in Safari while your IP address stays hidden.
- Use country and time zone: Use a wider location for your IP address while still being inside your country and time zone.
On Mac
- Click the Apple menu → select System Settings.
For macOS Monteratry and earlier, choose System Preferences. - Click your name(Apple ID) → select iCloud.
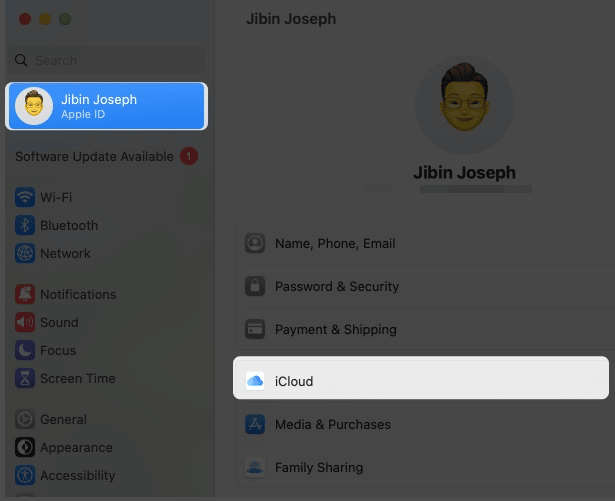
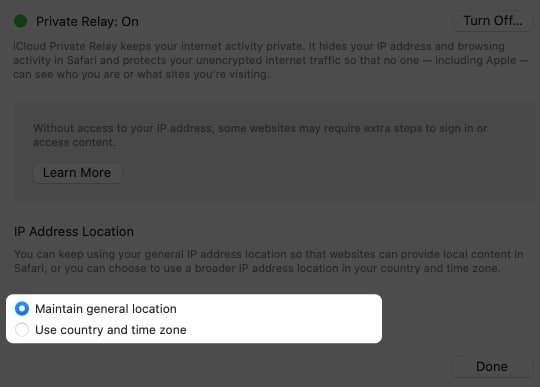
- Click Private Relay.

- Here, under IP address location, choose one of these:
- Maintain General Location: To let sites show you localized content while hiding your IP address.
- Use Country and Time Zone: Use a broader location for your IP address while being in your country and time zone.
FAQs
No. iCloud Private Relay is not a VPN from Apple, although it encrypts your data and hides your IP Address. This is because VPNs create a virtual private network; meanwhile, Private Relay doesn’t.
No. Despite taking an additional step by encrypting user data, Private Relay ensures to not affect your connection speed by a huge margin to be noticeable.
No. Currently, Private Realy is a feature exclusive to Safari. However, we are unsure if this feature will be deployed to other Apple or third-party services.
Stay safe on the internet
iCloud Private Relay is a huge step by Apple in protecting user data. While the feature is great, it is still at its infant stage, and hence many websites and other online services are yet to adopt it. Hence, we have also included the steps for both enabling and disabling iCloud Private Relay on iPhone, iPad, and Mac.
More interesting reads to check out
