Key Takeaways

- Stolen Device Protection adds extra security to your iPhone when away from familiar locations, requiring biometric checks for sensitive actions.
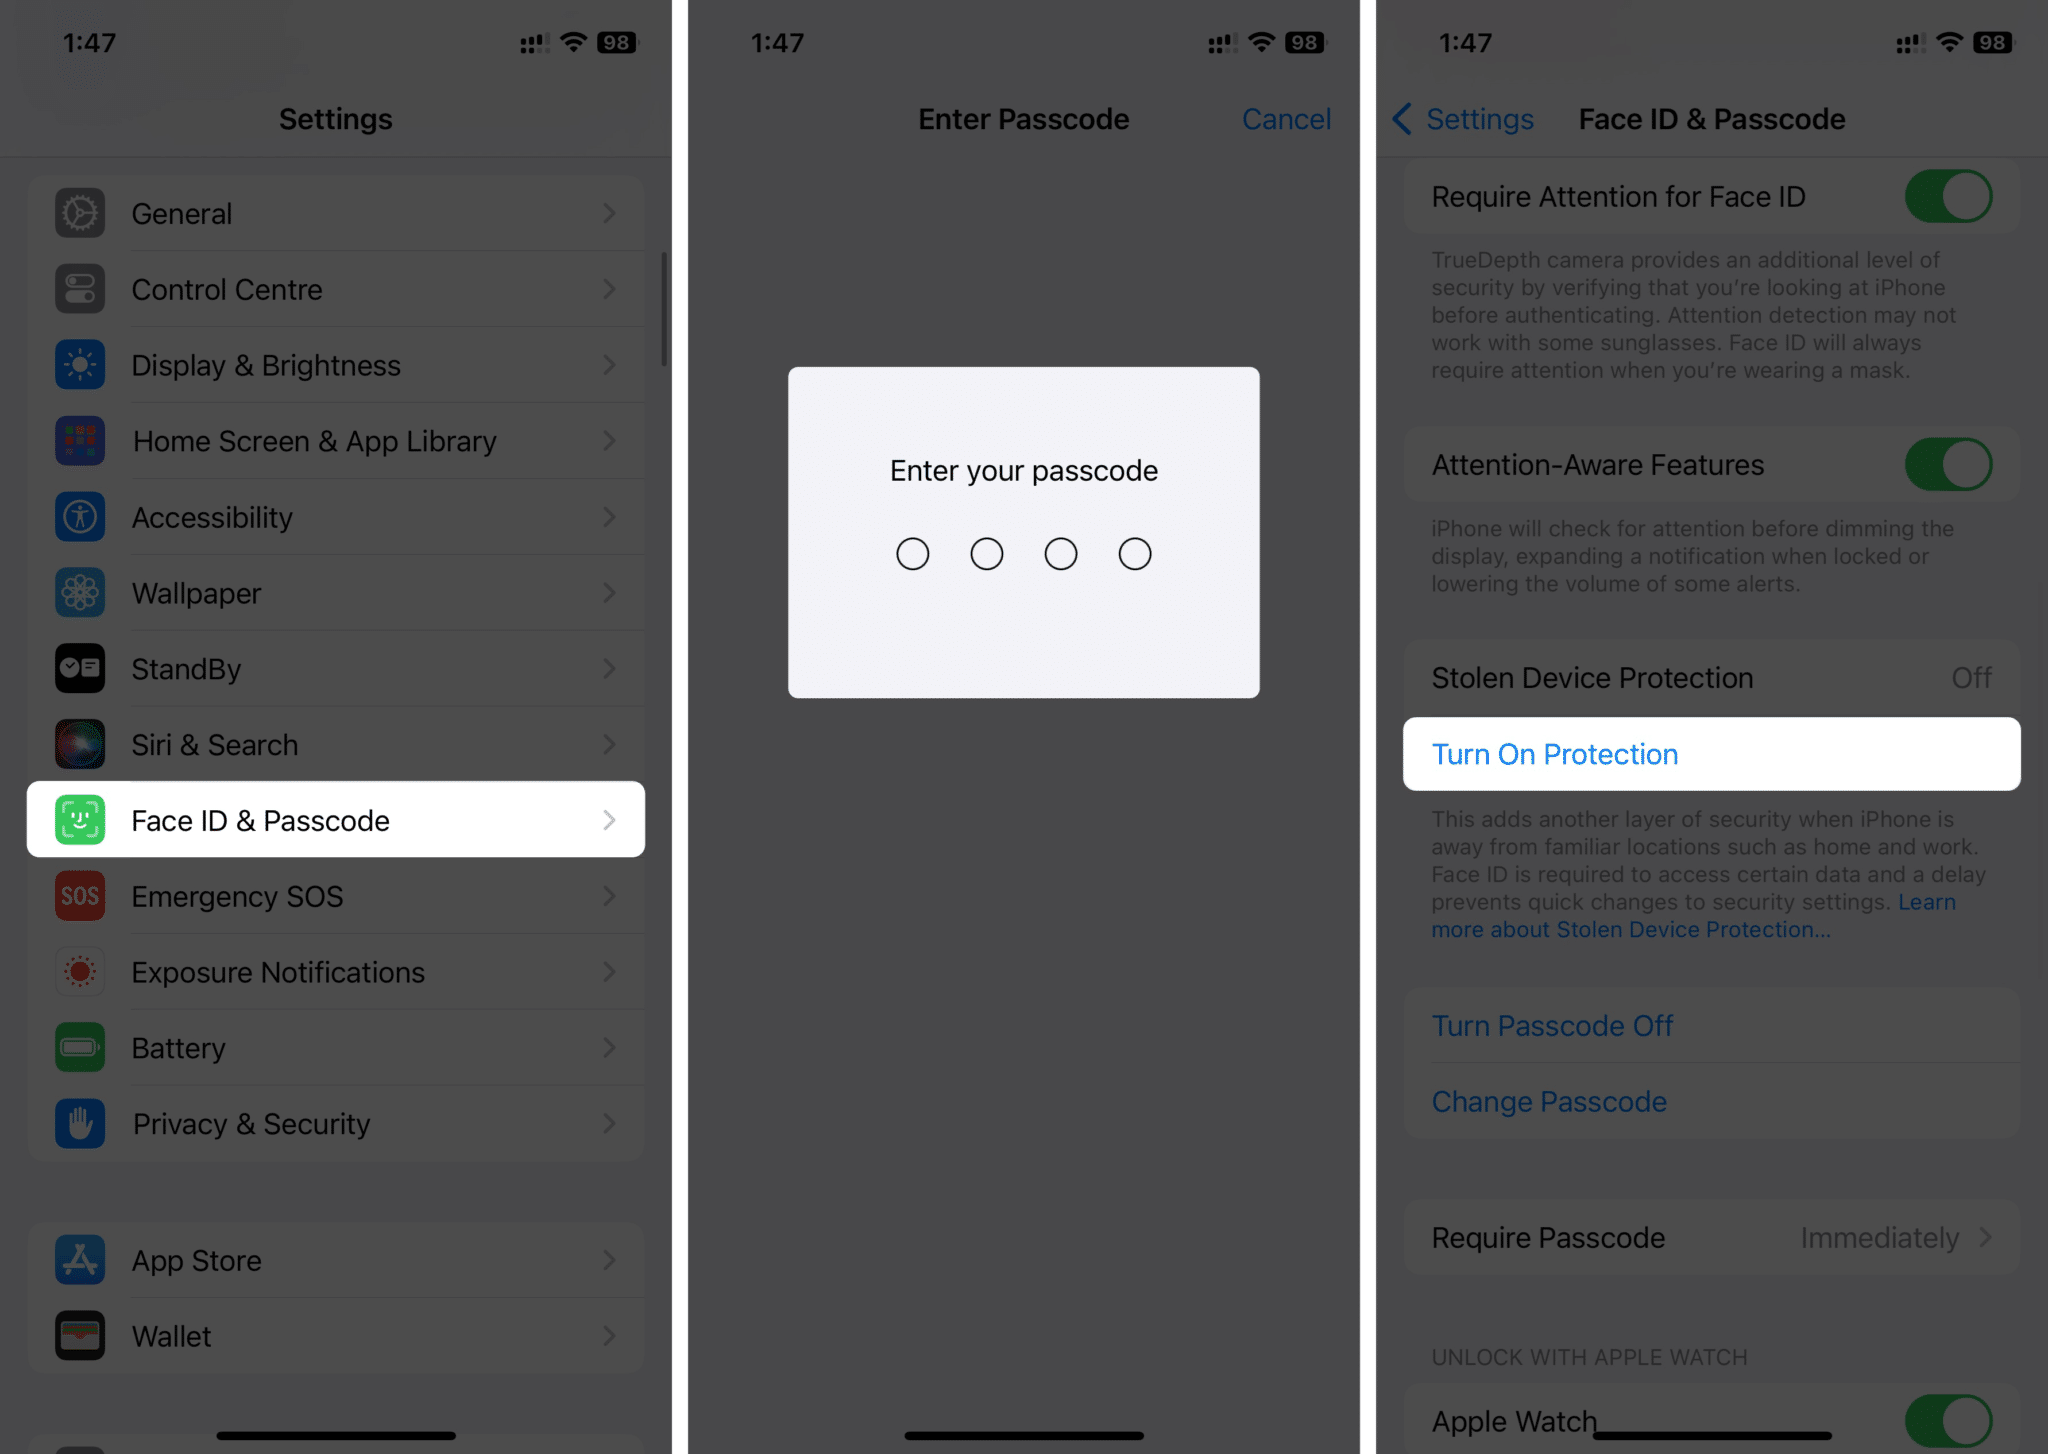
- To enable Stolen Device Protection on your iPhone, open Settings > Go to Face ID & Passcode > Enter your Passcode > Scroll down and tap Turn On Protection under Stolen Device Protection.
Since iPhones are popular and expensive, they often get stolen. Although Find My helps locate your device, it doesn’t ensure your iPhone’s data is safe from thieves. To cope with this issue and secure your data in case of theft, Apple has released a new feature called Stolen Device Protection with iOS 17.3.
This blog will help you understand what Stolen Device Protection is and how you can enable it on your iPhone.
What is Stolen Device Protection and how does it work on iPhone?

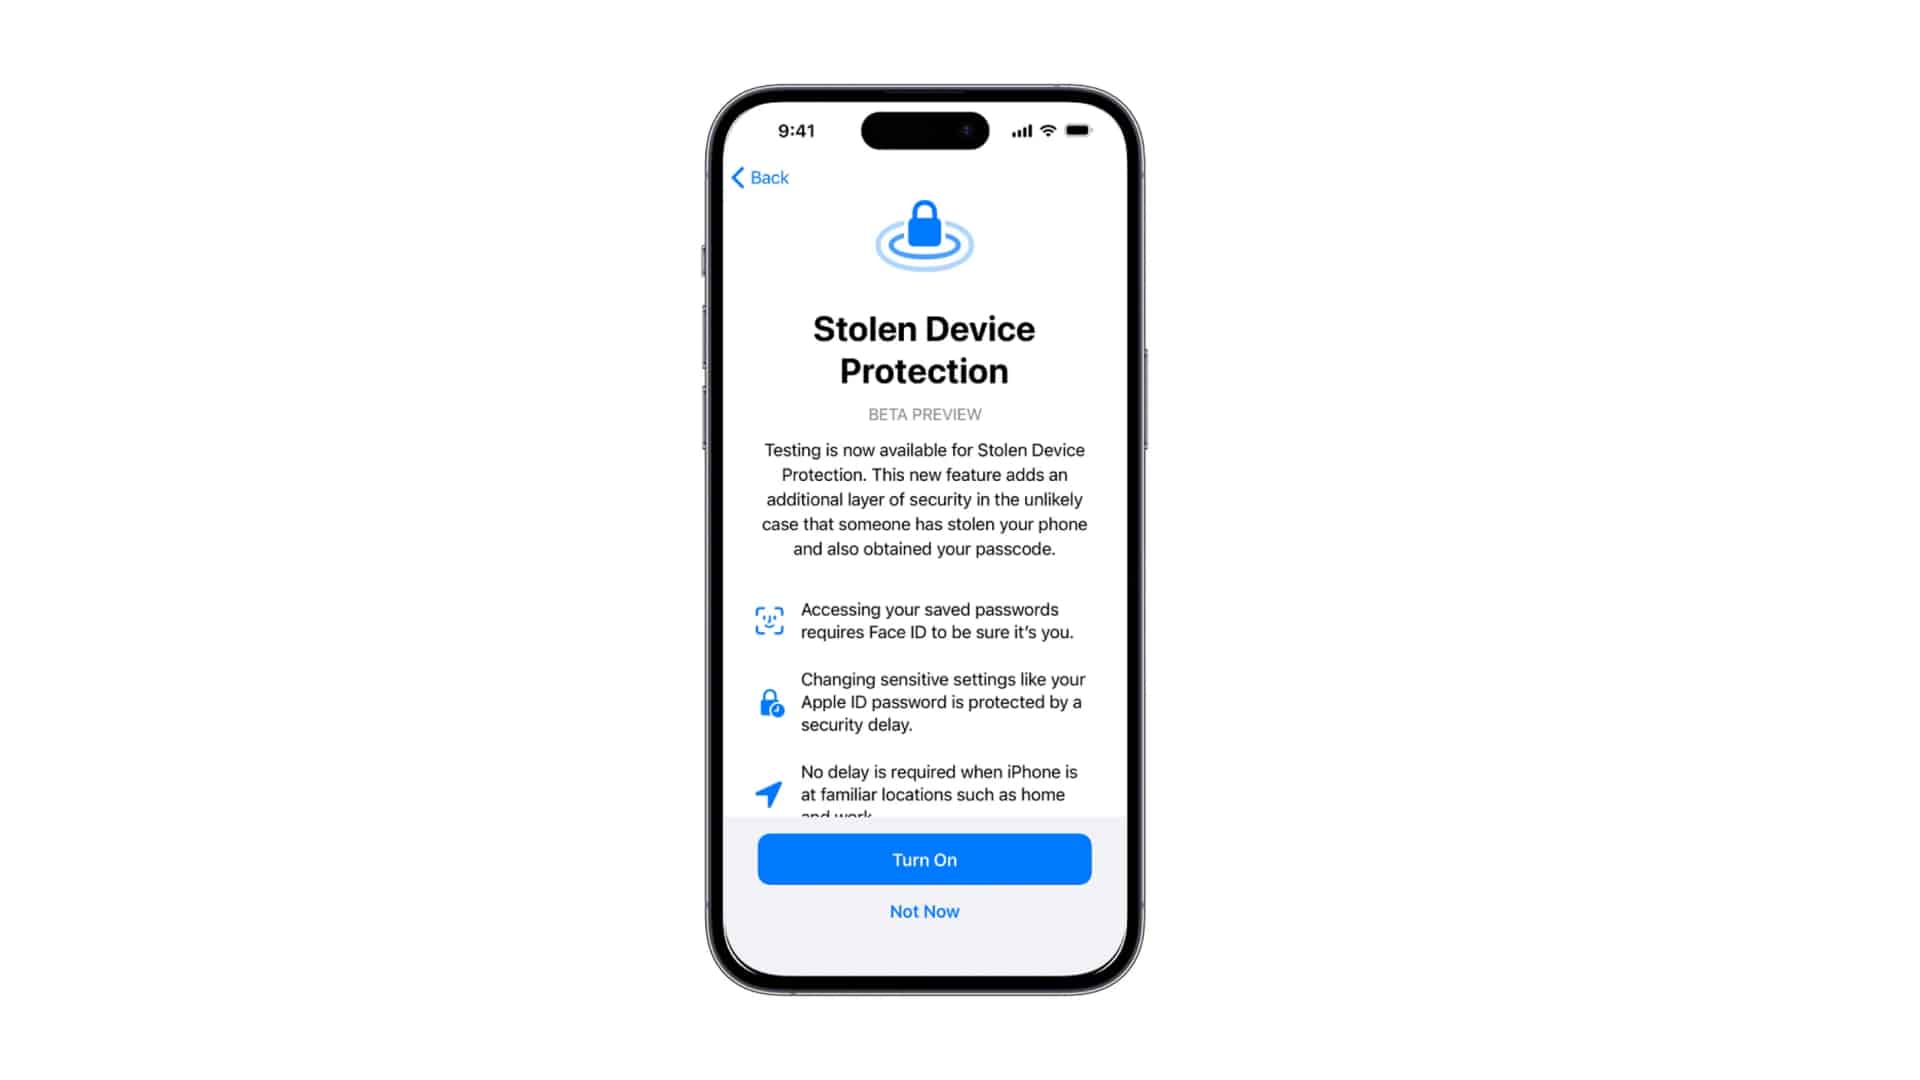
Stolen Device Protection is an additional layer of security that prevents anyone from changing sensitive information on your iPhone, meaning when stolen, the thief won’t be able to access any of your private data without Face ID/Touch ID.
It’s an extra security toggle that protects your iPhone against specific thefts. Once enabled, it’s hard for someone to alter your iPhone’s data even if they stole your iPhone knowing your passcode.
Earlier, the Wall Street Journal had reported a disturbing trend in iPhone thefts. Thieves were using long-range cameras to capture users entering their passcodes in public, later exploiting this information to alter Apple ID settings and access financial accounts.
With Stolen Device Protection enabled, the iPhone asks for Face ID/Touch ID when accessing or changing sensitive information, such as Apple ID passwords, saved passwords, auto-fill card details, and more.
Suppose someone other than you tries to change your Apple ID password. In that case, the system will ask for your Face ID/Touch ID and will also start a one-hour timer, after which it’ll ask the user to provide a valid Face ID/Touch ID again.
Stolen Device Protection won’t affect your usage when turned on. If your iPhone remembers your significant locations, such as home or work, it won’t ask for this extra layer of protection.
We hope this doesn’t happen, but when your iPhone gets stolen, here’s what the thief can’t do on your iPhone:
- Access your saved passwords
- Auto-fill your card or payment details in Safari
- Turn off Lost Mode
- Erase all contents & settings
- Apply for a new Apple Card
- View Apple Card virtual number
- Few Apple Cash/Savings Actions
- Set up new devices
- Turn off Stolen Device Protection
Requirements to use Stolen Device Protection
If you want to turn on Stolen Device Protection, you need to ensure that your iPhone meets these requirements:
- Your iPhone should be running iOS 17.3 or above.
- 2FA (Two-Factor Authentication) set up for Apple ID
- Device Passcode turned on
- Face ID/Touch ID enabled
- Find My enabled
Plus, if you have significant locations (such as Home or Work) set up, it can be beneficial.
How to enable Stolen Device Protection on iPhone
- Open Settings on your iPhone.
- Select the Face ID & Passcode option. Enter your Passcode when prompted.
- Scroll down and tap Turn On Protection under the Stolen Device Protection option.

- You should see “On” next to Stolen Device Protection now, meaning it’s enabled on your iPhone.
Later, if you don’t want to use it, select Turn Off Protection.
Stolen Device Protection Enhances Security…
Apple’s Stolen Device Protection is a valuable feature, enhancing your iPhone’s security when detected in unfamiliar locations. A lot of your data will remain safe even if someone gets their hands on your iPhone and knows your iPhone’s Passcode.
We recommend you immediately turn on the option when upgrading your iPhone to the iOS 17.3 update. If you have any other queries or suggestions regarding this guide, please leave them in the comment section below.
Read more:
- 6 Tips to Secure your iPhone and iPad Lock Screen
- How to check iPhone Activation Lock status online
- How to Set up Two-Factor Authentication (2FA) for Apple ID
