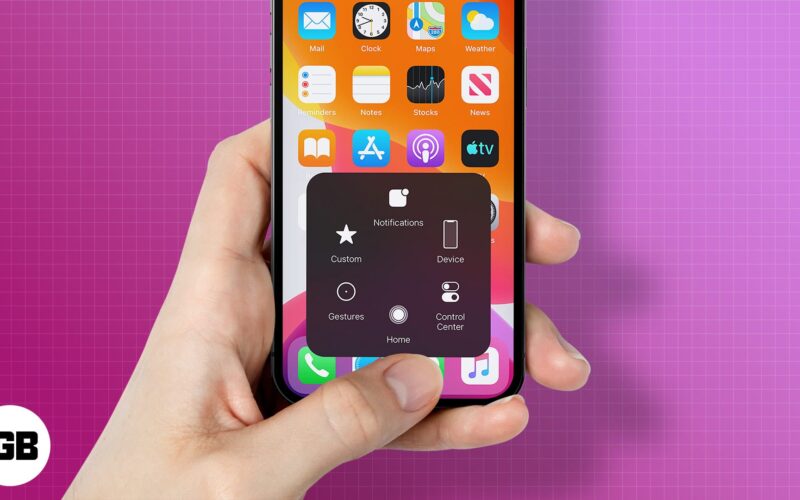
When you use AssistiveTouch on iPhone or iPad, you unlock a world full of shortcuts and hacks. Several potent tasks like screenshots, volume adjustment, device restart, etc., are just a tap away.
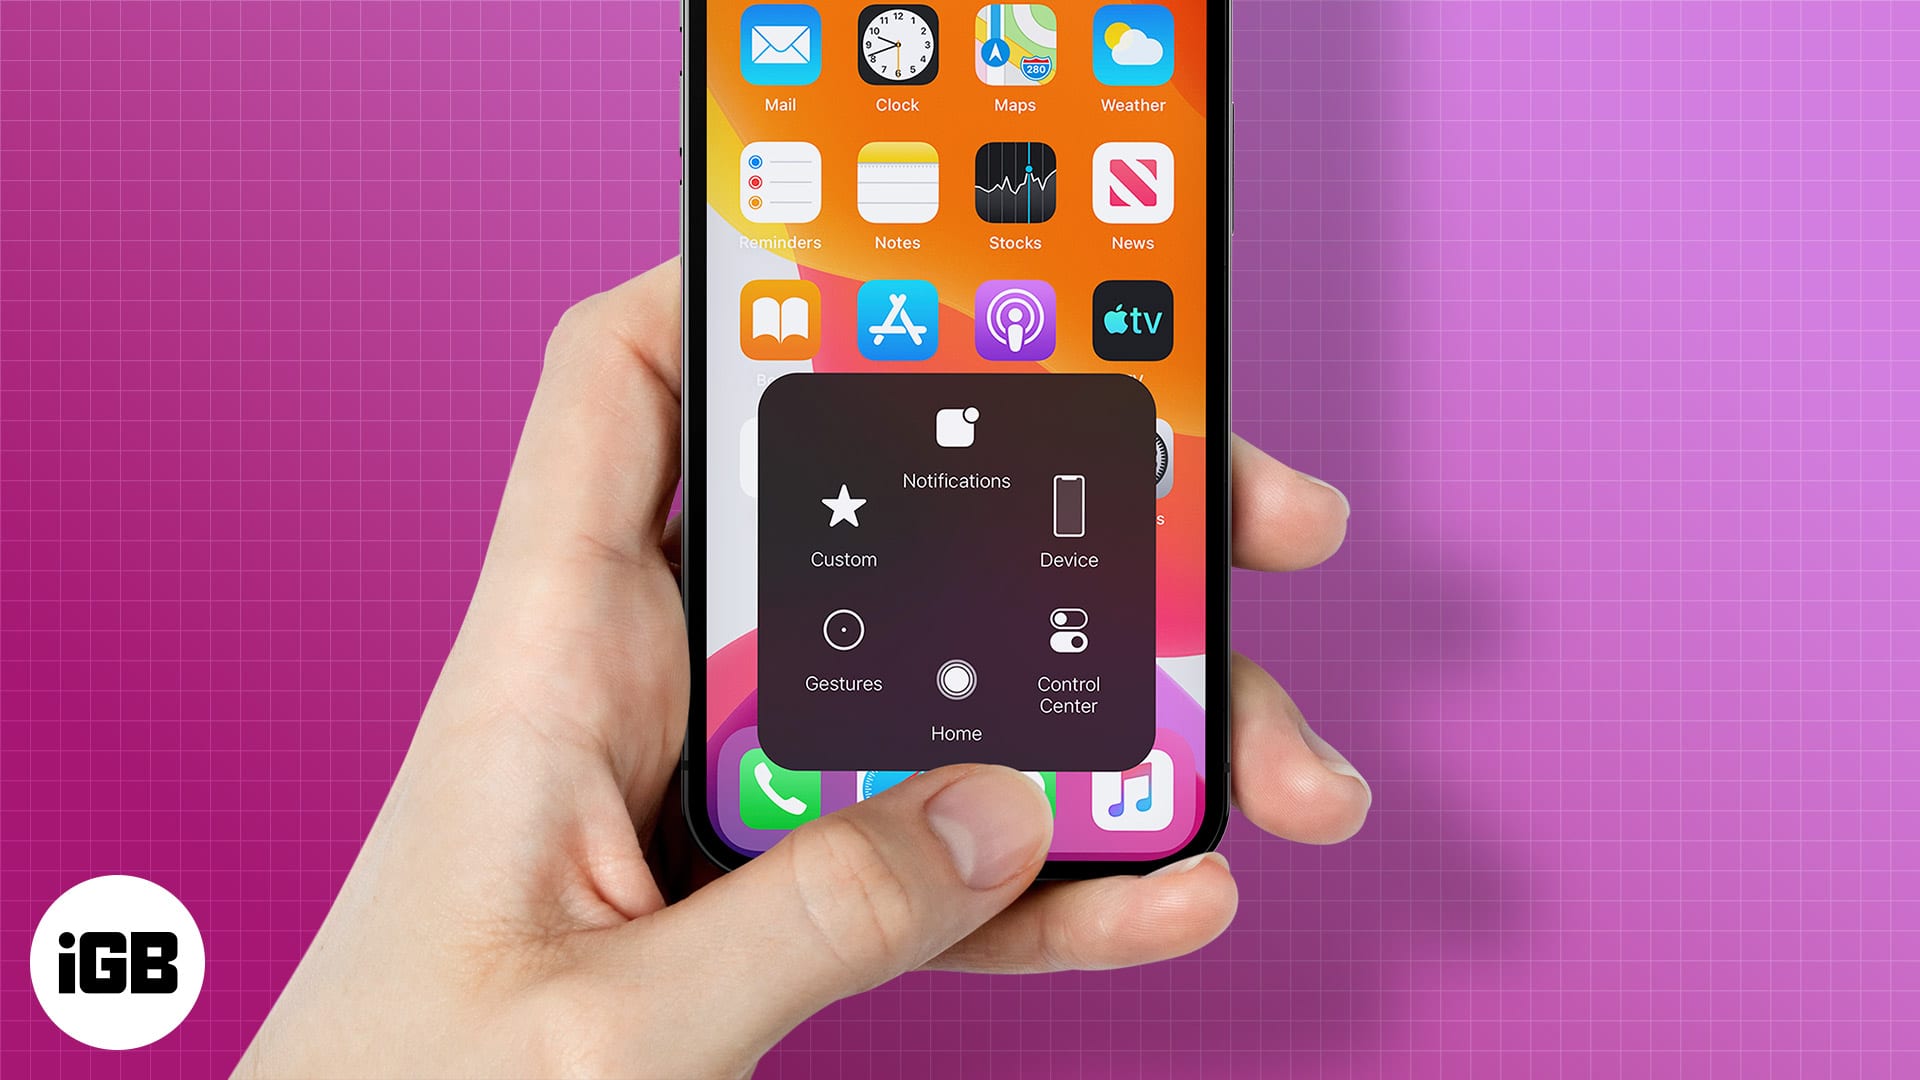
And the tips and tricks to use and master AssistiveTouch are just a scroll away. So, scroll down and check out the detailed guide.
- What is AssistiveTouch?
- How to turn on AssistiveTouch
- How to use AssistiveTouch
- How to customize the AssistiveTouch menu
- How to add custom AssistiveTouch actions
- How to create new AssistiveTouch gestures
- Connect a pointer device with AssistiveTouch
- How to turn off AssistiveTouch
What is AssistiveTouch?
AssitiveTouch is an impressive accessibility feature that can assist you in various tasks with just a touch. While a boon for differently-abled people, it is also a great asset for regular users.
When enabled, a translucent round button appears on your iPhone or iPad Home Screen. And as and when you touch it, a menu packed with multiple options is revealed.
Select the task you want from the menu and Tada! It will be done. Consider this as a shortcut tab that can help you take screenshots, employ custom gestures, invoke SOS, open App Switcher, and oh so much more.
What’s great is that you can easily customize the Assistive Touch to do your bidding.
How to turn on AssistiveTouch on iPhone or iPad
There are 3 ways to enable AssitiveTouch.
- The first one is to ask Siri. Invoke the iOS assistant and instruct it to Turn on AssistiveTouch.
- The second method is from the device settings:
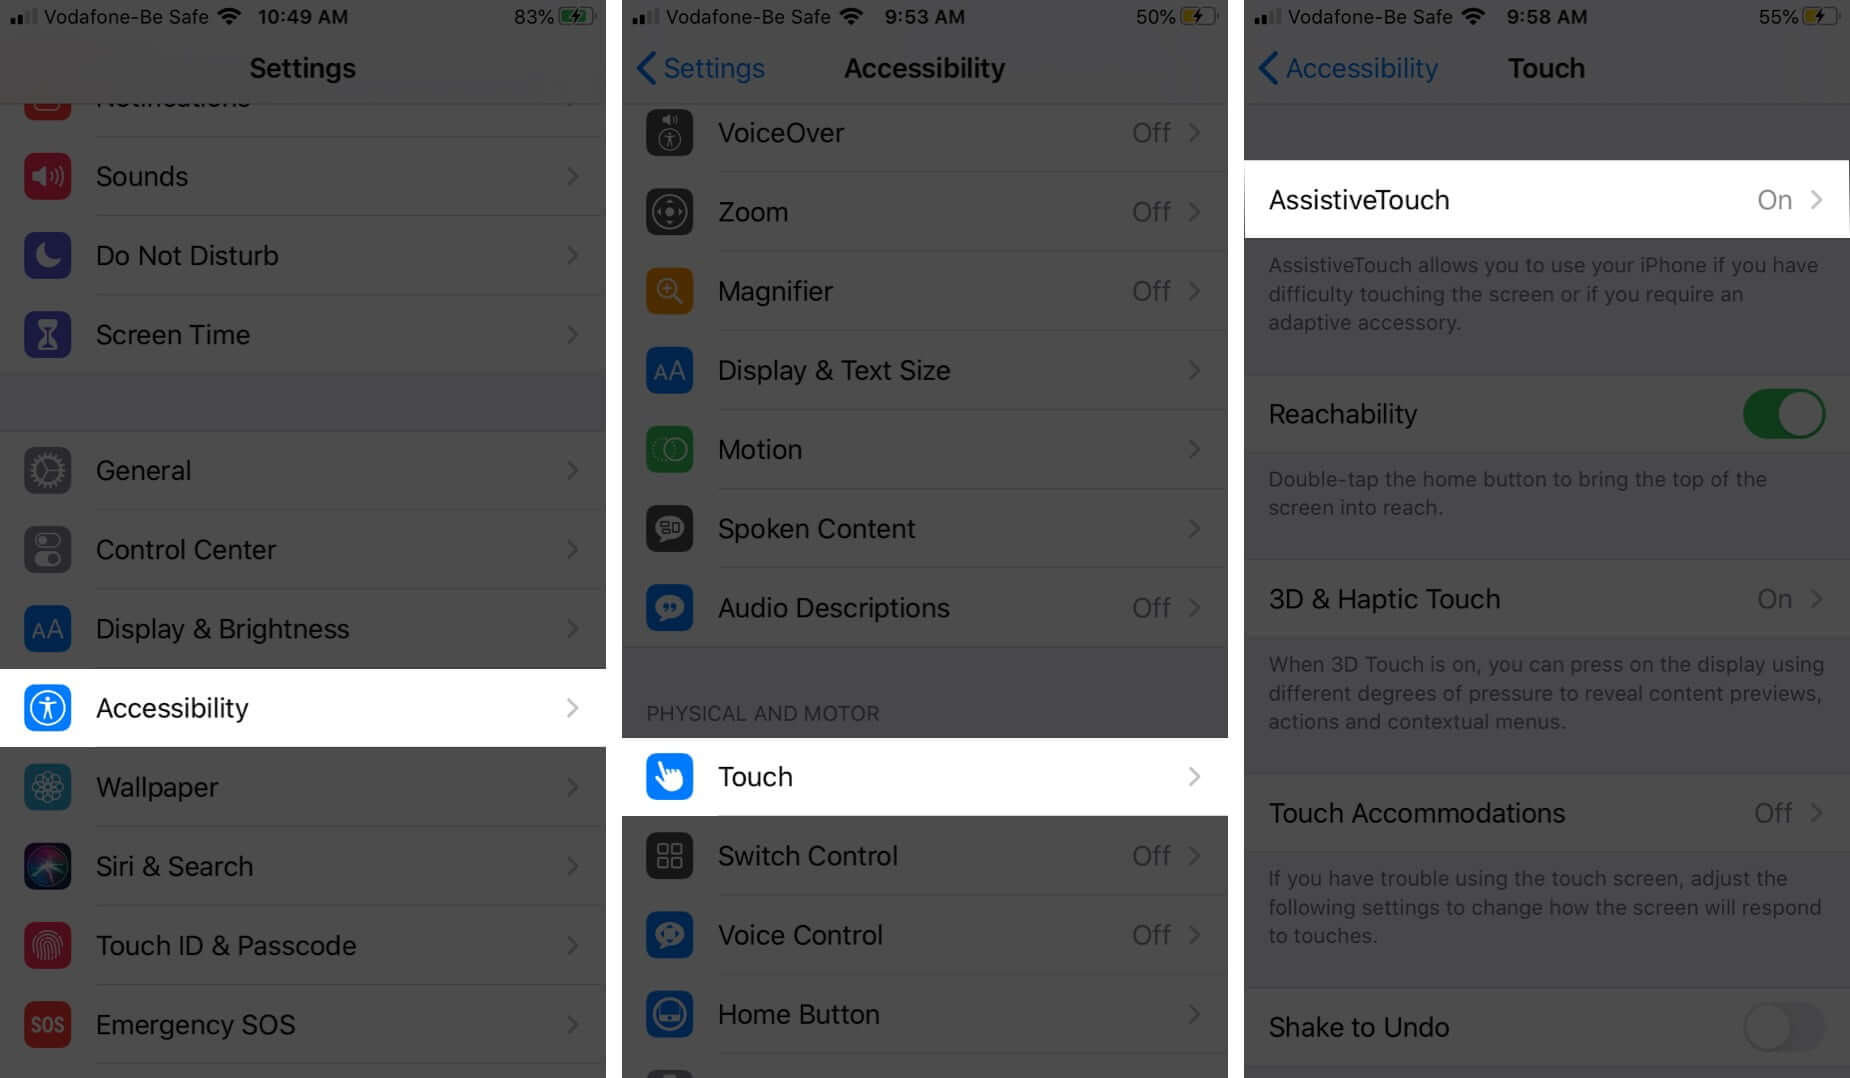
- Launch the Settings app and tap on Accessibility.
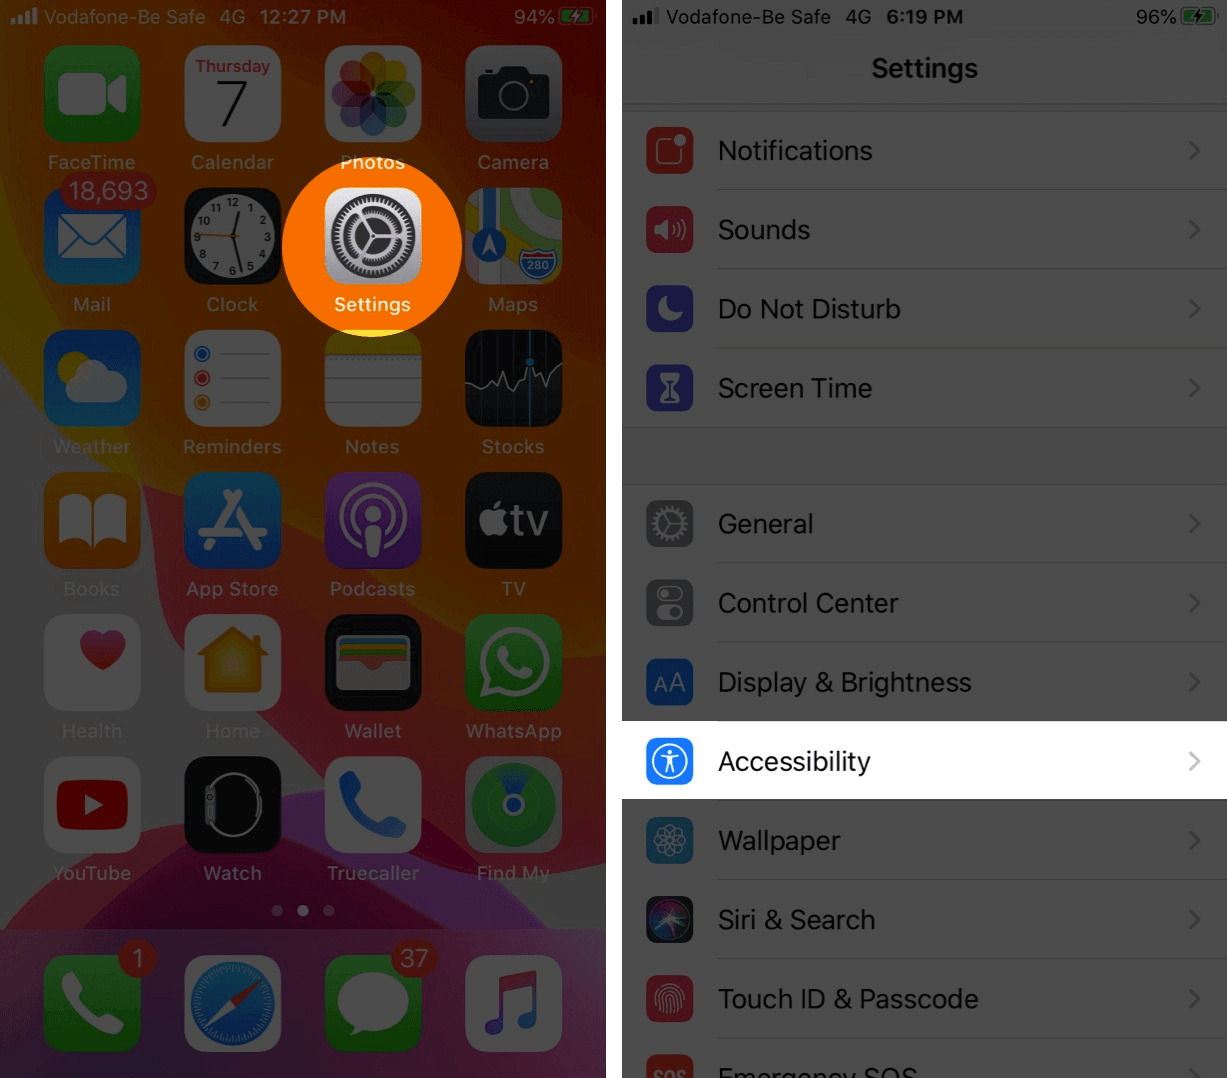
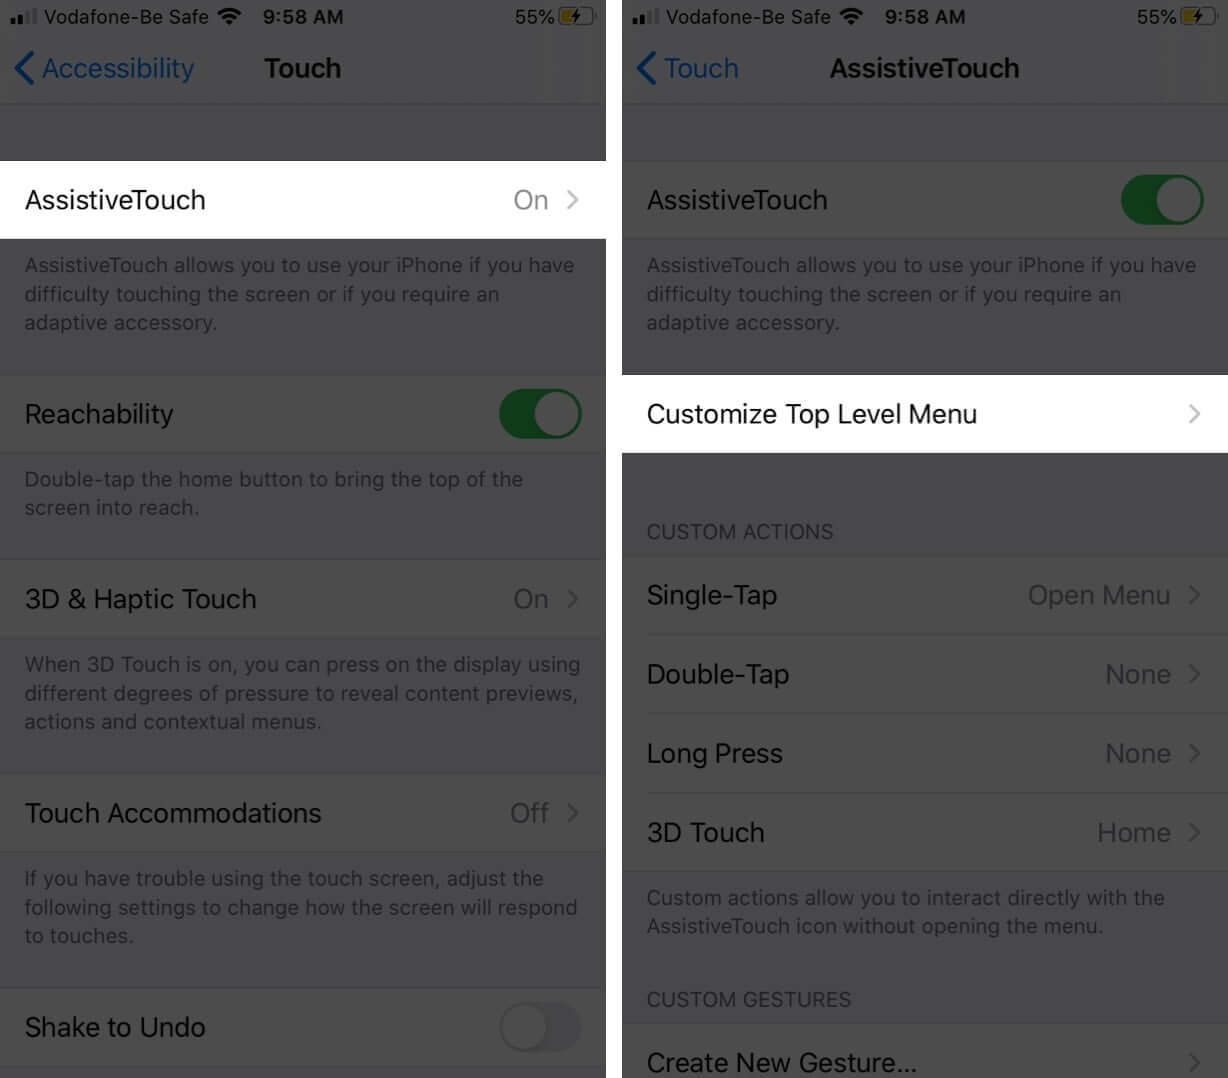
- Tap on Touch and then select AssitiveTouch.
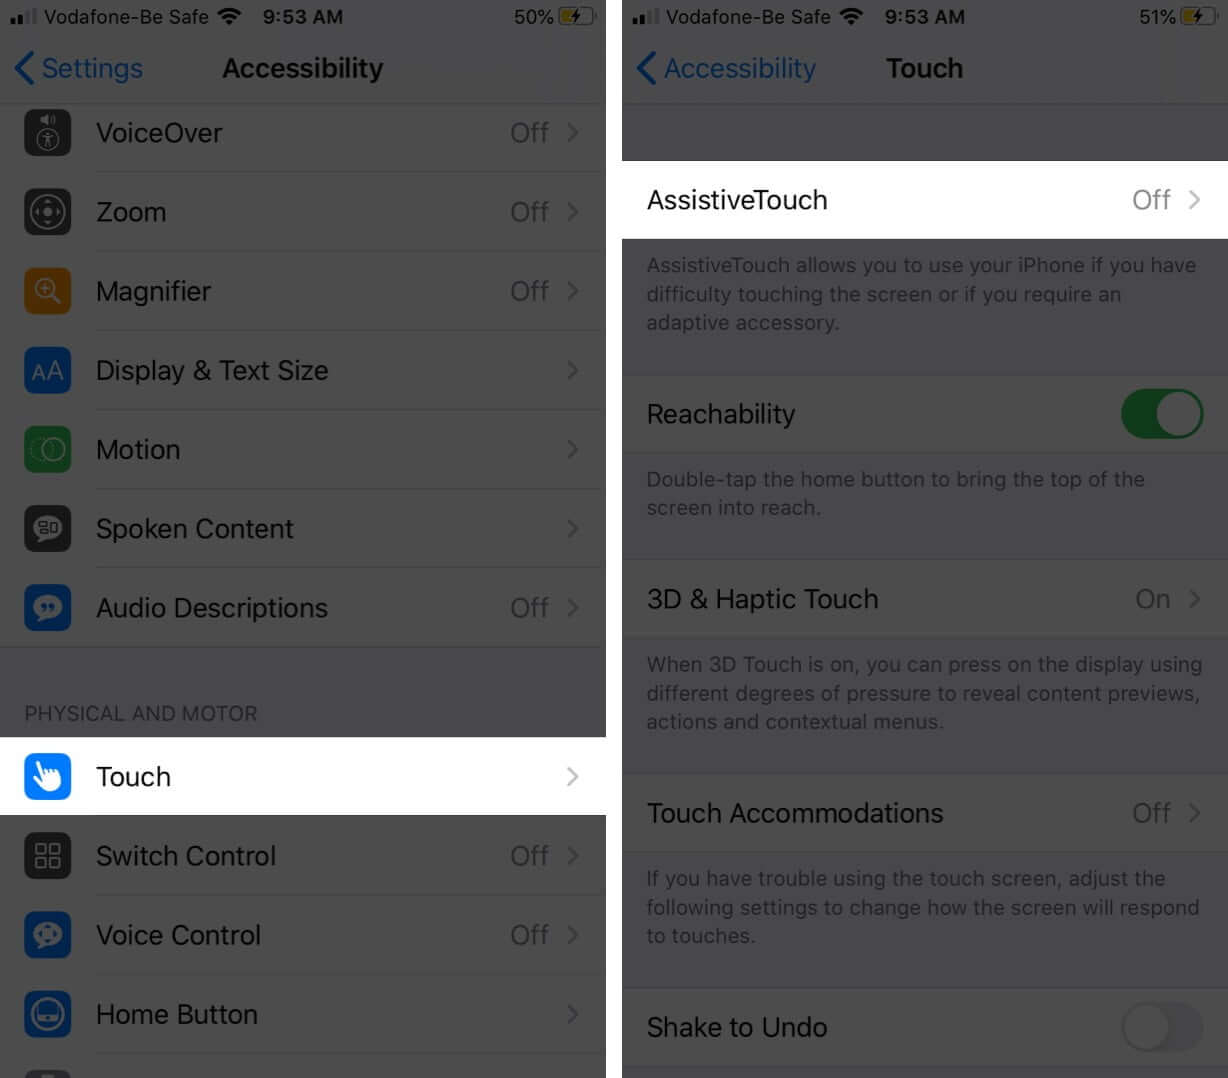
- Now toggle On the switch next to AssistiveTouch.
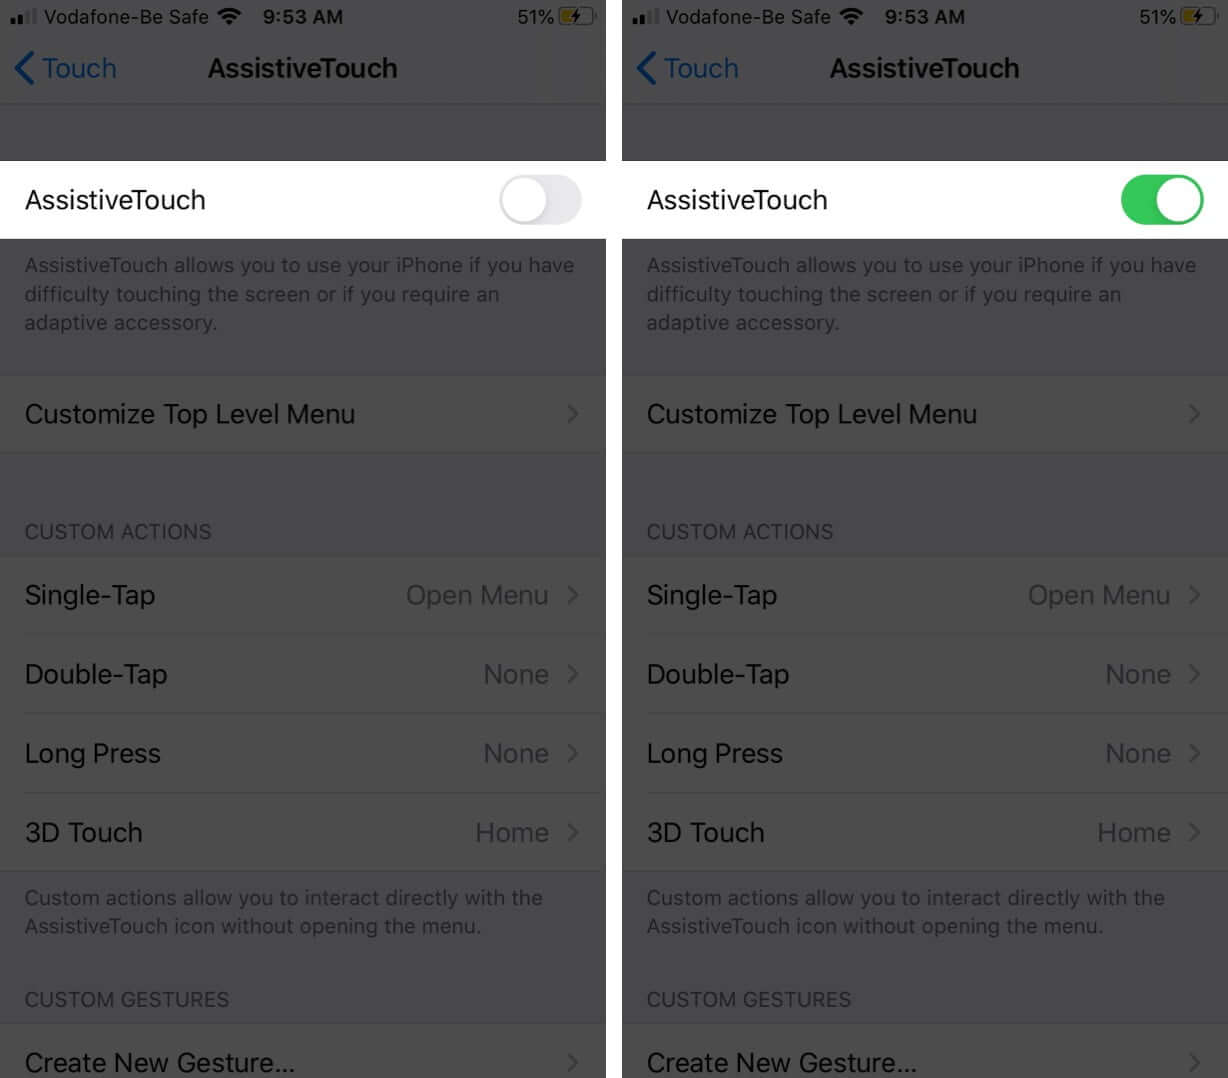
As soon as you turn on the setting, a circular button will appear on the screen. You can drag it to any edge on your iPhone or iPad Home Screen. AssitiveTouch will stay put until you move it again.
- The third way is the Accessibility Shortcut. Go to Settings → Accessibility → Accessibility Shortcut and tap on AssistiveTouch.
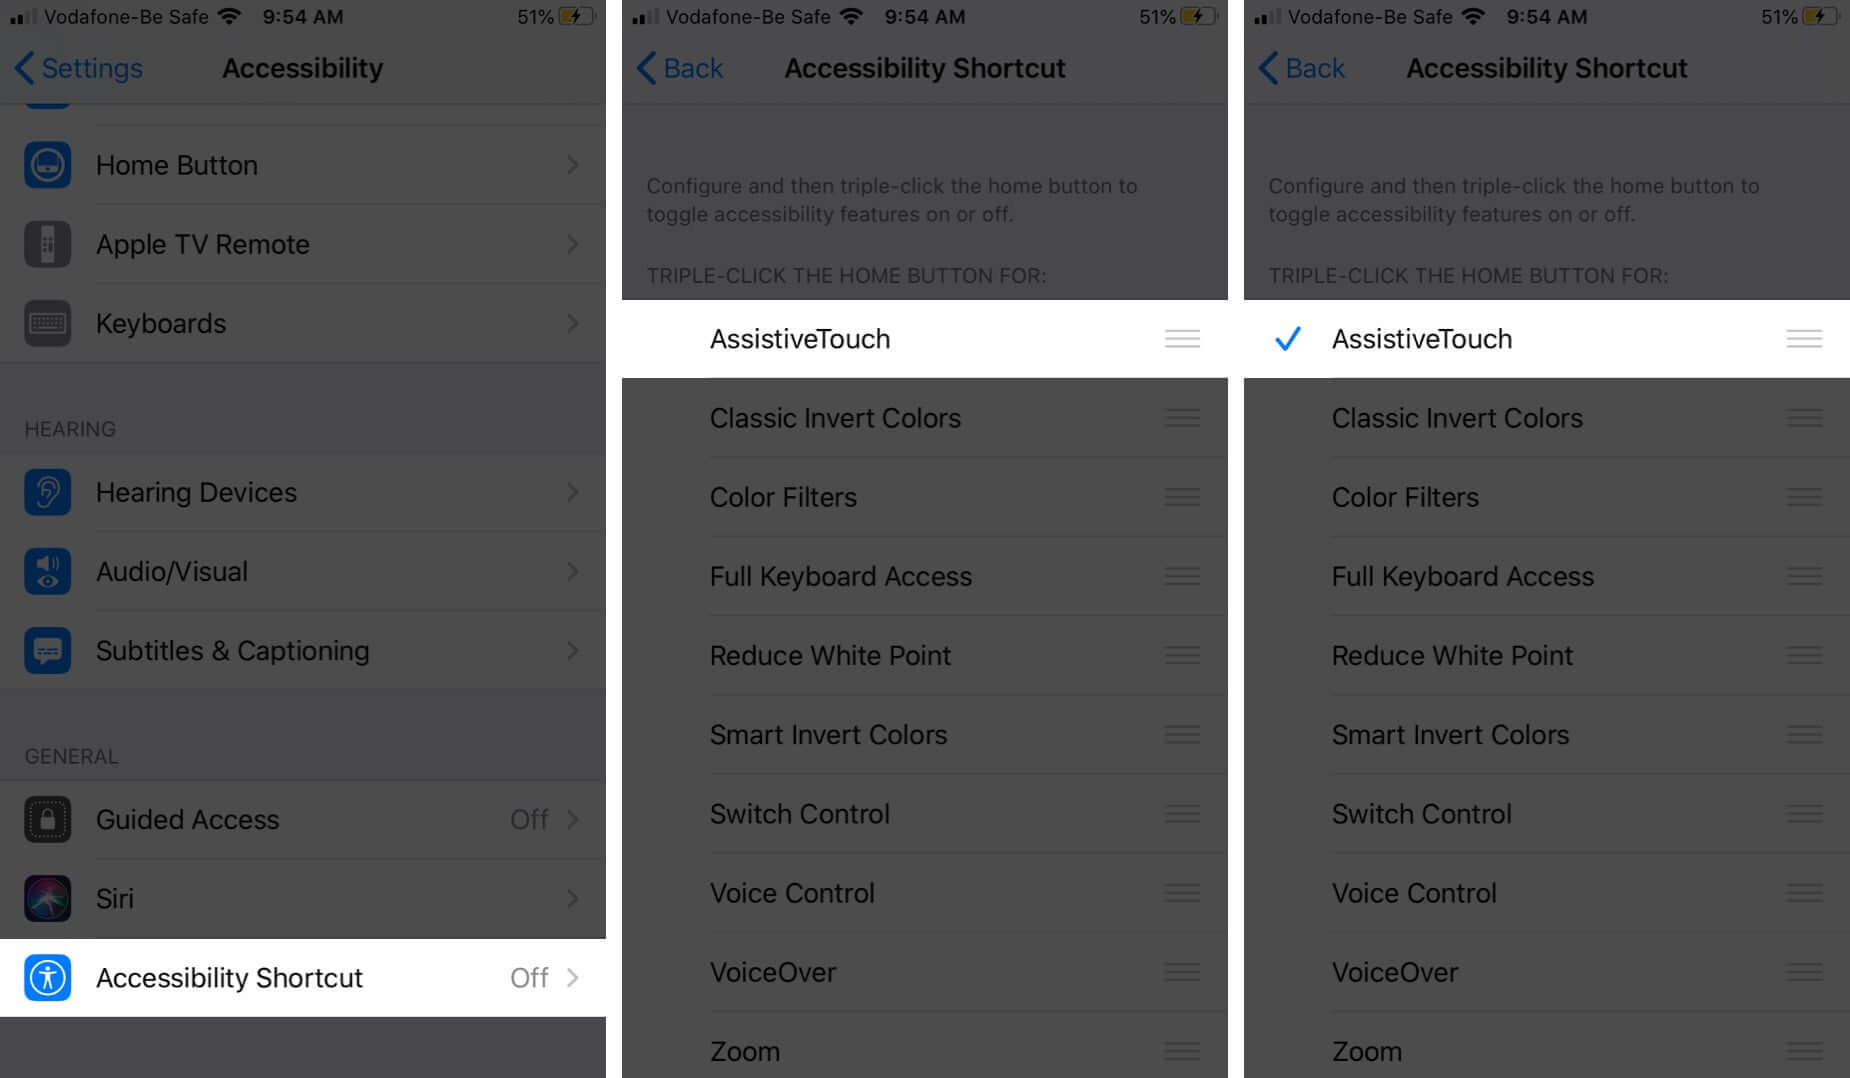
The profit of this method is that you can quickly turn on or off AssitiveTouch by pressing the power button or home button three times.
How to use AssistiveTouch on iPhone and iPad
Assistive Touch is very easy-to-use. By default, when you tap the button once, the menu opens up. And when you tap anywhere outside of the menu, it will close.
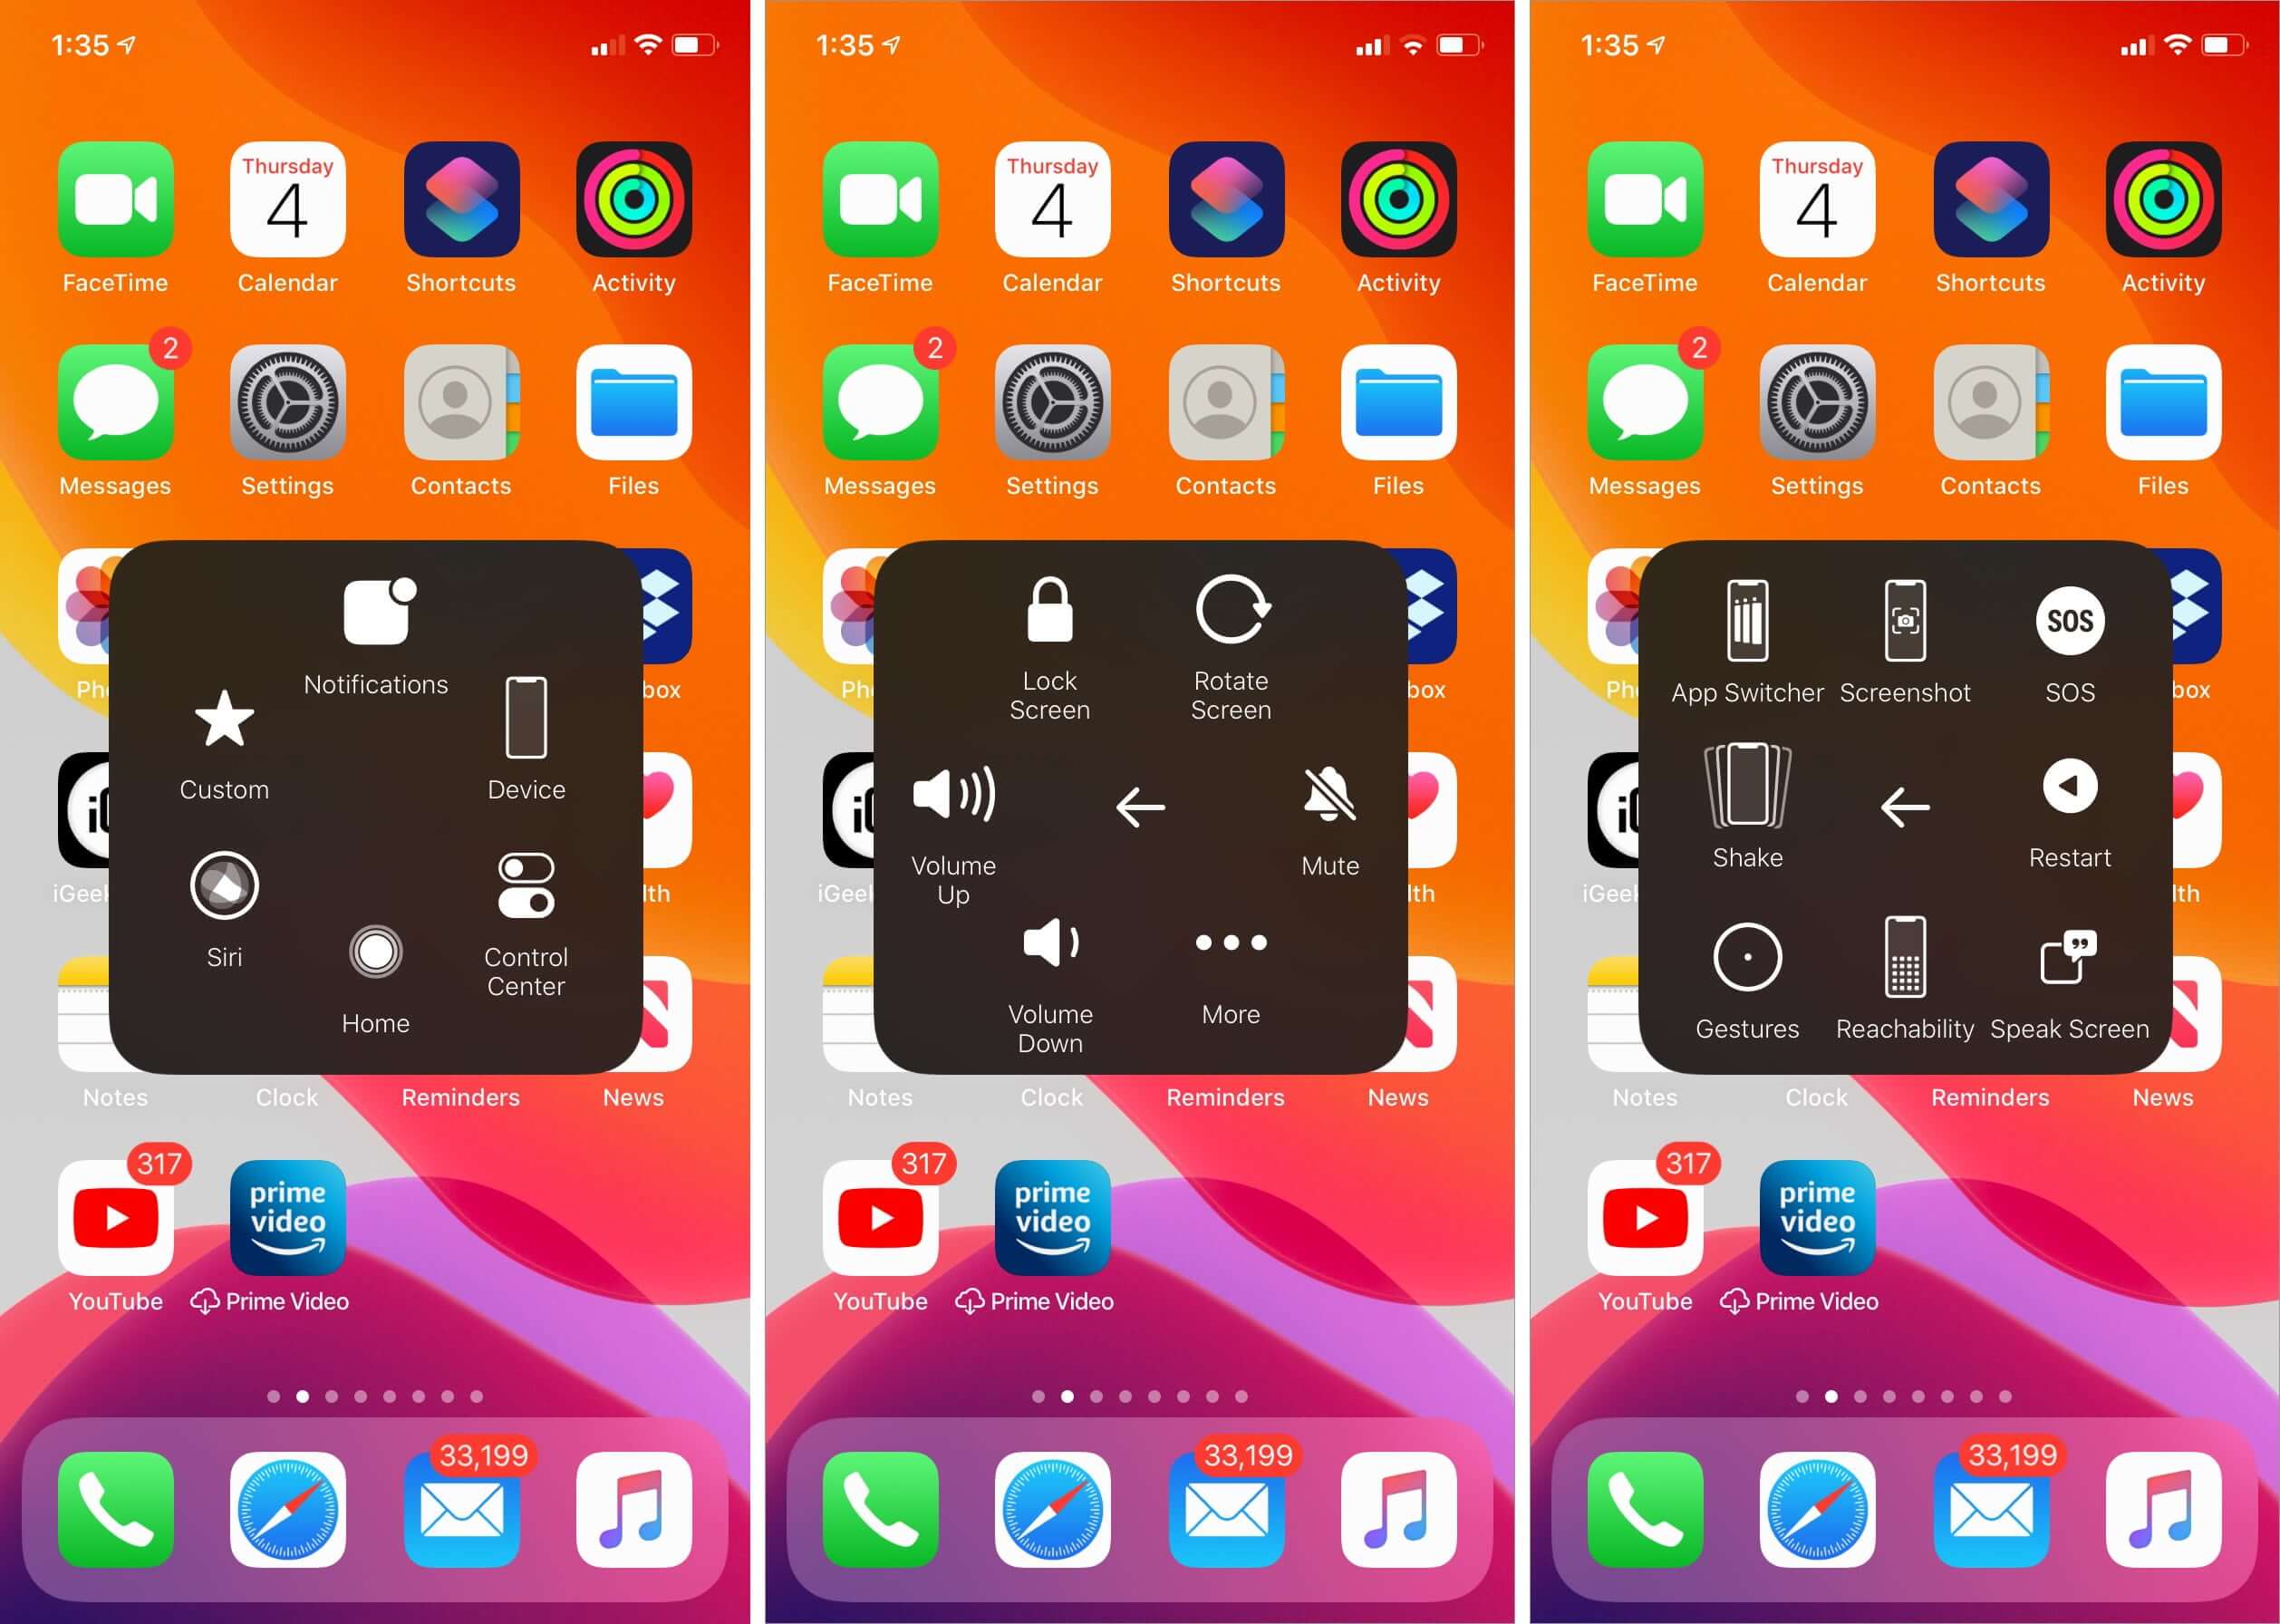
Once active, you can choose any option of your preference from the Assistive Touch menu.
- Notifications: Instantly opens the Notification Center
- Control Center: This brings up the Control Center without using any onscreen gesture
- Device: It opens up a device menu, wherein you can access Rotate Screen, Lock Screen, Volume up, down, or mute
- The More option further shows several other options such as App Switcher, Screenshot, and Restart
- Home: No matter which app you are using, this will quickly take you to the iOS Home Screen
- Siri: This activates Siri
- Custom: Here, you can perform and add custom gestures such as Hold & drag and Pinch & Rotate
While these are default buttons, you can customize the AssitiveTouch menu anytime.
Also dubbed as Top Level Menu, it is quite simple to tinker the AssitiveTouch menu to perfectly suit your requirements.
- Launch Settings → Accessibility → Touch.
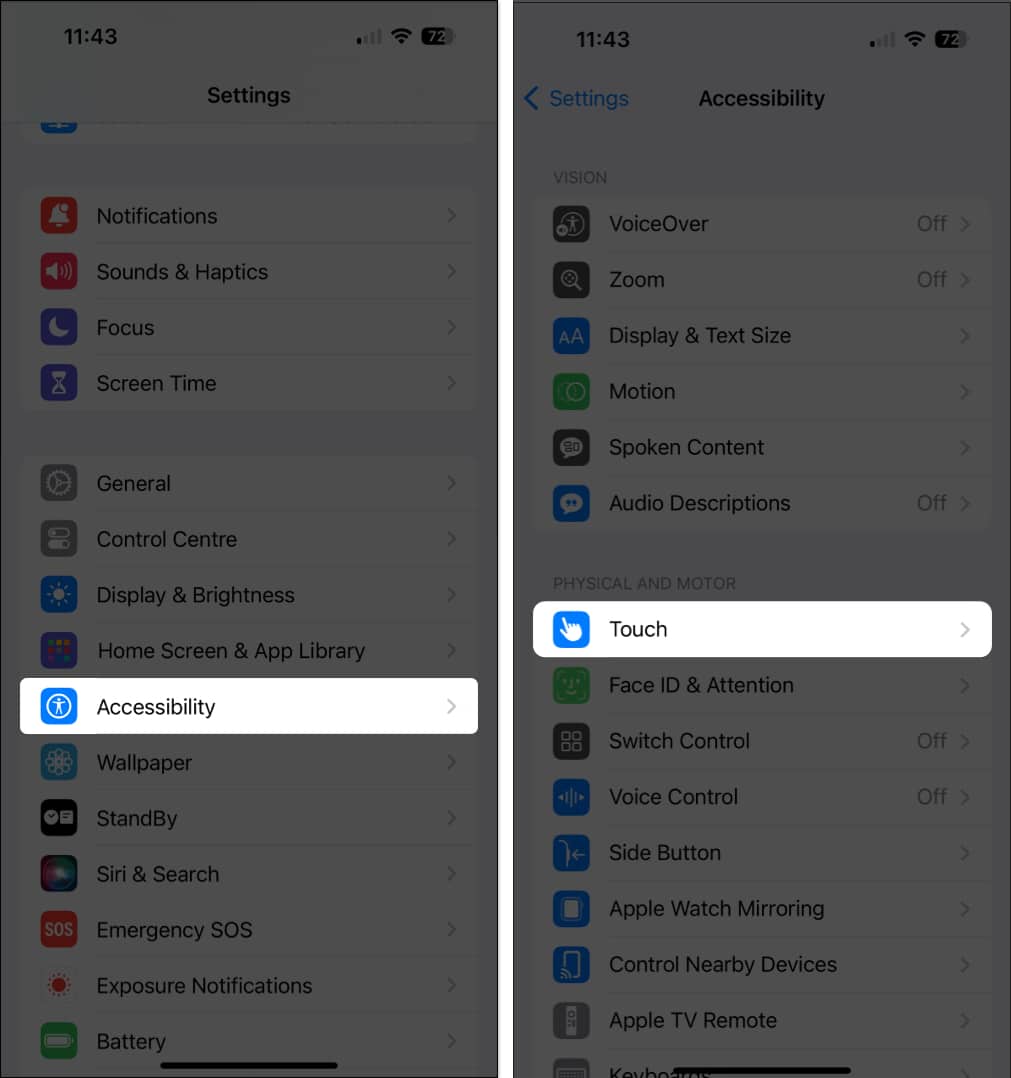
- Tap AssistiveTouch → Customize Top Level Menu.
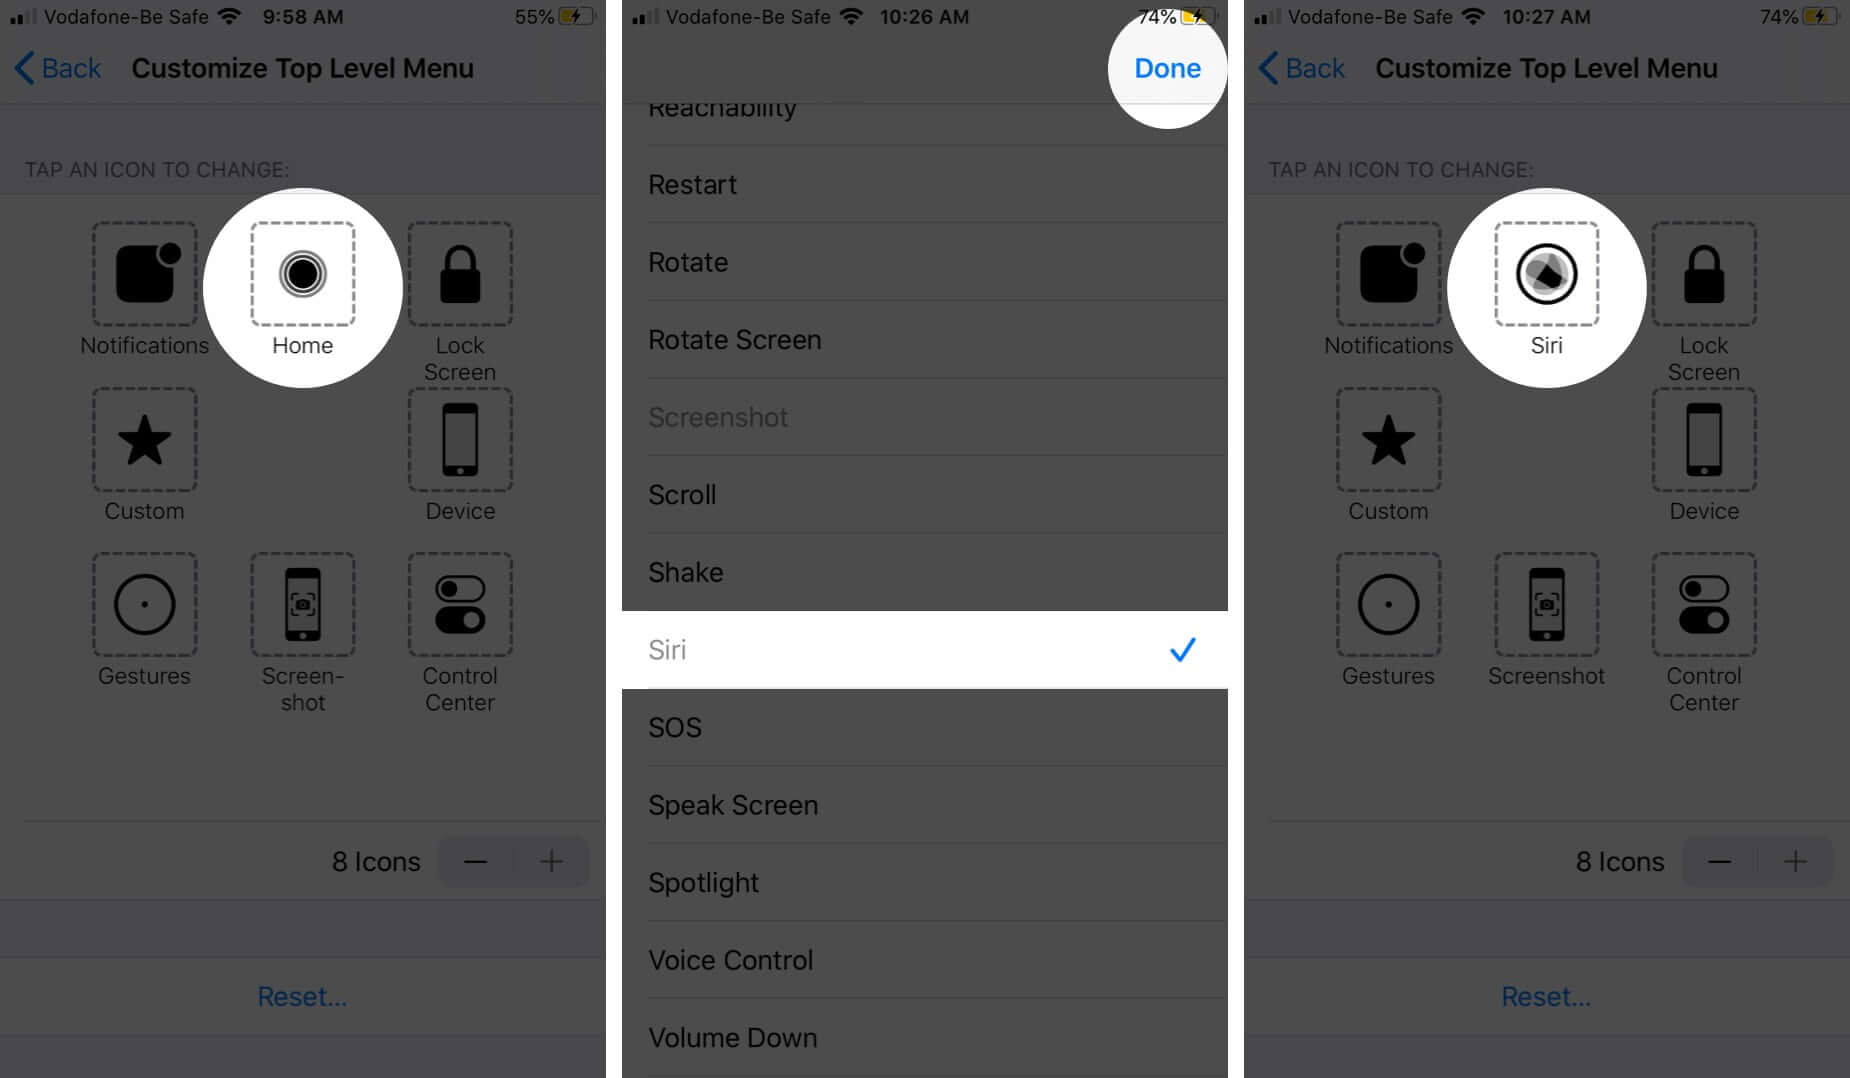
- To Reset or Rearrange the existing icon, tap on it
- Now, select the desired function or action and tap Done.
- To add or remove options in the Top Level menu, tap “+” and “-” buttons.
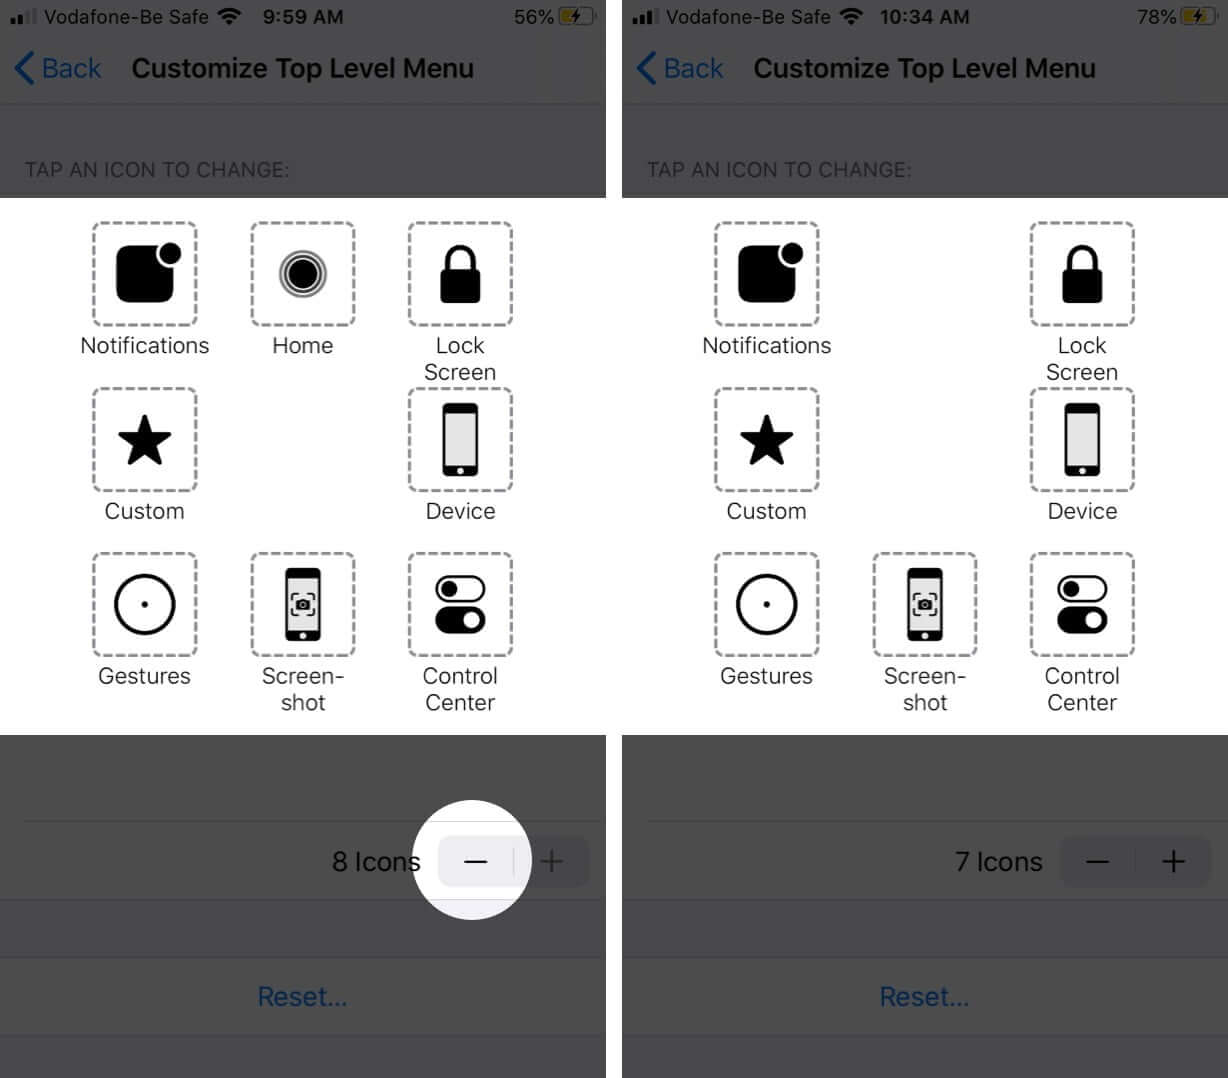
Note: You can add up to 8 icons and keep as less as one icon.
Become an iGeeksBlog Premium member and access our content ad-free with additional perks.
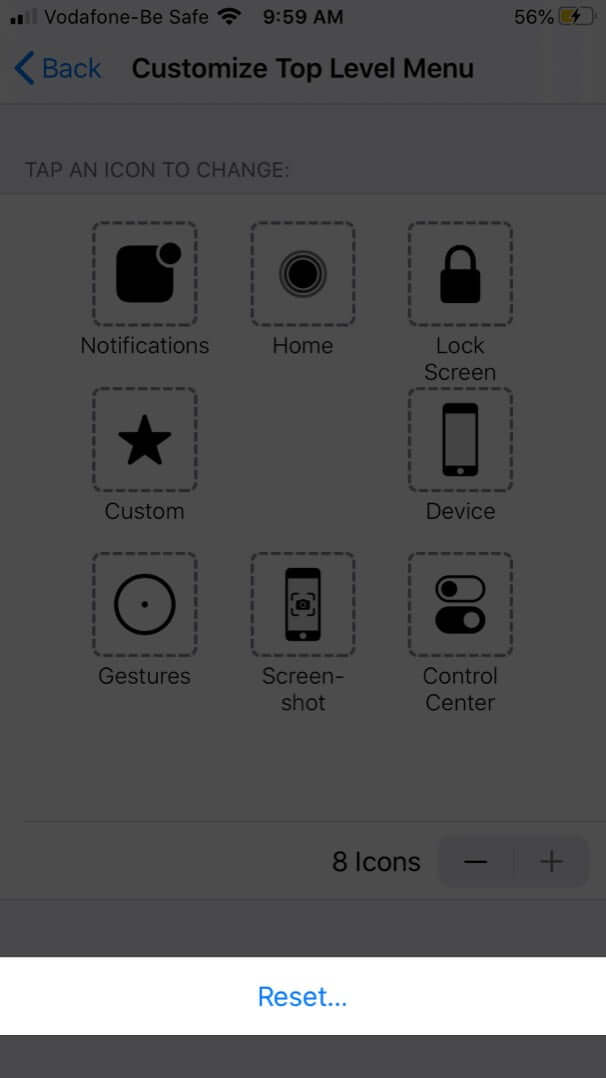
If you are not happy with the changes or want to return to the default menu, tap on the Reset button.
How to add custom AssistiveTouch actions
You can use Custom Actions. This enables you to interact directly with the AssistiveTouch without opening the menu.
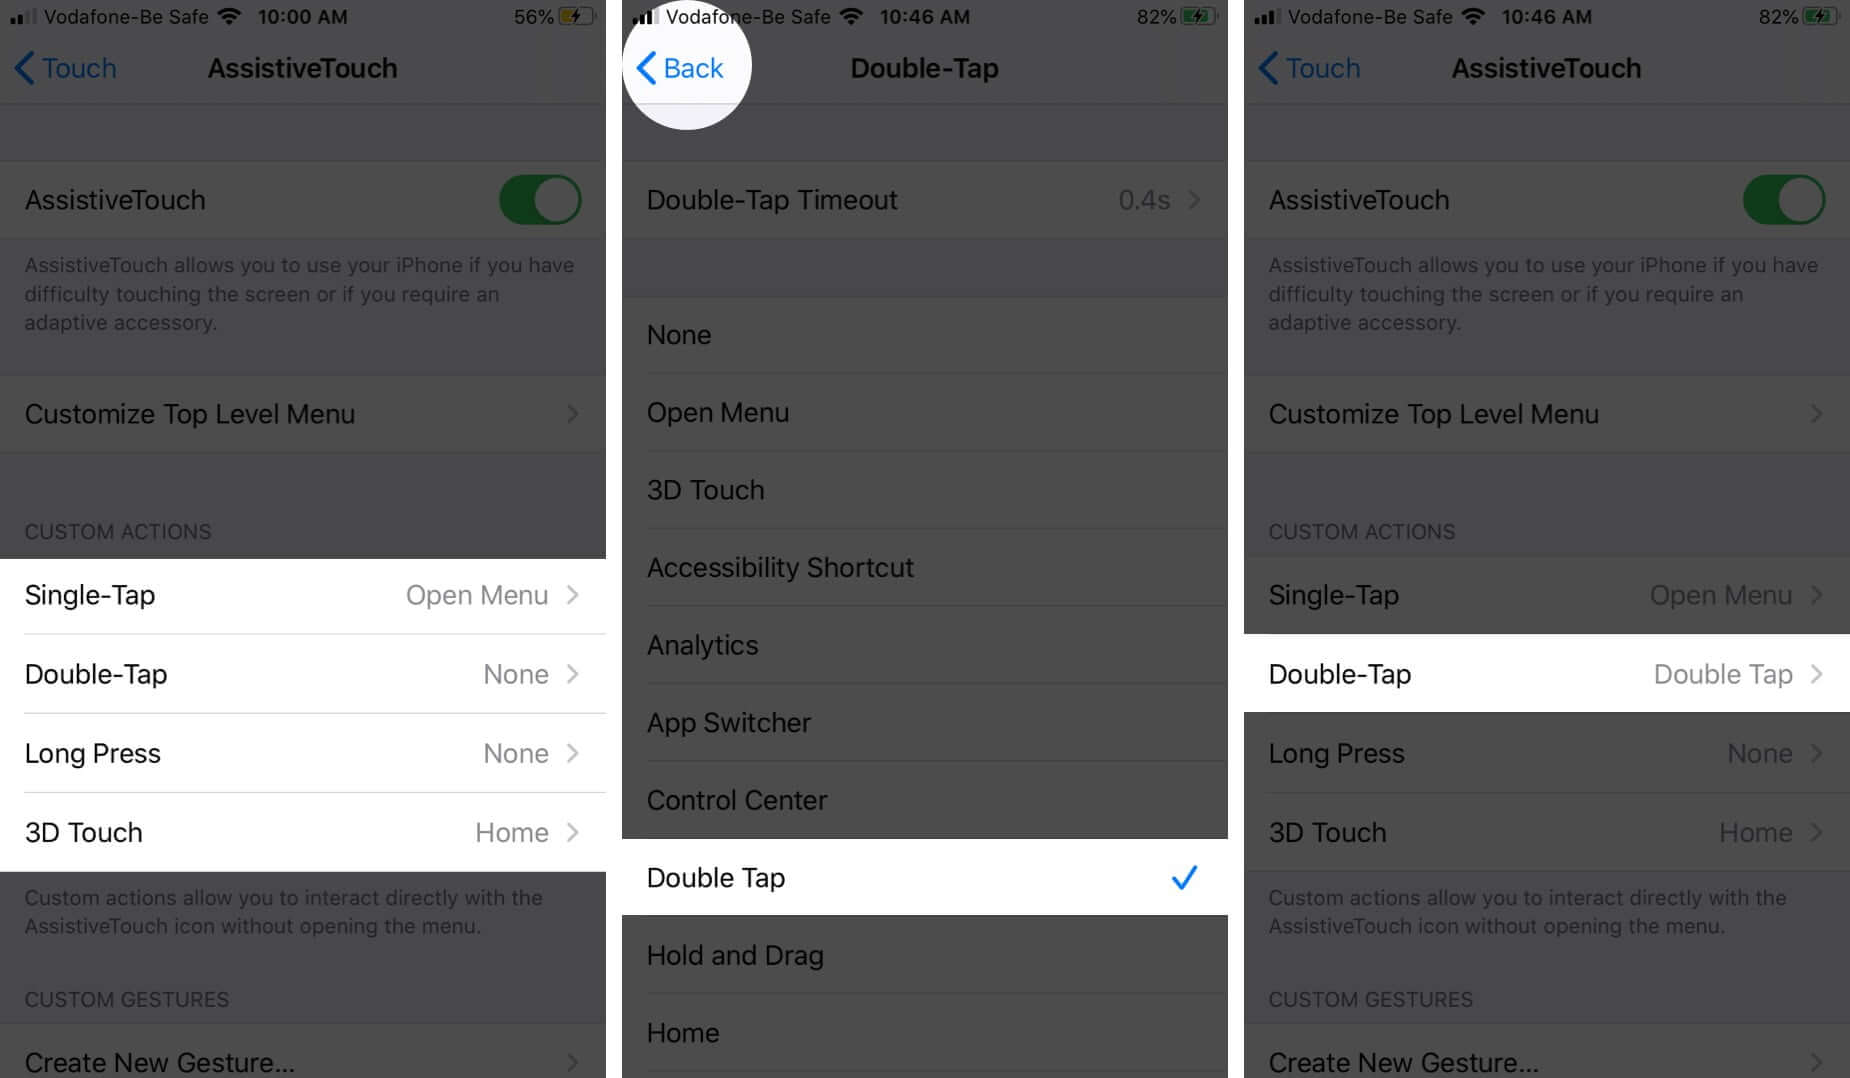
You can assign AssistiveTouch function to a single-tap, double-tap, or a long-press:
- Go to Settings → Accessibility → Touch → AssistiveTouch.
- Under the Custom Actions heading tap on the Single-Tap, Double-Tap, or Long Press.
- Select the action you would like to assign the gesture
- Tap on Back from the top-left of the page.
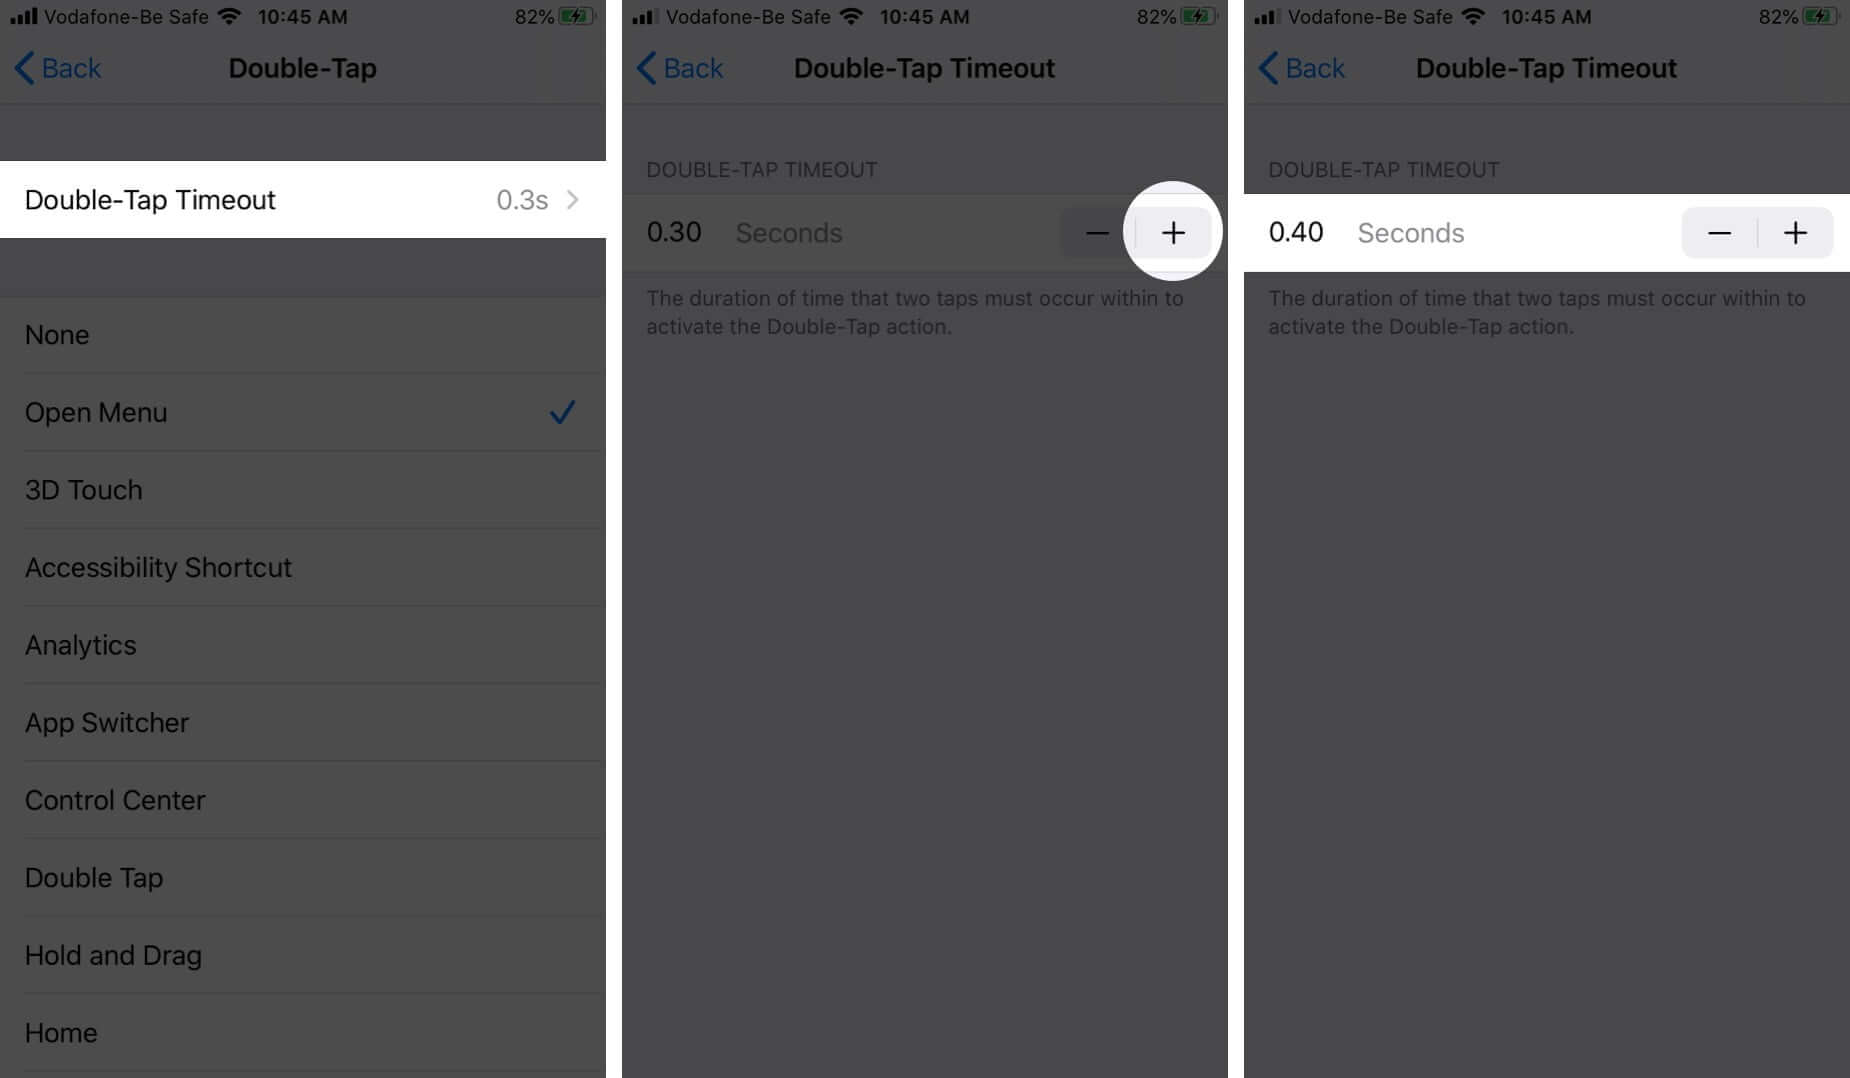
- And not just that, you can also edit the Double-Tap Timeout and Long Press Duration.
Create New AssistiveTouch Gestures
You can record custom taps and swipes using the touchscreen and add them to the Custom section of the AssistiveTouch menu.
- Open Settings → Accessibility → Touch → AssistiveTouch.

- Here, select Create New Gesture under the Custom Gesture section
- In the recording screen, feed the gesture you want to add
- Tap on Stop and Play to test. If unsatisfied tap Record and do it again.
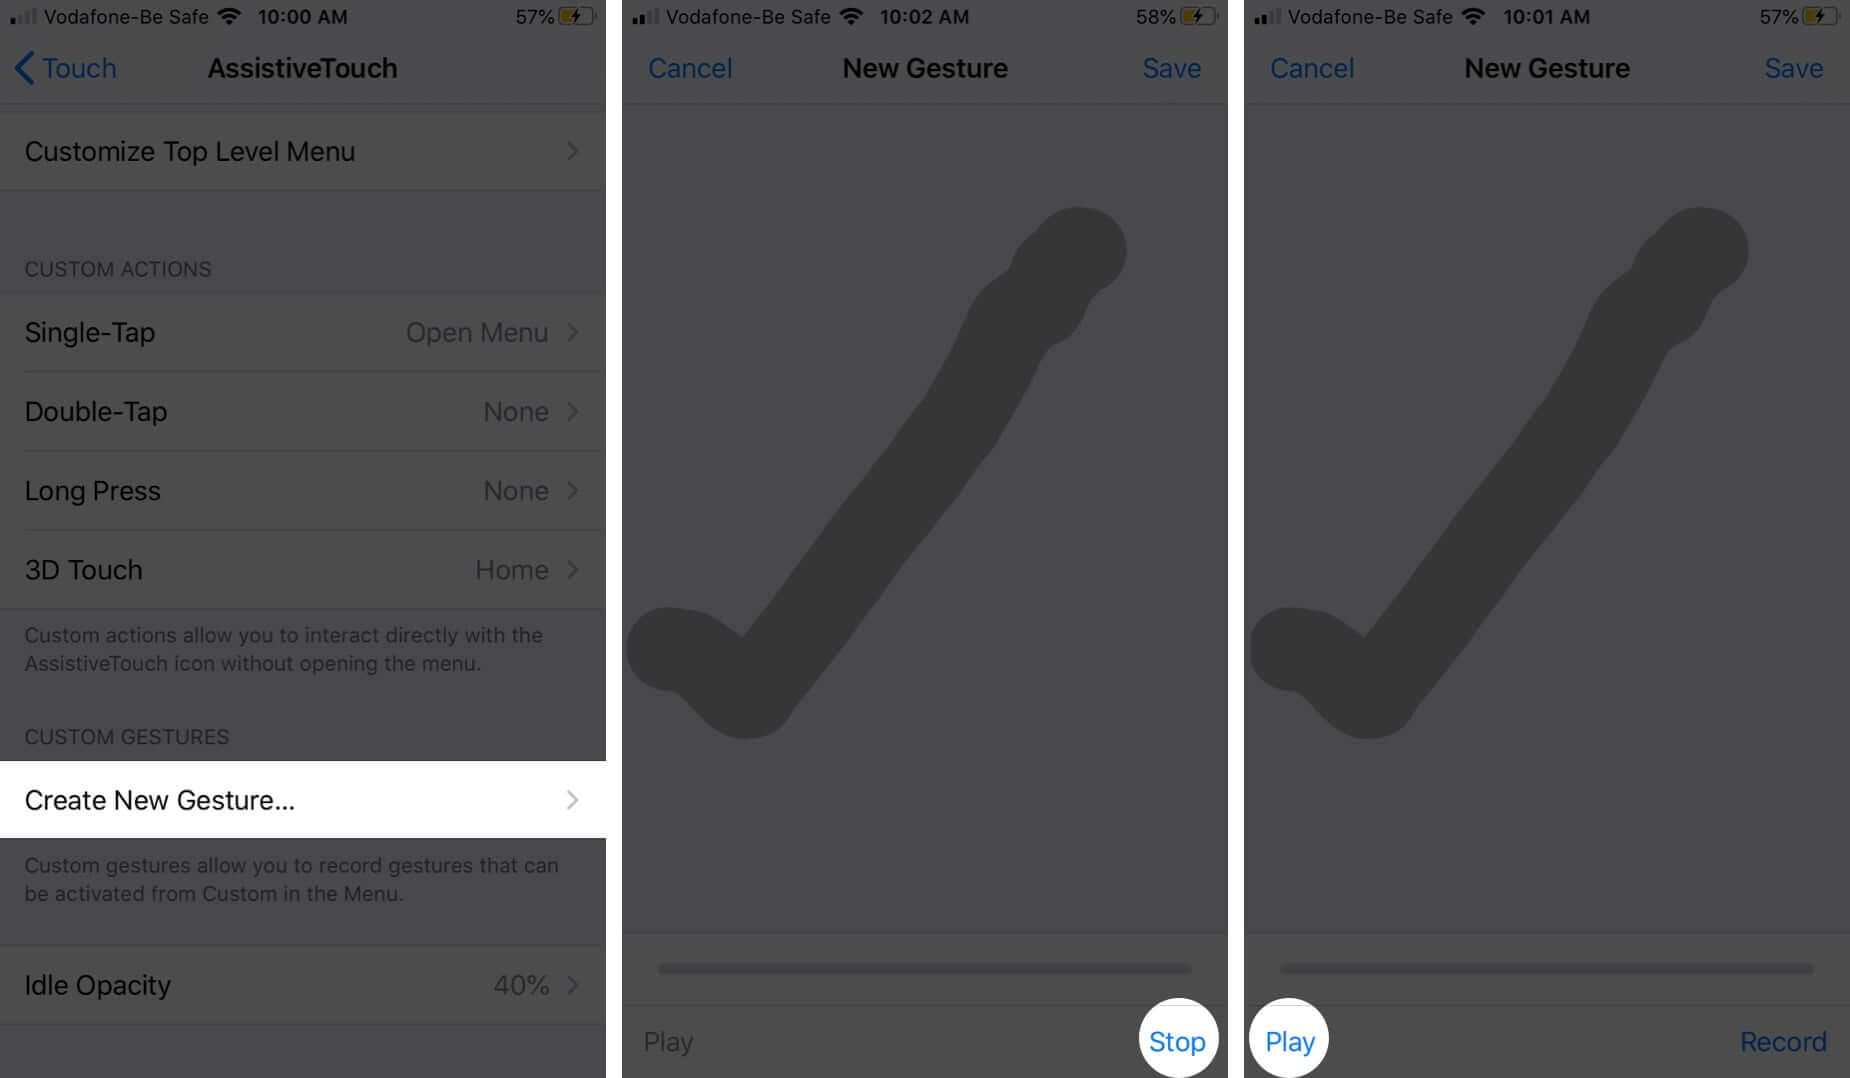
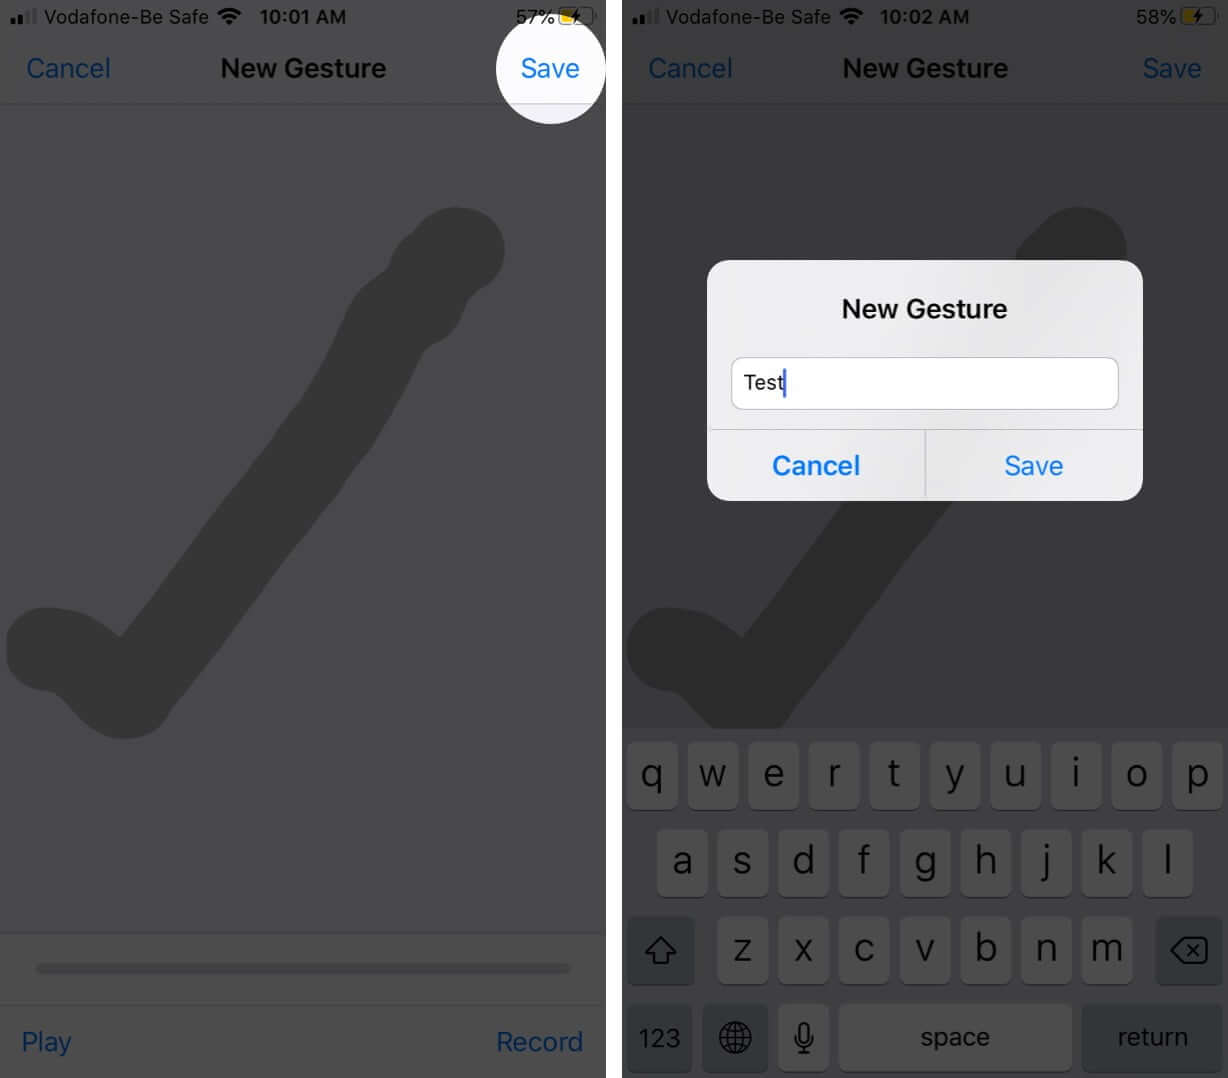
- Once satisfied, tap Save and enter the Gesture Name.
To test the gesture tap AssitiveTouch button → Custom → gesture name.
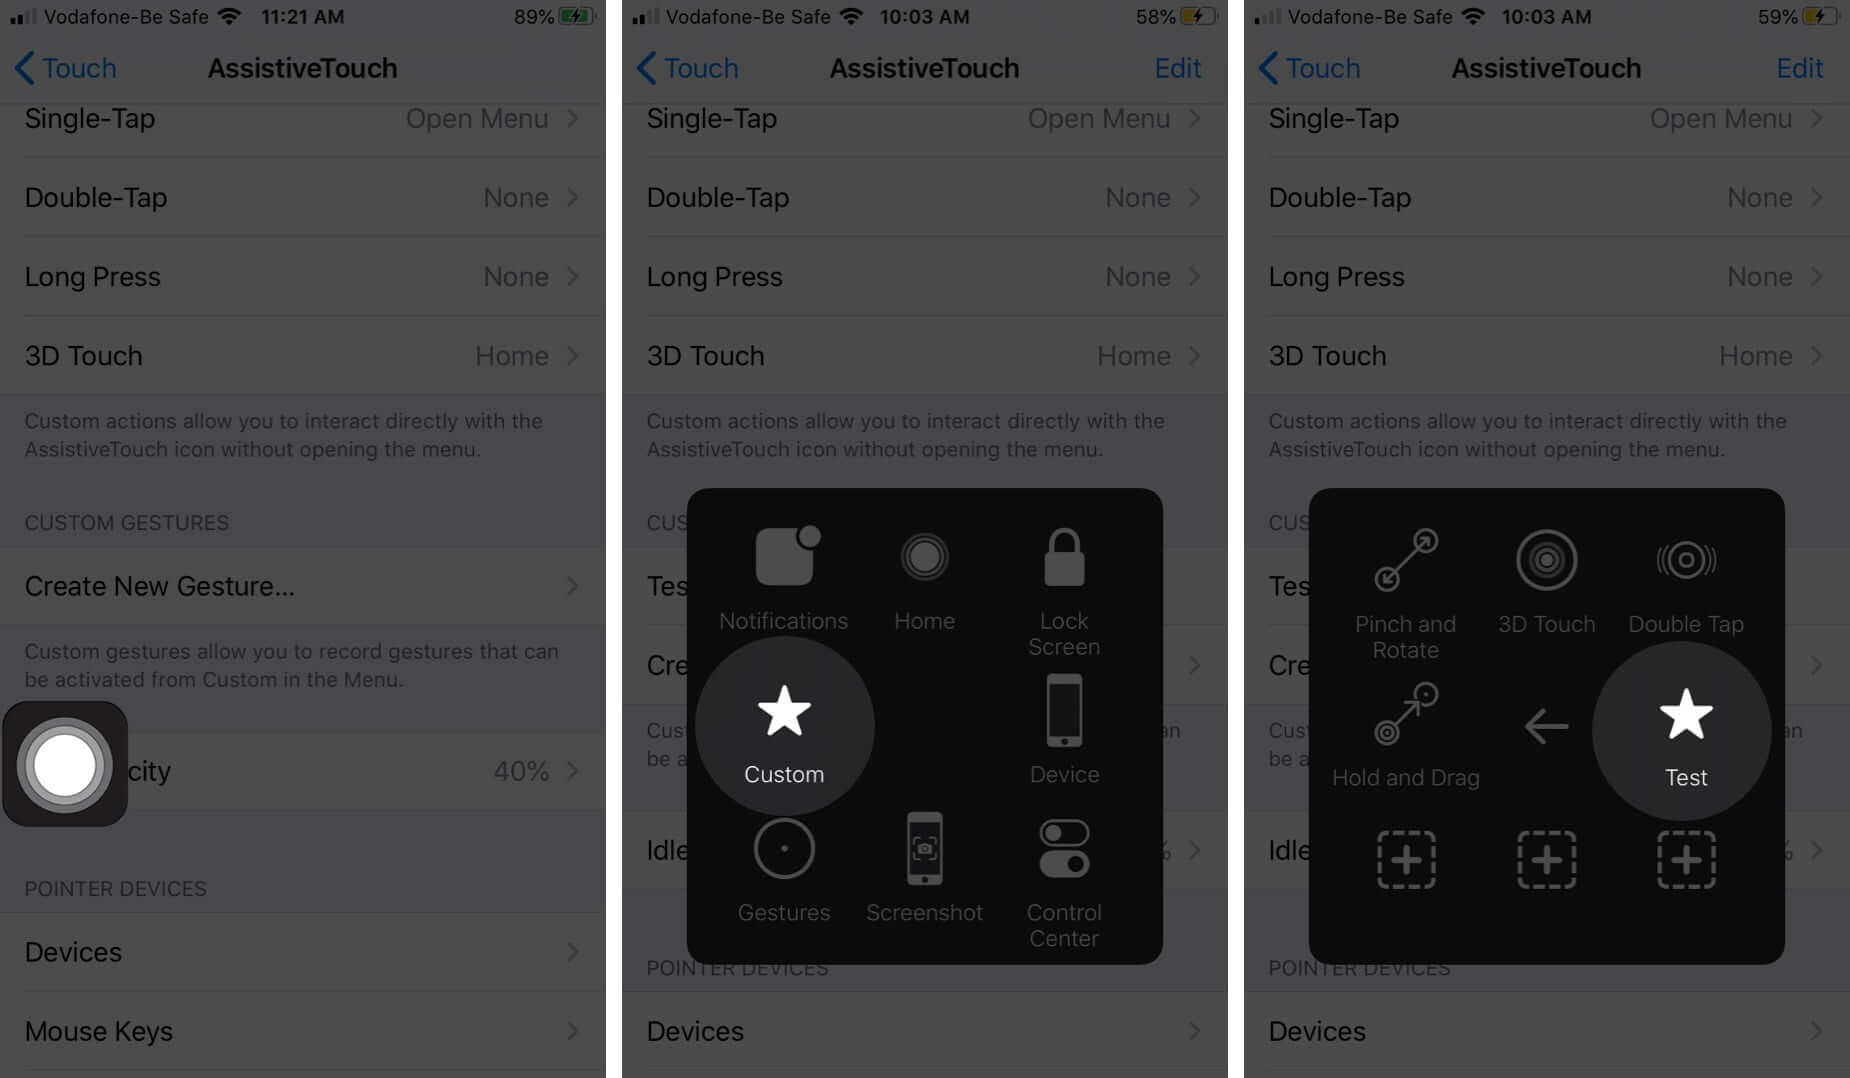
A translucent dot will appear on the screen, tap on it, and the action will happen. When done, close the gesture by tapping on the AssitiveTouch button again.
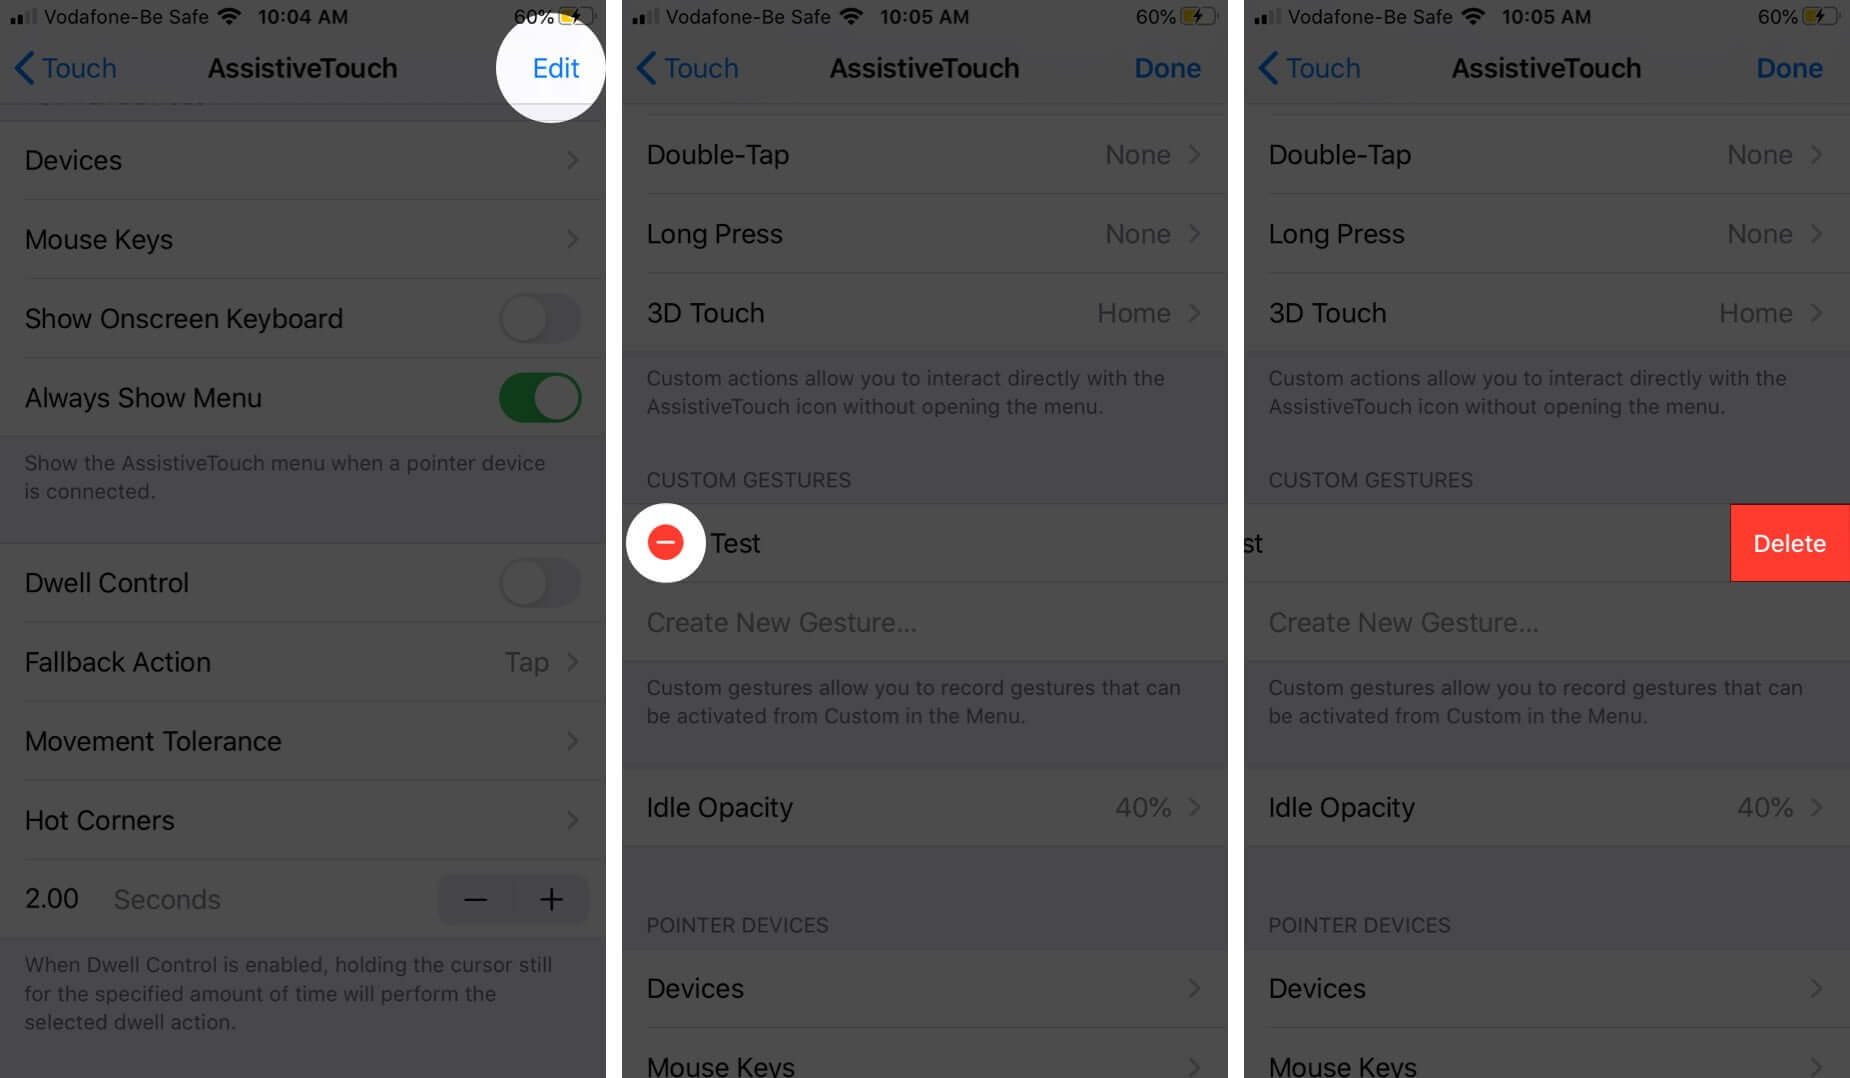
To delete a Custom Gesture, tap Edit from the top right corner of the AssitiveToch setting page. Select “-” and then tap on delete for the Gestures you want to remove.
Note: The setting only recognizes known gestures and can’t perform tasks like calling people. For instance, if you are an avid reader, you can set a scroll down gesture. This way, when you activate the custom gesture and tap on the translucent dot, the screen automatically scrolls down a bit.
Connect a Pointer Device With AssistiveTouch
As iOS 13 and iPadOS 13 brings mouse or trackpad support, the AssistiveTouch can help you connect an accessory like Bluetooth mouse or trackpad to control the onscreen pointer.
While still not fun or that compatible with iPhone, you can surely connect an iPad and use the mouse seamlessly.
How to Turn Off AssistiveTouch on iPhone
To disable AssistiveTouch, either ask Siri or from device settings.
- Open the Settings → Accessibility → Touch.
- AssistiveTouch → Toggle off the switch next to AssitiveTouch.
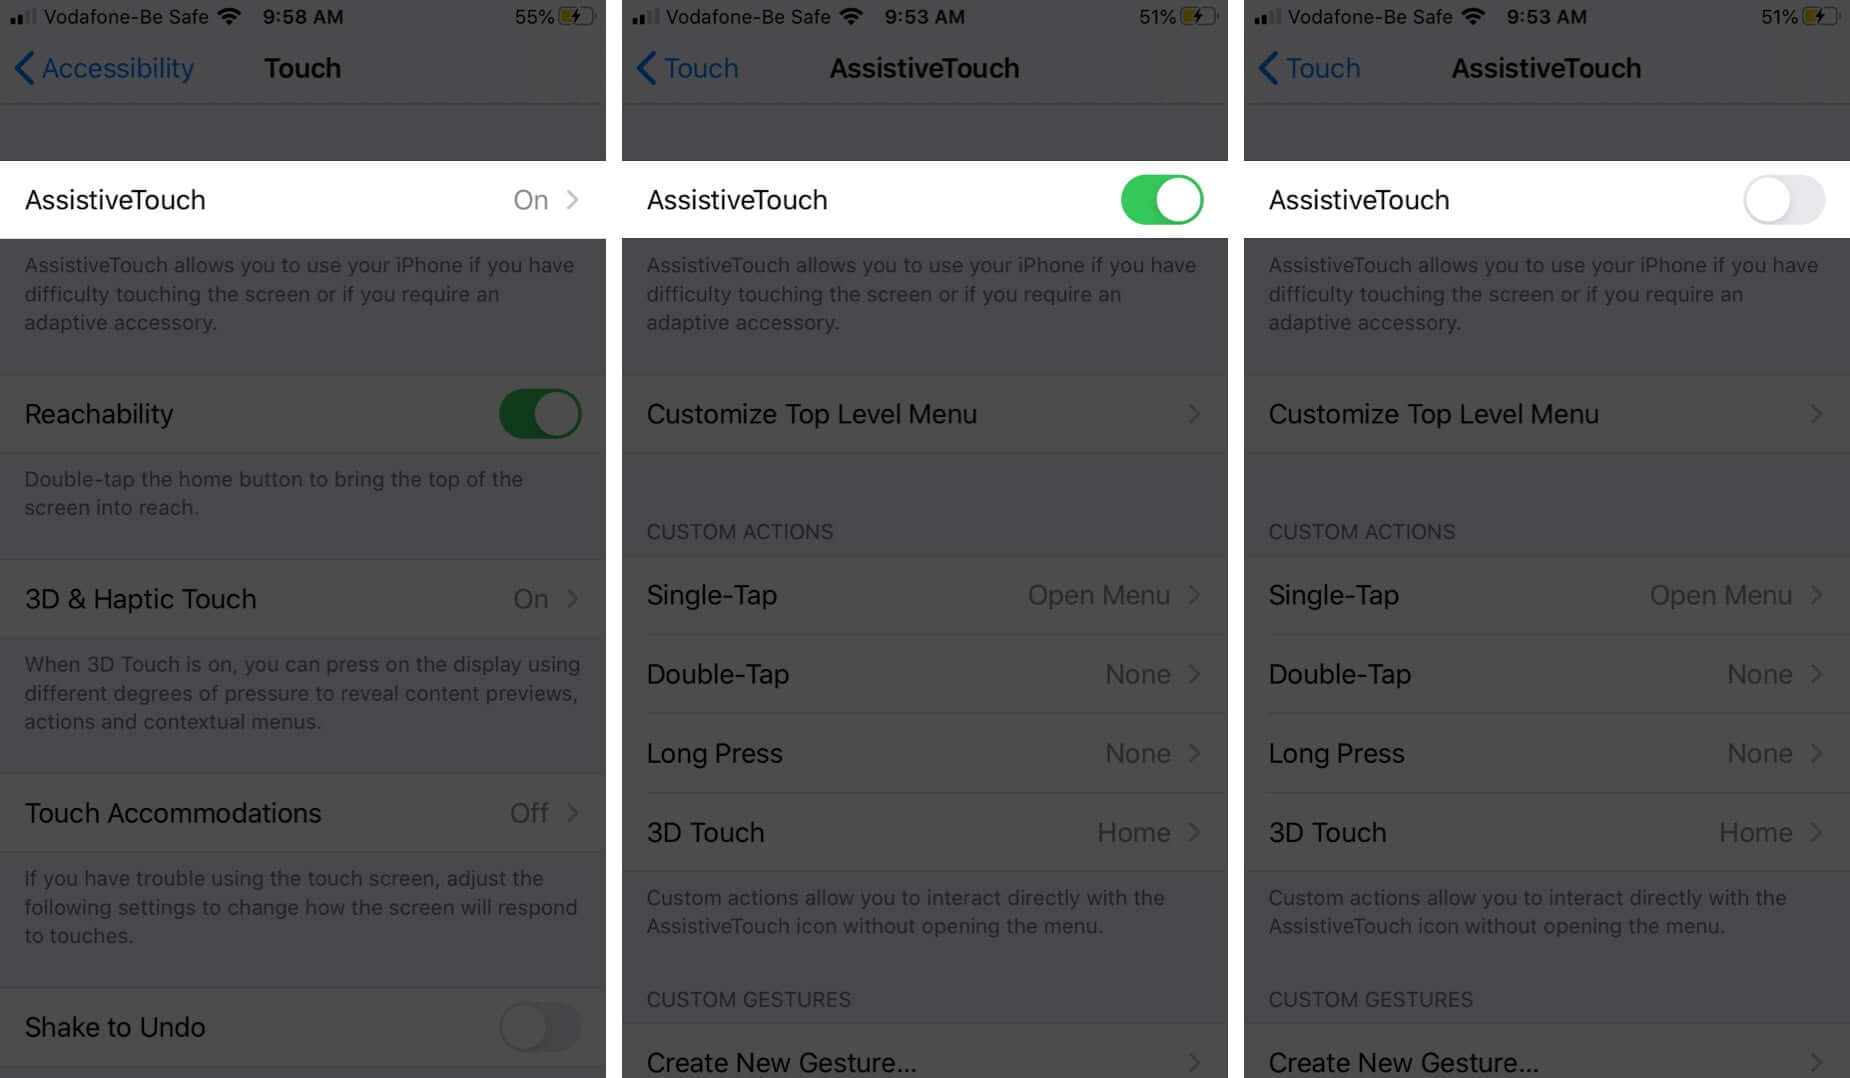
And if you have added AssitiveTouch to Accessibility Shortcuts, simply press the home or power button three times.
Signing off
Once you get the hang of AssitiveTouch can be really helpful. Whether you enjoy AssitiveTouch or not, you would agree that its a handy feature.
iOS is packed with some fantastic Accessibility features, check some of them and how to use them here:

