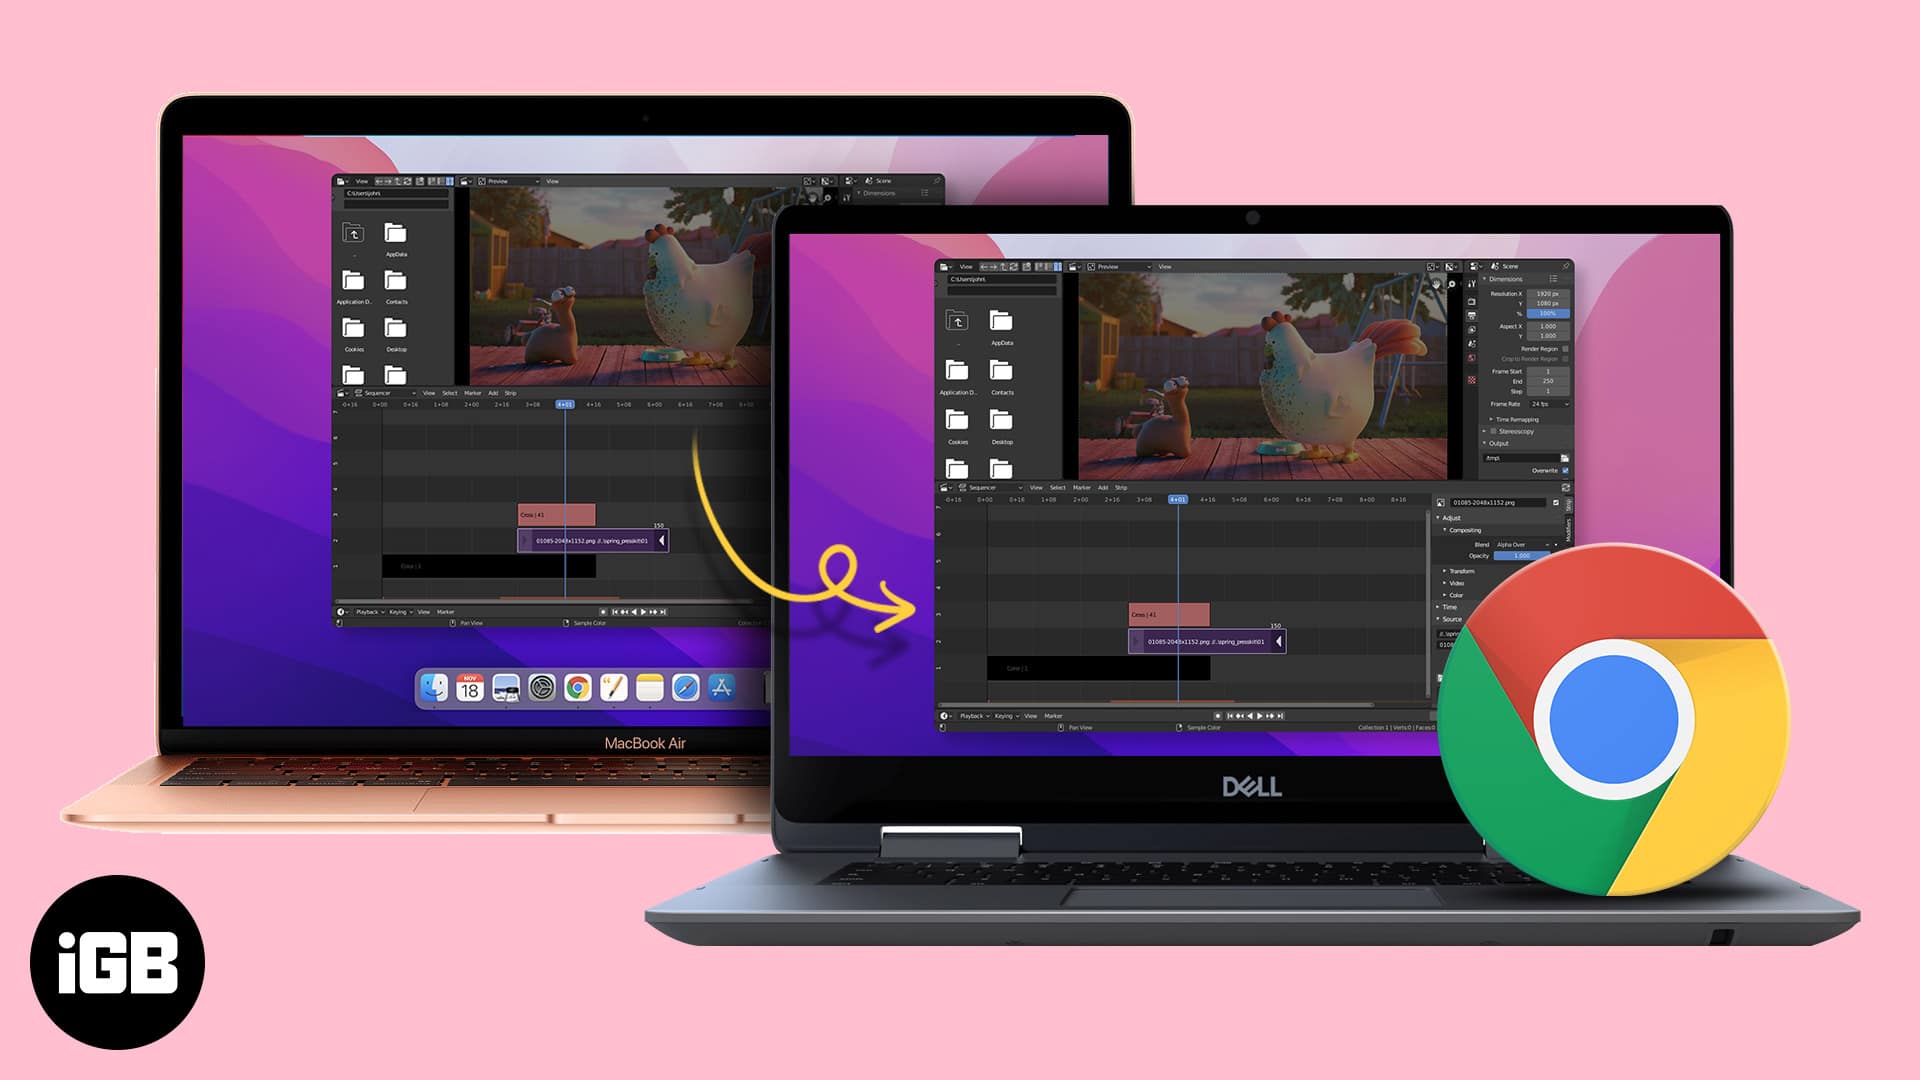
Multiple monitor setup is a boon if you want extra desktop real estate. Most Macs are capable of powering one or even two monitors. However, a decent monitor could end up eating your wallet. But what if I tell you that you can use your old (or even new) Chromebook as a Mac monitor? Read on to find out more!
- Can I use my Chromebook as a monitor?
- How to set up a Chromebook as a secondary monitor on Mac
- Manage Duet Display settings
Can I use my Chromebook as a monitor?
Yes, you can. The setup will come in handy if your Mac monitor is not functional. It works out well if you have a spare Chromebook. Or you can buy an entry-level Chromebook at the price of a monitor. This way, you can use it for other purposes as well.
The best part is that you don’t require cables or dongles. Mac can connect to Chromebook wirelessly with the help of a third-party app called Duet Display. However, you need to pay a one-time fee of $14.99 to use the app. This article explains how you can use a Chromebook as a Mac monitor.
How to set up a Chromebook as a secondary monitor on Mac
The process might feel tedious, but it’s pretty simple and super effective. Follow the next few steps to get started.
1. Install and configure Duet display on Mac
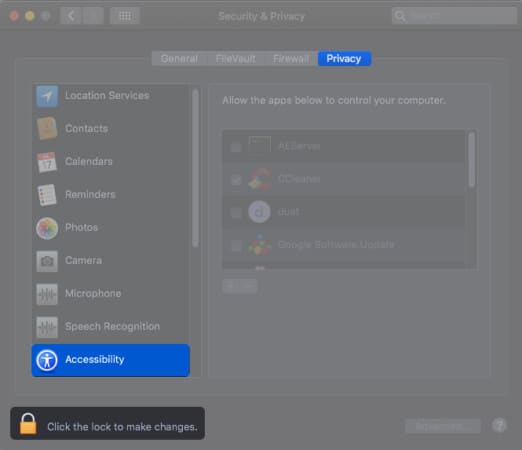
Firstly, you need to prep your Mac. Download Duet Display. Duet Display needs Accessibility and Screen access permissions. Once installed, grant the required permissions.
Grant Accessibility: Open System Preferences → Security & Privacy → Privacy → Accessibility. Click the lock icon to make changes.
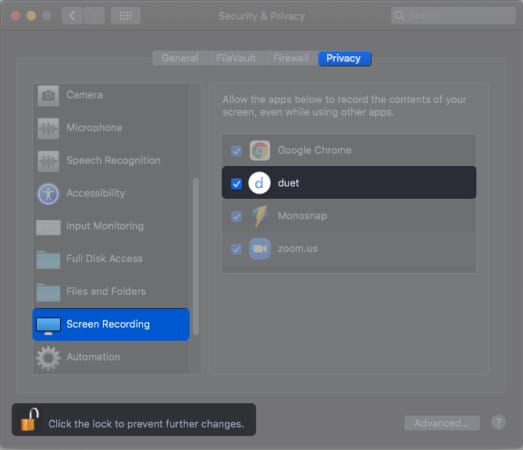
Grant recording access: Open System Preferences → Security & Privacy → Privacy → Screen recording. Once done, toggle the back lock icon. Now, launch the Duet Air and sign up. Select Sign in for Remote Desktop.
Lastly, you need to enable screen sharing on Duet. Tap Profile on the left menu pane. Select Screen Sharing Enabled.
2. Add Chromebook as the second monitor on Mac
Install Duet Display on Chromebook. You need to set up a Chromebook as a secondary monitor in this step. Ensure that both Chromebook and Mac are connected to the same Wi-Fi network.
- Open the Duet app on Chromebook.
- Open Duet on Mac and select Android from the menu.
Chromebook will be automatically detected on your Mac.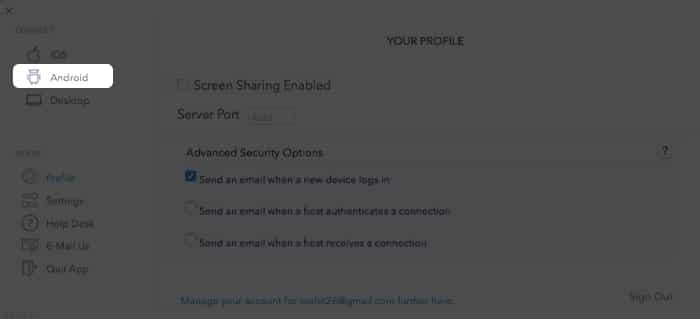
- Under Discovered Devices, click Click to connect wirelessly.
If your Chromebook isn’t detected, select Connect to IP Manually and enter Chromebook IP address.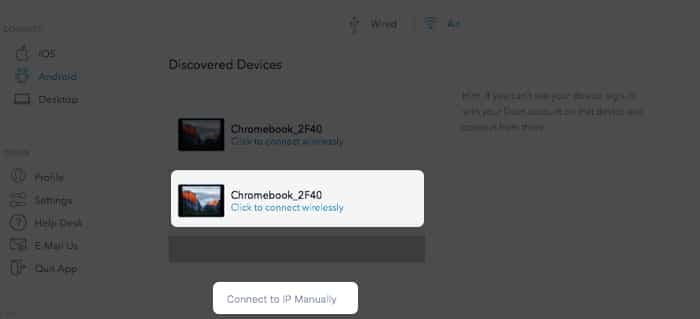
- Now, click the Duet icon on the menubar to switch displays.
You can choose between Mirror Built-in Retina Display or Use As Separate Display.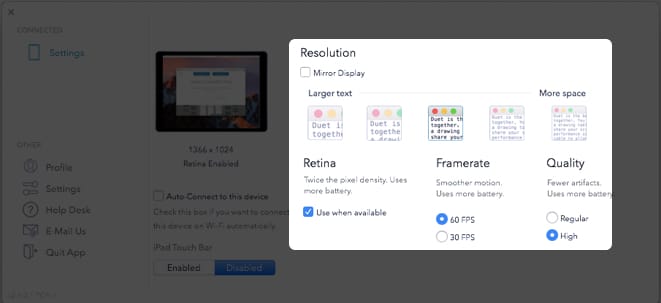
- Drag an app to the right edge and move it to the Chromebook display.
Tip: You can change screen positions by going to System Preferences → Displays → Arrangement. Furthermore, Duet also lets you use a Chromebook keypad and trackpad.
Become an iGeeksBlog Premium member and access our content ad-free with additional perks.
Manage Duet Display settings
Duet Display offers a slew of settings for optimum user experience. It lets you change text size, display resolution, and choose framerate. It is important to note that some settings will increase battery consumption. Let’s take a closer look at Duet Display settings:
1. Resolution and text
Duet Display lets you set various parameters, including framerate and quality. Select larger text if your work involves reading in detail. Smaller text size helps in accommodating more screen elements.
2. Retina
Retina setting scales up your resolution and, thus, pixel density. In other words, the setting offers the highest possible resolution while compromising on battery life.
3. Frame rate and quality
The frame rate setting lets you choose between 60 fps and 30 fps. You will notice less lag and smoother transitions with a higher frame rate. However, it comes at the cost of battery life.
Quality settings play an important role when mirroring your Mac display. The higher quality setting displays fewer artifacts and uses more battery. Meanwhile, the Regular Quality is adequate for general purposes like browsing the web or checking email.
I noticed some lag on Chromebook initially. The lag disappeared after I switched to the highest setting. I would suggest using the highest setting alongside the power source.
Surprisingly, it does. The Chromebook doubles up as a full-fledged laptop when not used as a monitor. The setup is best suited for those who occasionally need an external monitor.
Duet Display supports Windows PC. So yes, you can use Chromebook as a monitor for Windows PC.
Duet Display is free for Mac. The base version is priced at $14.99 for a lifetime license. The optional subscription is priced at $34.99. In-app purchases let you use the iPad Pro as a drawing tablet with Apple Pencil.
Duet Display is functional and offers a consistent experience. The one-time subscription pricing is reasonable until you feel the need for more features.
For instance, the remote desktop feature is available only on Duet Air. It costs an additional $24.99/year. On top of this, you need to shell out $34.99/year for Apple Pencil support. You can also use an iPad as a monitor or drawing pad.
I used the Duet Display base version with my Chrome and Mac. The experience has been spotless. I could work for hours using the Chromebook as a secondary monitor without any lag. How was your experience using Chromebook as a Mac monitor? Share in the comments below.
Read More:
