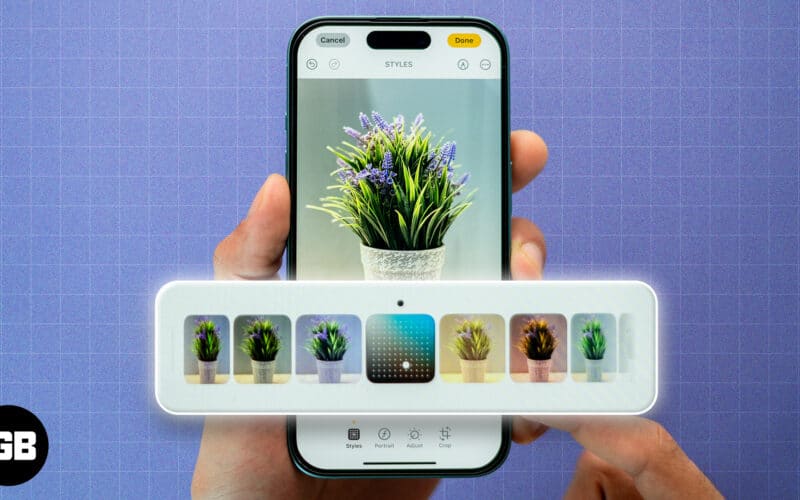
The iPhone 16 brings a host of new and improved features, including the Camera Control Button. While we are on the topic of capturing better photos on your iPhone, one standout feature for photography lovers is Photographic Styles.
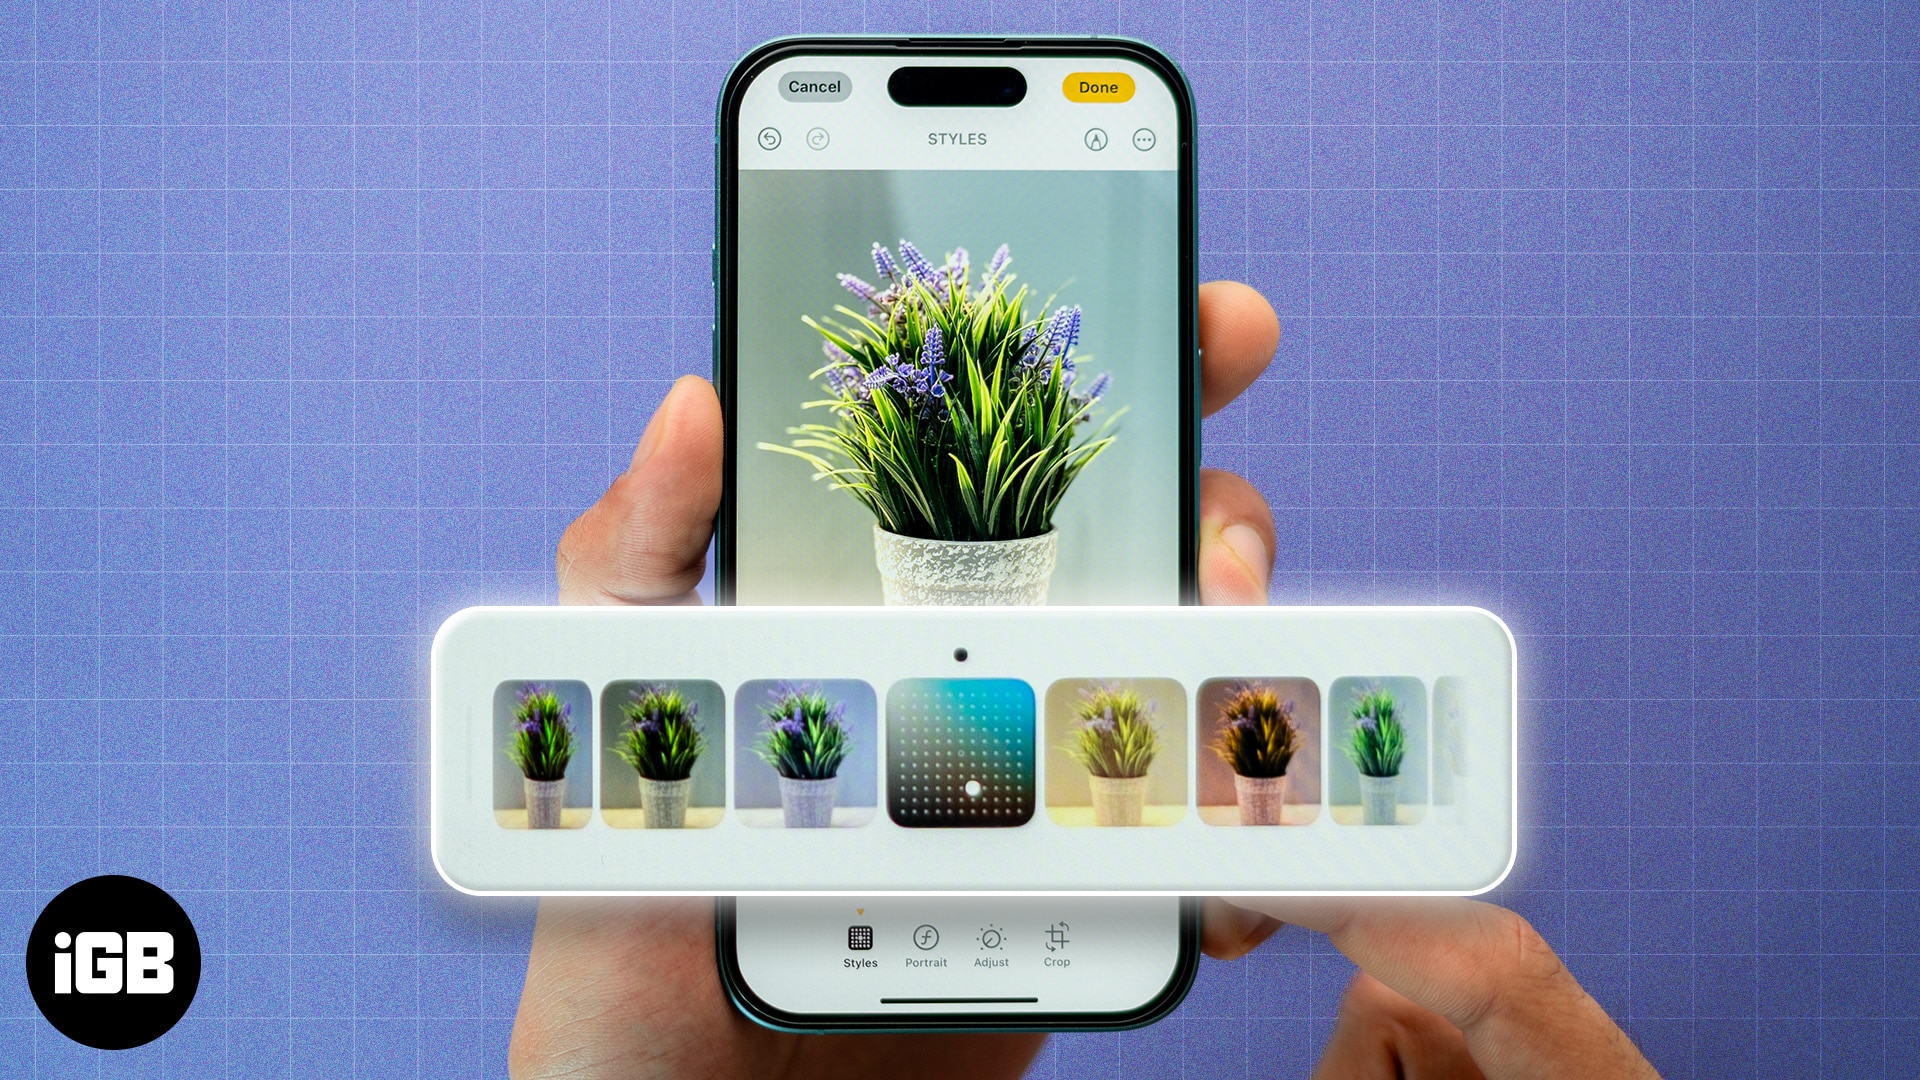
Photographic Styles isn’t a new feature. However, on the latest iPhone 16 models, Apple has updated the feature to include new styles. So, if you enjoy taking photos but wish you had more control over how they look right from the camera, this feature might just be your new best friend. But how do Photographic Styles differ from traditional filters, and how do you use them? Here’s what Photographic Styles is all about.
What are the Photographic Styles on iPhone 16?
Photographic Styles on the iPhone 16 allow you to personalize the tone and color of your photos without losing natural elements like skin tones. They essentially offer you a way to create a consistent aesthetic, much like professional photographers do with their editing workflows.
Think of Photographic Styles as a more flexible alternative to filters. Filters apply a fixed look to a photo, but with Photographic Styles, you can adjust parameters like warmth and contrast, which gives you far more control over your photos. As a result, unlike traditional filters, which can sometimes look artificial, Photographic Styles are designed to blend seamlessly with your original image, enhancing its natural beauty.
Types of Photographic Styles available
With the iPhone 16, Apple offers a variety of Photographic Styles designed to fit different moods, aesthetics, and photography types. Let’s check them out.
- Cool Rose: Adds a subtle, cool tint with a slight rose hue, perfect for making cooler landscapes or portraits feel dreamy without looking cold.
- Neutral: A balanced, natural look that enhances the photo’s original colors without making them too bright or too dark.
- Rose Gold: Infuses a soft, warm glow into your shots, ideal for adding a touch of romance or nostalgia to your photos.
- Gold: Warmer than Rose Gold, this style gives your images a more luxurious golden glow, which is perfect for portraits and nature shots during the golden hour.
- Amber: It deepens the warmth, making sunsets, cozy indoor scenes, and even food photos more inviting and vivid.
- Standard (No Edits): This is the baseline option where no tweaks are applied. It preserves the original colors and lighting and is perfect for those who want the camera’s default look.
- Vibrant: Adds extra saturation and punch to your colors without overwhelming the image and is great for bringing out the vibrancy of nature and cityscapes.
- Natural: Keeps the photo looking as close to the real scene as possible, which makes it perfect for those who like unedited, raw photos.
- Luminous: A dreamy, ethereal style that brightens the image, giving a soft, glowing look. It’s excellent for portraits or scenes where you want a magical feel.
- Dramatic: Heightens contrast, darkens shadows and pulls out details to add a cinematic touch to your images, perfect for urban photography or landscapes with strong textures.
- Quiet: Subdued and gentle, this style tones down colors, creating a peaceful and introspective feel. It’s ideal for soft lighting or minimalist photography.
- Cozy: Infuses warmth and comfort into your shots, making them feel more intimate. Think of it as a way to bring out the feeling of home in your images.
- Ethereal: A light, airy style that softens shadows and cools down colors, ideal for portraits or landscapes with a delicate, fairy-tale-like atmosphere.
- Muted Black and White: Softens contrasts while keeping things monochromatic, giving your black-and-white shots a more muted, relaxed feel.
- Stark Black and White: This one is all about drama—deep shadows and bright highlights for high-impact black-and-white photography that demands attention.
When to use Photographic Styles
Different scenes and subjects call for different photographic moods, and that’s where Photographic Styles really shine. Let’s break down when and where each style works best.
1. Portrait photography
- Rich Contrast: Want to create a bold, dramatic portrait? Rich Contrast is your go-to Photographic Style. It darkens shadows and boosts contrast, adding depth and intensity to facial features.
- Warm: For cozy, soft portraits, Warm infuses golden hues, perfect for family photos or intimate moments where you want to create a welcoming, friendly vibe.
2. Landscape photography
- Vibrant: Shooting a landscape with colorful skies or vibrant greenery? The Vibrant style amps up those colors, making them pop without losing detail.
- Cool: Great for capturing a tranquil water scene, snowy landscapes, or cityscapes at dawn. It tones down the warmth and adds a serene, blueish hue to your shot.
3. Street photography
- Standard: This style keeps your photos neutral, ideal for capturing the authenticity of the streets without any alterations.
- Rich Contrast: Street scenes often involve strong contrasts of light and dark. Rich Contrast helps bring out these details, adding drama and mood to your urban photography.
4. Event photography
- Vibrant: Shooting at a party, festival, or sports event? Vibrant turns up the energy by emphasizing bright colors and making the atmosphere feel more dynamic.
5. Food photography
- Warm: Perfect for foodies! Warm adds golden tones to make dishes appear more inviting, enhancing the natural colors and textures, and making your meals look extra delicious.
How to use Photographic Styles on iPhone 16 series
Now that you have a good idea of what Photographic Styles on iPhone 16 Series are, how about giving them a shot? Here’s how to use them on your iPhone 16, 16 Plus, 16 Pro, or 16 Pro Max.
Become an iGeeksBlog Premium member and access our content ad-free with additional perks.
Choose the default Photographic Style
To start, you need to select a default Photographic Styles. Do note that before proceeding and choosing a Photographic Style on your iPhone 16, you need to have taken at least four photos with your iPhone camera.
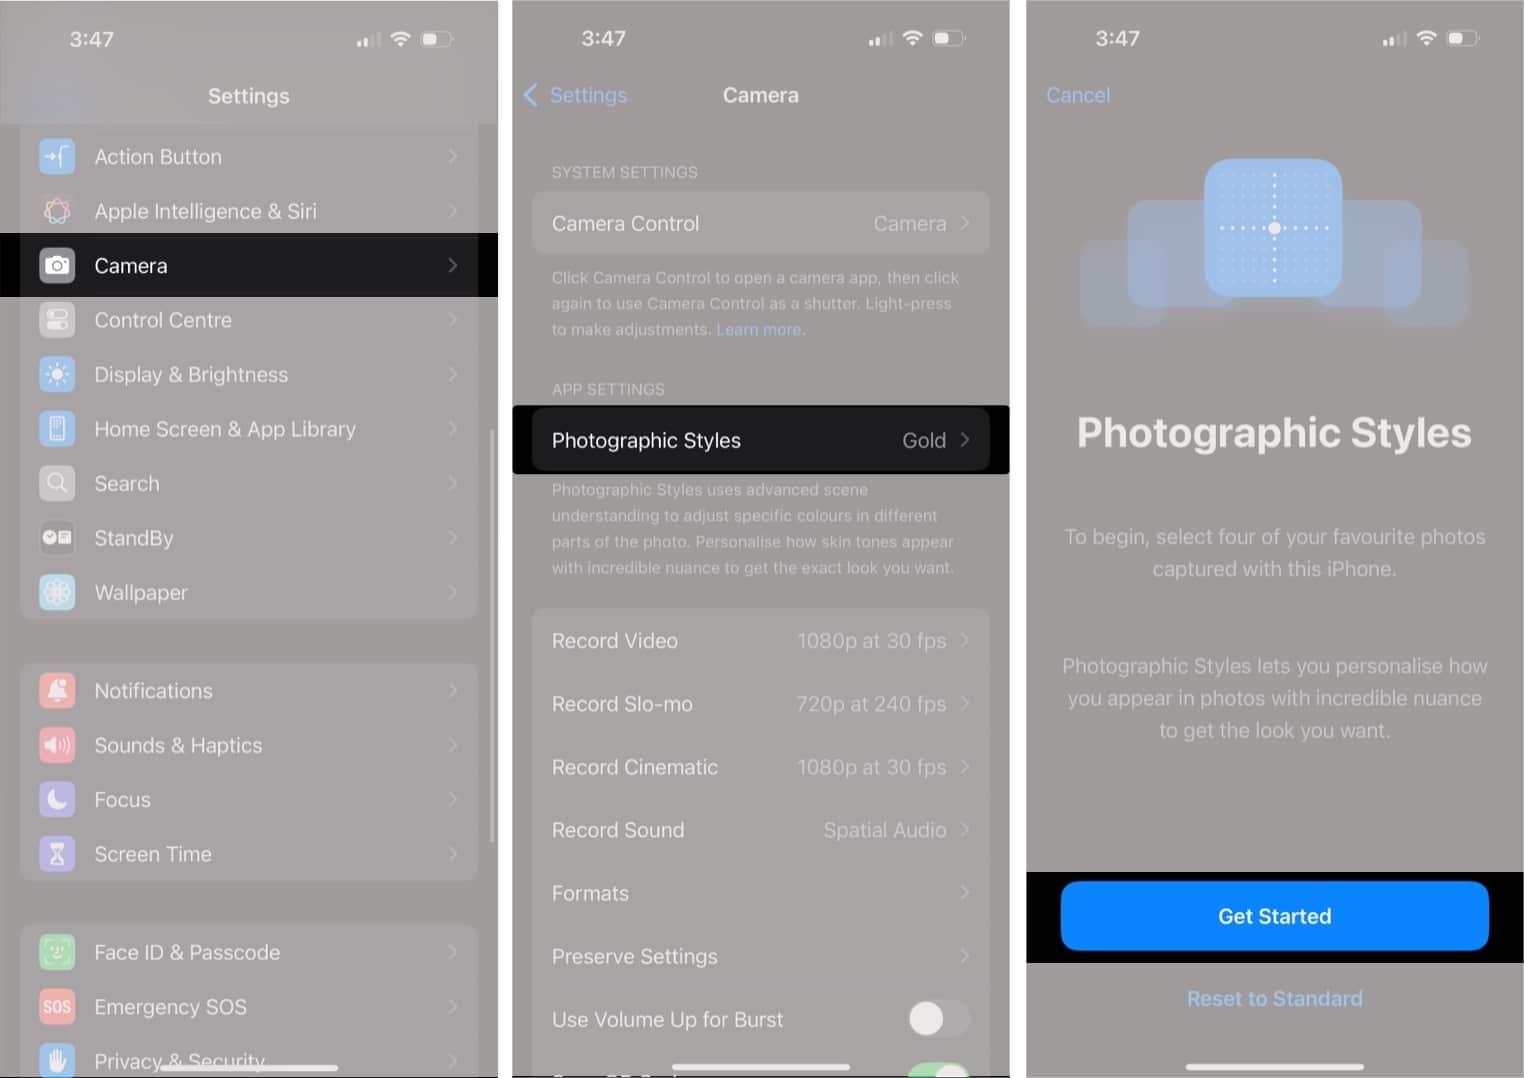
- Open Settings and head over to Camera > Photographic Styles.
- Tap Get Started and follow the on-screen instructions.
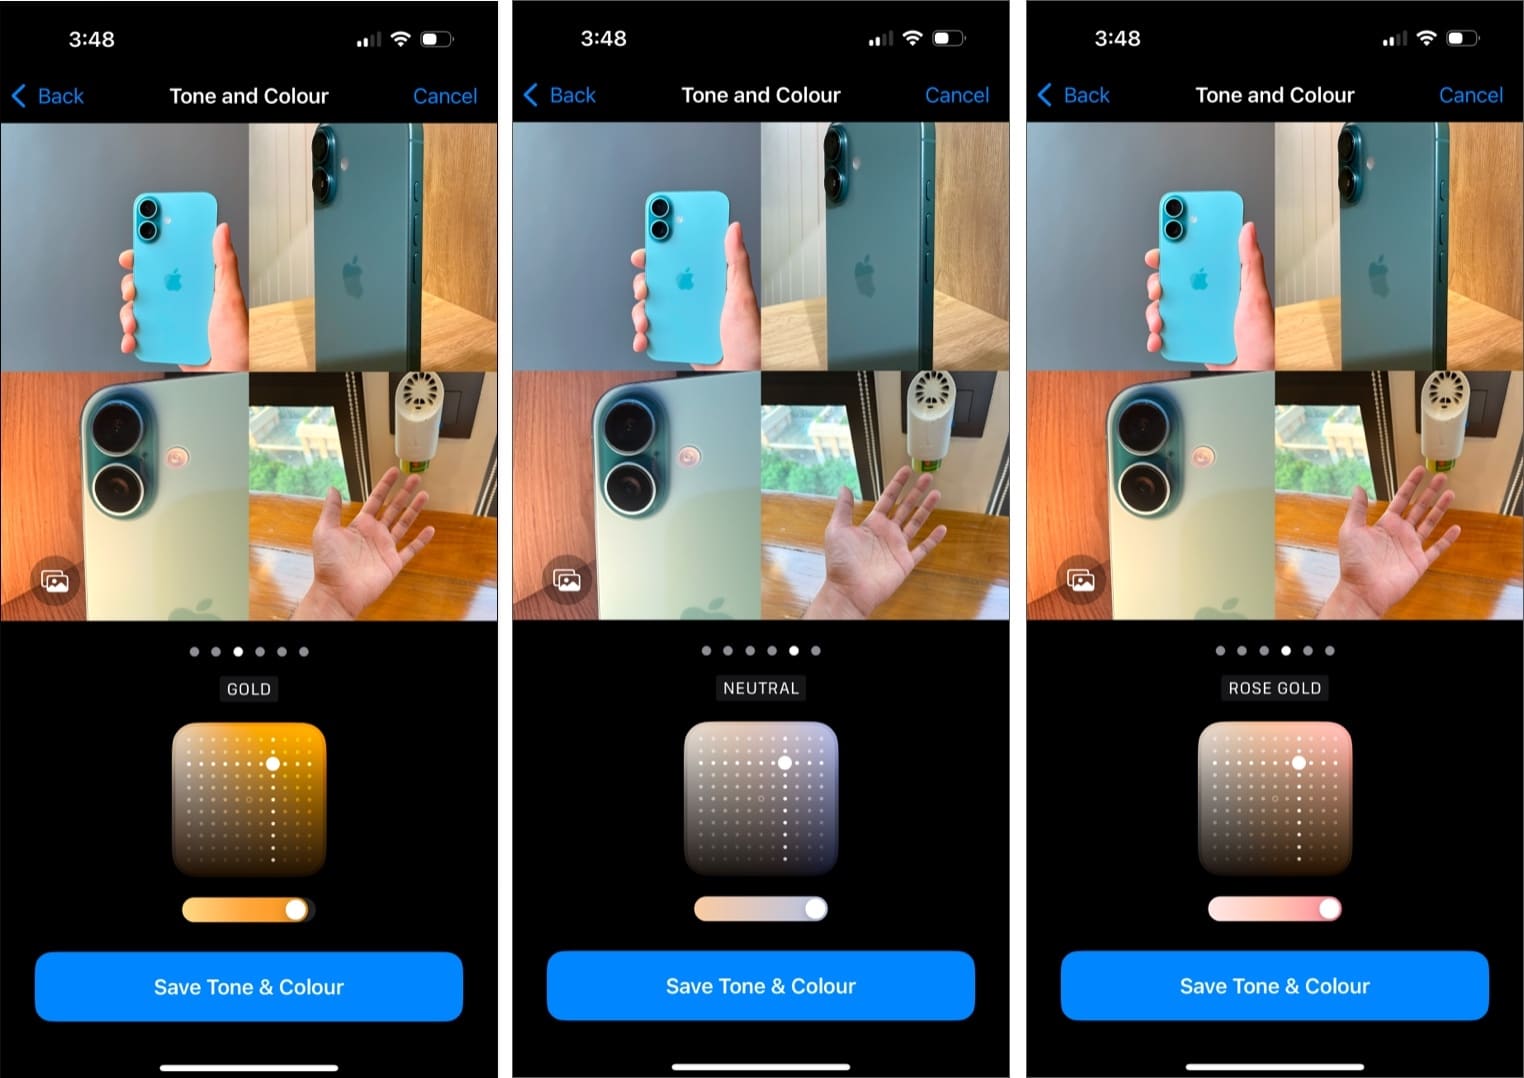
- Choose your desired default Photographic Style from the available options.
Adjusting Photographic Style
After you choose a default Photographic Style on your iPhone 16 series device, you can fine-tune its tone, color, and intensity before you take a photo in the Camera. Here’s how.
- Open the Camera app on your iPhone.
- Tap the Photographic Styles icon in the top-right corner of the screen.
- Drag your finger on the slider to adjust the tone and color.
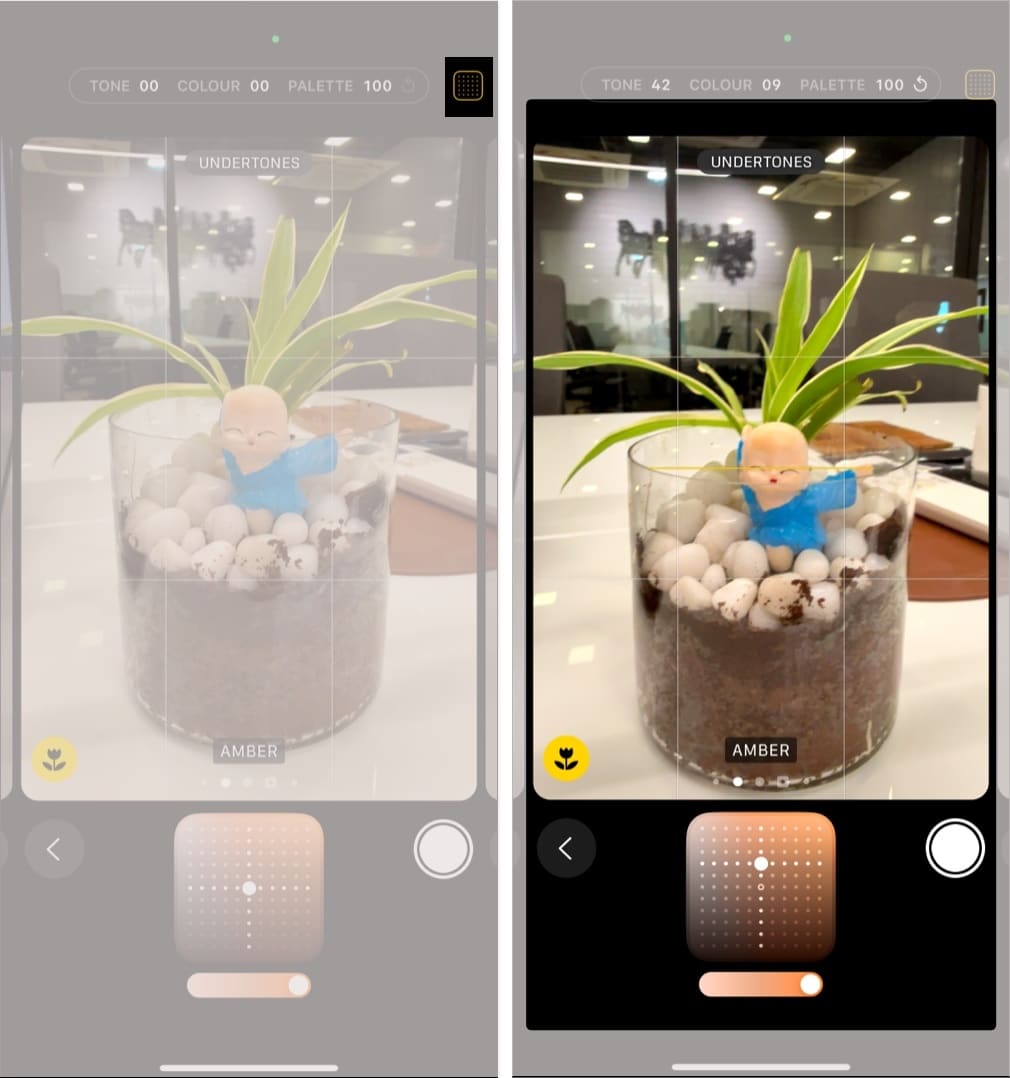
Alternatively, if you’d like to adjust the Photographic Style of a picture you’ve already captured, you can do that too.
- Open the image you’d like to edit inside the Photos app.
- Tap the Edit icon.
- Switch to the Styles tab.
- You can now swipe left or right to choose a different style. Also, you can adjust the tone and color as shown previously by sliding your finger across the Photographic Style icon.
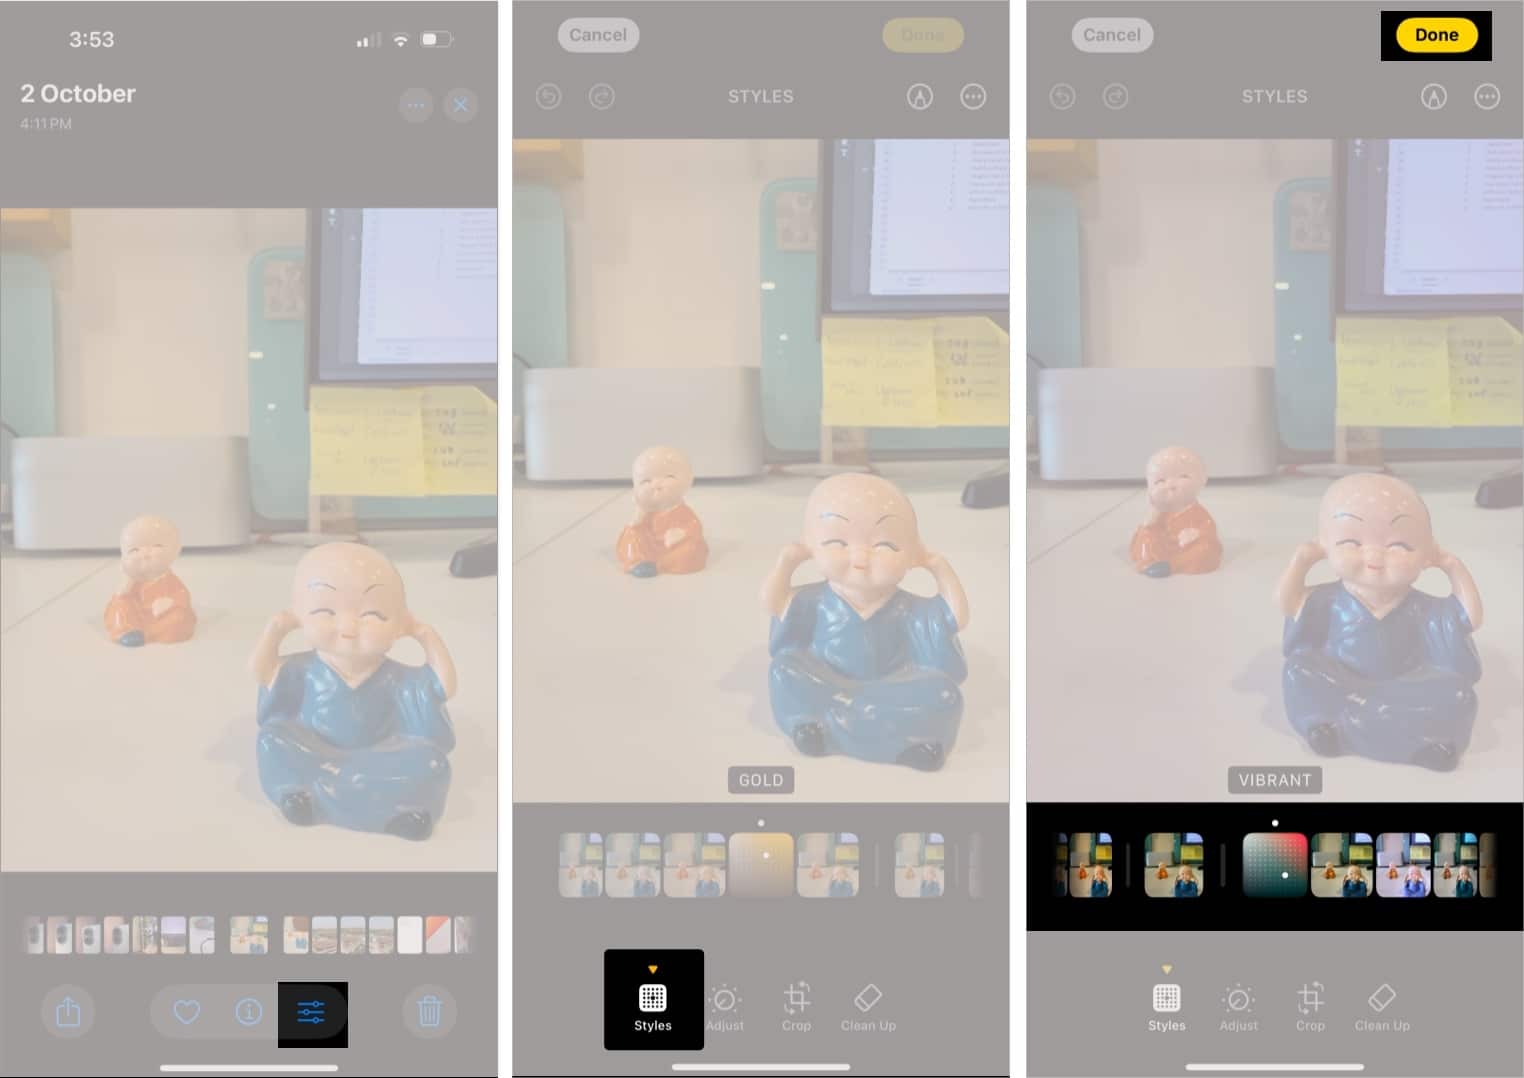
- Once you’re satisfied with your changes, simply tap Done to save the photo.
Change Photographic Style
Want to switch things up? You can easily change the Photographic Style while shooting from the Camera app itself.
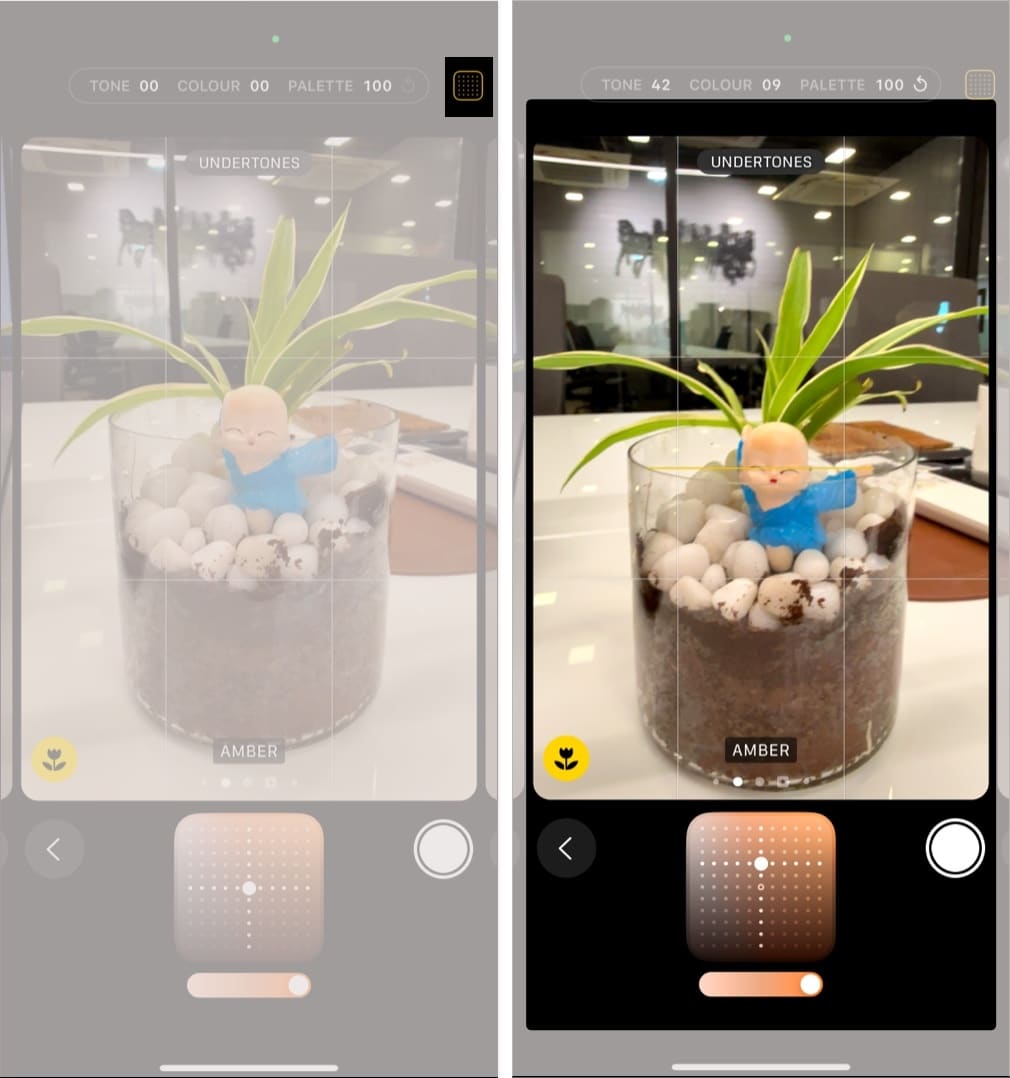
- Inside the Camera app, tap the Photographic Styles icon in the top-right corner.
- Swipe left or right on the camera frame and pick a different style.
- Tap the Photographic Styles icon once again to save the changes and start shooting.
Reset or remove Photographic Styles
In case you don’t like Photographic Styles, you can easily reset it using the steps below:
- Navigate to Settings > Camera > Photographic Styles.
- Here, tap Reset to Standard. This will remove the current Photographic Style.
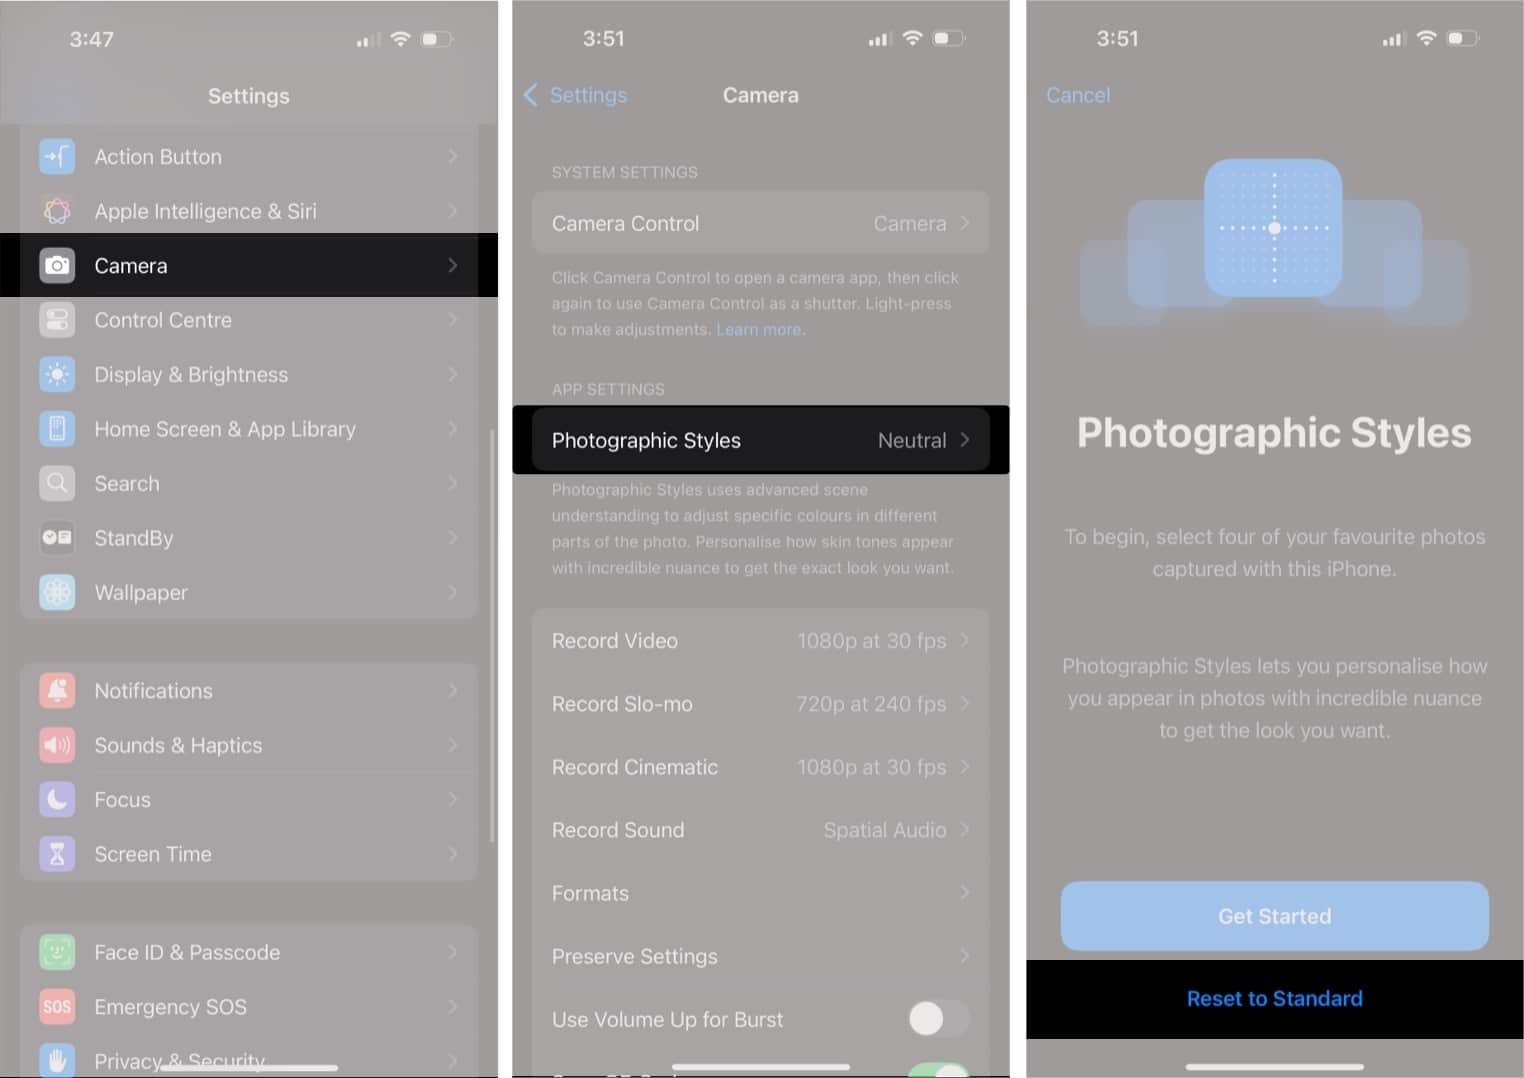
- Once done, you can then tap Get Started to choose a new Photographic Style as the default.
How do Photographic Styles differ from traditional filters?
Unlike traditional filters, Photographic Styles are designed to blend seamlessly with your original image, enhancing its natural beauty rather than drastically altering its appearance. They are also more customizable, allowing you to adjust their intensity to your liking. And while Android phone cameras do have customizable filters where one can control the intensity, Apple’s implementation allows one to customize the Photographic Styles with multiple values, making it better suited for a variety of different skin colors.
Signing off…
As someone who spends a lot of time in apps like Snapseed and Lightroom, just fine-tuning his pictures for the perfect effect, Photographic Styles on the iPhone 16 makes mobile photography a lot easier. Whether you’re capturing portraits, landscapes, or everyday moments, these customizable styles let you create photos that reflect your unique aesthetic, without the hassle of post-editing.
FAQs
Yes, you can. You can edit your photos and apply Photographic Styles using the Photos app on your iPhone.
No, Photographic Styles are designed for still photos and do not affect video recordings.
You may also enjoy reading:

