First introduced with iPadOS 15, Quick Note is a feature widely appreciated by iPad users for its ability to take notes anywhere you want. With iOS 16, Apple brought this feature to the iPhone, and if you don’t know what Quick Note is and how to use this feature, then read along.
What is a Quick Note?
Quick Notes were introduced with iPadOS 15 and macOS Monterey in the Notes app. Using this feature, you can add ideas and links anywhere on your iPad and Mac. Since its release, Quick Notes have been widely appreciated for its ease of usability. With iOS 16, Apple has now added it to even iPhone users.
How to enable Quick Notes on iPhone via Control Center
The easiest way to access Quick Notes from anywhere on your iPhone is by adding it to the Control Center. And for that:
- Open Settings.
- Tap Control Center.
- Scroll down to MORE CONTROLS and tap the + icon next to Quick Note.
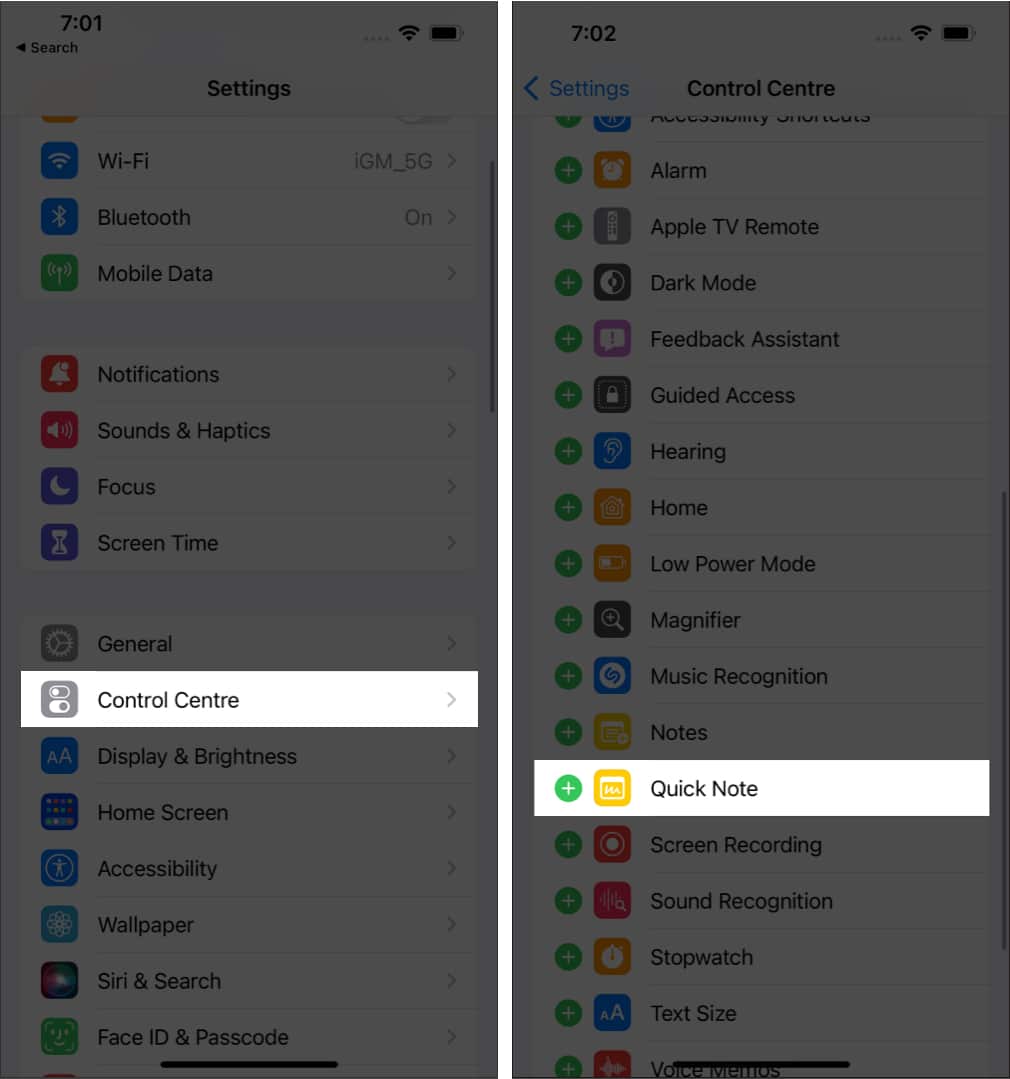
You have now successfully added Quick Note to Control Center. If you want to change its position, open Settings → Control Center, and under INCLUDED CONTROLS, touch and hold the three lines next to Quick Note and drag it accordingly.
Access Quick Notes in iOS 16 from Control Center
- Open Control Center.
- Tap the Quick Note icon.
- Jot down your thoughts, and tap Save at the top right.

Save a website link to a Quick Note on iPhone
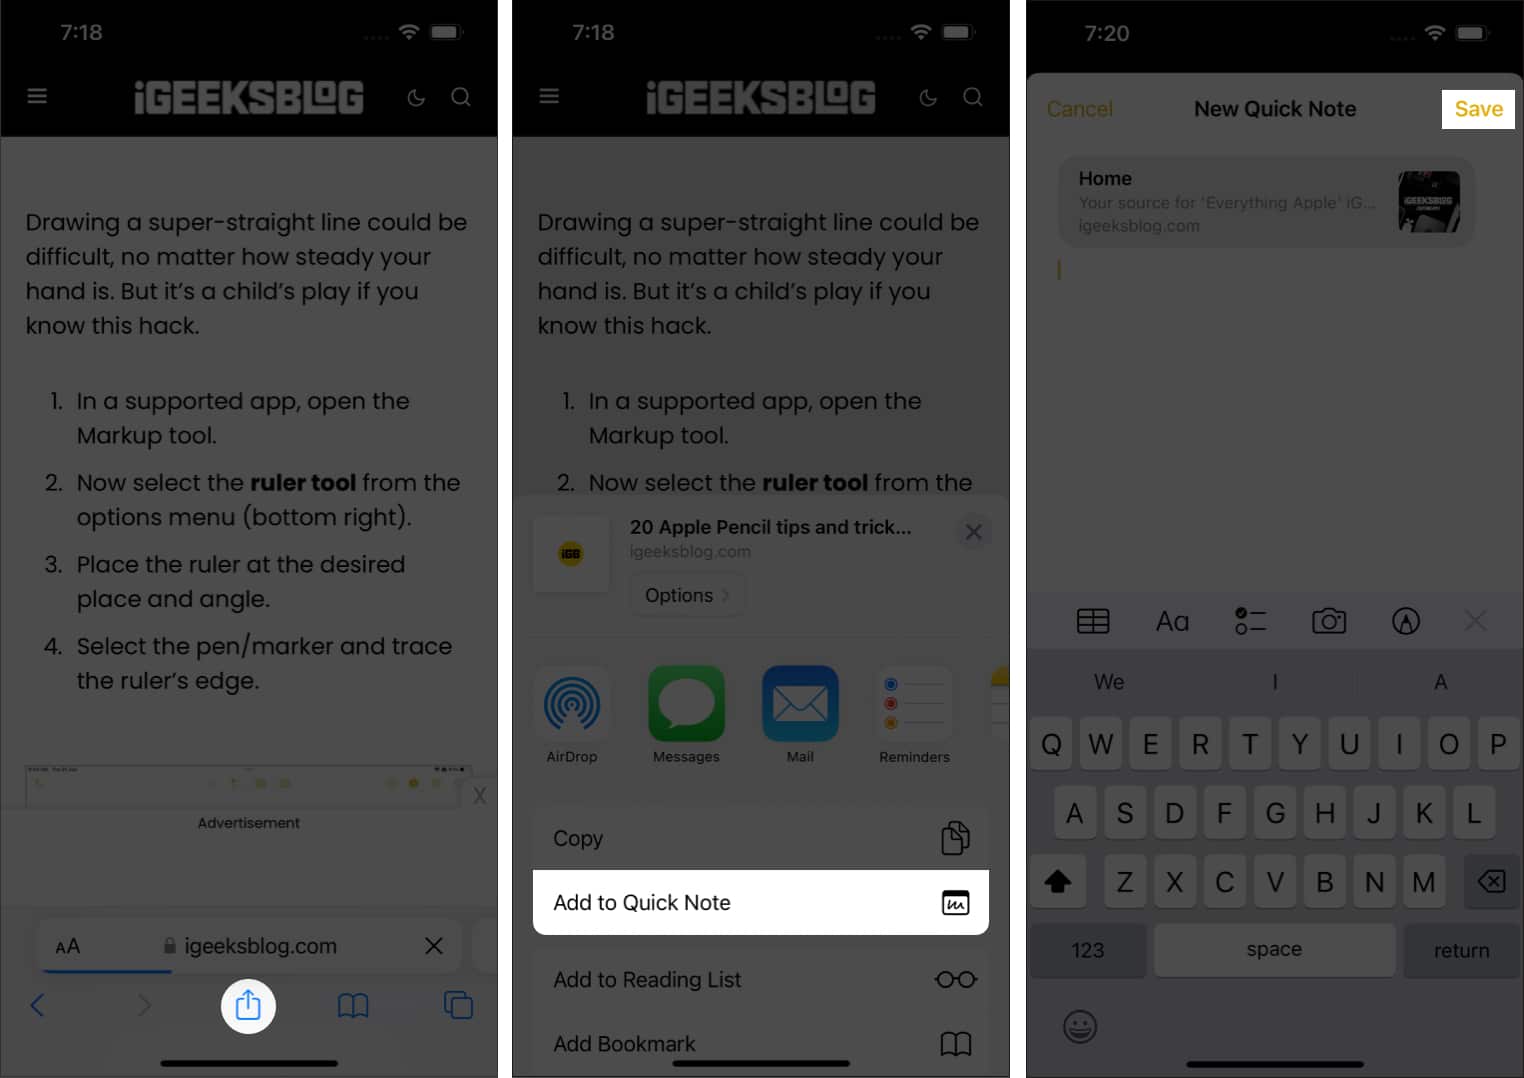
If you are web surfing on browsers such as Safari or Chrome and want to add any links to a Quick Note, you can do so from the browser itself. Here’s how:
- Open a webpage and tap share at the bottom.
The position of the share button changes according to the browser. - Tap Add to Quick Note.
For other browsers, it will be New Quick Note. - Optional: Add a note below the link.
- Tap Save.
Use Quick Note to save text
If you don’t want to share the article link but only a part of the text in the webpage to a Quick Note, here are the steps:
Become an iGeeksBlog Premium member and access our content ad-free with additional perks.
- Open the webpage from where you want to share the text.
- Tap and hold for the selector tool, and select the text you want.
- Tap the > icon and select New Quick Note.
- On Quick Notes, make necessary changes and tap Save.

Create a Quick Note from any app
When Apple said you could create a Quick Note from anywhere on your iPhone, they meant it. You can share links or apps from the App Store to Quick Note. All you have to do is tap Share and select Add to Quick Note. On some apps, this option will only be available after selecting Share via.
Access all Quick Notes on iPhone
- Open the Notes app on your iPhone.
- Tap Quick Notes.
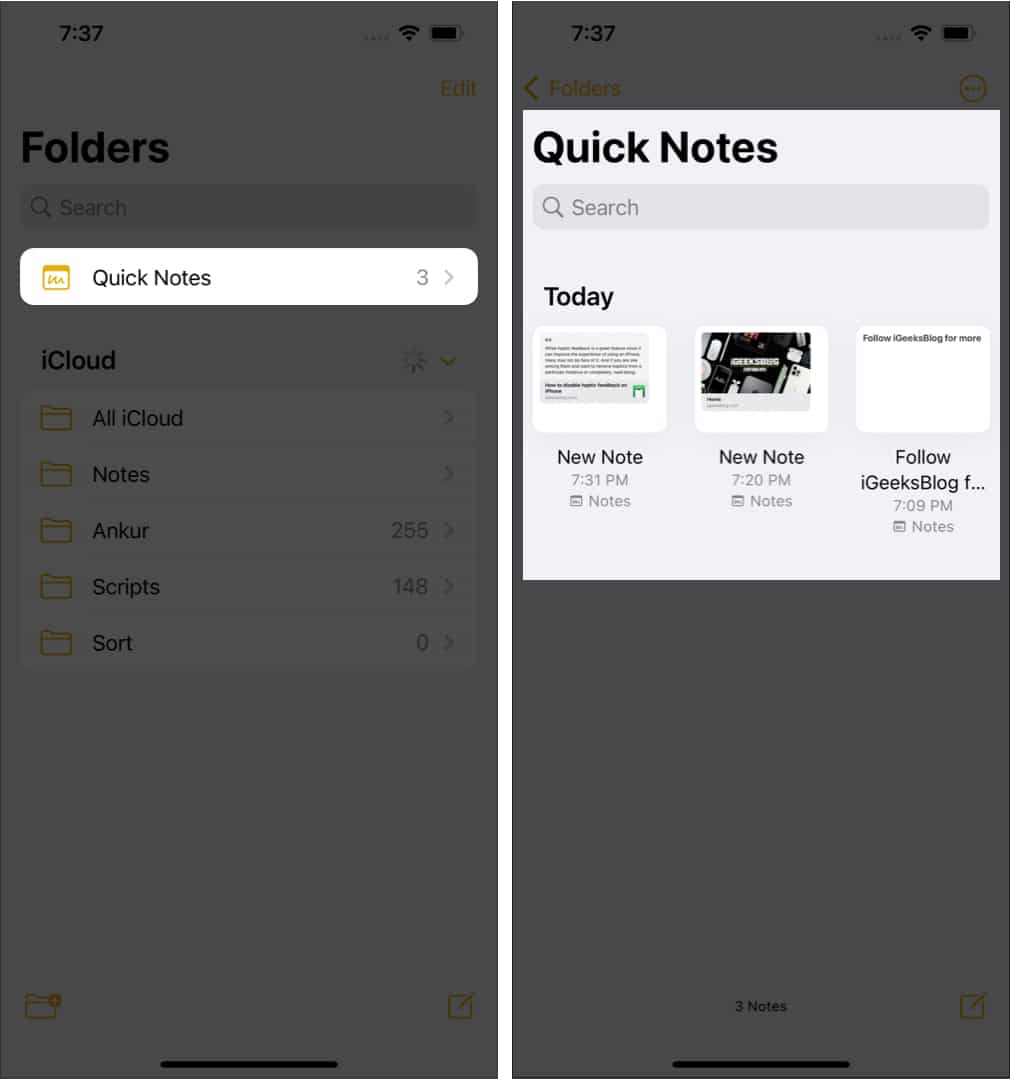
Here, you can make changes to the notes, share them, and even delete them according to your choice.
That’s it!
By giving the Quick Notes feature to even iOS users, Apple has made sure you can always jot down your ideas instantly. This is how you can create and use Quick Notes on your iPhone. What are other iPadOS features that you want to see on your iPhone? Let me know in the comments below.
FAQs
While there is no option to entirely remove a Quick Note from iPhone, you can remove it from the Control Center. To do so, open Settings → Control Center → under INCLUDED CONTROLS, tap the – sign next to Quick Note → tap Remove.
To add a note, you have to open the Note app. Whereas you can share a Quick Note from anywhere and any app on your iPhone.
The Quick Notes are stored inside the Note app. You can access them by opening the Notes app → selecting Quick Notes.
Liked this guide? You will also like these:
