Do you find yourself reusing the same lists in the Reminders app? Maybe it’s a grocery, packing, or back-to-school list. You can avoid creating the same list repeatedly by using a template. In this article, I’ll show how you can create and use templates in the Reminders app on your iPhone, iPad, and Mac.
- What are templates in Reminders app?
- How to create templates in Reminders app on iPhone and iPad
- How to create templates in Reminders app on Mac
What are templates in Reminders app?
A template in the Reminders app is similar to one you might use in Apple Pages, Microsoft Word, or Notion. It has the base for you to start creating your document without making it from scratch.
Once you create a template, you use it repeatedly, make changes to it if needed, and even share it with others who may set up the same lists.
As mentioned, templates work well for lists you regularly create, like those for the supermarket, packing for a trip, or getting your children ready for a new school year. But you can also use them for things like spring cleaning, gift lists, or tasks for a project.
You can use templates in Reminders on iPhone, iPad, and Mac. Just ensure you’re running iOS 16, iPadOS 16, or macOS Ventura or later.
Note: You cannot use one of the Reminder’s Smart Lists as a template. This includes the Today, Flagged, and Scheduled lists.
How to create templates in Reminders app on iPhone and iPad
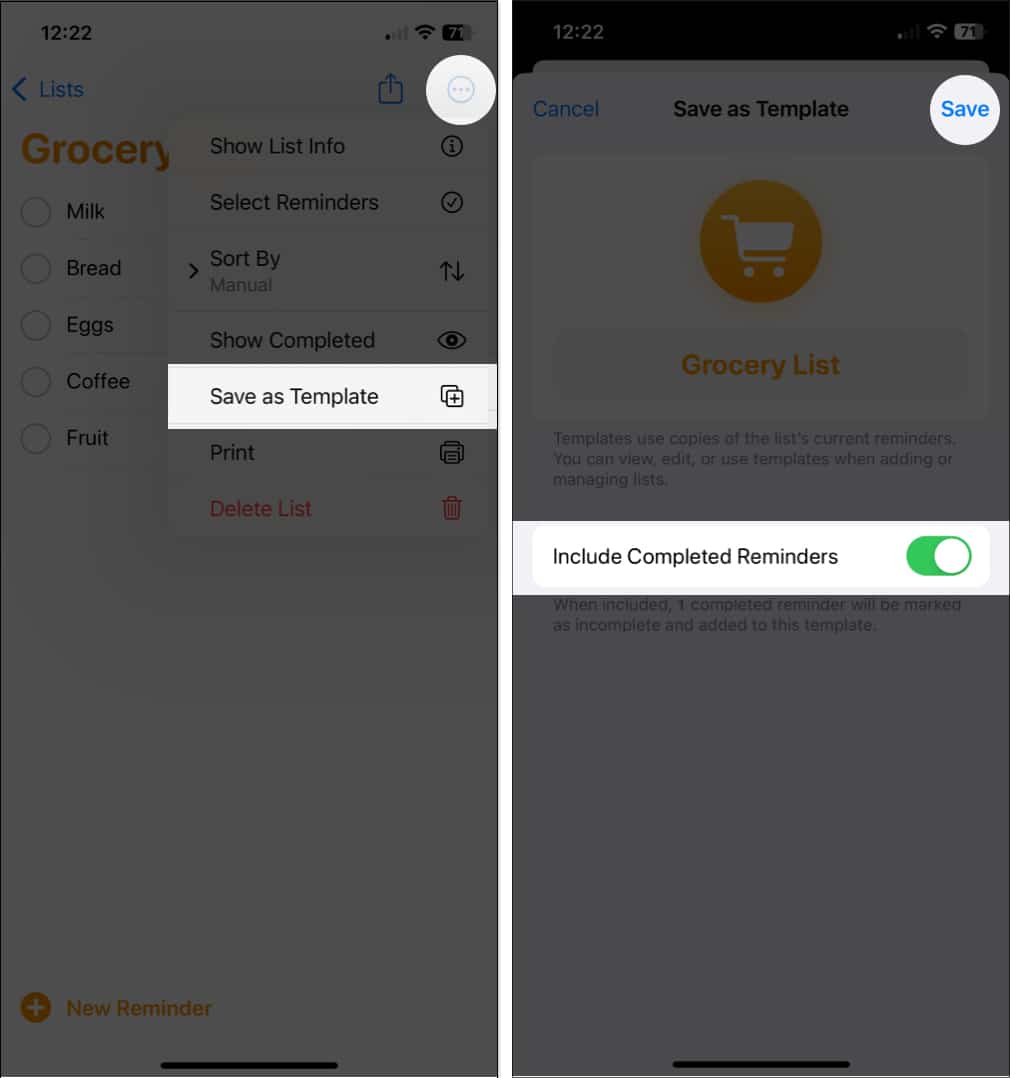
- Open the list you want to use in the Reminders app.
- Select the three dots on the top right → pick Save as Template.
- In the pop-up window, you can change the template name if you like.
- If you have items marked as completed, you have the option to include completed reminders in the template. Those items are then added to the list template as uncompleted.
- Tap Save on the top right to create the template.
Use a template on iPhone and iPad
When you’re ready to use a template you’ve created, it takes only a minute to open it and get to work.
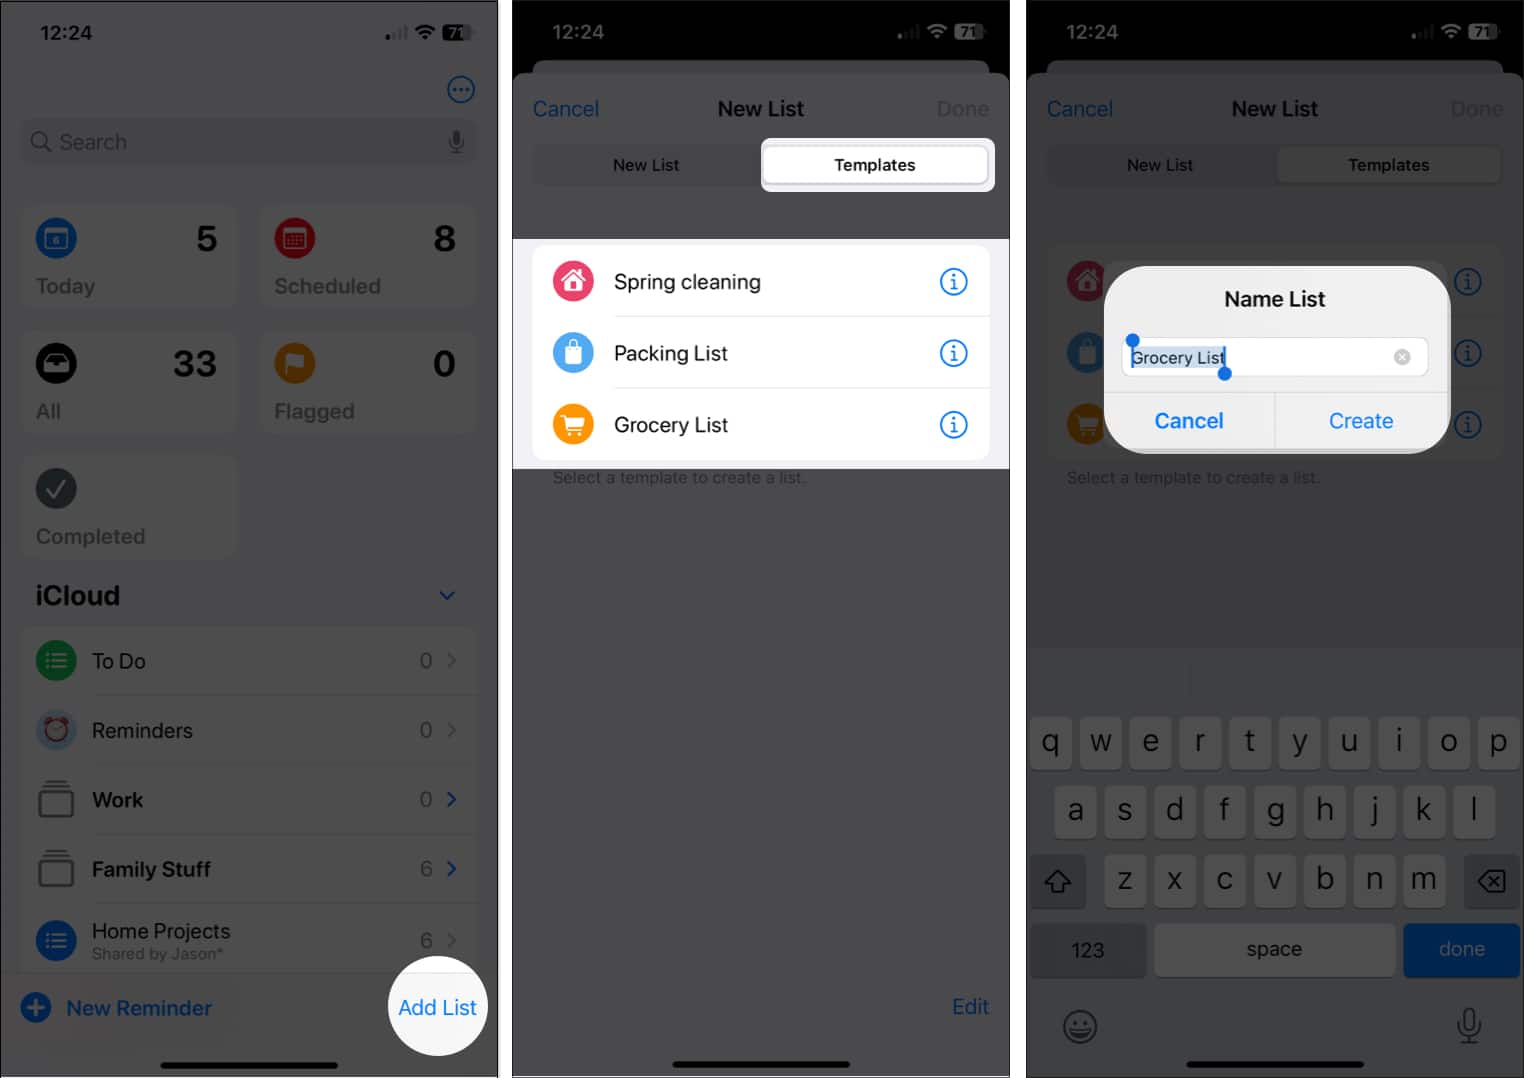
- Open the Reminders app.
- Tap Add List at the bottom.
Select an account if you have more than one. - In the New List window that appears, go to the Templates tab.
- Choose the template from the list and optionally rename it. This does not rename the template, only the list.
- Tap Create to set up your new list based on the template.
Edit a template on iPhone and iPad
If you want to make changes to a template or delete one, this is just as easy.
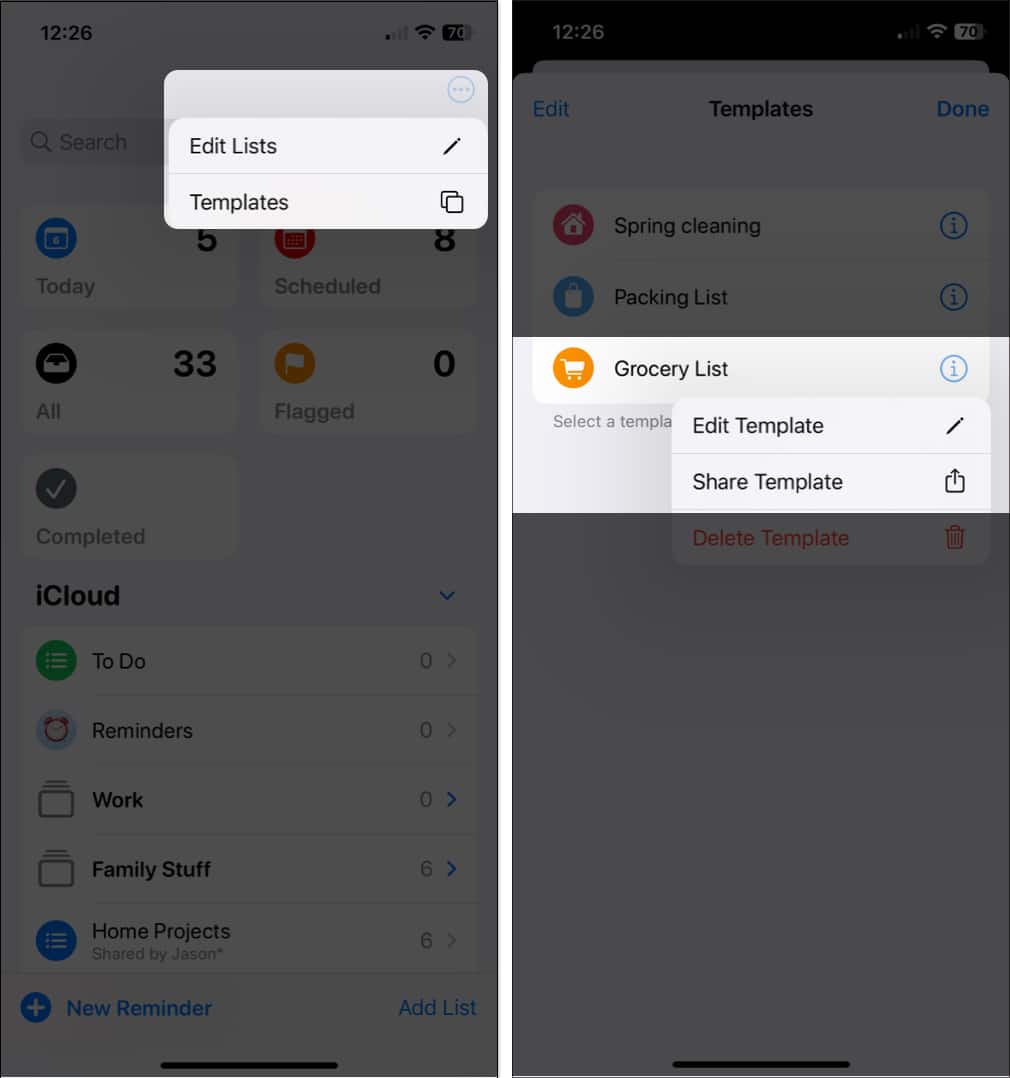
- Open Reminders → tap the three dots on the top right → pick Templates.
On iPad, the three dots are at the top of the sidebar. - Tap the info icon (small letter “i”) to the right of the template you want to edit.
- Then tap Edit Template.
- Make changes such as adding, removing, or changing list items. Tap Done when you finish.
- To change the color or icon, tap the three dots on the top and pick Show Template Info to make your edits, tapping Done when you finish.
- Any changes you make to a template do not apply to lists you created with the template beforehand.
Note: To delete a template, follow steps 1-2 and then select Delete template → tap Delete to confirm.
Maybe you have a template that you want to share with a friend or family member. They can then use the template for their own list. Your recipient must also be using iOS 16, iPadOS 16, or macOS Ventura or later.
- In Reminders, tap the three dots → select Templates.
- Tap the Info icon to the right of the template → pick Share Template.

- If you have due dates, tags, or locations attached to the template, you’ll be prompted to include those items when sharing the template. Turn on the toggle for each item you want to include and tap Continue.
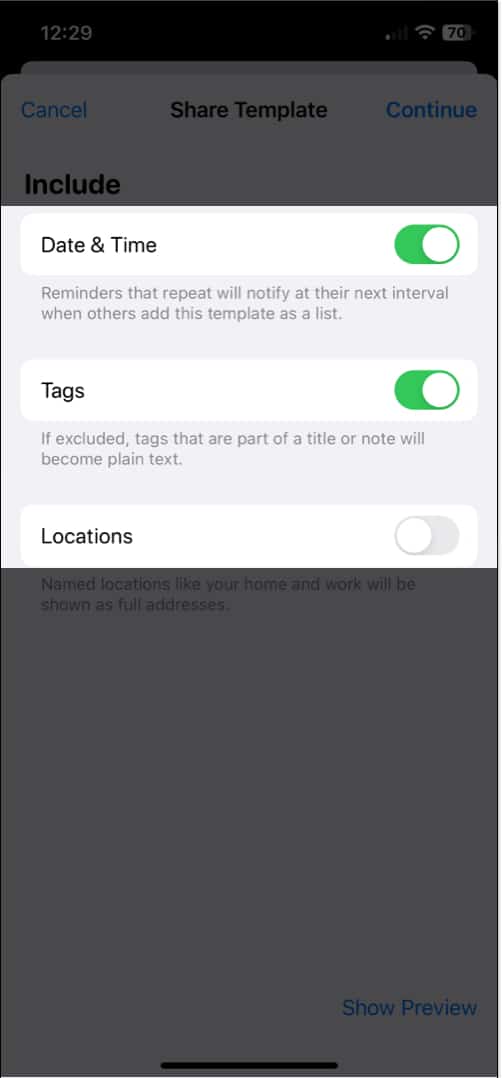
- Choose a sharing option and follow the subsequent prompts to share a link to the template.
After you share a template, you may make changes to it that you also want to share, or you might want to stop sharing the template.
Become an iGeeksBlog Premium member and access our content ad-free with additional perks.
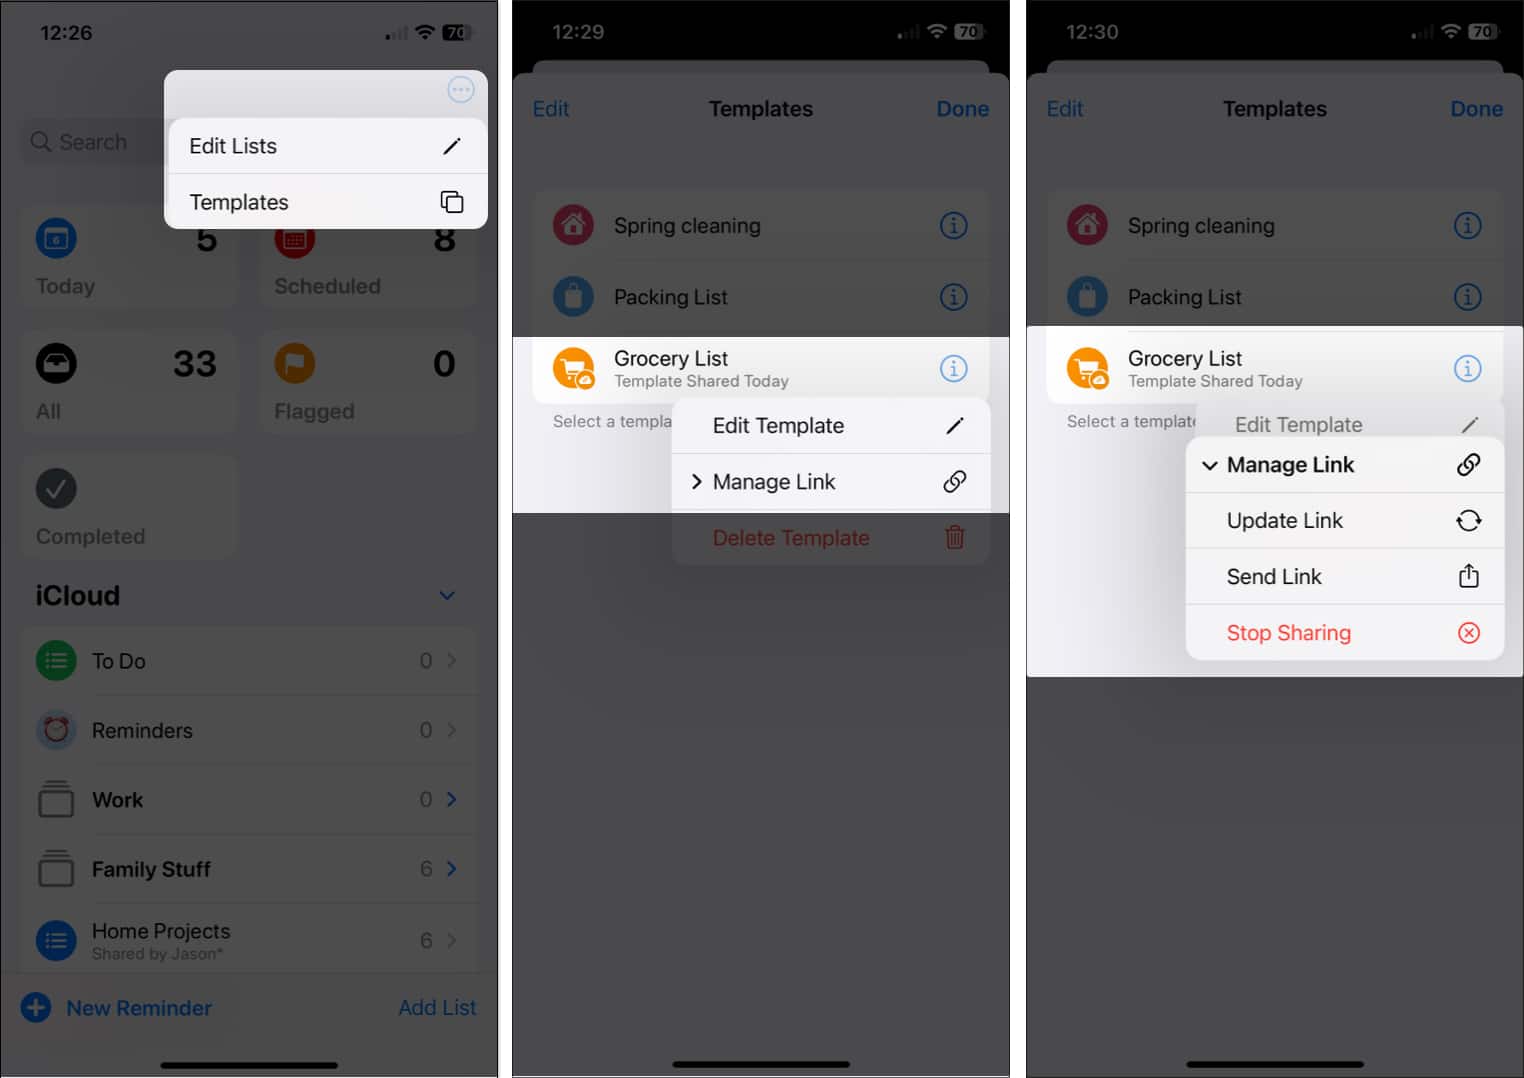
Tap the three dots to open Templates, select the Info icon, and pick Manage Link. You can then choose one of these actions:
- Update Link: Share changes you made to the template.
- Send Link: Share the template with another person.
- Stop Sharing: Remove access from the shared template.
How to create templates in Reminders app on Mac
- Open the list you want to use in the Reminders app.
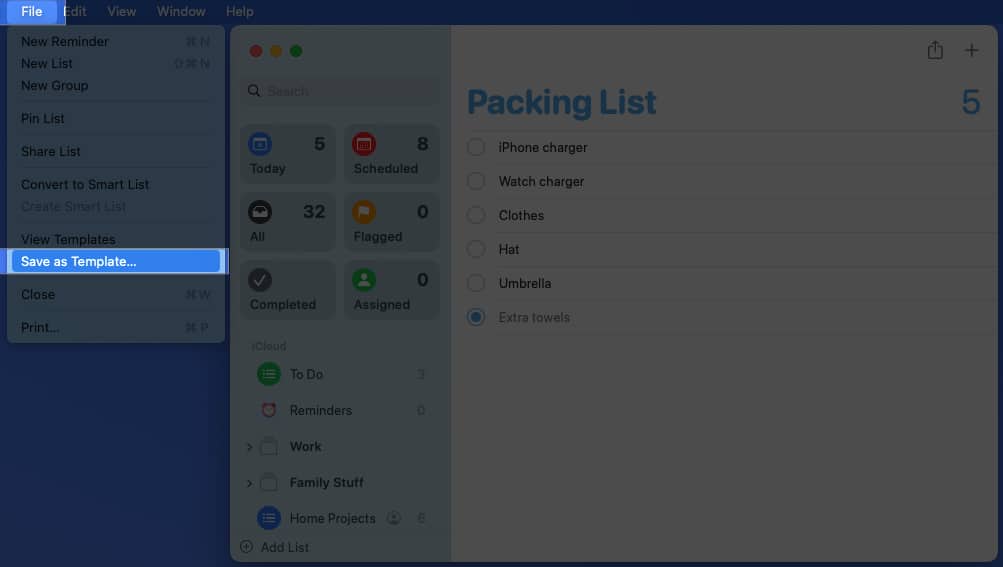
- Select File from the menu bar → pick Save as Template in the menu bar.
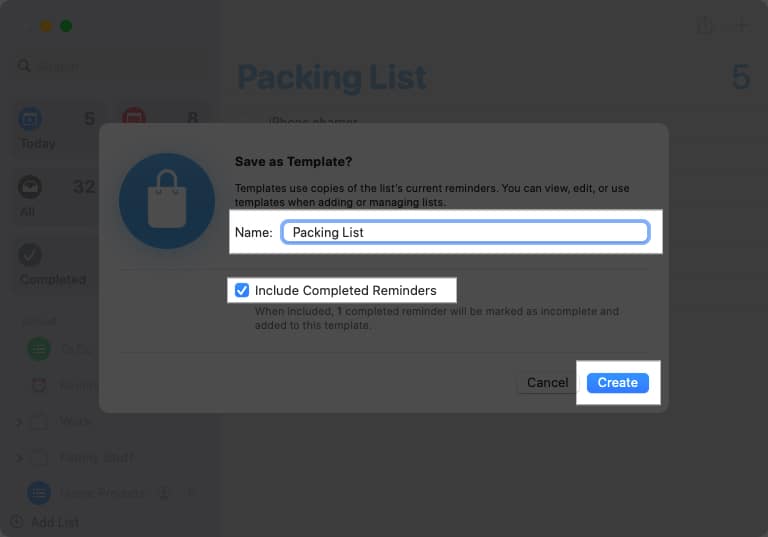
- Optionally, give the template a new name. Again, this only names the template, not your current list.
- Check the box for Include Completed Reminders if you want to add those to the template.
- Click Create to save the template.
Use a template on Mac
- Open Reminders and select Add List at the bottom of the sidebar.
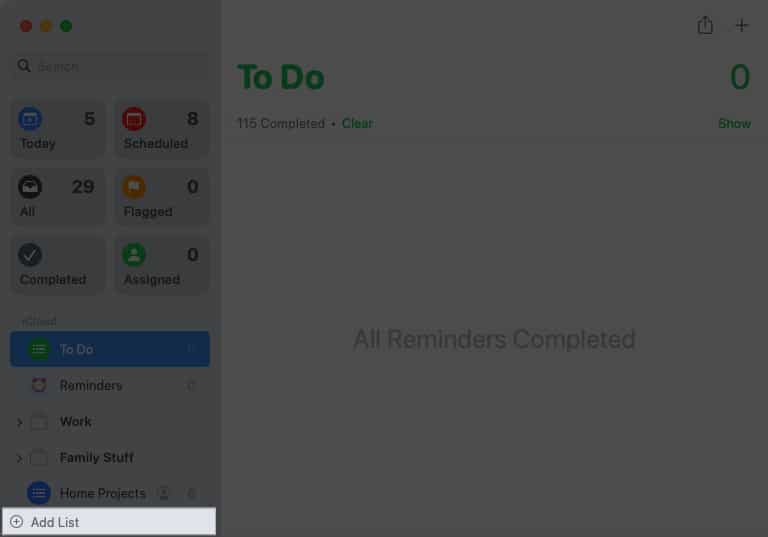
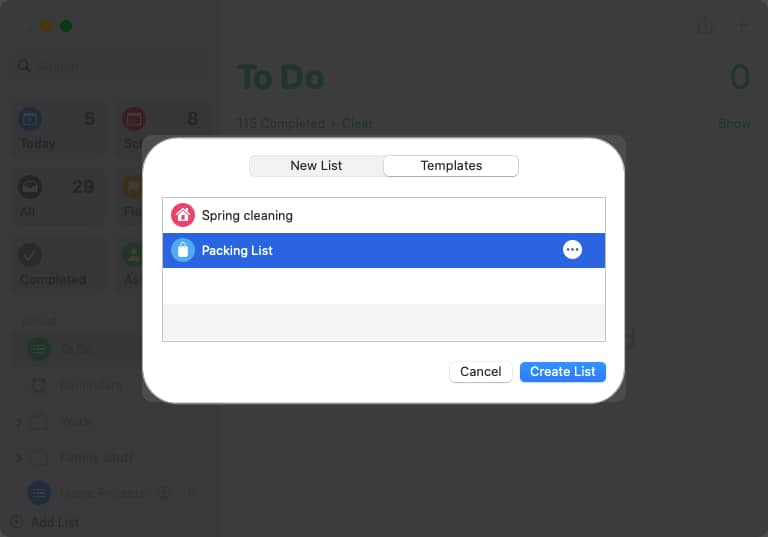
- Go to the Templates tab.
- Choose the template and click Create List.
Edit a template on Mac
- Open Reminders, select File in the menu bar → pick View Templates.
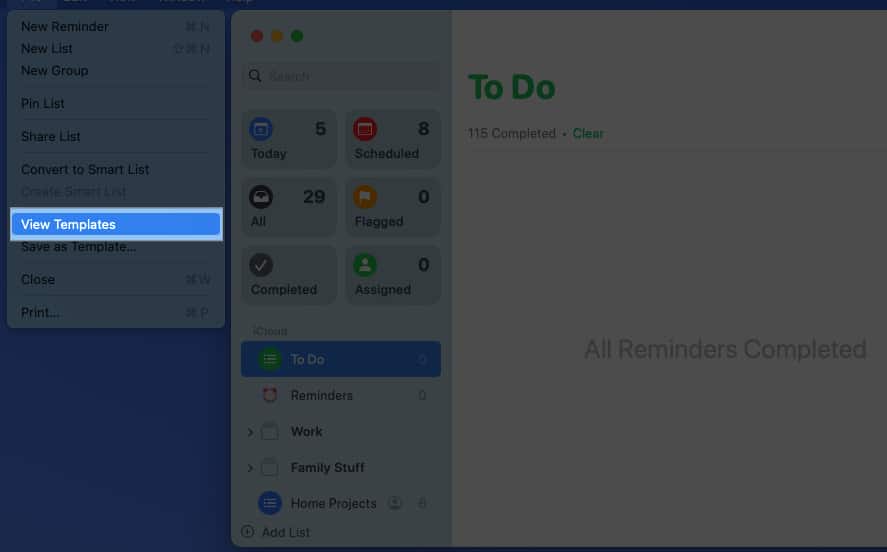
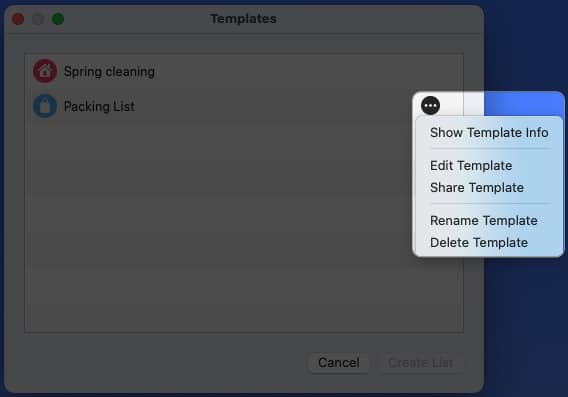
- Click the three dots to the right of the template and use one of these actions.
- Show Template Info: Change the color, icon, or name of the template.
- Edit Template: Add, remove, or change the list items.
- Rename Template: Give the template a new name.
- Delete Template: Remove the template and click Delete to confirm.
- Select File in the menu bar → pick View Templates.
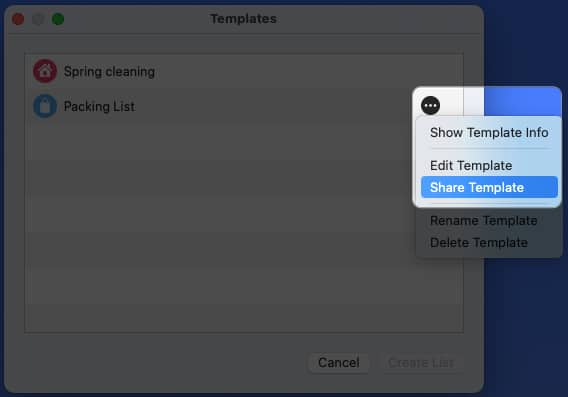
- Click the three dots to the right of the template → choose Share Template.
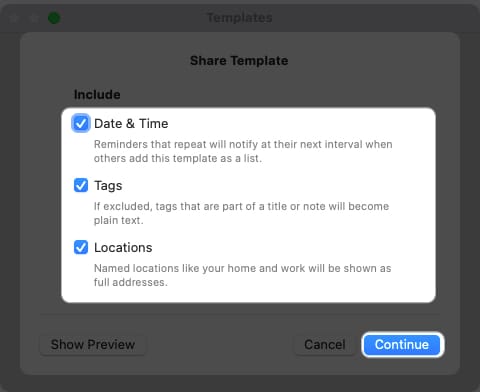
- If you have dates, tags, or locations in the template, you’ll be prompted to include these. Check the box next to each item you want to include, click Continue, and confirm.
- Select the sharing option you want to use and follow the subsequent prompts.
- Select File in the menu bar → pick View Templates.
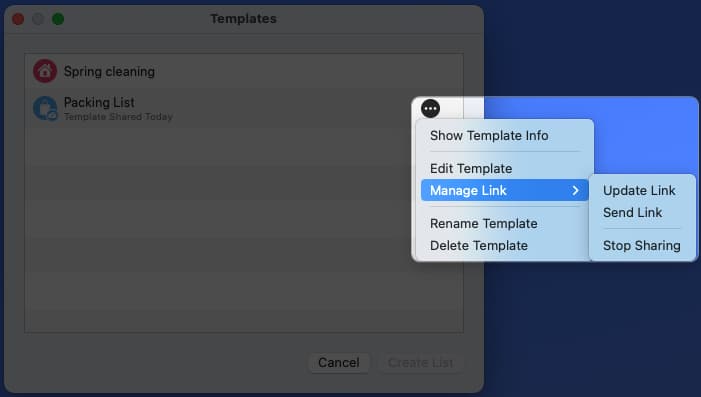
- Click the three dots to the right of the template, move to Manage Link, and choose one of the following:
- Update Link: Share edits you made to the template.
- Send Link: Share the template with another person.
- Stop Sharing: Remove access from the shared template.
Create new Reminders quickly with templates
Setting up a template or two in Reminders allows you to quickly start new lists without manually adding items from scratch. Will you give this terrific time-saving feature a try?
For more, look at how to set up hourly reminders on iPhone, iPad, and Mac.
Read more:
