
With the help of Google Maps timeline, you can quickly find the places you have visited and the routes you have traveled. It can turn the clock back and let you liven up the fascinating times you spent with your buddies! Willing to take a peek at the locations you have traveled? Follow this hands-on guide to view and edit your Google Maps timeline on your iPhone, iPad, and computer.
Haven’t created a timeline as yet? You need to first turn on your Location and Location History as Google takes the help of your location, search, and browsing info to make your timeline.
- How to Make Google Maps Timeline on iPhone, iPad, and Android
- How to View Google Maps Timeline on iPhone, iPad, and Android
- Delete Google Maps Location History on iPhone, iPad, or Android
- How to View and Edit your Google Maps Timeline on Computer
- How to Edit Google Maps Timeline on Computer
- Hide or Show Google Photos on Google Maps Timeline
- How to Remove a Photo from Google Maps Timeline
How to Make Google Maps Timeline on iPhone, iPad, and Android
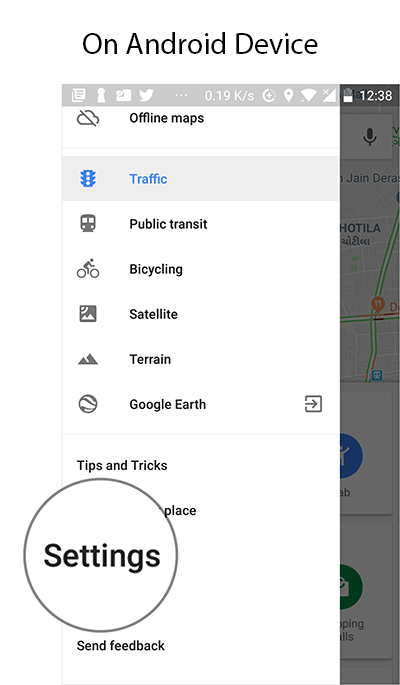
Step #1. Open Google Maps app on your device → tap on the menu button at the top left corner → tap on Gear Icon (On Android device tap on Settings.)
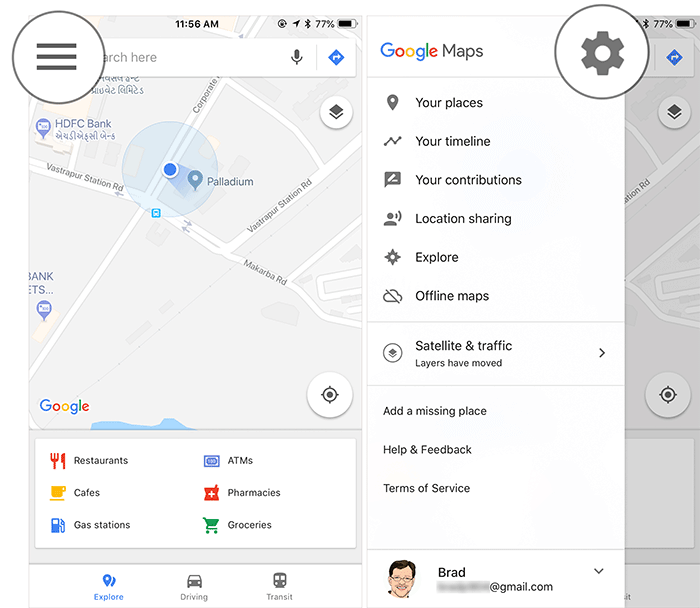
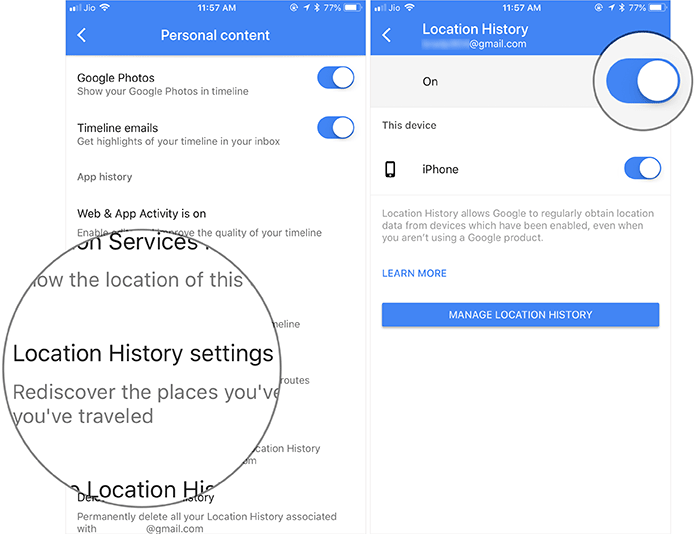
Step #2. Now Tap on Personal content.
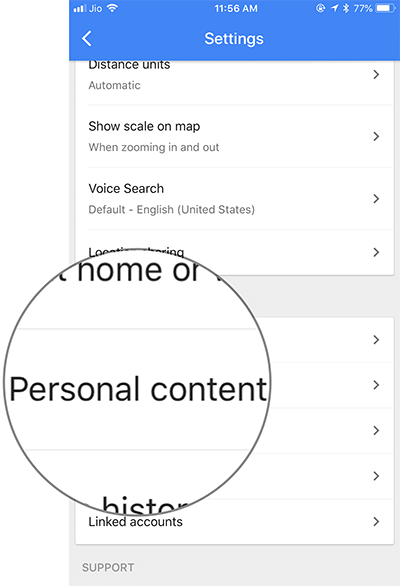
Step #3. Next, scroll down to Location settings and ensure that Location Services ON. (On your iOS device, you need to select Always.)
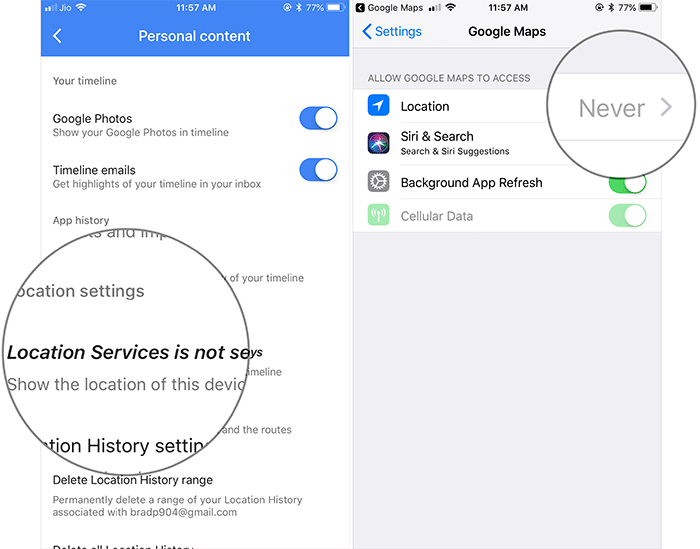
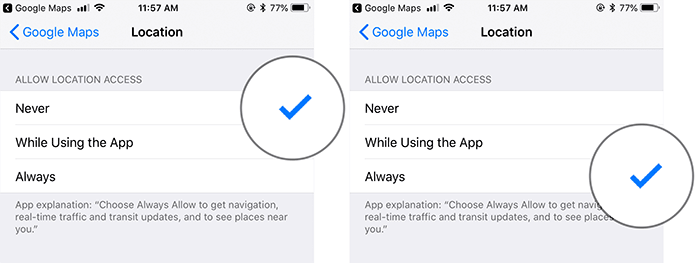
Also, make sure that Location History is ON.
How to View Google Maps Timeline on iPhone, iPad, and Android
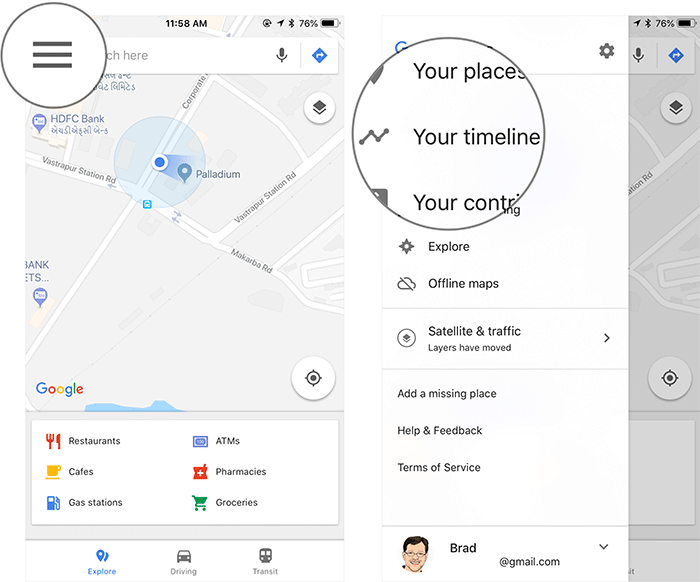
Step #1. Open Google Maps on your device → Tap menu button at the top right corner → tap on Timeline button.
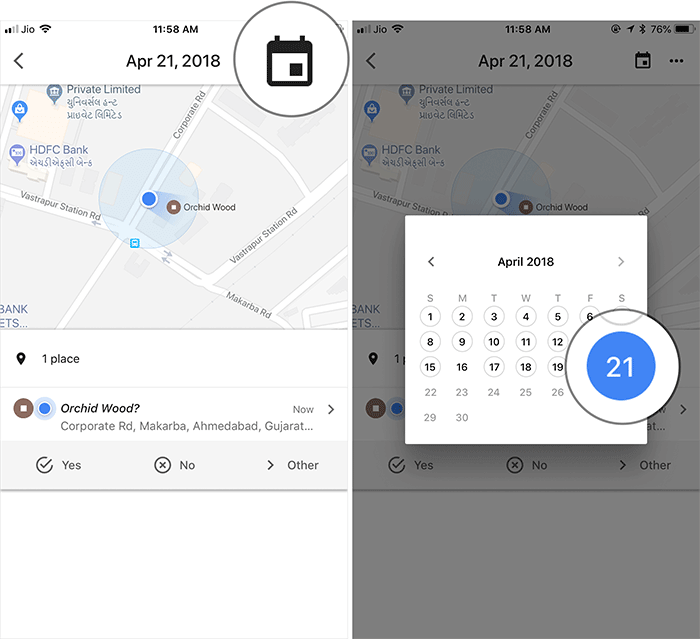
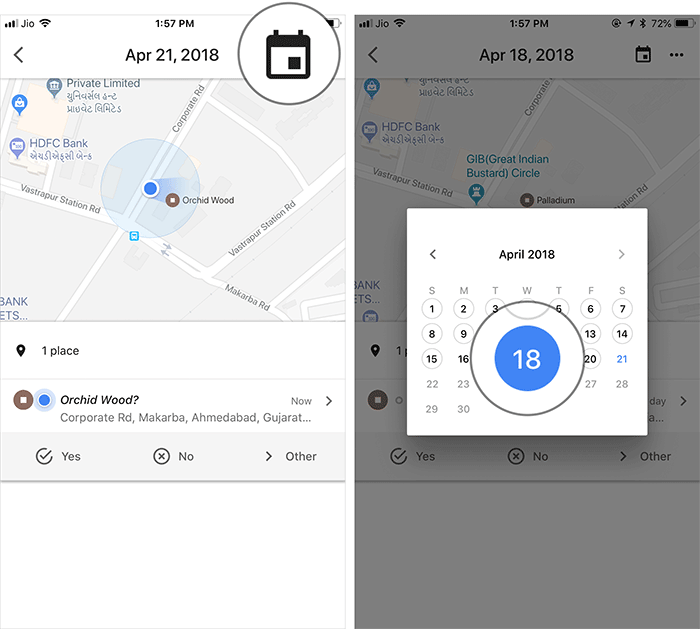
Step #2. To check the timeline of any day or month, tap Calendar button at the top. Then, then swipe left or right and tap a day.
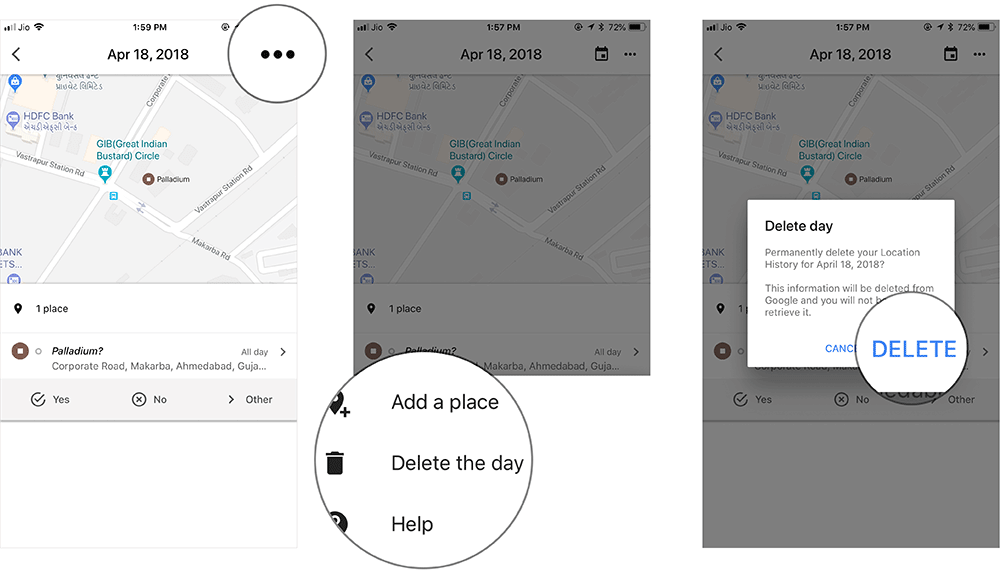
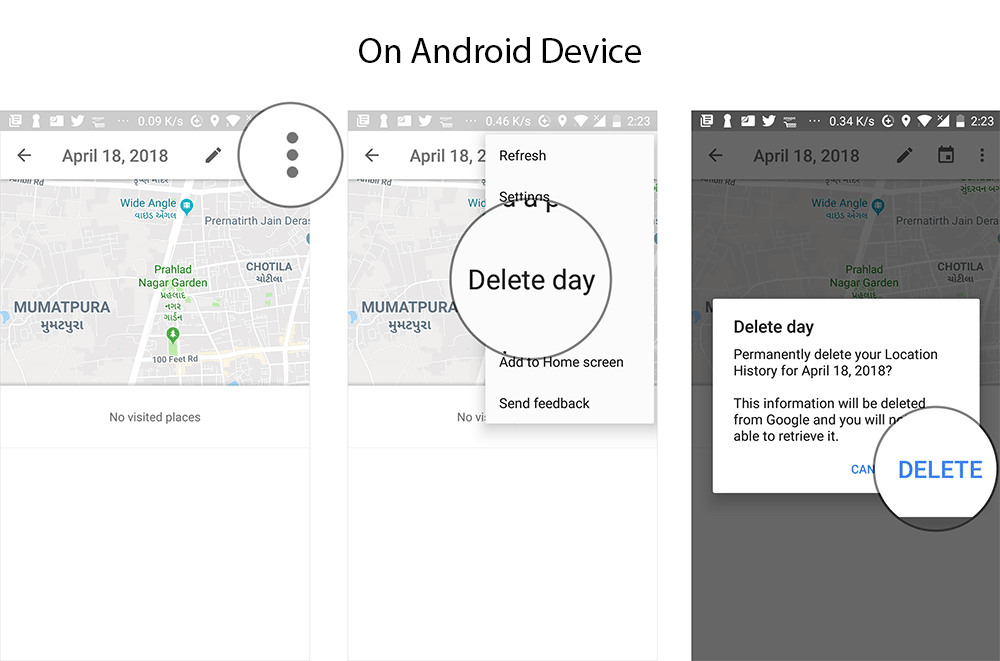
Delete a Day:
Step #1. Tap the Calendar icon and then choose the day you want to delete.
Step #2. Tap on More button and select Delete the day. Then, confirm.
Delete Google Maps Location History on iPhone, iPad, or Android
Step #1. Launch Google Maps → tap on the Menu button → choose Settings.
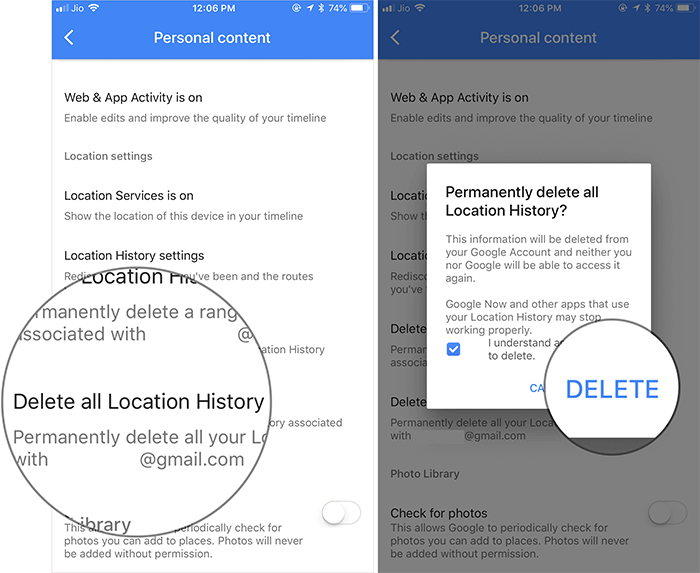
Step #2. Tap on Personal content.
Step #3. Scroll down to Location settings. Now, you have two options: either delete only some location history or completely remove it.
If you wish to delete only some location history, tap on Delete Location History range and then set the range. Then, tap on Delete.
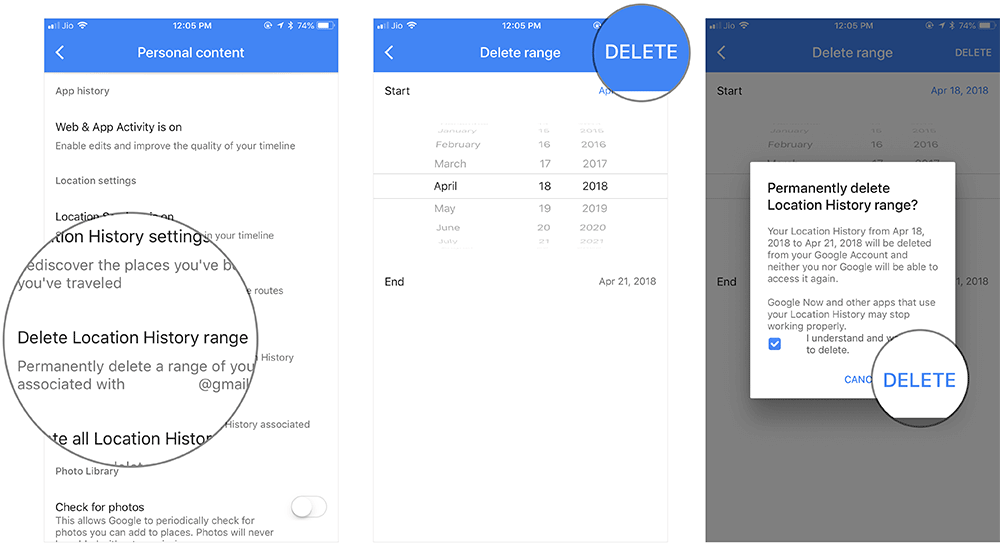
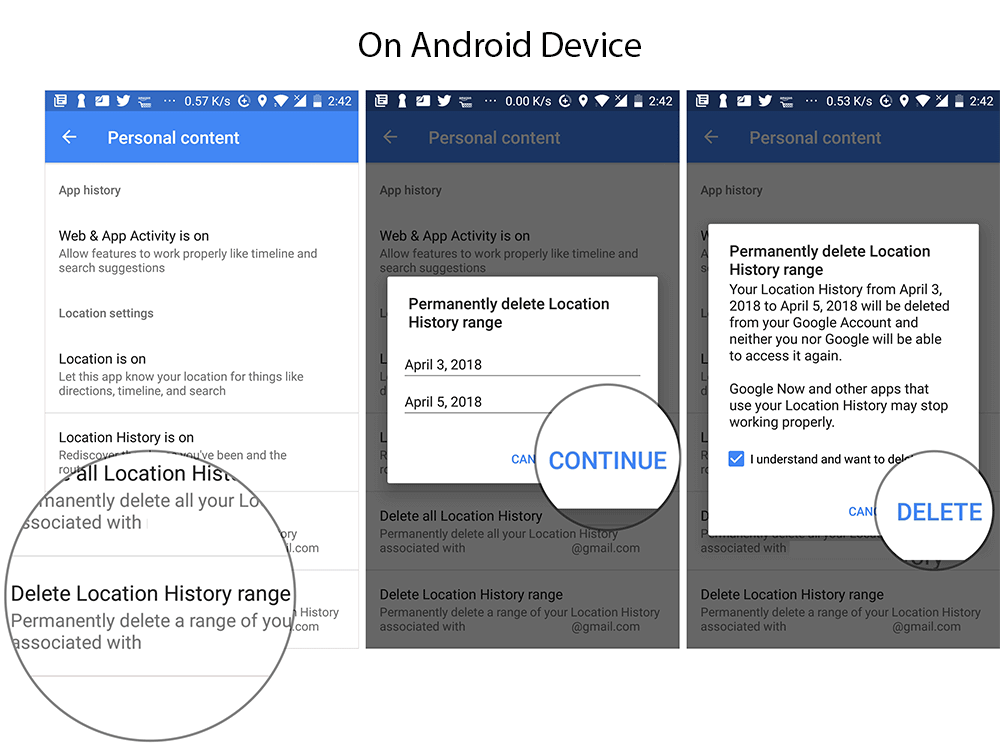
If you want to delete entire history → select Delete all Location History (This step is same for both, iOS and Android device.)
Note: You can also change how your timeline measures distance. To do so, open Google Maps → Menu → Settings → Distance units → select Automatic, Kilometers, or Miles.
Viewing and deleting the timeline on the desktop is just as simple.
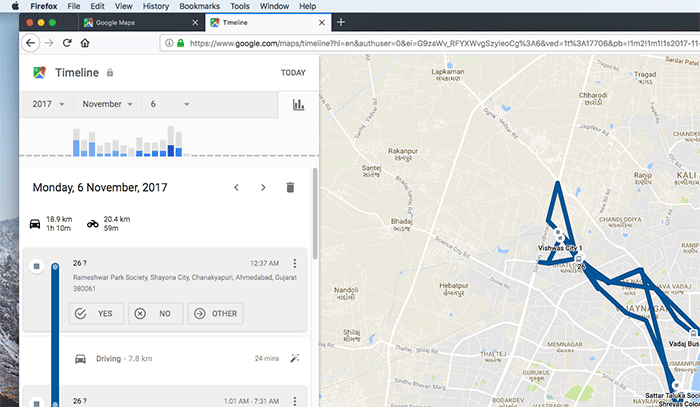
How to View and Edit your Google Maps Timeline on Computer
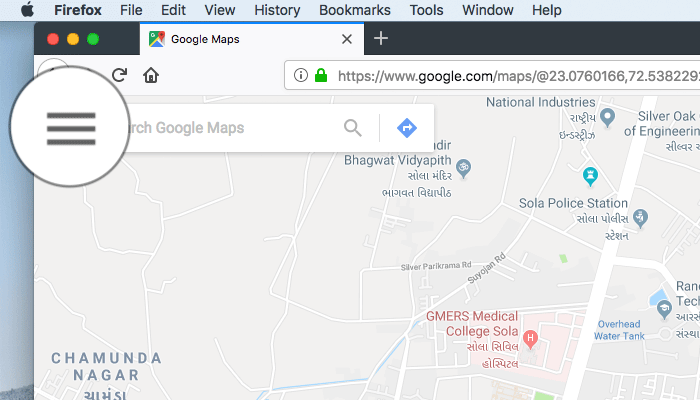
Step #1. Open any web browser on your computer and launch Google Maps. Now, sign in to your account, if you are not already.
Step #2. In the top left, click on the menu button.
Step #3. Click on your timeline button.
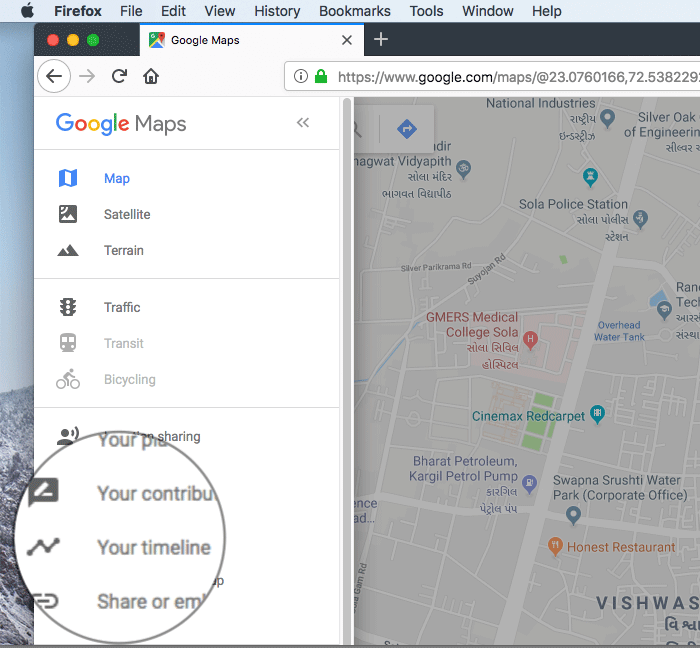
Step #4. To view the timeline of another date, select a day, month, and year.
How to Edit Google Maps Timeline on Computer
Step #1. Open Google Maps on your computer → click on the menu button at the top left.
Step #2. Now, click on your timeline button.
Next, you can do several things like get rid of the location history and even delete a day.
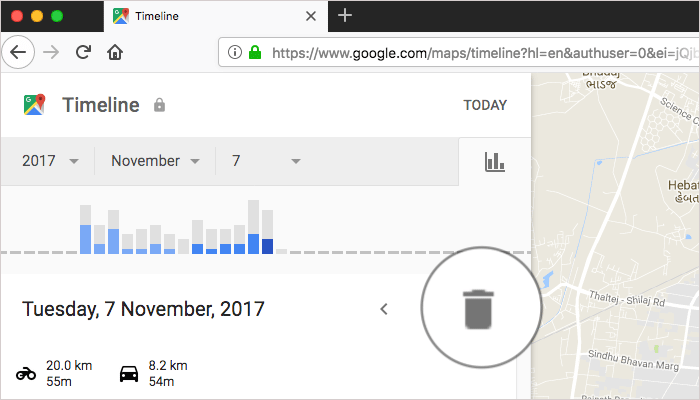
Delete a Day:
Step #1. Simply click on the day you wish to delete.
Step #2. Now, click on the trash button and confirm.

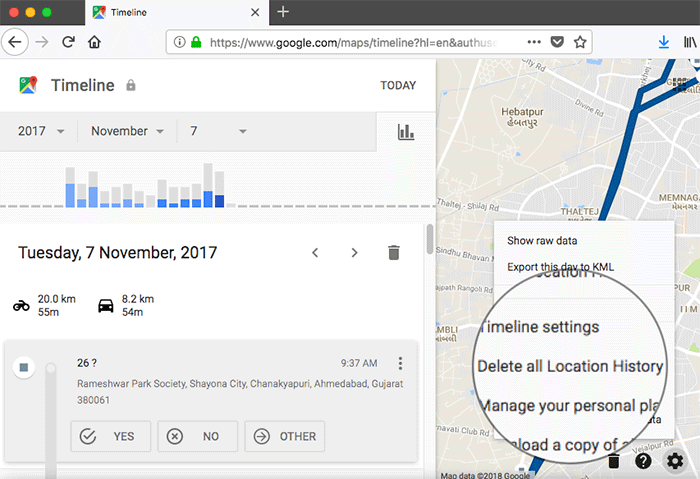
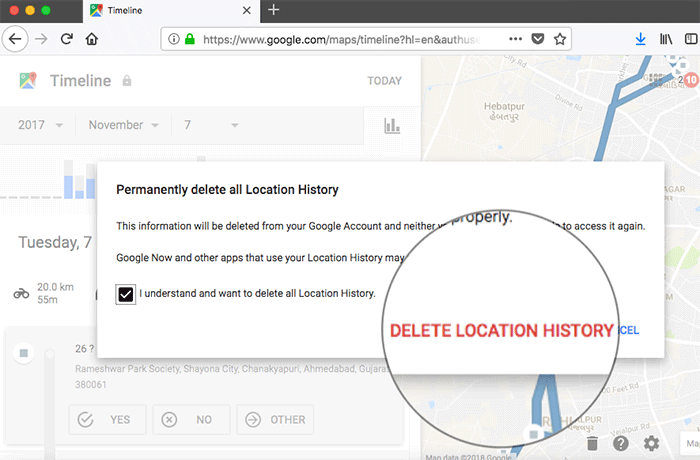
Delete all Location History:
Step #1. Click on the Settings button that looks like a gear icon.
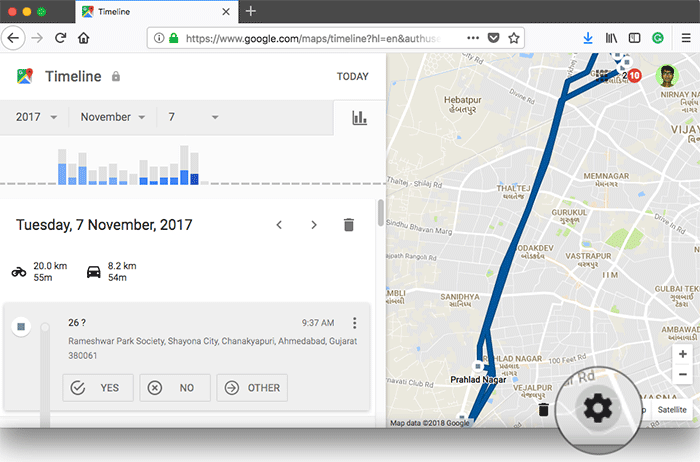
Step #2. Now, select Delete all Location History and confirm.
Hide or Show Google Photos on Google Maps Timeline
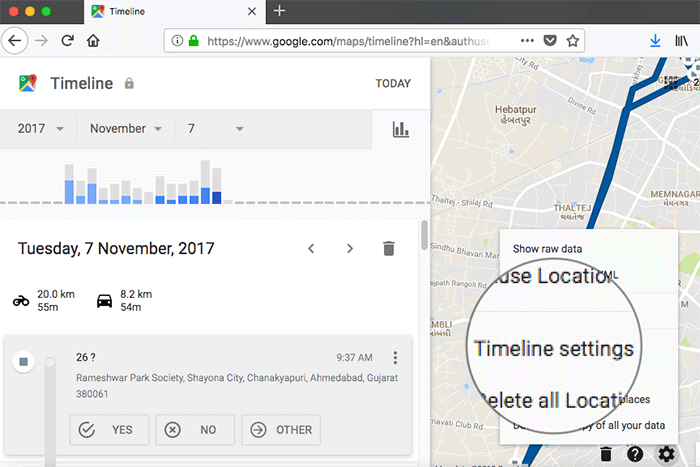
Step #1. Click the Settings button.
Step #2. Click on Timeline settings.
Step #3. Now, check the box for “Google Photos” to show the photos on your timeline.
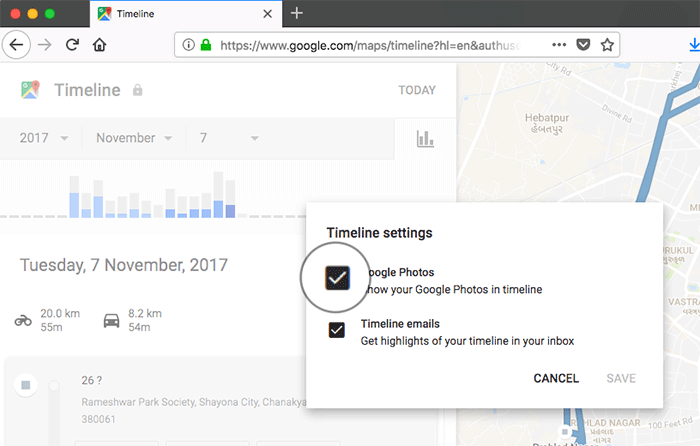
If you don’t want photos to show up on your timeline, uncheck the box.
In the end, click Save.
How to Remove a Photo from Google Maps Timeline
Step #1. If you want to remove a photo, click the check mark at the top right for each photo you wish to delete.
Step #2. Now, click on Remove photo.
That’s all, folks!
Wrapping up!
Google Maps remains by far the most popular navigation app in the world. What I like the most about this app is the ability to offer fast and accurate data. What’s your take on it? Share your thoughts in the comments below.
You might want to refer these posts as well:
- Change Voice Search Language in Google Maps on iPhone
- Share Location in iMessage Using Google Maps on iPhone
- How to use Incognito Mode in Google Maps for iPhone
🗣️ Our site is supported by our readers like you. When you purchase through our links, we earn a small commission. Read Disclaimer.