If you are a Mac user and need to send large files via email or other means, creating zip files can be convenient. Zipping a file or folder is a quick, efficient way to reduce file size without compromising on its content. In this tutorial, I’ll show you a couple of easy ways to zip and unzip files on your Mac.

What is a zip file and why are they used?
A ZIP file is a file that is compressed and archived. It combines one or more files into a single, smaller file for easy storage and sharing.
Zip files are extensively used for storing and transferring files over emails or other platforms on the internet, thereby decreasing the time and bandwidth necessary to transport huge quantities of data. Additionally, they can be used for backup purposes or to reduce disc space by storing files in a compressed format.
Keep in mind that after extracting a zip file, the original files or folders are restored to their original format and may be used regularly.
Benefits of using a zip file on Mac
- The compressed files take up less space on your Mac than the original file.
- Compressed files are smaller and faster to upload and download.
- Zip files can be used to group together relevant files into a single archive, which makes it easier to manage and find files.
- By adding password protection, an additional degree of security can be provided to zipped files or folders that contain confidential information.
- Zipped files can act as backups for critical files and folders, making it easier to restore data in the event of data loss or system breakdowns.
- Various operating systems can open and extract these compressed files, making file sharing simple.
How to zip a file on Mac
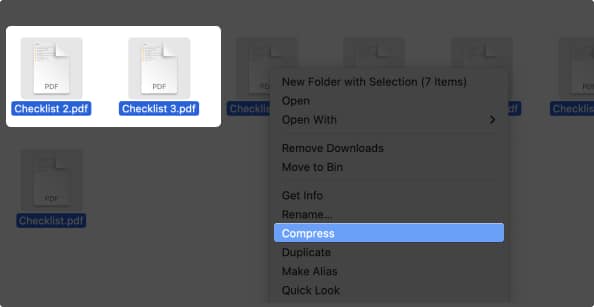
- Locate your desired files in Finder.
- Select all the files you want to zip.
- Right-click on the files.
- Choose Compress.

Congratulations, you’ve successfully compressed your file. The zip file will now appear beside your original file.
Additionally, if you’re compressing a single file, then select the file → right-click and choose Compress “your file name.”
Zip files on a Mac with native utility
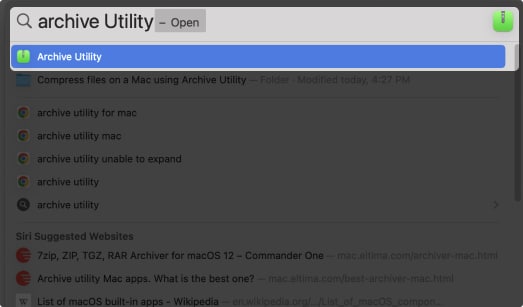
- Launch Spotlight (cmd + space bar).
- Search for and launch Archive Utility.

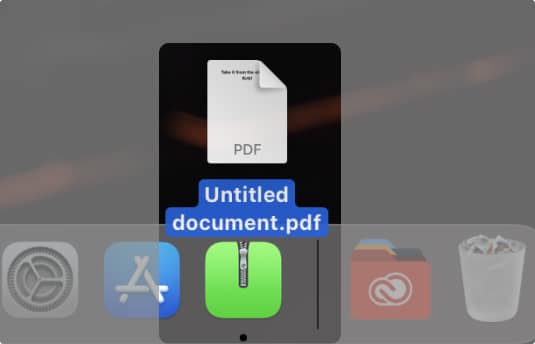
- Select the desired files in Finder.
- Drag the selected file(s) to the Archive Utility icon (green folder with chain) in the Dock.

- The Archive Utility will compress your files, and they will start reflecting alongside your original file in Finder on completion.
One thing to keep in mind is that if you drag a bunch of files in Archive Utility, then the app will create individual zipped files for each folder.
Become an iGeeksBlog Premium member and access our content ad-free with additional perks.
How to unzip files on Mac
Unzipping these files is a simple job that you can accomplish in a variety of ways. You can find all the techniques for doing so listed below.
- Double-click: Head to the compressed file → Double-click on it to unpack it.
- Right-click: Navigate to the file → right-click on it → select Open.
Alternatively, you can right-click on the file → choose Open with → click Archive Utility.
- Archive Utility: Launch Archive Utility → locate the ZIP file → drag and drop it onto the green folder icon with a zip in the dock menu.
FAQs
Yes, the Mac has a built-in zip tool known as Archive Utility, and it comes built-in with each macOS.
Yes, you can typically unzip a BIN file. Bin files are commonly known as binary files that include a variety of data, including a disk image, firmware update, and other types of program files.
It is feasible to unzip files on a Mac, but you can sometimes face problems when doing so. The main cause of the problem might be that the file is destroyed or corrupted or that the file is password protected.
Wrapping up…
Wasn’t it easy to zip and unzip files on a Mac? However, besides the methods mentioned earlier, you can also use the Mac terminal to compress files and save them more effectively. If you encounter any other problems with your Apple devices, feel free to leave them in the comments, and I will do my best to provide come up with a solution.
Read more:
