Amongst the many benefits of M1 chips, there is also a neat ability to install any iPhone or iPad apps on the M1 Macs. This is possible due to the common architecture shared by the two operating systems. The response to the development has been lukewarm; while some app developers chose to optimize their macOS apps, others did not pay much heed.
Now the question is, how can you install both the optimized and non-optimized iOS or iPadOS apps to run them on your M1 Mac? Fortunately, we have answers to both of your queries.
- Install iPhone or iPad apps from the M1 Mac App Store
- Run iOS or iPadOS apps on M1 Mac using iMazing
- Run any iPhone or iPad apps on M1 Mac using iMobie AppTrans
The iOS apps compatible with macOS are easily available on the Mac App Store, and here’s how you can download them:
Install iPhone or iPad apps from the M1 Mac App Store
- Open the Mac App Store and click your profile from the bottom-left of the page.
- Click ‘iPhone & iPad Apps’ tab situated under Account.
- Select the app from the list and click the download button.
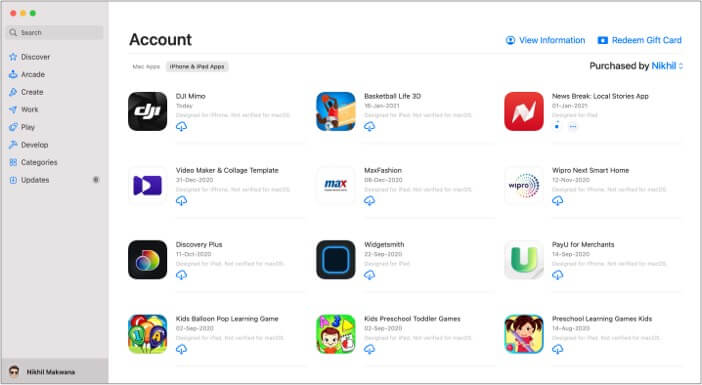
After taking its due time, the app will be downloaded on your M1 Mac. You can access the app from the Launchpad or the Applications folder.
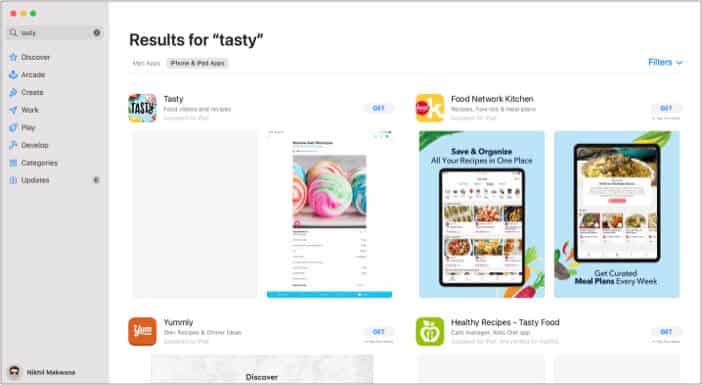
An alternative method is to search the app on your Mac App Store directly → Switch to iPhone & iPad Apps tab and download the desired app.
To download or, shall I say, side-load an iOS app on M1 Mac, you will need a third-party mobile device management software, iMazing. Download the software on your Mac, and let’s get going.
Run iOS or iPadOS app on M1 Mac using iMazing
- Launch iMazing and connect your iPhone/iPad with the M1 Mac.
- Select the Manage Apps tabs from the listing.
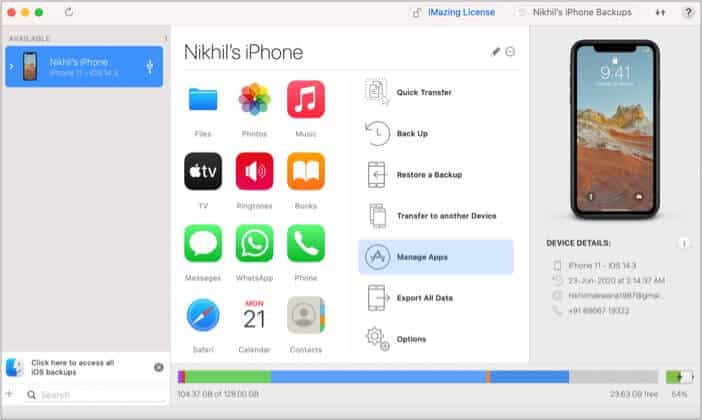
- Click the Library tab to see all apps downloaded on your Mac.
- Search the app and click the download button.
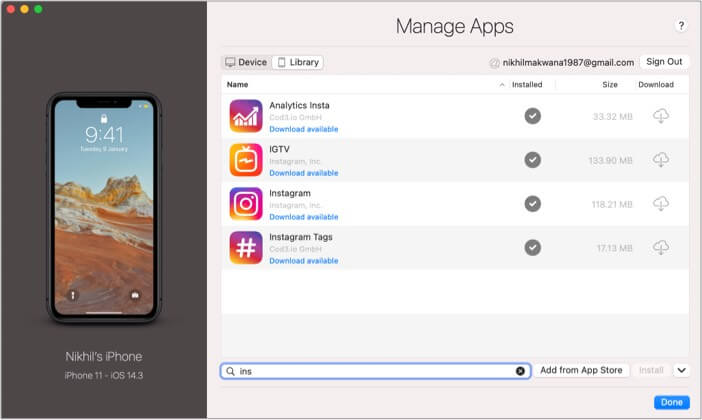
- Once downloaded, right-click the app & select Export.ipa option.
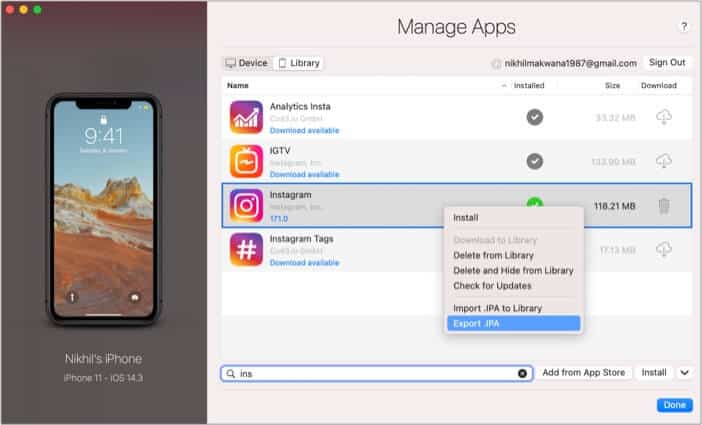
- Choose the desired destination folder and click Save.
- Open the folder and click the .ipa file to install the application.
The app will be installed in a bit. Open the Application folder or Launchpad and click the app icon to launch it on your Mac.
Run any iPhone or iPad apps on M1 Mac using iMobie AppTrans
So, the AppTrans software helps you backup iPhone/iPad apps on Mac in one tap. The idea is to secure all the Mac files and data related to the app, including the .ipa files, game progress, and more. It also enables you to restore them on your mobile device as and when required.
Become an iGeeksBlog Premium member and access our content ad-free with additional perks.
An amazing perk of AppTrans is that you can run and enjoy all the iOS apps on your M1 Mac seamlessly. So, let me show you how it’s done. After you download and install AppTrans from iMobie on your M1 Mac;
- Launch the AppTrans app and connect your iOS device via a USB.
- Go to App Downloader and search for the app you want.
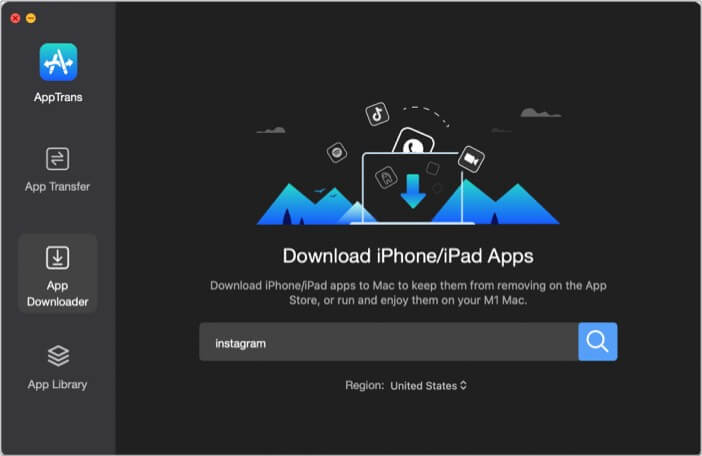
- Click the download icon next to the app to initiate the download.
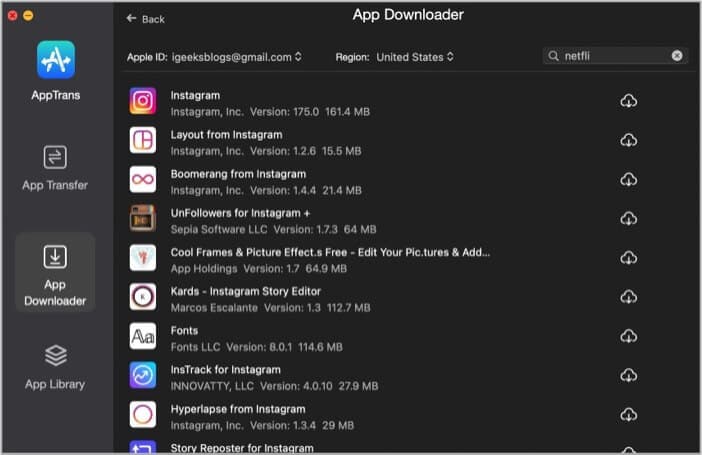
- If prompted, sign in with the Apple ID used on your mobile device.
- Now go to App Library, you will see all downloaded app here. Click Export next to the app you want.
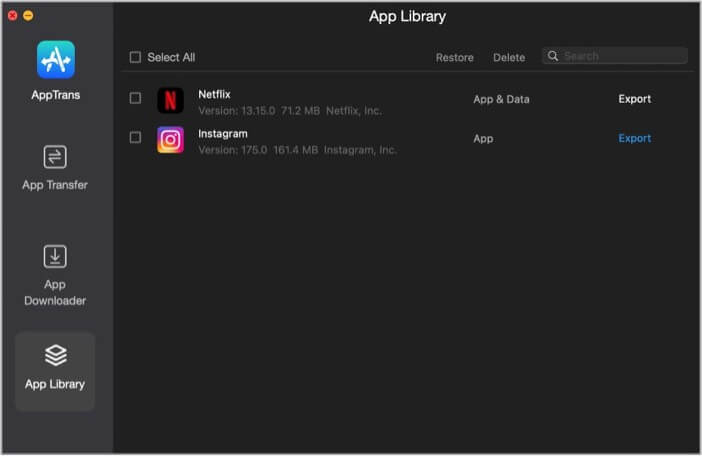
- Save the file in the desired folder and let the download finish.
- Click the .ipa file just downloaded to install the app on your Mac.

- Open the Applications folder/ Launchpad to spot and open the app.
That’s it! Notably, if you want to download both the app and its data, visit the App Transfer section and repeat similar steps.
Note:
- Limitations – These apps are designed for touchscreen devices and not optimized for macOS. So, there might be some limitations and bugs during usage.
- Blocked by Apple –
- On January 15th, 2021, Apple stop the support side-loading iOS apps in M1 Mac. So, the second method stopped working.
- However, as of January 19th, 2021, Apple reverted the change.
- Now the tech-giant could again change his mind, so if you want an install iPhone or iPad apps on your Mac, do it now!
Did you install iPhone or iPad apps on your M1 Mac?
I have a special soft corner for apps; they make life so easy. So you can imagine my joy that I can run the same app on Mac and iPhone.
Though I wish more developers optimize their apps for M1 Mac. Plus, please God, don’t let Apple change their mind again about side-loading apps. (keeping my fingers crossed)
How about you? Which is your favorite iOS app? Share it with us in the comment section below.
Read more:
