Being invested in the Apple ecosystem has its advantages. All devices can seamlessly interact with each other. But what if your iPhone keeps disconnecting from Mac? It could happen due to any underlying issue ranging from bad cable to software conflicts.
When this problem occurs, iPhone charging sound will keep playing. The issue could potentially slow down your Mac as well. Here’s how you can fix iPhone disconnecting from the Mac issue.
1. Check cables and ports
Check the cable for ruptures or any other damages. Borrow a lightning cable from someone and see if the issue persists. Another possibility is debris pileup in ports. It is common for lint and other debris to pile up in lightning ports. Use an earbud to clean the port.
Looking to replace lightning cable? Here are some of the best lightning cables.
2. Change Finder Preferences setting
Improper Finder settings could sometimes block iPhone connections. You will have to change settings to sort this out. Follow the steps below to do so:
- Open Finder on Mac.
- Now, click Finder at the top left menubar.
- Select Preferences.
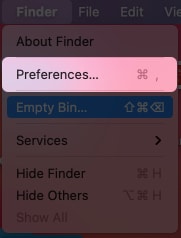
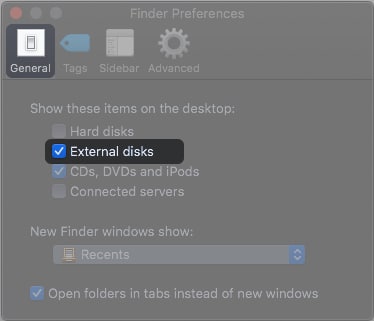
- Navigate to the General tab.
- Now, mark External disks.
3. Reset iPhone Location & Privacy Settings
Over some time, apps tend to change factory settings. It is always a good idea to reset settings. We can fix the iPhone connection issue with the Location & Privacy Settings reset.
- Go to iPhone Settings → General.
- Scroll down and tap Transfer or Reset iPhone.
- Tap Reset → select Reset Location & Privacy.
- Next, confirm Reset Settings.
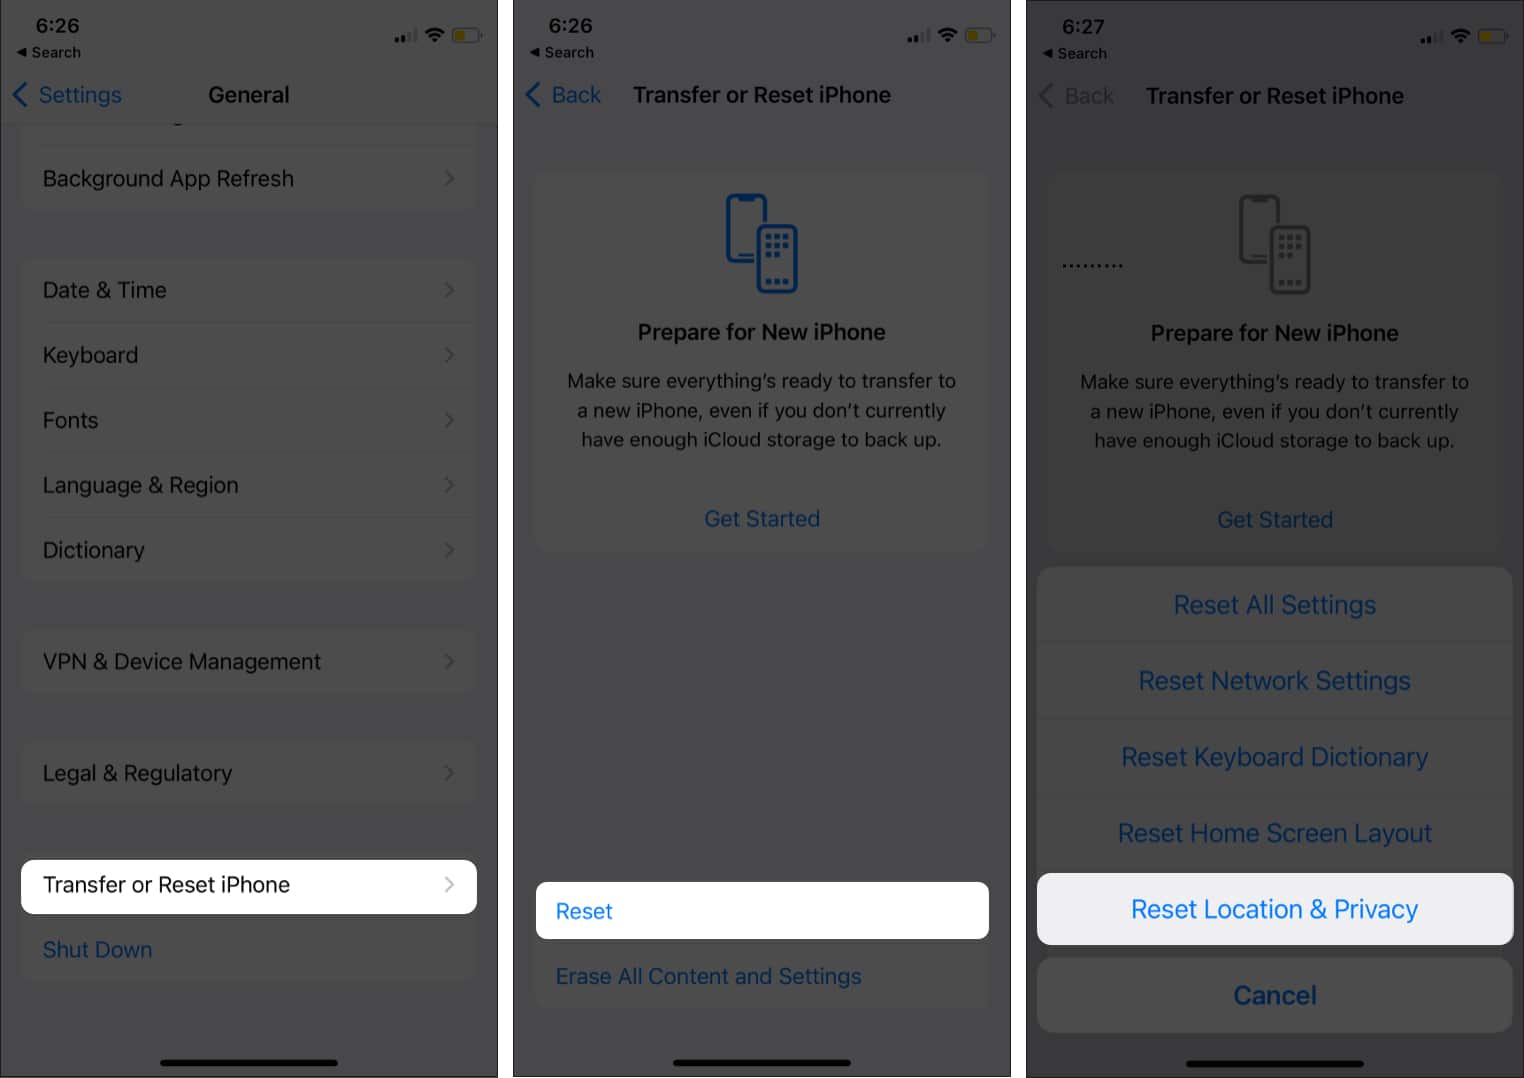
Once done, your iPhone Location & Privacy settings will revert to default.
4. Restart usbd process
I. Use macOS Terminal
I feel Terminal is one of the most underutilized macOS features. Most importantly, it can help you fix iPhone disconnecting from the Mac issue with a simple command. Use Spotlight search and open the Terminal app. Type the below command and press enter. When prompted, enter your Mac password.
end: sudo killall usbd
II. Use Activity Monitor
Become an iGeeksBlog Premium member and access our content ad-free with additional perks.
Not comfortable using Terminal? Activity Monitor is an alternative way to kill usbd process.
- Click Launchpad → select Others.
- Choose Activity Monitor.
- Click the Disk tab and search for usbd.
- Select usbd process and press the X button at the top.
- Now, click Force Quit from the pop-up.
5. Reset SMC/NVRAM on Mac
Sometimes restarting your Mac might not be enough to fix issues. Certain cases require NVRAM or PRAM reset. NVRAM (non-volatile random-access memory) is an always-on memory on an Intel-powered Mac. Check out our detailed guide to understand how to reset NVRAM on Mac.
6. Create a new admin account on Mac
Mac user account settings could sometimes cause this issue. I suggest creating a new Admin account using a different Apple ID. When you do this, macOS will erase current profile settings. Follow the steps below to create a new admin account.
- Click Apple Logo at the top right → System Preferences.
- Select Users & Group.
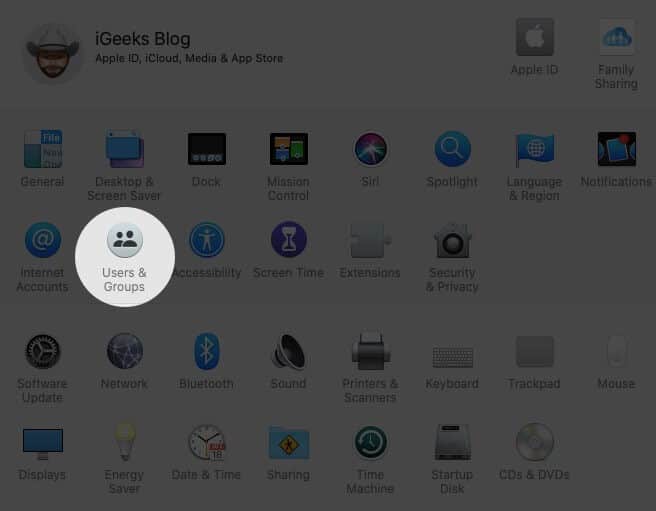
- Click the lock icon to unlock and enter the password.
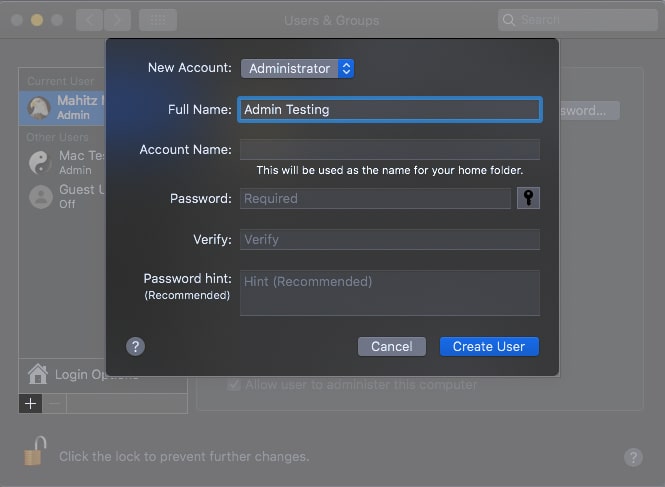
- Click the + icon to add a new User.
- Select Admin type Administrator.
- Add username and password for the new account.
7. Contact Apple Support
If everything fails, consider contacting Apple Support. iPhone disconnecting from Mac could be due to damaged hardware like lightning/USB port.
I hope this article helped you fix the iPhone disconnecting from the Mac issue. Were you able to fix the issue? Share your experience in the comments below.
FAQs
It could happen due to faulty cables or improper Finder settings. If you face this issue, follow the steps detailed in section two.
Reset Network Settings. Make sure the device is within the Wi-Fi range. Sometimes restarting the iPhone and Wi-Fi router could help.
In extreme cases, you may be required to reinstall macOS. Before doing this, try contacting Apple Support. It will most certainly help as all user data and settings are erased.
Read next:
